Home Sweet Home Contest

With Spring comes new beginnings, sunshine, flowers, warmer days, and a fresh start. Speaking of a fresh start… pack up the moving truck! This Spring, Ravenwood Academy’s contest is all about Housing.

We want you to use your decoration imagination. Tell us about one potential furniture item you would like to see from anywhere in the Spiral, take a screenshot and post it in our Official Channel to enter!

Please post your entry in the Ravenwood Community Discord, our official Ravenwood Community Facebook Group, or by tagging @RW_Academy101 on Twitter. One entry per person, dual entries will be disqualified.

This contest closes on May 17th, 2021, and winners will be announced by May 31st. Winners will be chosen by vote of the Ravenwood Community Staff and will receive:

First Place: A Heavenly Palace Bundle and a Charmers Mystical Flute
Second Place: A Doomsday Krok Gauntlet and a Charmers Mystical Flute
Third Place:  An Empyrean Airship and a Charmers Mystical Flute

All qualifying entries will be posted in the Ravenwood Community Contest Channel and entered into a random drawing for 5000 Crowns

What will you find to put in your Home Sweet Home?

If you have any questions, please reach out to any Ravenwood Community Staff member.

FAQ

– Entries must be from any public area of the Spiral. Screenshots cannot come from any area already considered housing or include any current housing items.

– Wallpaper, paintings, trees, potted plants, or any other item that might be considered housing or decoration will qualify you for entry.

Congrats Winners!!!

Thank you to everyone that participated in the contest. Check out the winning entries below and let us know what you think. If you are a winner, I will contact you soon with your prize. We are so glad you made Ravenwood Academy part of your Home Sweet Home!

1st Place Faelle#4079

For me, the answer came without a doubt. I invite you all to take a moment and enter my humble home.
Remove all distractions, turn the music on without the other sounds, and close your eyes. This music you are listening to, so mystic and ethereal, is what I image being the real song of creation, what is keeping the spiral together. I could listen to it as a meditative guide. Nature is where I am at peace, and this place is built around it, and not against it. The schools are both protected by Bartleby, and their architecture makes them feel like part of the decor, like they always belonged there. Ravenwood feels vast, only cluttered by foliage, vines and elemental effects, which is my perfect aesthetic. You can almost feel the warmth of the soft sunbeams peaking through the canopy.
If I could visit a place in the spiral, it would undoubtedly be Ravenwood.

2nd place Dragonkiller258#0265

Located in Maulwurf von Trap’s Musicology Office at the Arcanum, the music note lights would make a great addition to any music enthusiast’s house!

3rd place QueenAttitude50#7154

The Wild in Avalon has to be my special place as it reminds me of special times I had with my step dad growing up. I absolutely loved all of Avalon but The Wild was my favorite. If I’m ever having a bad day, I come here in game. I love the toadstool houses, I enjoy mushroom hunting in real life and I went with my stepdad growing up, it was a time I will always remember. So the mushrooms feel like home to me because it reminds me of those times. Sometimes we need to just stop and smell the roses, in the crazy hectic lives we live. I come here and just pause the outside world and stay here for a little while. Being outside, I love the open area here.

Random Drawing Winner   Pinkified#2478


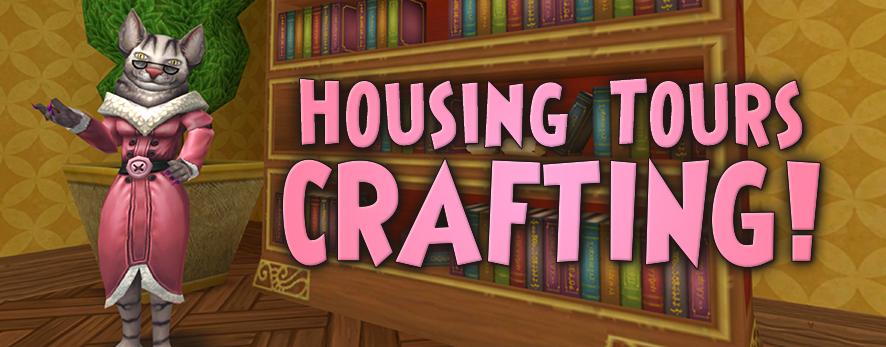
Meet Angelica Windspar

A sister joins the team!

We have an exciting addition to the Housing Tours office! Angelica Windspar has decided to join her sisters Myrella and Eliza. I do believe that “everything housing” is their family motto. I wish they’d offer stock options, as they do booming business! Angelica’s a crafty cat and brings some fabulous new recipes for our crafting pleasure. Attractive and functional, I’m sure you will enjoy their uses.

Angelicas Recipe Book

Angelica was kind enough to let me peek in her crafting recipe book. Here are the beautiful things I saw that she brought to Housing Tours. Useful housing items, invisible housing blocks, and even a new apartment! She has an exciting variety of new treasures to suit any Wizard.

So without further ado, let’s check out what she has to offer!

As with some other crafting recipes, there are badges you must get to buy the recipe. You can earn the badges by visiting and voting on different castles. Here are the ones I have found :

Castle Tourist-Vote on 10 castles

Castle Auditor-Vote on 100 castles

Castle Inspector-(Vote on 1000 castles?)

Castle Assessor-Unknown

All the new recipes need reagents that can be easily acquired except for one. In this update, a new reagent was introduced; they’re called “Blueprint Tokens.” One known way of getting them is through The Spiral Scene housing tours event. KI has also mentioned they may become available from other sources in the future, like the Scroll of Fortune.

Babbage Basset

No more running to Marleybone for your Castle Magic needs. You can craft your very own Babbage Basset to have in your castle. Very convenient, to say the least!

6 new banks

A great time-saver is the new bank item that you can place anywhere in your castle, for your convenience. With six versions available, I’m sure you will find one to suit your style.

New housing blocks

Angelica has something special for all the housing fanatics. Recipes for invisible housing blocks! As a fanatic myself, I can think of some fantastic and incredible ways to use them.

I can’t wait to see what you all create with them!

Spiral Door

If you have ever wished you could have a Spiral Door elsewhere in your castle, your wishes have been granted. Craft this and place it wherever your heart desires.

I’ll definitely be placing them all around my castles.

a new apartment!

Woohoo! Looky here! Last but not least, we have a new craftable apartment!

Your fabulous new apartment will be located across from the Fairegrounds in the Commons. What a lively place for a home! It’s the same basic style as the craftable one from Derrick Blaze at the Team-Up Kiosk. This recipe calls for A LOT of Blueprint Tokens, so I sure do hope they aren’t too hard to get. With such a great location, though, it will be well worth the effort.

Thanks for Reading!

Well, there you have it. All the new recipes are available at the Housing Tours office in the Commons. I think they are a great addition to the game. You can bet I’ll be utilizing most if not all of them. Leave a comment and let me know what you think. Will you be crafting them? Have you thought of a clever use for a new item? Let us know in the comments below or the housing channel at Ravenwood Community! See you there.

Critical Changes Explained

The New Critcal System Explained

Hello Wizards, Nathan Shadowbringer, and Scot Moonshade here! We’re going to explain the recent changes to Critical and Block. Today’s article will revisit the previous age’s Critical and delve into the new system. We will examine the formulas to calculate your Critical Chance and damage multiplier. Critical has undergone a lot of change in recent years, and this update brings a new era of Critical! Critical and Block were once a percentage-point based system. Now it’s changed to a dynamic framework involving both Critical and Block.

Disclaimer!

Before we begin, we need to make a quick disclaimer. According to Ratbeard’s Karamelle PvP Update #2, Critical in PvP is not calculated the same as in PvE. The formulas we used do not work for calculating Critical or Block in PVP. All the information below applies to PVE only. With that said, let’s get started!

Old Versus New

Before the 2020 Fall Update, Critical was well… more critical. There was a chance to critical and a chance to block—the Critical stat based itself on how high your rating was in the respective category. Landing a Critical would ensure that your attack would do twice the damage (or 1.33 times damage in PvP). The problem with the old system was that achieving a high Critical Rating was easier than Block. It was making Block obsolete compared to Critical. With the new changes, it’s more balanced.

The following variables represent the corresponding data sets:

c = Critical rating

b = Block rating

l = Level / 100, where l ≤ 1.

The changes to Critical involve two new formulas. Both equations depend on the attacker’s Critical and the defender’s Block. The first formula determines your Critical chance. Note that Critical chance and Block chance must always add to 100%. For example, if you have a Critical chance of 90%, your opponent would still have a 10% chance to Block. 

If your attack doesn’t Critical, or if the enemy blocks, the calculation ends there. In this scenario, the second formula isn’t necessary. But, if you do land a Critical hit, then the second equation runs. This determines the Critical Multiplier. This formula relies on the attacker’s Critical and the defender’s Block. Further examples are available in KI Developer Ratbeard’s Dev Diary.

Critical heals also use the Critical Chance formula. But they’re based on your Critical Rating and the Block of the person you are healing. The only difference is, they cannot Block a heal but instead can “resist.” The higher your Block, the less you’ll get from a critical heal. Fortunately, the schools that have more Block also tend to lean towards a tank-type playstyle. Tank builds have more Health and Resistance, so they can afford to lose some of that incoming healing from the Critical. Regardless, the amount of extra healing uses the same critical multiplier formula. Remember, it’s still impossible to block a critical heal!

Spell Alterations

Another important note to these changes is the way Vengeance and Conviction work. Vengeance is an Astral spell that increases your Critical chance by 20% for four rounds. This bonus only affects your chance to Critical. It doesn’t affect the enemy’s Block or your damage multiplier. Conviction increases your stun resistance by 90% and Block chance by 20% for four rounds. This 20% increase only affects the possibility to block a Critical. It doesn’t affect the enemy’s chance to critical, nor does it lower the multiplier.

Charts and Calculations

There are a few basic formulas that can roughly estimate Critical and Block ratings. These formulas are interchangeable, and most involve moving numbers and variables around. The following equation presented removes the need for complex fractions. Here are two general procedures for determining Critical chance:

Much like the Critical percentage formula, the damage ratio also follows a function. In this case, the damage multiplier is equal to 2 – 3 * Block / (Critical + 3 * Block). See the formula below.

Here is an estimate of your Critical Chance against mobs with ninety block (blue) and two hundred-forty block (red). The green line at the top represents the Critical Chance soft cap at ninety-five percent.

Using these formulas, you can now find optimal Critical numbers for mobs and bosses. Karamelle mobs have around 90 Block while Karamelle bosses have at most 240 Block. Except for the final boss, it would seem.

This is the approximate damage multiplier against a mob with 90 Block.
Here is the approximate damage multiplier against a mob with 240 block.

What Does this Mean?

It’s important to remember that everything we’ve shown you is subject to change. Critical and Block in PvP are calculated differently than PvE.

Using these numbers, you can find your optimal amount of Critical; 570 Critical will get you up to 95% Critical against most mobs. Using the formula for Critical Multiplier, we suggest 630 Critical as a good general goal. This way, against monsters with 90 Block, you’ll Critical 95% of the time and get a 1.7 multiplier against them.

As we enter the “Third-Age” of Critical, there’s potential for more diverse character builds. An example of this could be full-damage pets as opposed to pets that have Critical and damage. These changes also give new life to the may-cast Vengeance talent. This update creates better balance and a more dynamic flow between Critical and Block, allowing players to customize stats to their unique play-style. Thanks for reading; we hope this helps you understand the changes and how they affect your Wizard. If you have questions, you can always find us around the community. That’s all for now, until next time, we’ll see you in the Spiral.

-Nathan Shadowbringer & Scot Moonshade

Pet Trainer Bundle

Burrow your way to adventure with the fantastic Pet Trainer Bundle for Wizard101! This excellent addition to the Spiral brings you a faithful companion and gear to help you on your adventures! For $29.00 at Gamestop, you get a fantastic gear set, speedy mount, cute pet, and some unique housing items!

The Pet Trainer Bundle includes:

– Pet Burrow Teleporter

– Pet Door Teleporter

– Fur Wheeler Mount

– Pup Prodigy Pet

– Pet Trainer Attire

– Pawzooka Weapon

– One Month of Wizard101 Membership or 5000 Crowns

Doors & Burrows

Exclusive to this new bundle are the Pet Burrows and Pet Door teleporters. These special teleporters add more ways to play as your pet, allowing you to travel anywhere your little heart desires! Wizards are too big to fit! You’ll have to become one with your furry friend to venture through!

The Burrow will blend in with the nature outside of your castle, meanwhile, the door compliments any home interior. These teleporters are only usable while playing as your pet and are too small for Wizards to fit. Once you’re at home, set up the Teleporter while decorating your house. When chosen, a circle will appear that you’ll have to place; this is where you’ll get teleported to. After you’ve selected the location, you may choose the Teleporter again and place it.

With these teleporters, you can open up new possibilities for one-of-a-kind party games with your pets. You can create discrete hidden entrances to your other castles or secret passages to the best hiding places for Hide-and-Seek. They also make a great addition to any maze!

Hamster Power!

Next up, we’re going to take a look at one of the cutest mounts, the Fur Wheeler! Horse power is a thing of the past, because this new mount is full of energy. Why? It’s powered by none other than the Ravenwood Hamster! This mount will have you zooming around the Spiral with its +40% speed. All your friends are going to be jealous when they see you doing wheelies and tricks on this board. 

A Wizard's Best Friend

You also get a furry and faithful companion with this bundle! The Pup Prodigy Pet will be by your side through everything Wizard101 has to offer. Equipped with his glasses and a calculator, this is one smart pup. He’s a Balance School pet, equipped with an Accurate spell card as a baby. So you’ll never miss that dire hit to save your tail.

First-generation Pup Prodigies have a Pedigree Score of fifty-six and the following stats:

  • Strength: 210
  • Intellect: 240
  • Agility: 210
  • Will: 190
  • Power: 200

First-generation talents can include; Big Energy, which pairs with the Bundle’s gear set. Lively, that will increase Incoming Healing, an excellent thing for any maycast pet. Next, there’s Balance Assailant, granting a bonus to your Balance Critical Rating. Finally, there’s May Cast Balance Blade, which gives your pet a chance to help you by casting a universal blade. These are only a select few talents this pet can get.

Once you train this prodigy to Adult, you also gain another card: Disarm. This card removes one positive charm from your opponent. This pet lends itself well to expanding your energy reserves given its base Talent pool. Making the Pup Prodigy an excellent choice to take Fishing or Gardening. This pet would also make a decent Support pet or May Cast Heal pet.

Got to Train 'Em All

Moving on, we have the Pet Trainer Gear. This is by far the best energy set you can get in the game and the best part? You don’t have to struggle opening tons of packs for it! This outfit is ready for anything with all the tools needed to train your magical menagerie. You’ll definitely want this outfit the next time you’re at the Pet Pavilion. But why stop there? With all the Energy this outfit grants, you’ll have no problem tending your garden or going fishing!

The higher tiers of this outfit also offer a variety of Animus extraction cards. So this set may come in handy if you’re out gathering Animus! 

Previous slide
Next slide

This set provides the same amount of Energy as the Yule Logger Gear, and Light Elf sets. Both are heralded as the best Energy gear sets you can get, but they’re also seasonal items. Which means the there’s a limited window to get them each year. The beauty of the Pet Trainer Attire is that it’s guaranteed. Meaning you won’t have to spend countless Crowns opening packs or wait an entire year to get the best Energy set.

When it comes to this bundle’s style, I must say I’m impressed with the look. The Pawzooka is one of the more unique looking wands in the game. With a crosshair for insane accuracy and extra tennis balls, you’ll always be ready to play fetch.

The stats aren’t particularly glorious, as this set focuses on Energy. The lowest tier has 2% damage, a nice boost for first level wizards. The max tier option has 3% Peirce, +85 Critical, 8% damage, and 245 pip conversion. Not the ideal choice for combat at high levels, but the gear makes up for it with its fabulous look.

In Conclusion

That concludes the review of the Pet Trainers Bundle; it’s unique and has outstanding elements! The equipment is currently tied for the best Energy gear in the game. The Pup Prodigy is adorable and provides a great starting point for expanding your energy reserves. The Fur Wheeler mount is cute and fun, with it’s a nod to the Ravenwood Hamster. The Pawwzooka’s stats are a bit underwhelming, but it makes for a great stitch! Finally, the Pet Burrows and Pet Doors are nothing like what we’ve seen before. I’m excited to see what Wizards will do with them!
 
Thank you all for joining me on this review. I hope it helps you choose whether this is the bundle for you. Should you pick up this card and see how awesome it is for yourself, I’ll see you skating around the Spiral!
-Mana Tea

Pet Lending

“Pet Lending gives Wizards a powerful in-person hatching option to lend their pet for hatching to another Wizard. And as a bonus you can do this without being charged Gold or having your Wizard’s Hatching Slot timer started. It’s a wonderful opportunity to exchange adventure stories as you also exchange pet types!

New pet features wouldn’t be complete without rewards for having fun going through the process. You will get advance warning before the hatch process begins on what type and quality of reward you are expected to receive. The value of the reward will depend on the pet lending level and pedigree. Also, you will receive a badge for many of these lending actions!

Note that there is a limit to how many times you can lend a pet (based on your Wizard’s level).”

-KingsIsle Entertainment 

Pet Lending

The arrival of the 2020 Fall Update brings some exciting changes to the Hatchery. The most noteworthy feature is Pet Lending. A new mechanic that gives players more options in the Hatchery.
 
What is Pet Lending exactly? Pet Lending allows another player to hatch with your pet without costing you any gold. Lending also bypasses your Hatch Timer! Gone is the guilt of having to turn someone away because you’re still on a cooldown. Plus, you don’t have extra unwanted pets cluttering your inventory. You’ll even get a small reward each time you lend someone your pet. These benefits simplify Hatching and encourage powerful players to help their peers. This new mechanic makes hatching a snap! Whether you’re helping a friend or a new player, it’s never been easier to help someone create their dream pet.

Lending101

To get started, bring an adult pet and a reasonable sum of gold to the Hatchery. Hatchery prices tend to be half the price of using the Hatchmaking Kiosk. The cost of the Hatch is going to depend on the age of the pets involved. Hatching two Adult pets usually start around ten thousand gold. Meanwhile, hatching an Adult pet with a pet that’s Mega or older is around forty-five thousand gold. If you’re getting started, using younger pets will be to your benefit.
 
Next, find someone with a pet you want to hatch with. If you want more information on creating pets, read our Pet Training Guide and Petmaking101.
 
Once you are on the Hatching screen, you and your partner will see two options. One says “Hatch,” and the other says “Lend”. If you both choose Hatch, you will both pay a sum of gold to create a new pet egg for each of you. To use the Lend mechanic, one of you must choose Hatch and the other Lend.
 
Note how you can only lend a pet a specific number of times daily. You gain one lend every fifty levels. For example, if you’re under level fifty, you can lend once per day. But should you be between levels fifty to ninety-nine, you can lend twice. Finally, if you’re level one-hundred or higher, you get three lends.

Hatcher

If you’re being lent the pet, select the hatch option. From there, everything will proceed as usual. The cost to create the new pet will remain the same based upon the pet’s age. Keep in mind older pets will cost more to Hatch than younger ones. You can tell if someone is lending you their pet by looking beneath their pet’s stat block; it should say “Lending”.

Hatcher's Screen
Lender Rewards

Lender

Meanwhile, if you’re the one Lending the pet, you will select the “Lend” option. Don’t worry when you choose this route; your pet doesn’t actually leave your inventory. If you’re out of lends, the choice will appear greyed out, and a timer will show up to tell you when you can lend again.
 
When you lend a pet, you will not pay any gold, but you won’t receive an egg either. Instead, you will receive an amount of Gold and Hatch Peppers depending on your pet’s pedigree. The little stars in the bottom corner beneath your pet’s stats represent your reward. The better pet you offer, the better the bonus. Remember that your partner must be able to afford the Hatch. Most rewards are under one thousand gold, but you do have the chance to earn two Hatch Peppers.
Lender's Screen

Uses for Hatch Peppers

You can now use Hatch Peppers in a variety of pet-related crafting recipes. These recipes are all available from Doctor Purreau in the Hatchery. All these recipes are excellent additions to your Recipes Tab.

Craftable Housing Items

The Hatchmaker Kiosk recipe allows you to create your own personal kiosk for your castle. This will enable you to reach a Kiosk by teleporting back to your Wizard’s house. Mist Wood and Cat Tails are all over the Spiral, while Black Coal is purchasable from any reagent vendor. Acorns are a rare drop from piles of Mist Wood. Likewise, Mist Wood can be transmuted into Acorns. All these reagents are also found in the Bazaar except for Hatch Peppers.
 
To get all the ingredients, you’ll need two hundred fifty Hatch Peppers, which will take a while. So, your best strategy is to place five pets in the Hatchmaking Kiosk at once and wait. This could give any “failed” pets a use! As the saying goes, “One wizard’s trash is another Wizard’s treasure.” A certain Talent set might not be perfect for you, but that doesn’t mean that it’s not ideal for someone else.

Craftable Elixirs

Purreau also provides recipes for a small assortment of elixirs. These elixirs are the “Clear Hatching Slot,” “Hatch All Eggs in Inventory,” and “Next Hatch Free”. The first will reset your Hatch Timer back to zero like Purreau’s Potion Number Nine from the Crown shop. The second potion’s function is in its name. It will hatch all the unhatched eggs in your character’s backpack. Meanwhile, the last elixir will reduce the cost for your next Hatch to zero. Having these recipes is a massive help to players on a tight budget.
 
The reagents for these potions are easy to get. Each recipe only requires Hatch Peppers and Glass Vials and Black Coal, and various Rank one gems. The latter is sold by reagent vendors throughout the Spiral, but they also turn up in the Bazaar. The Hatch Peppers are going to take some time to get depending on which elixir you’re making. The costliest recipe is the “Next Hatch Free,” which requires two hundred Hatch Peppers. Meanwhile, the “Clear Hatching Slot” elixir is less steep, costing only one hundred. The cheapest elixir is the “Hatch All Eggs in Inventory,” which needs twenty-five to make.
Previous slide
Next slide

Craftable Mega Snacks

The best recipes on this list, are the rank eight Mega Snacks. Each snack requires only a few reagents; a rank one treasure card, a Glass Vial, and ten Hatch Peppers. These items are far from costly, acquirable from the Bazaar or various NPC vendors. Any treasure cards required are purchasable from Harold Argleston in the Library. Hatch Peppers are now easier to get with Pet Lending, granted it’ll still take some time to get enough of them. But if you lend out your pets , getting ten peppers should only take a few days. Combine this with checking in on your Couch Potato farm, and you can increase your yield of Mega Snacks. In truth, the trickiest reagent to get for some wizards is Glass Vials.
 
Glass Vials are only available in bulk from reagent vendors in Marleybone and beyond. But don’t despair! This reagent is obtainable from Burning Snap Dragons if you have the proper spells to help them grow. The seeds are sold by Marley in Mooshu and drop from many monsters across the Spiral. Because of this fact, Burning Snap Dragon seeds are often sold in the Bazaar. They are also found in a variety of Hoard and Lore packs from the Crown shop. So, they’re not impossible for Free-to-Play wizards to get but it will take some effort.
Previous slide
Next slide

Final Thoughts

I must applaud the Wizard101 Team for the feature they’ve added to the Hatchery. For years players have been in the game forums asking for more Hatch Slots. With this update, KingsIlse not only solved this problem, but they took things an extra step. They not only gave us a system that makes Hatching easier and more affordable. They included a system the reinforces and rewards players for helping one another.

No longer do we have to make the difficult choice between helping someone else with their pet or working on our own. Gone is the stress and struggle of finding someone willing to Hatch. Players no longer have to feel guilty for turning someone away or wait an entire day to Hatch.

Hatch Peppers are now much more comfortable to get and are more useful. Grinding and Gardening aren’t the only way to get Mega Snacks anymore. Which makes snacks of that caliber more available to players who struggle to get them. The same goes for the select few Elixirs we can now craft.

I am amazed by the impact of this little feature. Pet Lending has made the eternal quest to achieve the perfect pet that much easier. With that said, I look forward to what future updates will bring.

Thanks for Reading!

That’s all for now! Thank you for reading; I hope it helps you on your journey towards the perfect pet. I would also like to extend a special thanks to everyone who assisted in this article’s writing.
 
Feel free to explore the wealth of guides and information on Ravenwood Academy. If you want to stay up to date on the latest news, follow Ravenwood Academy on social media.
 
Thank you all again. See you in the Spiral!
 
-Morgan Shade

Candied Isles Bundle

Welkommen to the Ravenwood Academy’s official review on the brand new Candied Isle Bundle! My name is DruBoo and I am here to guide you through the new content, step by step. Rest assured, this bundle is filled with all sorts of sweet surprises but you won’t find anything sour here!

Let’s begin where all journeys do, the Spiral Door! What a delightful view. Wizards will be captivated right away by the friendly, grass-filled, Karamelle themed wonderland. Thanks, Nana! In the distance, you will find scenic trees, a winding river, a cozy town square, and even a huge mountain that you can explore! 

Welcome to Candyland

This is the town square! Here you will find 5 awesome houses, placed elegantly in a cozy circle formation. This area captures the sweetness of Karamelle and all its delights. In the center of the square, you will find a chocolate fountain that holds some pretty sweet daily rewards!

You may be wondering… where does all of this chocolate come from? Luckily, I found the chocolatier! A never-ending source of molten chocolate can be found under the town square, in a beautiful cave, surrounded with all sorts of wonderful sweets, all embedded into its chocolatey walls! Delicious, delightful, de-lovely! 

Moving away from the town square, we come upon quite a monumintal mountain! The view from the top is breathtaking. You can see everything, from the wafer roof-tops to the peppermint PvP ring! Sweet! Before you enter it though, make sure you are not biting off more than you can chew! 

You thought that was it? Well, I hope you saved room for dessert because we are just getting started! This bundle is full of fun little treats! Speaking of fun… your Wizard has the ability to drift up or down, and use a sleigh on the winding ice ramp that starts at the top of the mountain! For the more sensible Wizards, a door can be found at the bottom and top of the mountain, allowing for easy access! 

The Extra Goodies

Sweetish Chef Set and Marshfellow Pet!

Okay, let’s talk gear! This bundle comes with a hat, robe, boots, and wand that would be at home in any magical bakery, and a toasty roasty marshmallow pet of your very own! The level 130 Sweetish Chef set can be seen below. This gear adds to the ever growing collection of “item set bonuses.” that came to Wizard101 this year. Three pieces of this gear will grant an extra 4% universal damage. Four pieces will earn you an additional 5% universal resist and, if you manage to get 5 pieces, your Wizard will be rewarded with 6% more outgoing healing as well as 8% more power pip chance! Look out, Nana! The gear comes with a variety of different statistics, it is up to you to decide if using some, or all of the gear is worth the whisk!

Sweet Ride!

No really, that’s the mount’s name. Here you can see my stylish new vehicle. It comes equipped with chocolate-flavored syrup, a dazzling arrangement of sprinkles, and yes… It has a cherry on top! All of this, paired with a 40% speed boost. I sure do hope the brakes work on this thing!

This bundle can be found at GameStop for $39 and comes with:

– Candied Isles Village

– “Sweet Ride” Mount

-” Marshfellow” Pet

– “Sweetish Chef” Gear

– “Whisk of Doom” Weapon

– One-month membership or 5,000 Crowns! 

With that, our scrumptious journey has come to an appetizing end. Whether it’s the vibrant town square, the smell of warm cookies rising from the ground below, or the fun-filled sleigh ride this bundle is sure to become a fan favorite! 


Ravenwood Community Official Rules

In the spirit of Wizard101, we aim to provide a PG, family-friendly group setting online. We offer friendship, game advice, and entertainment. Every player in the Spiral that happens to come our way is welcome. To keep the peace, we ask you to be polite and respectful to the new friends you meet. These are the rules and guidelines for all branches of the Ravenwood Community.

Community Rules


  1. The Ravynwood Community supports the Terms of Service for Discord and KingsIsle.

  2. Ravynwood is a family-friendly community. No profanity of any kind, no obscene gestures. Any user posting NSFW content will be permanently banned.

  3. Don’t spam mentions, gifs, emotes, pictures, or comments.

  4. Images of any kind that do not comply with our other rules are not allowed. This includes hacked, leaked, and data mined information.

  5. Threats, bullying, and disrespect will not be tolerated. This includes racism, nationalism, sexism, exposing others, making false accusations, or hate speech and slurs. 

  6. Asking for gifts or exchanging real currency is not permitted anywhere within Ravynwood Community.

  7. No advertising your stream, channel, group, server, or page unless approved.

  8. Blocking, ignoring staff, or back seat moderation will not be tolerated.

  9. Disruptive or irrelevant comments will not be tolerated.

  10.  No violent or threatening comments, images, or topics.

  11. All posts and comments must be in English.

  12. Back-up or “Alt” accounts are not allowed.

  13. We reserve the right to warn or ban any member for any reason if we deem their behavior unsafe or inappropriate for the community.


Appeal

At Ravynwood, we believe in second chances. If you have been banned from the Ravynwood Community server, you may appeal directly on Discord to any server administrator. Please send one of the Discord tags listed below a friend request and explain that you would like to appeal after the term of your ban has been served. 

Head Administrator:
huntersoulpants

Administrators:
qualifa
tgif_fry
babypeanuttree

Community Leader:
ravynlea

Thanks for being a part of the Ravynwood Community. We hope you have fun and enjoy your time here. If you have any questions, message me anytime.

Ravynlea

Crafting101 – The Arcanum

Tonight we will craft Legendary and Focused school-specific wands and weapons for Ignus Ferric's crafting quest.

Welcome back to Crafting101, Young Wizard! Now that you have achieved your Promethean Crafter Badge, you are well on your way to become a Champion, Visionary, and/or a Revered Crafter. You may complete this crafting quest by teleporting to a friend or questing to this point.

Ignus Ferric

You will find Ignus Ferric in the Hall of Pyromancy within The Panopticon, The Arcanum. Once you talk to him, you will be assigned “Forging a Legend,” requiring you to read from The Repository and enter The Arcanum world crafting room. Upon completion, you will be seen as a Champion Crafter and earn 43,500 gold, which you will need later to buy the recipe for your Legendary weapon

After that, you will be assigned the quest “Legendary Tomfoolery.” This quest requires you to craft one Legendary sword specific to your school. Let’s take a look through the reagents required to craft these recipes!

Antiquities

For all of the recipes, 25 antiquities are required in each recipe. Antique Chalice, Antique Chest, Antique Coins, Antique Egg, Antique TeaPot, Antique Unicorn Statue are all considered “Antiquities.” You can find these in the sands of Mirage in places like the Alkali Barrows, Caravan Caterwaul Canyons, Eerem Palace, Istanboa, Rubal Wastes, Yakhal Mountain.

Stardust

Three Stardust is called for in all of the recipes. This is a rare harvest from Comet Tail, which you may find in Castle Darkmoor, and Sardonyx, Kondha Desert, and Crescent Beach, Khrysalis. The Transmute Recipe is listed below.

Astral Shard

There will be 10 Astral Shards required in every Legendary weapon. This is a difficult reagent to get because it is typically only a mob drop. Some mobs you might want to farm are the Cave Crawlers in The Hive, Khrysalis, Bacuda Commander and Sentinel in Kataba Iceblock, Polaris,

Ore

Fourty-five Ore is needed in the Legendary recipes. This is a common reagent, notably found throughout Wizard City, Krokotopia, and Dragonspyre. It can also be harvested from plants such the Dandelion, Fickle Pickle, Helephant Ears, and Snap Dragon.

Vine

In each of these recipes, 5 vines are called for. The Vine can be harvested from plants like Moonflowers, Huckleberries, Sunions, Maelstrom Snap Dragons, and Trumpet Vines. The mobs and bosses of Mirage also are able to drop this reagent as apart of their loot, so keep your eye pealed when questing. Brandon Mistborn sells this reagent for 400 Arena Tickets in Unicorn Way, Wizard City.

Golden Pearl

You will need 5 Golden Pearls for each Legendary weapon you craft. These are a rare harvest that you can find from pearls in Stormriven hall, The Grotto, The Portico, and Waterworks, Crab Alley. They may be harvested from Maelstrom Snap Dragon, Evil Magma Peas, Deadly Helephant Ears, and Fickle Pickles. The Gorilla, Minotaur, Magic Eggs, and Dragonfly all have this item as one of their daily rewards. The Transmute Recipe is listed below.

Ignus' Legendary Torchstaff

Meteor Strike

Ten Ra Treasure Cards are required in order to create our staff. This item is auctioned in the Bazaar for _ gold. This card is a drop from Ahnic Striders and Djeserit Dwellers in Krokotopia. Another way to obtain this card is by harvesting Burning Snap Dragons. As a Pyromancer, you have the ability to craft this card from Bernie for 500 gold.

Perfect Rubies

Thirty-five Perfect Rubies will be required for Ignus’ Legendary Torchstaff. Perfect Rubies cannot be found in the Spiral, which you may buy this reagent from Canica Sweet Chile, Archytas, or Noxolo Fasttrack for 100 gold per Ruby. You may also harvest this reagent from Ivy League and Maelstrom Snap Dragons.

Tarrak's Legendary Frostome

Frost Giant

Ten Frost Giant Treasure Cards are required in order to create our tome. This item is auctioned in the Bazaar. You may also receive this Treasure Card as a reward for battling mobs in the Winterbane Gauntlet. You can harvest this from the White Tiger Lilly. As a Thaumaturge, you have the capability to craft this card from Carcinos in the Crustacean Empire, Celestia for 1,500 gold. In contrast, Librarian Fitzhume has this card available for 1,500 each.

Perfect Sapphires

You will need 35 Perfect Sapphires for this recipe. Perfct Sapphires cannot be found in the Spiral, which you are able to buy this reagent from Canica Sweet Chile, Archytas, or Noxolo Fasttrack for 100 gold per Sapphire. You may also harvest this reagent from Ivy League and Maelstrom Snap Dragons.

Ione's Legendary Sword

Tempest

Ten Tempest Treasure Cards are required in order to create our sword. This item is auctioned in the Bazaar. One way to get this card is to battle the Deep Woods Imps in Savarstaad Pass, Grizzleheim or Djeserit Dwellers in Krokotopia. You may harvest this from Burning Snap Dragons, Deadly Helephant Ears, Fiery Boom Shrooms, Fish on a Vine, and Maelstrom Snap Dragons. As a Diviner, you have the ability to craft this from Torrence for 1,200 gold.

Perfect Amethyst

You will need to get 35 Perfect Amethysts in order to craft Ione’s Legendary Sword. Perfect Amtheysts cannot be found in the Spiral, which you may buy this reagent from Canica Sweet Chile, Archytas, or Noxolo Fasttrack for 100 gold per Amethyst. You may also harvest this reagent from Ivy League and Maelstrom Snap Dragons.

Zander's Legendary Staff

Rebirth

Ten Rebirth Treasure Cards are required in order to create our staff. This item is auctioned in the Bazaar. You may also receive this Treasure Card as a reward for battling mobs in the Winterbane Gauntlet. Through Queen Crape Myrtles, you are able to harvest this card. As a Theurgist, you are able to craft this Treasure Card from Carcinos in The Crustacean Empire, Celestia for 1,500 gold. In contrast, Librarian Fitzhume has this card available for 1,500 each.

Perfect Jade

You must aquire thirty-five Perfect Jades for thsi recipe. Perfect Jades cannot be found in the Spiral, which you may buy this reagent from Canica Sweet Chile, Archytas, or Noxolo Fasttrack for 100 gold per Jade. You may also harvest this reagent from Ivy League and Maelstrom Snap Dragons.

Baba Yaga's Legendary Mace

Orthrus

Ten Orthrus Treasure Cards are required in order to create our mace. This item is auctioned in the Bazaar. You may also receive this Treasure Card as a reward for battling mobs in the Winterbane Gauntlet. This card is harvestable from Silver Trumpet Vines. As a conjurer, you can craft this card from Carnicos’ recipe in The Crustacean Empire, Celestia for 1,500 gold. In contrast, Librarian Fitzhume has this card available for 1,500 each.

Perfect Peridot

Thirty-five Perfect Peridots will be used in this recipe. Perfect Peridots cannot be found in the Spiral, which you may buy this reagent from Canica Sweet Chile, Archytas, or Noxolo Fasttrack for 100 gold per Peridot. You may also harvest this reagent from Ivy League and Maelstrom Snap Dragons.

Qismah's Legendary Dagger

Scarecrow

Ten Scarecrow Treasure Cards are required in order to create our dagger. This item is auctioned in the Bazaar. You may also receive this Treasure Card as a reward for battling Hobgoblin fiends in High Road, Avalon. The Deadly Flytrap, Deadly Helephant Ears, and Rotten Beats give this card in their harvests. As a Necromancer, you are able to craft this Treasure Card from Carcinos’ recipe in The Crustacean Empire, Celestia for 1,500 gold. In contrast, Librarian Fitzhume has this card available for 1,500 each.

Perfect Onyx

We will need thirty-five Perfect Onyxes for Qismah’s Legendary Dagger. Perfect Onyxes cannot be found in the Spiral, which you may buy this reagent from Canica Sweet Chile, Archytas, or Noxolo Fasttrack for 100 gold per Onyx. You may also harvest this reagent from Ivy League and Maelstrom Snap Dragons.

Jaki's Legendary Bow

Power Nova

Ten Power Nova Treasure Cards are required in order to create our bow. This item is auctioned in the Bazaar. You may also receive this Treasure Card as a reward for battling the Fomori Giants in The Wild, Avalon. Harvesting the Fiery Boom Sroom may yield this card as a reward. As a Sorcerer, you have the ability to craft this card from Carcinos’ recipe for 1,500 gold in The Crustacean Empire, Celestia. In contrast, Librarian Fitzhume has this card available for 1,500 each.

Perfect Citrine

Thirty-five Perfect Citrines will be needed to create Jaki’s Legendary Bow. Perfect Citrines cannot be found in the Spiral, which you may buy this reagent from Canica Sweet Chile, Archytas, or Noxolo Fasttrack for 100 gold per Citrine. You may also harvest this reagent from Ivy League and Maelstrom Snap Dragons.

Completion

Now that you have all your ingredients, go to The Arcanum world Crafting Station and craft your legendary weapon. Once you have turned in the quest, you will be awarded one crafting slot, 10,000 gold, and your Visionary Crafter badge. Congratulations, young wizard! We will now continue on to become a Revered Crafter now in Ignus’ next quest, “Hi-Yo Silver Chest.”

Aethyr Ore

Twenty-five Aethyr Ore is required for our focused weapon. By questing, you will receive this reagent in several quests. This reagent can be gathered throughout Empyrea, notably found in places such as the Aerial Jungle, Inner Athanor, and the Aerial Shores. The Transmute Recipe is listed below.

Shining Scales

You will need 3 Shining Scales in this recipe. These can be found throughout while fishing throughout the Spiral, notably in the school-themed houses, bundle houses, and the worlds of Wizard City, Avalon, and Zafaria. Check out our guides on fishing to see what else you can get here.

Shocked Key

There will be 10 Shocked Keys needed in order to craft this our focused weapon. As titled on the card, “This key was found in a Silver Chest” is most likely how you will farm these. This reagent can also be harvested from Key Limes.

Flying Squid Ink

Forty-five squid ink will be needed for this item. By questing, you will be able to receive some of this reagent in side quests such as “Ancient Kalamar Secrets,” “A Reasonable Reaction,” “Fahrenheit 4500,” “Postal Stamping,” “Presporo’s Books,” “That New Black Magic,” “Underground Package Service,” and “Word Search.”  You may also farm it from the three bosses in the Secret Tunnel in Aeriel Jungle, Empyrea: Gannon, Madd’n, and D’viss.

Participation Trophy

Five Participation Trophies are required in our recipe. As labeled on the card, “A reagent bought with Arena Tickets,” you may purchase this reagent from Sir Nigel Higgenbottom in Unicorn Way for 800 Arena Tickets each. This may also be a possible reward from Daily Assignment quests.

Your Legendary Weapon

The weapon you crafted previously is an essential element to crafting your new one. The rarer reagents listed above will focus its power and enhance itself.

The Crystal Gems

You will need 35 more of your school-specific gem from the previous recipe. Locations have been mentioned previously.

Transmute Recipes

Golden Pearl

Golden Pearls can be created with 15 typical pearls. I have no doubt you already have this recipe from previous guides, but you may this recipe be sold for 600 gold by Avery Templeton in Survey Camp, Celestia.

Stardust

Stardust can be created with 15 Comet Tails. Comet Tails can be found in Crescent Beach, Sardonyx, and Kondha Desert, Khrysalis as well as Darkmoor and Aerial Shores, Empyrea. This recipe is sold for 5,000 gold by Zellozosia the HomeGilder.

Aethyr Ore

Aethyr Ore can be created with 15 Aethyr Dust. As you go about Empyrea harvesting the reagents for Aethyr Ore, you will also collect Aethyr Dust in the meantime. This recipe is sold for 10,000 by Lolligo in Aerial Shores.

Completion

Now that you have all your ingredients, go to The Arcanum World Crafting Station and craft your focused weapon. Once you have turned in the quest, you will be awarded 30,000 gold and your Revered Crafter badge. Congratulations, young wizard!

Thank you, Starlights, for joining me crafting and collecting reagents! Our next season of Crafting101 guides will feature the craftable houses, starting off with the Watchtower Hall.

Crafting101 – Khrysalis

Tonight we will learn how to craft an Ornate Burrower Chair for Stendhill Hammertail's quest, “Stop! Hammertail.”

Welcome back to Crafting101, young Wizard! The next step in your crafting journey is Promethean Crafter! This stage comes after you earn the Transcendent Crafter badge. Like most crafting quests, you may teleport to a friend to reach Stendhill Hammertail. Otherwise, you will reach Stendhill while questing through Khrysalis. Khrysalis is home to many great recipes, so be sure to keep an eye out for the many vendors you’ll meet on your journey!

Stendhill Hammertail

Find Oztomeca in Silent Market, Khrysalis. He will assign you the next quest, called “Stop! HammerTail” This quest has you craft one Ornate Burrower Chair. The recipe is available for 45,000 gold.

The Recipe

Below is a list of all the reagents needed to craft an Ornate Burrower Chair along with their locations.

Deep Mushroom

Ten Deep Mushrooms are first on our recipe. This is a common reagent found throughout Wizard City, Krokotopia, Mooshu, and Grizzleheim. You can harvest this reagent from Boom Shrooms, Burning Snap Dragons, Fickle Pickle, and Dandelions. They’re sometimes available in the Bazaar!

Perfect Jade

Six Perfect Jades will bedazzle the chair. You can buy this reagent from Canica Sweet Chile, Archytas, or Noxolo Fasttrack for 100 gold per Perfect Jade. You might also harvest this reagent from Ivy League and Maelstrom Snap Dragons.

Comet Tail

Eight Comet Tails will give the chair some glimmer. Like other harvests, Comet Tail can be collected in areas of Khrysalis. You can collect this reagent in Crescent Beach, Khonda Desert, Sardonyx, and The Shadow Palace. This reagent is also dropped from mobs in Khrysalis, such as The Common Killer. In the Bazaar, this reagent goes for 400 to 4000 gold.

Sunstone

Four dazzling Sunstones also contribute to the making of the chair. These are a rare harvest from Sandstone and can be found in either Khonda Desert or Last Wood. I would also search the Halley’s Observatory instance in Marleybone. Sunstone is sometimes a harvest reward from Maelstrom Snap Dragon, Evil Magma Peas, Fickle Pickle, and Deadly Helephant Ears. While sometimes it can be found in the Bazaar, Sunstone can be bought with 200 Arena Tickets from Diego the Duelmaster.

The Transmute Recipe is listed below.

Turquoise

Seven Turquoise will add accent color to the recipe. Turquoise will be the hardest reagent to get on the list. You may want to farm the bosses of Xibalba or other bosses in Azteca to get this reagent. Aquilan bosses, like the Gladiator in The Pit of The Noxii, also have excellent drop rates for Turquoise. You might be lucky and find some in the Bazaar!

Golden Pearl

Six Golden Pearls will give off that nice golden look. These are a rare harvest that you can find from pearls in Stormriven Hall, The Grotto, The Portico, and Waterworks, Crab Alley. They are also able to be harvested from Maelstrom Snap Dragon, Evil Magma Peas, Deadly Helephant Ears, and Fickle Pickles. The Gorilla, Minotaur, Magic Eggs, and Dragonfly all have this item as one of their daily rewards. It’s also available in the Bazaar!

The Transmute Recipe is listed below.

Ore

Five Ore will complete our recipe. This is a common reagent, notably found throughout Wizard City, Krokotopia, and Dragonspyre. It can also be harvested from plants such the Dandelion, Fickle Pickle, Helephant Ears, and Snap Dragon. This reagent is rarely in the Bazaar because of its demand, but you might be lucky to find a few!

Transmute Recipes

Golden Pearl

Golden Pearls can be created with 15 normal Pearls. These Pearls can be found in aquatic places, such as Crab Alley, Wizard City’s Stormriven Hall, The Portico, and The Grotto in Celestia. This recipe is sold for 600 gold by Avery Templeton in Survey Camp, Celestia.

Sunstone

Sunstone can be created with 15 Sandstone. This recipe is available from Avery Templeton for 150 gold in Survery Camp, Celestia.

Completion

Now that you have all your ingredients, go back to your Housing Crafting Station and begin making the Ornate Burrower Chair. Once you turn in the quest, you will be awarded 1 crafting time slot, 150 gold, 23,245 experience points, and your Promethean Crafter badge. Congratulations, young Wizard!

Thank you, Starlights, for joining me in crafting and collecting reagents! Catch our next edition of Crafting101 in The Arcanum with Ignus Ferric.

Skeleton Key Spiral Tour

Do you have plenty of Wooden, Stone or Gold Skeleton keys?

Have you collected so many Skeleton Keys that you don’t know what to do with them? Or, maybe you just earned your first key and can’t wait to use it!?

This guide will take you on a tour of every Key Room in the Spiral. You will discover chances at rare and special drops and collect many cool badges on the way! So, let’s get going!

Wizard City – Olde Town – Roberto’s Sanctum

Roberto’s Sanctum is found in Roberto’s Lair in Olde Town, Wizard City. It requires a Wooden Skeleton Key to enter, and contains Roberto. Wizards first come here during the quest Unlocking the Truth to retrieve a family heirloom for Diego the Duelmaster.

Roberto brings you the first place to farm for 7 Day mounts like Enchanted Broom, Horned Sweeper, Purple Glider or a cool wands like Roberto’s Rapier. You may also receive an Adept’s, or Novice’s Socket Wrench, or a Wooden Skeleton Key which will enable you to return again.

Wizard City – Crab Alley – Crab Alley Wooden Key Room

The Crab Alley Wooden Key Room is found immediately upon entering Crab Alley from Triton Avenue in Wizard City. It requires a Wooden Skeleton Key to enter, and contains the boss, Spirit of Ignorance.

This is a good spot to farm for cool stitching gear like Rhapsodist’s Cap, and the Purple Fairy Wings mount. There is a good chance of getting Wooden or Stone Skeleton Keys.

Strategy: If a Wizard is late to join the duel, Feckless Soul will cheat-cast a spell that steals one pip. Use blades and traps to defeat this Boss.

Wizard City – Sunken City – Simon’s Workshop Stone Skeleton Room

Simon’s Workshop is in the Sunken City, near the entrance from Nightside. Defeating this cheating boss will earn the Simon’s Bane badge.

 Farm Simon’s Workshop for Hairstyles like The Dreamweaver, The Manticore, The Restless Titan, The Raven Eye, and more.Daniel’s Answer of Life, a wand with five percent pierce can be found here. Housing Items like White King Chesspiece, Pets like Fierce Hound, Snacks, Couch Potato Seeds and many 7 Day Mounts like Ancient Koy, Bat Wings, Hippogriff, and Purple Glider. There is also a chance of getting Stone Skeleton Keys.

Strategy: If a Wizard joins the duel after the second round the Boss will cast Mana Burn. Place the hitter in the last position, use first and second round to blade, trap and feint. Don’t blade yourself or he will remove them, blade the hitter. Hit on the third round to finish the battle.

Wizard City – Castle Darkmoor – Castle Darkmoor Gold Key Room

The Castle Darkmoor Gold Key Room is found in the stairway leading up to the observatory inside Castle Darkmoor, and requires a Gold Skeleton Key to enter. It can be accessed after the duel with Sir Blackwater and contains a Locked Chest.

Castle Darkmoor is an excellent place to farm for level 100 Mastery Amulets like the Death Mastery, Howling Werewolf’s Collar. The Mastery Amulets that drop here provide accuracy, damage, and a handy Shadow Shield. A few other notable drops include Gold Skeleton Keys and the Soulful Knight pet.

Wizard City – Castle Darkmoor – Upper Halls Gold Key Room

The Upper Halls Gold Key room is found on the spiral staicase following the first fight. It requires a Gold Skeleton Key, and contains the boss, Bunferatu. Defeating Bunferatu grants the Bunferatu’s Downfall badge.

This Room is a good place to farm for level 100 Rings with 10% Damage like the Spirit of Darkmoor’s Band or the Band of the Cold Grave. Pets, Snacks, there is also a chance of getting Gold Skeleton Keys.

Strategy: Place the hitter last. Blade the first two rounds, no traps. Trap and Feint on the third round, then hit on the fourth. You can use any blades or traps you have on the hit round.

Wizard City – Castle Darkmoor – Graveyard Gold Key Room

The Graveyard Gold Key Room is inside the Graveyard instance, in the first area with Yevgeny NightCreeper. It requires a Gold Skeleton Key to enter and contains the Boss, Aphrodite II. Defeating Aphrodite grants the Flower Power badge.

Aphrodite II drops the best level 100 damage ringsIt is also a good spot for Energy Gear and the Life spell Sacred Charge. There is a chance to get your key back, and you will need to farm with a full team of Wizards in order to defeat this Boss.

Strategy: Check out Ravenwood Academy’s guide including deck set-up tips and strategies for every position here.

Wizard City – The Catacombs – Fathomless Tomb

The Fathomless Tomb Gold Key Room is inside the Catacombs, in the left corridor opposite to Viggor’s Tomb. It requires a Gold Skeleton Key to enter and contains the Boss, Fellspawn. Fellspawn grants different badges depending on the number of times you defeat him!

This is the place to farm if you are looking for the Vanguard’s Gear like Vanguard’s Shocking Boots, it also drops Dragoon’s Sets and Gold Skeleton Keys.

Strategy: Do not use blades. Use Feint, Mass Feint or traps instead. Fellspawn has two phases; Storm and Moon. While he is in either phase, your Wizard cannot blade. When he is in his Moon phase your Wizard cannot place traps on him, but previously placed traps will not be removed. The ideal team uses two hitters. One to focus on the boss, and other to focus on minions. Bad Juju and other weaknesses can be helpful here to reduce this Boss’s outgoing damage.

Wizard City – Ravenwood – Krampusgarten (Wooden, Stone, Gold Lock)

The Yuletide Feasting Hall connects to the following three instances, where Krampus can be fought:

  • Krampusgarten (Wooden Lock)
  • Krampusgarten (Stone Lock)
  • Krampusgarten (Gold Lock)

Krampus can be found during the Christmas event in:

Ravenwood, Colossus Boulevard, Celestia Base Camp, and Walruskberg Harbor.

This Room is a good place to farm for the Krampus’ Tolltaker wand, Christmas Items like the Yuletide Wood Paneling, Pets like Maple Moose or SnowballChristmas Seeds, and Mounts like Blue, Green and Red Candy-Canes

Strategy: The hitter should enter last. The team should blade the hitter to finish with a single attack on the third round. Krampus will remove any blades you cast on yourself, but not blades cast on someone else. To avoid Beguile, use a single attack. The hitter may blade himself using Aegis. Do not use Feint of any kind.

Drop list

Krokotopia – The Oasis – Sapoti’s Landing Wooden Skeleton Room

Sapoti’s Treasure Chamber is accessed from the Skeleton Key Room known as Sapoti’s Landing. The chamber contains a master-thief named Sapoti and his minion, who managed to lock themselves inside. Defeating them earns the Sapoti’s Savior badge.

Farm Sapoti’s Landing for level 15 Wands like the Fenix Ashen Staff , which gives two percent damage. Other drops include the Foxy Dragon Pet, Krokotopian Housing Items and the Adept’s or Expert’s Socket Wrench. Wooden Skeleton Keys also return here.

Krokotopia – The Oasis – Ra’s Reading Room Wooden Skeleton Room

Ra’s Reading Room is accessed from Ra’s Landing inside the Library in the Oasis, Krokotopia. It requires a Wooden Skeleton Key to enter and contains the boss, Ra. Defeating Ra grants the Reading Room Roustabout badge.

This Room is a popular place to farm mounts like the Camel, Crokagator, Mander Palanquin, and the Moonlight, StarlightStarshine and Sunshine Ponies. Wizards also farm here for level twenty Crowns gear, and Crowns wands. Other drops include Krokotopian housing itemsAmber, pets such as Mummy Cat, and seeds including Key Lime or Sunion. Adept’s or Expert’s Socket Wrench and Wooden Skeleton Keys finish out the offerings found here.

Krokotopia – Kembaalung Village – Pagoda of Harmony Wooden Key Room

The Pagoda of Harmony Wooden Key Room is accessed from inside the Pagoda of Harmony instance, following the duel with Tsutsui. It requires a Wooden Skeleton Key to enter and contains a Locked Chest.

This room is a good place to farm for popular level 20 amulets like the Kembaalung Blizzard Charm. Rings like the Monk’s Ring of Dedication, Three percent damage wands, and Crowns pets like Red Panda or Lavender Foo Dog. There is also a good chance of getting Wooden Skeleton Keys.

Krokotopia – Kembaalung Village – Hollow Mountain Wooden Key Room

The Hollow Mountain Wooden Key Room is inside the Hollow Mountain instance. You will find it following the first fight with the Hoof Ninjas in Hamakala’s Mausoleum. It requires a Wooden Skeleton Key to enter and contains the Boss, Temple Phantom. Defeating the Temple Phantom grants the Phantom’s Menace badge.

Kembaalung is a good place to farm for the Gold, Blue or Silver Kirin Mount and the Band of Harmony Ring. The only ring that gives 2% universal resistance to Balance! There is also a chance of getting Wooden Skeleton Keys.

Krokotopia – Lower Zigazag – Lower Zigazag Stone Key Room

The Lower Zigazag Stone Key Room is in the Lower Zigazag, following the first fight with the Ravenous Teeth. It requires a Stone Skeleton Key to enter and contains the Boss, In’Zhizor. Defeating In’Zhizor grants the In’Zhizor’s Undoing Badge.

Farm here for 38% block and 2% pierce Wands like the Eternal Verses of Anubis. Damage Athameslike the 8% Ammit’s Claw of Revolution can also be found. Wooden Skeleton Keys sometimes return here, so bring your friends.

Krokotopia – Lower Zigazag – Lower Zigazag Wooden Key Room

The Lower Zigazag Wooden Key Room is located inside the Lower Zigazag instance, behind the second set of caged Manders. It can be accessed with a Wooden Skeleton Key, after defeating the Ravenous Teeth (Death), and contains a Locked Chest.

This Room is a good place to farm for some of the best level 60 Amulets like the Charm of the Soul Devourer. School specific Amulets that will give you health, 2% damage, and blade item cards. Pets like the Mummy Cat or Royal Ibis drop here, there is also a chance of getting Wooden or Stone Skeleton Keys.

Krokotopia – Upper Zigazag – House of Scales Stone Key Room

The House of Scales Stone Key Room is inside the House of Scales instance, following the second fight with the Condemned Soldiers. It requires a Stone Skeleton Key to enter and contains the Boss, Bellosh. Defeating Bellosh grants the Caged the Elephant badge.

The House of Scales is a good place to farm for the only level 60 Deck that gives 1% Accuracy with a Triangle Socket. You can also get the Mander Palanquin Mount, and there is a good chance of getting Stone Skeleton Keys.

Strategy: One Wizard should hit Bellosh every single round to prevent him from casting Ra. Then, kill him as fast as possible using any traps or blades you like.

Marleybone – Barkingham Palace – Main Hall Wooden Key Room

The Main Hall Wooden Key Room is found on the second level of the Main Hall instance and requires a Wooden Skeleton Key to enter. It can be accessed after the duel with Chief Whip and contains a Locked Chest.

This Room is a good place to farm for level fourty rings like the Marleybone Fog, athames like the Royal Athame of Duality, pets like the Wolf Hound or Dapper Corgi, and Wooden Skeleton Keys.

Marleybone – Barkingham Palace – State Wing Wooden Key Room

The State Wing Wooden Key Room is inside the State Wing, following the second fight with the Enfield Tricksters. It requires a Wooden Skeleton Key to enter and contains the Boss, Billy the Cutter. Defeating Billy the Cutter grants the Cutter’s Bane badge.

This is a good place to farm for level 40 rings like the Jackall’s Ring of Duality, which gives 5% Storm damage, or pets like the Dapper Corgi. There is also a good chance of getting Wooden Skeleton Keys.

Strategy: Don’t cast any shields or he will steal them, just blade and trap to finish in one round.

MooShu – Cave of Solitude – Cave of Solitude Wooden Key Room

The Cave of Solitude Wooden Key Room is in the Cave of Solitude Skeleton Key Room. It requires a Wooden Skeleton Key to enter and contains the Boss, Takanobu the Masterless. Defeating Takanobu grants the Master of the Masterless badge.

Farm here for the Catch of the Day Storm spell and the Katana of Takanobu’s Wrath wand, the only one percent universal resistance wand in the Spiral. There is a good chance of getting Wooden Skeleton Keys. Because of this, I suggest farming in groups of 3 or 4 Wizards to increase your chances of getting a key back.

Strategy: Have the hitter enter the battle last, and use FeintMass Feint or any traps you can stack as a team to defeat the boss and minions all at once. 

Zafaria – Waterfront – Waterfront Stone Key Room

The Waterfront Stone Key room is accessed from the Waterfront Skeleton Key room. This is the home of the Witch Doctor to whom Captain Hockins has come to have his curse removed. Defeating them earns the Hockins’ Hex badge.

The Waterfront is a good place to farm for the Pirate Rowboat mount and Burlap Boy pet, the Adept’s, Novice, or Expert’s Socket Wrench and Wooden, Stone or Gold Skeleton Keys.

Strategy: This Boss is nearly immune to every attack. I suggest that you use Shadow Shrike if you can. When a Wizard attacks directly, the Boss will give you a 10% Piercing Blade. If the next Wizard attacks he will then give you a 20% Piercing Blade. So, eliminate the minions first. Then attack the Boss until you start getting enough Piercing Blades to end the battle.

Avalon – Crystal Caves – Crystal Caves Stone Key Room

The Crystal Caves Stone Key Room is accessed from the Crystal Caves Skeleton Key Room. It requires a Stone Skeleton Key to enter and contains the Boss, Lambent Fire. Defeating Lambent Fire grants the Lambent’s Damper badge.

This room is a good place to farm for Burning Rampage, a Fire spell that is popular in PvP. This Boss has a good chance of dropping Stone Keys, so farm in groups to get the most chances.

Strategy: Check out Ravenwood Academy’s amazing Two-Turn Farming Strategy right here!

Azteca – Three Points – Eternal Sanctum Stone Key Room

The Eternal Sanctum is inside the Black Sun Pyramid Master Chamber, following the fight with Belloq. It requires a Stone Skeleton Key to enter and contains the Boss, Ixcax CursedWing. Defeating Ixcax grants the Ixnay on the Ixcax badge.

Not surprisingly, the Azteca Key Room is a good place to farm for Dinosaur Mounts. Mounts that drop here include: Ankylosaurus, Arcus Cloud, Crokagator, Feathered Raptor, Gold-Wrought Eagle, Jeweled Scarab, Triceratops, and the Tyrannosaurus Rex. There is a good chance of getting Wooden Keys or Golden Keys. You can also get housing items such as the Azteca Fire Pit or Aztecosaur Stela. Snacks, Amber, Cool Pets like Royal Ibis or Therizinosaurus and rare Treasure Cards like Monsoon Hound round out the selection of possible drops. 

Strategy: Use all blades and traps except regular Feints. You can use Potent Feint, just avoid un-enchanted Feint. Minions cast Beguile sometimes, so try to eliminate them first, then focus on the Boss.

Polaris – River of Frozen Tears – Icefall Cavern

Icefall Cavern is near the Sunless Shrine, in the River of Frozen Tears. This Gold Key room is accessed from the “Skeleton Key Room” sigil and connects to Omen’s Hideout, which contains the Boss, Omen Stribog. Defeating Omen grants the Omen’s Adversary badge.

Omen Stribog is a good Boss to farm for many things including the Luphilim’s Eternal Deck. Mastery Amulets like the Luphilim’s Grim Chain will give you health, 6% school specific resistance and a school blade.

Other notable drops include:

Crowns Gear like Seal Team Assault Helmet, Housing Items like the Polarian Well and Lydia’s Cold Table. AmberPets including the Floe Siren and Snowball. Mounts including Frostfang Tiger, Himoolayan Yak, Luphilim Wings, Owl, Snow Ram, White Stag, Winter Treant, WinterGlide Skates. There is a good chance of getting Gold Skeleton Keys, Artisan’s, and Master Socket Wrench.

Strategy: Eliminate the Sentinel first by stacking school-specific traps and Indemnity Feint. Do not use blades. It’s recommended to have a Fire school hitter, who casts Backdraft. Remember to use Shatter before hitting to remove all of the Sentinels shields. After defeating the Sentinel you can use blades. Stack blades and traps to finish the battle with an All-In-One attack. 

Mirage – Aggrobah – Vault of the Verboten Gold Skeleton Room

This room is accessed via the “Skeleton Key Room” sigil in the River District of Aggrobah. It connects to the Vault of the Verboten, which requires a Gold Skeleton Key and contains Verboten Mimic. Defeating this cheating Boss earns Wizards the Mimic Muter badge.

If you are looking for the best level 120 Critical Ring then this is your place to farm. Rings like Drake Ancestral Signet with 10% Damage and 84% Critical will help your Wizard to achieve maximum Critical.

Strategy: This Boss has five different forms that change at random. Every Boss form has different cheats, based on the cheats they had the first time we faced them. You can use Feint on almost all of them except Cyrus Drake and Luska. Just blade, trap and Feint to kill the boss and minions. Minions only materialize when the Ghost Dog or Mithraya forms appear. Bring Shatter in case Gobblestone shows up and casts his cheat; a stacked Tower Shield, Legion Shield, and Brace aura.

Empyrea – Zanadu Sewers – Corporal Tenni’syn Gold Key Room

Corporal Tenni’syn is a boss located in the Zanadu Sewers.

The Sewers are a good place to farm for 125 level Robe and Stitch Robes. Wizards looking for some extra Critical and Damage will farm here for robes like the Radiant Light Brigade Armor witch gives 23% Damage and 110% Critical. This robe is a good choice for every school except for Storm. You can also get Crowns Gear like the Comfort Zone Hat, or wands like the Mirrorsphere Relic. Jewels like the Shiny PIP Hematite, or the Sparkling Critical Citrine, Amber, Pets, Couch Potatoes, and rental Mounts like the Gobbler, Light Blades, Junk-Copter, and Royal Lioness. There is a chance of getting Artisan’s or Master’s Socket Wrench and Gold Skeleton Keys.

Strategy: Feints are allowed once per round. Death can spam Bad Juju to decrease damage. The Wizard with the most resistance should join first. Stack every Feint you can including Potent and Treasure Card Feint. Scion should kill after stacking blades and traps in the fourth round.

Empyrea – Northeast Aeroplains –  Aethyr Elemental Gold Key Room

Aethyr Elemental is a boss located in Northeast Aero Plains near the bridge. Defeating an Aethyr Elemental grants the Aethyr Eater badge.

Farm here for Robes, Mastery Amulets like the Immutable Zanadu Pendant, or Wands like Sycorax’s Crook of Tempests with 85% Storm Critical. Empyrean Housing Items, Snacks, Jewels, and Pets like the Dark Hound. The Aethyr Cloud Mount drops here. There is also a chance of getting a Grandmaster Socket Wrench, or a Wooden, Stone or Gold Skeleton Key.

Strategy: Use Indemnity Feint on the Boss. Stun Block the main hitter. Stack traps on the Boss, then blade the main hitter and the secondary hitter to finish the fight fast. 

Well, what a trip! That is every Key room in the Spiral from Wizard City to Empyrea. We hope you had fun and found something new. Let us know what your best drop on the tour was in the comments below, or over at Ravenwood Community.