A Game Changing Deck Strategy

Have you been spending your training points on a secondary school thinking it’s the best option to help on your questing journey?

Well, I have a little game changer for you! Personally, this helped me so much in my journey through the spiral. I am a life wizard and everyone knows us life wizards don’t hit hard in the beginning. It’s a struggle until we get Forest Lord. So, I thought learning the spells of the strongest school in the game would help me out a lot. I was wrong. I struggled through all the worlds until I got to Celestia, which is main world no.6! I spent all my training points on the wrong cards.

It wasn’t until I found a useful set up that saved me more times than I can remember that life in the Spiral got a bit easier.

Let’s elaborate shall we?

ICE - Tower Shield

Tower shield is a necessary spell in case you are facing an enemy you don’t have a shield for or didn’t pack a treasure card for. It reduces 50% damage from any school. I don’t take this spell out of my deck unless I have a shield to match the school of the enemy I’m facing in battle. You have to be level 16 to learn it. All spells require 1 training point but you will have to learn Frost Beetle, Snow Serpent, Volcanic Shield, and Evil Snowman before getting access to train the spell. You will need a total of 5 training points.

Tower Shield is also available as a Treasure Card which gives an additional 5% shield. It can be bought from the Bazaar in Wizard City Olde Town.

DEATH - Feint

Feint is one of my favorite spells from the death school. It’s a trap that adds 70% damage with a small catch of also casting a 30% trap on you. It is not linked to another school, so can be used on any enemy to add more damage. You will have to be level 26 to be able to get this spell. You will have to learn Dark Sprite, Ghoul, Dream Shield, Banshee, Vampire, and Skeletal Pirate before getting it. You will need a total of 7 training points.

Feint is also available as a Treasure Card too! Instead of a 30% trap on your self it reduces to 20%. Also can be bought from the Bazaar.

BALANCE - Reshuffle

Reshuffle, a spell I had no idea was actually trainable in Wizard City itself! This spell is another favorite of mine and never leaves my deck. It is a massive help when you’re fighting a boss, or even a mob battle and haven’t packed enough attack spells or heals. Reshuffle does exactly what it’s called, reshuffles all your cards back into your deck. This spell is located in Colossus Boulevard in Wizard City. Mildred Farseer has the spell for you to train along with a few others. You will have to be level 20 to be able to train it and will only be 1 training point. You do not need to learn all the spells that she offers in order to train one. 

Reshuffle can be bought from the Bazaar. If you haven’t trained the spell and see it in the Bazaar, buy it quick as it is fast to go. You can also buy Reshuffle from the Library in the commons of Wizard City.

Below is a picture of Mildred Farseer and a map of where she is located in Colossus Boulevard. 

BALANCE - Spirit and Elemental Blades/Traps

These 4 spells are great for setting up a boss or mob to increase your damage. The blades adding 35% and traps adding 25% damage. They are not only great for yourself but if you are working with a team of other wizards, you can also help out by trapping the enemy they are aiming to hit or casting the blades on them. So these are a multi-useful spell. I would only get the cards that match your school.

Niles, the Balance tree has these spells. He is at the entrance of the Krokosphinx in Krokotopia, which is the second main world in the Spiral.  You will have to be level 15-25 to get these spells and you also must complete all the Wizard City main quests to gain the Krokotopia Spiral Key. Each of these spells needs 1 training point. 

Below is a picture of Niles and where he is located.

Training Points

To learn all the spells above, you will need a total of 15 training points. Don’t panic! Every four levels, you gain 1 training point and your school spells don’t cost anything! Also, doing Prospector Zeke’s quests in every world, which involve you exploring the world you are in to find whatever item he has requested, will help you gain another training point in each world.

A picture of Prospector Zeke along with 2 of his quests are below.

saffron22

I hope this guide helps you the way it did for me! 

Power Pips

Power pips are a special feature within the game and with good reason. A wizard has a base chance of getting a power pip, starting at level ten. This chance goes up by one percent every level until you reach level fifty, where it is maxed at 40%.
 
Power pip chance can be increased with gear (pets can also develop a talent for increasing a power pip chance.) Depending on how the game is played by the individual, some may favor another stat. Others will devote a whole gear set just for power pip chance. Higher power pip chance is found on better gear, and as your wizard gains more levels, the gear has a higher power pip chance. Balancing power pip chance with other stats is a part of the game.
(These are just examples. Not all rings will offer 12% power pip chance.)
 
Once you reach a certain level, wands will start to give you either a pip or a power pip. This is just a standard power pip, it doesn’t affect power pip chance.
 
Power pips are, as stated above, a two-for-one deal. One power pip represents two normal pips, but only for spells that are from your primary school. A storm wizard who has two power pips could not, for instance, cast Satyr (a four pip spell.) This is because life isn’t their primary school, and the power pip would only count as one.
 
The number of pips a spell cost is in the upper left-hand corner of your spell card.
 
Spells that have an X in their upper left-hand corner are based on the number of pips you have on hand. Tempest and Dryad, for example, have this symbol. However, Dryad is a healing card, and based on the number of pips you have, is how much it would heal you for. Dryad heals 200 health for one pip. A life wizard who wanted to heal 800 would have to wait for four turns. This life wizard would only have to wait for two turns if they received a power pip each turn.
 
No power pip: 200 [amount of health on the card] x 4 [the number of normal pips] = 800 [the amount that would be healed]. This would take four turns.
 
One power pip: 200 [amount of health on the card] x (2 [the number of normal pips] + (1 [ number of power pips] x 2 [value of power pips])) = 800. This would take tree turns.
 
Two power pips: 200 x (2 [number of power pips) x 2 [value of power pips]) = 800. This would take two turns.
 
Tempest would be the same way, only for damage. If a storm wizard wanted to do 320 damage, that would require four turns. (As it is 80 damage per pip).
 
Power pips can be used for a side school if you have the school’s mastery amulet. There is a mastery amulet for each of the seven schools of magic. You can buy the basic mastery amulets in the Crowns Shop, but you cannot buy the amulet of your own school.
 
There are also exalted mastery amulets that do the same thing but offer extra stats for your wizard. Critical block for two other schools, damage boost, and balance and life offer incoming or outgoing health boosts. Exalted amulets have to be farmed for as they cannot be bought in the Crowns Shop.
 
Spells that take pips (Mana Burn, Lord of Winter, etc.) will specify on the card. Mana Burn is a balance card that does 80 damage per pip and takes the enemy’s pips as well. It takes 3 pips from your opponent.
 
Spells that take pips will only take what it lists on the card. If the enemy has three power pips, it will take the three pips the enemy has and give you three normal pips, even though the power pips would equal out as six pips. If an enemy has two normal pips and a power pip, it will take the two normal pips and a power pip. It won’t leave a pip behind. Power pips cannot be taken apart and you are only given what you’re promised on the spell. It’s all or nothing.
 
It’s important to know that if you cast a spell, and someone casts a spell on you that removes your pips, you still attack even if you have nothing. If you are hit with a Mana Burn, and the seven pips you had go to four, you still use the spell you selected that costs seven pips.
 
In short, power pips are considered a fundamental part of the game because they help with performing a spell quicker. Every school uses some form of the pip, and power pips are just a two-in-one pip deal. Increasing the power pip chance is invaluable as well, however, some wizards may choose to increase another stat.

Shields101

Shields are a type of ward and are the exact opposite of traps. While traps add damage to a spell, shields detract damage. Charms and blades trigger first, and wards go second. So any shielding you do will affect the spell with the charm buffs.
 
There are three different types of shields: Absorbs, Universal Shields, and School-Specific Shields.
 

ABSORBS

Some absorbs absorb a set amount of damage.
Life gets absorb 400 damage at level 16
 
Other absorbs take damage based on the number of pips the wizard has when it was cast.
If the wizard had 3 non-power pips, the absorb would absorb 375 points of damage. Ice learns this spell at level 18
 

It’s important to note that any damage will be absorbed by this shield, making all absorbs also universal shields. If there is a boss that takes universal shields, they will take absorbs that are individually cast. (Rebirth users, rejoice! Some bosses won’t take your absorb, but some will. Depends on the boss)

UNIVERSAL SHIELDS

These are the shields the Ice school is known for. You guessed it; the tower shield. The other, slightly less common one is the legion shield. A universal shield takes a certain percentage off of any school-type damage before it hits you. A tower shield, specifically, halves the damage. A spell that does a 100 damage will only do 50. The legion shield takes off 30% damage.

SCHOOL SPECIFIC SHIELDS

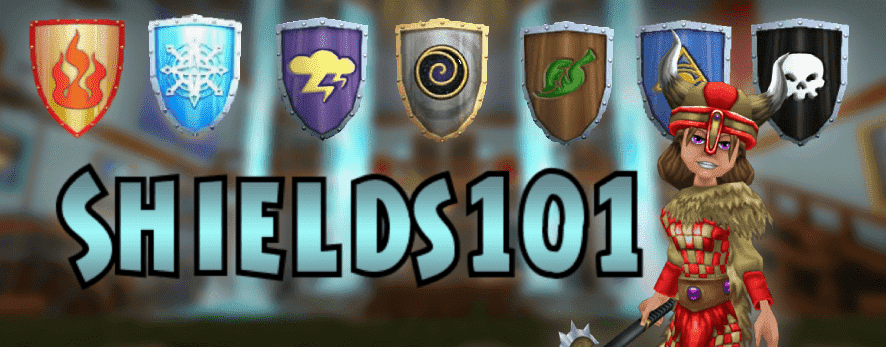
These are the most numerous. There are school shields for every school except balance. There are different amounts of damage they take off as well. Everyone, starting at level 10, can get a -80% shield of their school for no training point cost. Others can be trained for one point each if you wish. Sabrina Greenstar, in the Commons, by Hilda Brewer, trains these spells

Each school, except for Balance, gets a spell with two -70% shields of the other members of its trio. The elemental trio (Storm, Fire, and Ice) can get the Glacial (Fire), Thermic (Storm), or Volcanic (Ice) shield. The spirit trio (Life, Death, and Myth) can get the Legend (Life), Dream (Death), or Ether (Myth) shield.

As you can see, the Volcanic shield gives the user two shields; one-70% storm, and one -70% fire.

Just because Balance isn’t a part of a trio, doesn’t mean it gets left out. Balance wizards get two different spells. One spell has the spirit trio shields, all at -50%. The other spell is the elemental shield.

NOTE: Damage over time’s (DOTs) do count as incoming damage, meaning that any shield placed will be used by the DOT. This is either helpful or just a nuisance.

Be careful, and pay attention.

LAYERING SHIELDS

Just like traps and blades, shields can also be layered. However, two shields of the same kind will not stack. Three of the same type of tower shields won’t work better than one tower shield. However, it is worth noting that different types of shields can be stacked. For instance, a trained tower shield can be stacked on top of a treasure card tower shield to increase its protection.
The rule of layering: First thing on, last thing off!
 
When it comes to layering shields, you should watch carefully. A tower shield placed before an absorb will only trigger after the absorb has been broken. A tower shield placed after an absorb will trigger as soon as you take damage, halving the damage the absorb takes. If you’re in charge of shielding think about whether you want an absorb as the last line of defense, or if you want standard shields last.
 
Consider this scenario, you place a Spirit Armor (400 absorb) on a teammate. The teammate suffers no damage, and next round you place a -80% Storm on top of it. The enemy casts a Storm Lord (690 base damage) and ends up doing a total of 0 damage. This is because the -80% storm shield lowered the damage to 138. The absorb had enough to take the damage, lowering the amount left to 262.
 
Now, consider the reverse, with the storm shield on first, and the absorb on second. The opponent hits. The absorb takes 400 damage, leaving 290. The -80% shield pops, damaging the wizard with 58 points.
 
These two scenarios are basic, but, as you can see, layering shields so you can get the best advantage out of them is important. Keep track of the shields going off and on.


GETTING RID OF SHIELDS

Ice has this handy little spell called Steal Ward. It takes a shield off of the chosen target and places it on you. However, this only works for the most recently cast shield. If a wizard places a tower shield followed by a -80% Myth shield, the spell will take the -80% shield off.
 
Myth’s infamous Earthquake will take every ward off including any traps. If there are important traps that need to stay in place, Shatter can be used instead on a single target for 3 pips. After reaching level 100, Mystic Colossus will do a mass shatter, taking all unused shields and leaving behind any unused traps. Myth can also use Pierce to remove the last shield cast in much the same way as Ice’s Steal.
 
Another way of taking shields off is with small spells. Wand charges, for example, will take a tower shield off, or a school-specific shield. A decent DOT will be enough to take off most absorbs. Having a teammate hit before you will also be semi-helpful if they can pull the absorbs and universal shields.


CONCLUSION

Shields are just as important as blades and traps. When soloing in attack gear shields can save you. They can give you enough time to save pips for that one-shot. When shielding others, keep in mind their health and resist. Don’t just shield one person, pay attention to every Wizard. Properly used, shields can make all the difference in your quest for victory.

Basic Deck Building

INTRODUCTION

This is a guide that is designed to help people build their decks accordingly, as a lot of people tend to overcrowd, under-pack, and/or leave out some useful cards.

This focuses on max level decks, however lessons learnt here can be applied to any level of play.

This guide is broken down into 4 categories of decks, of which each category will go into further specifics and detail: Offensive, Supportive, Healing, and Defensive.

Just remember that there is no rule to sticking to one certain build type. Logically mixing sets and types for maximum output within the game makes a whole lot of sense. A very basic idea of this is how Defensive and Healing can easily be mixed, for a little less here and a little more here. It’s not all about min-maxing.

We also recommend having multiple decks, and having each of them set up for their certain task. This will make going into battles easier and will ensure you won’t be That Guy who takes 5 minutes before every boss to “Fix your deck.”

Please note that we differentiate between a “boss fight” and a “dungeon”.  

A boss fight would be a single boss, no cheats etc.  A dungeon is, well… a dungeon!


OFFENSIVE

Single target hits ARE NOT always needed. While they may be useful in solo boss fights, all of the offensive schools have AOE hits that can rival a Single Target attack in damage. (e.g. Glowbug Squall VS Rusalka’s Wrath) Unless you’re in a boss fight alone, you typically only need a max of 4/5 blades, a few hits, and epics for those hits. And potentially some feints depending on the health of the boss.

  • This is an example of a basic, offensive Storm deck. With an amulet and pet blade, this can OHKO just about anything with a bugs or lord. Tempest would be used against really weak minions or to clean up low HP enemies.

  • This is an example of a basic, offensive Fire deck. The exact same principle as the storm deck, just fire!

Of course, the addition of traps, potents, and auras can all work to your advantage, too, should you require them.  However if you’re not alone, someone else can normally help out with these. There’s a lot of class specific traits too, Death’s LOVE to use frenzy but Storm tends to be a little too squishy for those drastic means. One thing I’d never recommend using are bubbles. For 2-4 pips, they’re usually not worth using! Try keep your Offensive decks slimmer and more concise. You don’t want someone dying because you couldn’t pull a hit!


SUPPORTIVE

This Class we’ve created is a little oddly named. But it is by far the most versatile and in some cases important role in the team. This role will consist of various uses, all very different yet important.

  • This variation of Storm deck would be used if you are required to spam hits in order to prevent a certain cheat. But it also allows for you to help set-up should the opportunity present itself.

  • This sort of deck is a set-up deck, including side. You aren’t hitting, merely making sure whoever is does so much damage everyone simultaneously says “overkill lol”. However should the enemy survive, your back up hit can clean up the 1k health or so.

Supportive by nature is there to support your team in whatever way is needed. You may be used to bypass a cheat system, set-up your attacker or help out with shields and healing. It’s an ultimate mix of whatever is needed by your team, but this is also the easiest build type to overcrowd your deck. Try and know what you’ll be doing more of before the fight, so you focus more on that. Important to note, if the main hitter is fully bladed and just waiting on pips or to pull, feel free to blade yourself up, just don’t hit. You don’t want to clear any feints or traps in place. Sounds obvious, but you’d be surprised!


HEALING

This one is fairly self-explanatory. You’re there to refill those little red spheres when they get low. This is by far the hardest role for anyone to just randomly pick up, and is normally very class dependent Eg: Life or Death

  • This is a pretty healing-focused Life deck. You worked your way up to 159% outgoing and you’re gonna make sure your team knows it! It’s just all about healing here. You’d also include some Pigsie, sadly I’m not that good.

  • This is a more balanced healing deck for Death. This allows them to pump out high intensity healing, but still provide some extra Support. This is more of a Supportive/Healing build. Healing in combo with traps, blades, feintsetc.

Healing is normally only really needed inside of dungeons. A core thing to note is you’ll want to expand on these decks further. Find what works for youReshuffles are also rather important. Running out of cards to heal your team is never a good thing!  It also wouldn’t hurt to incorporate shields into your deck, so support your team in a bulkier way, but that is for our next category!


DEFENSIVE

This is quite possibly the most useless of the classes, in modern Wiz that is. Nowadays the dream of an Ice or a Jade entering first to pull their aggression, with the rest of the team entering late doesn’t exist thanks to the wonderful addition of Late CheatsHowever it can still find use when used in combination with other class types. But the basic premise is shields, or debuff spamming the enemy.

  • This deck for Death would be used against a Storm boss. Of course this isn’t all you’d use, but these are the core ideas for this concept.

So you’ve got all your shields, and then all your weaknesses. Then you’re gonna wanna throw in some extra debuffs, soinfections, mantles etc. Lastly, adjust it to suit who you’re fighting, by changing out dispels and set shields! This class has basically been absorbed by Supportive and Healing builds in today’s game. But I figured I’d include it due to the cards being really useful and worthy of their own section. But these decks are basically used to increase your teams longevity, and make those pesky hits hurt a lot less! But alone they will be rather weak, so make sure to mix these in with other builds.


DUNGEON EDITS

This idea isn’t too hard to understand. Do some research on the Wiki and learn a bosses cheats. Then simply adjust your deck accordingly to help you better fight it!  You can find a variety of boss guides on this site to help you out! Below I’ll go through some nifty examples to help you understand:

  1. Omen Striborg: It’s kinda funny that the boss in this fight isn’t the challenge, it’s his minion with way too much health. However, you can’t blade! So no supercharge! But traps work, so get a fire to hit after using a backdraft or two, on top of a million traps.
  2. Rasputin: You’re gonna need to spam a lot of hits, as every time you do just about anything he’ll summon a minion.
  3. Malistaire: You’re gonna need to learn his cycle if you’re gonna wanna hit. He’ll clear all blades, traps, shields etc every 4 rounds. So pack multiple of each type of blade, you’re gonna need them. Also, Doom and Gloom is needed.
  4. Fight Club: This one is a pain to fight. You can’t blade other people, you have to spam hits, and you cannot feint. This dungeon is just not enjoyable all round.

So please, look up your bosses and cheats! You don’t wanna be that guy who triggers an enfeeble cheat the round you hit!