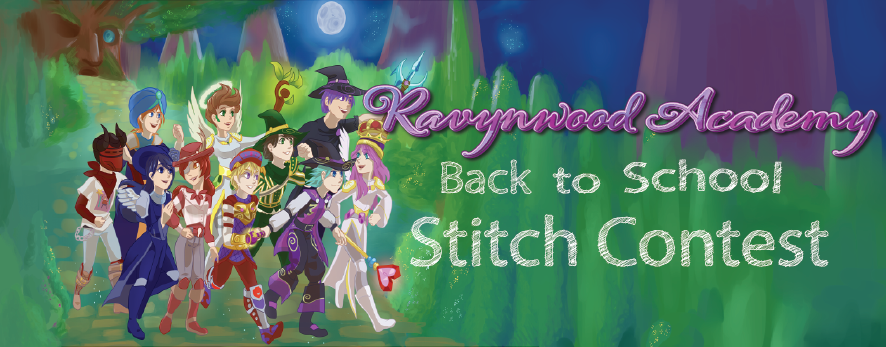
Back To School Stitch

Amber and friends by Mellow#3210

Make sure your Wizard is looking their best for a new year of spell-slinging with Ravenwood Academy’s Back to School Stitch Contest!

Will you take home the prize for the fieriest Fire, the most electrifying Storm, or the chillest Ice of the year? Enter Ravenwood’s school-themed stitch contest to find out and win fabulous prizes! 

Prepare your Wizard for fall by designing a school-themed stitch for your main character. Only one entry per person is allowed, so choose wisely!

Take a screenshot of your Wizard and post it in the Ravynwood Community’s Discord contest channel, tag us on Twitter, or email it to [email protected]. We will be looking for stitches that combine things in unexpected or rarely seen ways to show the spirit of your Wizards school. Enter by midnight PST on 9/30/2022 to qualify! 

One winner representing each school will receive:

First Place: The awesome new Peppergrass Glen Bundle, a Charmers Mystical Flute, and the rare, stunning Wings of Whimsy 30-day mount!

Second Place: 10,000 Crowns and a Fogstaff!

Third Place: 10,000 Crowns

Good luck. We can’t wait to see how you embody your favorite school in Wizard101! 

Ice School Guide to 99% Resist

Have you ever wondered how you could increase the resistance on your level 110 Ice Wizard? Well, Ravenwood Academy is here to help. Let us guide you on the right gear and pet to achieve 99% universal resist in Wizard101.

Now, I know what you’re thinking, can this be true? Imagine having ninety-nine percent universal resist… Sounds amazing right? Well, like all good things it won’t be easy. So, lets begin.
An Ice Wizard with that kind of resist isn’t dying any time soon, unless the opposing party has a LOT of pierce. Even then, it will take some time to defeat an Ice Wizard with almost complete immunity. Now, if that doesn’t sound like a worthy challenge for any Ice Wizard, I don’t know what is.
 
Its pretty fun to show other Wizards how amazing Ice school can be with all that resist. Spamming shields, Boss battles, leveling with friends, farming. Your team will be become unstoppable as you take the “damage” for them.
 
Now on to the fun part…. Where and how do we get the items we need to achieve all that resist?

Hat

The first thing you will need is the Jade Hood of Mystery. At level 110, it gives 22 Universal Resist, 6 % Power Pip chance, +340 Health, 6% Incoming and 5% Outgoing Healing. This Hat Comes from the “Keeper’s Lore Pack” and sells for 399 Crowns per pack.

**Note for newer players if you are not level 110 or higher it will not give you these stats!!**

Robes

Next, the Jade Robe of Mystery. It gives 23 Universal Resist, 4 % Power Pip chance, +480 Health, 5% Outgoing Heal, and +40 Critical Block at level 110. You can get this robe from the “Keeper’s Lore Pack.”

Boots

Then, the “Rockstar Kicks.” Patt Minotaur, in the once shot Gauntlet, “Battle of the Bands”, drops this rare item. These boots give +224 Health, 6 % Power Pip chance, +85 Critical Block, +6 % Damage, 18% Universal Resist at level 100.

Amulet

Now for the Amulet, the “Arcanum Exile Snowflake Torc”. Many bosses in Polaris including Boris the Boarder, Colonel Orlov, Marshal Gill, and the Rat, all drop it. The Amulet itself gives +326 Health, +88 Critical Block, +6 Universal Resist. It also gives one card, the Bolstered Ward.

Athame

The Heartsteel is an Athame you can get at Level 5 from the Crowns Shop. It gives +45 Health, and +5 Resist. You can buy it for 260 crowns. Or, you if you would rather, you can farm it from Prince Gobblestone. He is a rank 3 boss located in Colossus Boulevard, in Wizard City.

Ring

The ring you need is “Elissa’s Chill band”, which is for level 66+. It gives +415 Health, +165 Mana, 8% Power Pip chance, +3 Universal Resist, +54 Ice Critical Block, +2% Ice Damage, and 4% Incoming Healing. Now, how do you get this ring? Well, let me tell you, there are 11 bosses and mobs that drop it in Zafaria!! They are, Amedras Lightstep, Blackback Soldier, Custos Decimus, Ghuerruld, Goliath Bruiser, Gorilla Spider Witch, Oya Bloodstorm, Shadow- Web Haunt, Shaka Zebu, The Hoarder, and Tse-tse Snaketail. If you don’t have luck with one, try another!

Wand

Next, we have the wand, “Katana of Takanobu’s Wrath.” It gives +1 Universal Resist, and +1 Power Pip, as well as 5 wand hit cards. It also has a “Shift Ninja Pig” May-Cast. Takanobu the Masterless in the Cave of Solitude Wooden Key Room, in Mooshu, drops this rarely seen wand.

Pet Stats

Finally, this set-up wouldn’t be complete without a resist pet. Strive for Relentless, Mighty, Unshakeable, and Durable even though they are usually considered selfish talents. In this pet, they boost the standard Proof + Defy to provide extra universal defense. In a pet with base stats of 255 strength and 260 agility, these talents will increase that to 360 strength and 400 agility which determine the pet’s final resistance.


Well, there you have it! This is currently the best resist available. 99% Resist for Ice School is the highest that we can currently go. I’ll definitely be keeping my eyes open for gear that will take us to a full 100%. Until then, so long wonderful Wizards, cya when 100% resist is possible.

~Ravenwood Community Guest Writers, Tsunami and vKoor

Great Guide for 100% Critical
Come join the fun at Wizard101

Wizard101 Friendship Festival

Happy Friendship Festival!

Here we are, it’s February in the Spiral and that means it’s time for the Wizard101 Friendship Festival! Lots of goodies, from bubble emojis you can hang on your wall to an adorable stuffed sloth. Wizard101 has some wonderful new things for us this year! We also have our favorite items from years past making a reappearance. I simply couldn’t resist a shopping spree, so I’ll share with you here all my Wizard101 Friendship Festival Finds.

Friendship Pack

The first thing I’m going to share with you is the new Friendship Pack. It’s 99 crowns and has 3 items in it.  What you will find are adorable Bubble Emojis that hang on a wall. 
 
There are 14 different emoji heart wall hangings. You’ll find all your favorites, including Laughing, Happy, Silly, and Quirky! 
And, in addition, there are also 11 different school heart wall hangings. There are the basic 7 schools and the Shadow and Astral schools!

Best Friends Seat

I can barely contain my excitement over one of the new items introduced in the Crown Shop. Therefore, I’m showing this one first.

More furniture we can sit on!

For the Friendship Festival, they have brought us an adorable garden bench. Quite a suitable name too, “The Best Friends Bench”.  Wooden, with what appears to be a metal framework. In addition you’ll see it has a lovely carved design on the seat back.  A must-have for decorators gardens! Make sure to get them while you can!

Vases of Roses and Plush Hug Sloth

I love these next 3 items!

Another great addition are the Vases of Yellow or Red Roses and the most adorable stuffed Sloth you’ll ever see. I have to admit, the Sloth was one of my first purchases, lol!

  • Vase of Yellow Roses-250 crowns or 5000 gold
  • Vase of Red Roses-250 crowns
  • Plush Hug Sloth-1000 crowns

Look at that sweet little face, awwwwww!

New Plushie Housing

Last, but certainly not least, we have a bunch of new plushie housing items! 3 new teddy bears and 2 manders. They would certainly look adorable in any Wizards bedroom.

  • Velvet Friendship Bear-1500 crowns
  • Brown Friendship Bear-1000 crowns
  • Black Friendship Bear-1000 crowns
  • Orange Friendship Mander-1000 crowns
  • Blue Friendship Mander-500 crowns

Oldies, but goodies

Of course, all of our old favorites are back for a limited time. Including the first ever furniture we could sit on. I was excited to see The Friendship Table again, originally introduced in February 2019. The 2019 Sweet Heart mount was also brought back for this event. If you missed out on them last year, here’s your chance again!

  • Friendship Teddy Bear-1000 crowns/15,000 gold
  • Friendship Table-2200 Crowns
  • Friendship Keeper Multi-tank-1500 Crowns
  • Friendship Balloons-100 Crowns (currently on sale for 70 crowns)
  • Care Hare-3750 Crowns
  • Sweet Heart-4500 Crowns
  • Soaring Heart Wings-3375 Crowns
  • Friendship Oni-4500 Crowns
  • Lovely Ladybug-3750 Crowns
  • Lovely Leopard-4750 Crowns

Don’t forget to drop by and visit Valentina Heartsong for the perfect wand for that special Valentines party! In addition, she has 2 of the cutest Piggles you’ve ever seen. You’ll find her in the shopping district near the fountain.

I am very excited about the new items KI has released. You can bet, decorator/glitcher that I am, that I will be working on some creative uses of these items. Especially the Emote wall hangings! What are you excited about? Do you plan on indulging in any of the new releases? Is your creative mind thinking of ways to use the new wall hangings? I’d love to hear your thoughts in the comments below!

Friendship Festival-2020
Friendship Pack-2020
Ravenwood Academy Home Page

Spooky Halloween Stitches

With the spooky season fast approaching, it’s time for us to drag all the skeletons out of the closet!  So, organize your wardrobe, break out the mirror, and get ready to create your own personal Halloween themed stitch. We’ll take you through some of the most popular and scariest stitches you can use this Halloween in the Spiral!

We’re going to be breaking down various options from different sources. We’ll be giving you options for every piece of gear too, so you can make sure you’re fully decked out in your spookiest attire.  Make sure to mix and match any pieces of gear to make a look that’s completely your own!

Hats

Hats are one of the most important parts of any stitch, as we’re naturally drawn to our characters faces.  Fortunately, we have a litany of scary masks and hats just for the occasion!  

To the right, you can see various options I’d recommend.  You could be a Mummy, a Vampire, a Skeleton, or anything else you can imagine. A lot of Halloween hats cover the Wizards face, which can be very cool for the scary, dead theme! 

My personal favorites include the Skeleton Hat, Spooky Carnival Hat and the Pumpkin Masks.  They work really well with just about anything!

Robes

Robes are the biggest part of any stitch, taking up more visual space on a Wizard than hats and boots combined!  You’ll want to make sure you choose the perfect robe for your stitch.

Fancy Vampire robes for a suave and scary Wizard might be exactly what your stitch needs.  Or, if you are focusing on the more deadly aspects of Halloween, a Mummy or a Skeleton robe might be just what you are looking for!  The Spooky Carnival robe is also a fun and slightly more unique choice. 

However, my personal favorite robe for Halloween is Youkai’s Death stitch robe!  I think it works great with anything, allowing you to mix and match while suiting all your scary needs!

Boots

The boots are a fun part of any stitch.  I find they’re the piece I fuss over the most. Even though they’re nearest to the ground and comparatively smaller to robes, it’s really noticeable if they don’t fit the look.

Pack boots such as the Terror’s Hoard Boots or the Ancient Purrzian variants work great!

You can also use the more traditional options, such as the Vampire, Mummy and Skeletal Boots as they can work brilliantly.  However, they can be harder to mix and match in some cases.

I personally use the Ancient Purrzian Galesh, which have an awesome color scheme and a great skull pattern!

Wands

I have always considered the wand to be the most important part of any stitch.  They have to match the overall look, and in many instances they are the signature piece that completes it.  So, here are my seasonal favorites.

The Pumpkin and Witch wands found in the Shopping District carry the Halloween spirit.  They’re delightfully frightening options for any ghoulish stitch.

Some other possible choices come from packs, bundles and drops. Malistaire’s Wand and Hades’s Staff might be exactly what you’re looking for. Or, what about a scary floating eyeball, with dragon wings like the Terror’s Hoard wands?

My favorite is the Spooky Throwing Knife.  It’s scary, glowing, and has a skull in the grip!

So make your own stitch now!

I hope these options inspire you to create your own Halloween stitch!  Who knows, maybe it will help you win Kingsisle’s Halloween Decorating Contest!  Here’s a look at what I came up with for my wizard. We offer you this chilling challenge, tweet us or post on Facebook showing us what your Wizard looks like this spooky season @RW_Academy101  and join in the fun.

Enjoy all the Tricks and Treats in the Spiral Wizards!

Fire Guide to Max Damage

Guess which school has the highest damage boost of all the schools in the game?

Storm?

WRONG!

Fire currently boasts higher damage than Storm. Weird right? This is a trend that’s been happening since Polaris where the fire school gear has been getting higher damage than the storm school. Currently, the max damage the Fire school can output is 190%.

 Sadly, this damage is pretty much just for show, as you’ll find with the other max damage guides in this series.

So sit back and run around the commons showing off your total damage.

Disadvantages

Pretty much all of your other stats will be sacrificed for this build, but as I said before, this is a build to impress, not a necessarily a build you should use in a battle.

While Fire still boosts higher than Storm, Storm spells still have higher base damage, which sometimes goes over Fire’s total damage output in battle, or equals it. 

What you will need:

Hat: Fiery Paradox Hat (Dropped by Vigilant Sargun and Titan’s Trident in Empyrea)

Robe: Royal Fusilier’s Dress Robe (130+) (Dropped from the Yuletide Pack)

Boots: Fiery Paradox Boots (Dropped by Vigilant Sargun and Titan’s Trident in Empyrea)

Wand: Nimbari Centurion Scimitar (130+) (Dropped from the Nimbari Hoard Pack)

Ring: Duelist’s Daredevil Ring (130+) (PVP item Sold by Brandon Mistborn in Unicorn Way)

Athame: Edge of the Shadow Web (Dropped from Death Morganthe)

Amulet: Medallion of the Lower Zigazag (Dropped from Moh’Lharz in the Lower Zigazag)

Pet (2.0): Fire Dealer, Fire Giver, Pain Giver, Pain Bringer, Fire Boon, Mighty or Cautious Jewel

Deck: Ice Deckathalete’s Deck 4 (Deckathalon event)

Mount: Fire Ghulture (Ghulture’s Hoard Pack)


Gear Calculation Chart

Alternatives

If necessary,  you can switch out the ring and deck and you’ll still have super high damage (180+) that you can use in any battle. This will decrease your damage a little, but will allow you to use your damage outside of PVP and give you access to a TC and main deck.


Ring: You can use Mithraya’s Blazing Loop, available for level 120+


Deck: You can use the Case of Engulfing Flames, available for level 93+. 

Let’s ignite these flames together! Get it, Flames? Fire? 

Keep your eyes open for upcoming guides for all the schools very soon!

Let us know in the comments below if you have a way to boost your Fire even more without the aid of an NPC or elixir.

Check out the rest of our Gear Guides, we have a guide for every school at Ravenwood Academy!

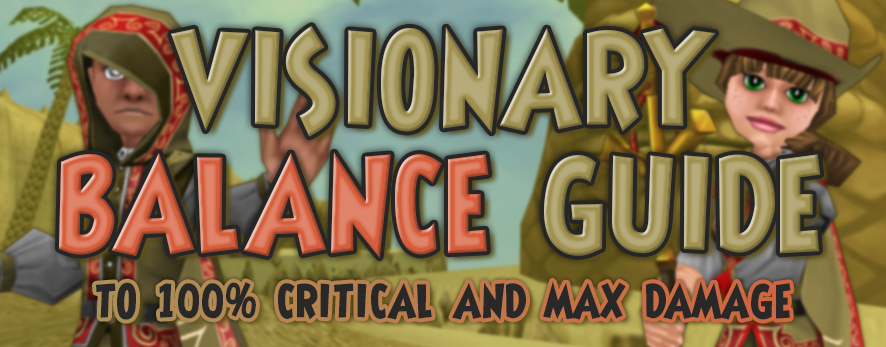
Visionary Storm 100% Critical and Max Damage Guide

Ah the Storm school! The hardest hitting school and the easiest school to hit 100% critical. It is also the easiest school to balance super high damage with super high critical. Storm eclipses the other schools in that department but that’s not surprising since that’s what storm is all about, hitting high while trying not to die very quickly (intended shade). Currently, there are many methods to gain high damage and max critical with this school. We’ll explore the one that gives the highest damage while maintaining 100% critical. The current highest damage storm can achieve with 100% critical is 165% damage. The critical amount goes to 842 which is 100%.


Benefits

The Storm school is the hardest hitting school in the game. This means that they can end battles really fast. They have the highest critical in the game as well as the highest pierce. Their attacks are pretty deadly if they hit you directly. They also have quite a few spells that remove blades which is pretty cool, unless you’re fighting against one of course.

Problems

With this gear build, there are just a few problems you will run into. I would say not much is sacrificed compared to the other schools since this area is Storm’s specialty. If you run this gear you will have to sacrifice pierce, and a little bit of resist but you should be fine. Some schools will have to give up these factors along with accuracy but with this build, Storm usually maintains high accuracy. The other problem that you will encounter, which is not just native to this build, is health. Storm is notorious for their low health so this gear setup just reflects that.

What you’ll need

Robe: Malistaire’s Cloak of Flux

Hat: Stormy Paradox Conical

Boots: Stormy Paradox Boots

Wand: Sky Captain’s Boarding Hook

Pet: Triple damage Double critical pet with a Cautious Jewel

Athame: Aphrodite’s Storm of Thorns (with two (2) +18 critical Amethyst jewels)

Ring: Stormy Paradox Ring (With one (1) +18 critical Amethyst jewel)

Amulet: Flygob’s Medallion

Mount: Storm Ghulture

Deck: Stormy Paradox Deck

Total Damage: 165%
Total Critical: 842 (100%)

Storm Gear Setup

Calculations


Alternative Gear/Recommendations

So with the following gear on, Storm usually maintains 165% damage with 100% critical. The alternative gear will be shown at the end. You can also use the Lady of Spider’s Lure Amulet from Morganthe instead of the Flygob’s Medallion which will give you two extra blades.


What you’ll need

Robe: Malistaire’s Cloak of Flux

Hat: Stormy Paradox Conical

Boots: Stormy Paradox Boots

Wand: Wysteria Warrior’s Longsword (level 130+)

Pet: Triple damage Triple Critical pet

Athame: Aphrodite’s Storm of Thorns (with two (2) +18 critical Amethyst jewels)

Ring: Stormy Paradox Ring (With one (1) +18 critical Amethyst jewel)

Amulet: Flygob’s Medallion

Mount: Storm Ghulture

Deck: Stormy Paradox Deck

Total Damage: 160%
Total Critical: 838 (100%)

Storm Gear Setup

Calculations

Gear Calculations

Thanks for reading my guide on achieving 100% Storm critical in Wizard101. I hope it will help your Storm Wizard hit like a Hurricane as you explore the Spiral with your friends from Ravenwood Academy.

Check out the rest of our Gear Guides, we have a guide for every school at Ravenwood Academy!

PS. Credit to AtmoPlex on twitter for the wand screenshot!

Ice Guide to 100% Critical

You probably thought it was impossible to get 100% critical plus high damage with the Ice school, huh? Well, you’re wrong!

With Ice, this is the most difficult school to get 100% critical, even more so with balancing high damage with it. Ice doesn’t have the privilege of having high critical items compared to the other schools. For example, Jack Hallow’s wand sets all have 195 critical while the ice version is much lower. From my calculations, this Ice setup should give you 845 critical and 123% damage.

Benefits of the Ice School

The Ice school is a very powerful school in Wizard101. They have the highest amount of health and resist in the game. You’d think the Life school would take the trophy in that department. Ice is very flexible in the sense that they can defend, they can attack and they can assist their allies with shields in a battle. Usually, when I see an Ice character in PVP, I get scared since they can hit very hard with their spells yet defend themselves well.

Problems with this build

Well, Ice shouldn’t be a school that runs this build since their health decreases by a bit along with some other stats since the robe we’ll be using decreases health. We’re only using it because it increases damage by a lot. A substitute would be to use the Frosty Light Brigade Armor instead even though it will decrease the damage. At least you’ll still critical every Ice spell. I figured this school would be at a higher disadvantage than the others since KingsIsle built the Ice school to be a more defence-driven school which explains their resist and insane health. Personally, for this build, I’d replace some of the critical talents on the pet with more damage and replace the amulet with Morganthe’s Gem of the Grand Prophecy (gives 2 extra ice blades) but you can play around with it.

What you’ll need:

Robe: Glorious Avenger’s Armor

Hat: Icy Paradox Conical

Boots: Icy Paradox Boots

Wand: Polarian Explorer’s Pickaxe

Pet: Double damage quad critical pet

Athame: Shadow Spider’s Sting (with two (2) +18 critical Sapphire jewels)

Ring: Icy Paradox Ring (With one (1) +18 critical Sapphire jewel)

Amulet: Amulet of Neverwhere

Mount: Ice Ghulture

Deck: Icy Paradox Deck

Total Damage: 123%

Total Critical: 845 (100%)

Gear Setup

Gear Setup Note: You can alternatively use Morganthe’s Amulet (Gem of the Grand Prophecy) which gives 2 extra Ice Blade cards. It will just decrease the critical by 5 which still would register as 100%.

Gear Calculations

I hope you enjoyed my guide on how to unleash the critical potential of Ice school. Let it turn your snowstorms into  Blizzards, and let us know what you think in the comments below!

Check out the rest of our Gear Guides, we have a guide for every school at Ravenwood Academy!

Balance 100% Critical Guide

Ah the school of Balance! Arguably one of the hardest schools to beat in PVP. In addition, they can also achieve max critical and high damage. With this setup you can get around 130% damage and 839 critical.

Benefits of the Balance School

The Balance school is really amazing. They’re one of the most feared schools in PVP. Loremaster, Mana Burn and Supernova can all be deadly spells when used correctly. I usually always lose to Balance in PVP, so I hate going up against them.
 
Their wide variety of spells can prove to be very useful in certain situations. Yet, one disadvantage they have that isn’t shared with the other schools is a prism card. This forces them to fight Balance bosses without the option of a hit conversion spell. This can be very annoying in PVE. You’re forced to ask for help, which is not always possible since some dungeons are solo.

disadvantages of this build

 
 Of course when you boost certain stats, you run the risk of decreasing the others. In this case, pierce and power pip chance and resist might be reduced. You don’t really see many Balances running around with 100% critical these days. This is solely because they don’t really like sacrificing other valuable stats. However, it’s always nice to critical every hit you use.
 
For this build I would use the Morganthe’s Shadow of Amber amulet because of the extra blades. You can swap it out for the Darkmoor alternative if you’d like. It would increase your critical by 5 and increase your pierce a little.
 
Personally, I would adjust the pet slightly to allow for more damage. This would decrease your critical, but it would still be high enough to achieve regular critical hits. That’s the beauty about customizing your load out to your own specifications. You can adjust the damage and critical to suit you, as long as you don’t decrease one of them too much.
 
Another disadvantage is that the Balance school doesn’t have the 3% damage Ghulture mount. Unlike the other Ghulture mounts, it caps it at 2% which is unfortunate. This is because the Balance Ghulture gives universal damage, not school specific damage.


What You’ll Need

Robe: Virtuous Light Brigade Armor

Hat: Balanced Paradox Conical

Boots: Balanced Paradox Boots

Wand: Jack Hallows Guitar

Pet: Quad damage, double critical pet.

Athame: Athame of the Chosen one (with two (2) +18 critical Citrine jewels)

Ring: Balanced Paradox Ring (With one (1) +18 critical Citrine jewel)

Amulet: Travelling Dead’s Charm

Mount: Balance Ghulture

Deck: Balanced Paradox Deck

Total Damage: 129% (Rounded to 130%)

Total Critical: 839 (100%)

Gear Setup

Calculations

We hope you find this guide helpful in your journey as a Balance Wizard. What is your favorite way to use your Balance 100% critical set? Let us know in the comments below!

Check out the rest of our Gear Guides, we have a guide for every school at Ravenwood Academy!

Flat Stat Jewels101

The Misconception

Flat jewels are a misinterpreted stat for Wizard101. They have been since the beginning of the Spiral’s time. In fact, most players get rid of these jewels thinking they have no value. But it’s not true! I’ve used them since their introduction into the game. Many of my solo runs are successful because of these resist jewels.

How they work

Flat stat jewels come in two main categories: offensive and defensive. The offensive stats boost your damage while the defensive absorb incoming damage. These stats are static, meaning that pierce does not affect flat resistance. Likewise, flat damage is not hindered by resistance in its final value!
 

Being careful with calculations

Many online sources that mention flat stat jewels are incorrect. Here are the stats for my testing. Let’s use it as an example to see the calculations.
 

Example: (From my solo run of Grandfather Spider – lvl 120)

Mathematical functions for calculating stats

1.) For your attacks:
[(your spell X (1 + damage%) + flat damageX buffs (1+/-Blades)

2.) For resisting incoming attacks:
[(incoming damage – flat resist) X (1 – resist%)]X buffs (1+/-Traps)

The concept of flat jewels is the same for flat damage and flat resistance!

Simplifying the math

Let’s assume you’re about to take an attack dealing 1000 base damage. Flat resist works like an absorb. In this example it will remove 50 damage points from every school and 158 from Shadow School, before regular resist takes damage.
 
So, what if the situation changed where the attack does 4000 damage?
 
The jewels would still absorb 50 damage points from every school and 158 from Shadow School attacks. Then our percent resistance would reduce the rest of the remaining damage.
 
For X damage, we will absorb 50 from every school and 158 from Shadow School.
 
 
Adding the flat jewels to our percent resistance:

Resistance for X incoming damage:
Storm: 71% + 50
Ice: 72% + 50 
Fire: 51% + 50
Myth: 29% + 50
Life: 29% + 50 
Death: 29% + 50
Shadow: 29% + 158

Using Brace (-20% to incoming attacks) stacks to the player’s resistance:

Storm: 71+ 20 = 96%+50
Ice: 72 + 20 = 92%+50
Fire: 51 + 20 = 76%+50
Myth: 29 + 20 = 49%+50
Life: 29 + 20 = 49%+50
Death: 29 + 20 = 49%+50
Shadow: 29 + 20 = 49%+158

Grandfather Spider’s Stats

Grandfather Spider has a universal 120% damage boost, 7% universal pierce, and 20% fire resistance. His attacks are not only of the school of storm, but also of the Shadow School. He also has Balance Mastery and uses 3 Balance spells.
 
His natural attacks deal 330 X 14 = 4620 base shadow damage if he has max power pips!
 
[(spell’s max damage X (1 + damage%) + total flat damage] X buffs
 
If buffs = 0
total flat damage = 0
 
[(4620 X ( 1 + 120%)] X buffs = (4620 X 2.2) = 10,164!
 
So , we should prepare for Storm and Shadow hits.
 
An average 6 pip natural Shadow attack of his would deal:
 
6 X 330 = 1980 X 2.2 = 4356 damage, and that number will double if he lands a critical!
 
The spell “Rusalka’s Wrath (Shadow)” without any blades or traps deals:
 
[(spell base damage X (1 + damage%) + total flat damage] X buffs= [1445 X (1 + 120%)] = 3179 damage!
 
Let’s compare possible damage taken with or without some of these  stats:
 
If I hadn’t put brace on myself, it would be:
My Shadow resist: 29 – 7 (pierce) = 22 (incoming damage – total flat resist) X (1-resist%) =  3179 X (1 – 22%) = 3179 X 0.78= 2480!
 
My Shadow resist: 49 – 7% (due to pierce) = 42% base resistance. Now continue with the rest of the equation:
(incoming damage – total flat resist) X (1 – resist%) = (3179 – 158) X (1 – 42%) = 3021 X 0,58  = 1752
 
If I wasn’t wearing gear equipped with jewels, the resulting damage would be:
(incoming damage – total flat resist) X (1 – resist%) = (3179 – 0) X (1 – 42%) = 3179 X 0.58 = 1844
 
The difference between 1844 damage and 1752 is due to the flat stat jewels!
 
The differences might seem minor, but if you combine jewels in different pieces of gear, you will notice that they make a big difference.
 

Flat damage jewels work the same way

Here’s a hypothetical example in this specific fight
My damage is 104

When I cast the spell Fire From Above on Grandfather Spider, he receives damage according to our 1st mathematical function: With a nice Backdraft = 210% 
[[(your spell X (1 + damage%) + total flat jewels damage] X buffs(blades)] = [[1400 X ( 1 + 104%)]  = (1400 X 2.04) = 2856
 
*Attention! Not include all the decimals results in two formulas, rounds down after each calculation.
The exception for that rule, is only in the pets damage or resistance! We need exactly the percent of the pets to calculated correctly!
 
My spell with traps deals to Grandfather Spider:
Flat resist=0
Buffs=210
Grandfather resist on fire (due to pierce) = 20-22= 0 
 
[(incoming damage – flat resist) X (1 – resist%)]X buffs(traps)=
(2856 X 1) Χ (1+210%= 2856 Χ (1+210%) =  Χ 3,1 = 8853   
 
But if I had two flat damage jewels (fire), let’s say 50 points worth: [[(your spell X (1 + damage%) + total flat  damage] X buffs] =  [1400 X (1 + 104%)+ 50] = [(1400 X 2.04) + 50] = 2856 + 50 = 2906
 
[(incoming damage – flat resist) X (1 – resist%)]X buffs(traps)=
(2906 X 1) Χ (1+210%)= 2906 Χ 3,1 = 9008   
 
Don’t forget that since Grandfather Spider has shields, the actual number would be less. This was just a quick example with math!
 
As you can see, flat stat jewels can help our fights in their own way.
 
I hope this makes you think twice before tossing those flat stat jewels away! I have shown my stats below for convenience. Thank you as always, and best of luck questing!
 
*You can see the stats which I used for the above calculations as well as my gear, in the following pictures.
Also, you can see the battle that I describe above from my solo video at Europeans servers when I was 120 lvl, one year before.
Have fun!
 

Visionary Myth Critical Guide

Note: This guide is created for level 130 myth wizards and requires a pet with 2.0 (max stats) to be successful.

Myth School

Myth is such an interesting school. Anyone that can take the wrath of Cyrus Drake in the first arc deserves a little respect. The myth school is not considered one of the best, but I’ve seen plenty of dangerous myth wizards when they run the right gear and strategy.

Since myth’s two main strengths are the use of minions and stuns, running a full critical set can probably break the Richter scale itself. Using a minion to keep shields off an opponent while combo hitting with stuns can make a landing critical hit terrifying for any opponent. This guide will lay out the gear to help your myth wizard reach 100% critical with the highest damage possible.

What You’ll Need

For the best setup, here is the gear you’ll need:

Hat: Mythic Paradox Conical – 140

Boots: Mythic Paradox Boots – 117

Wand: Jack Hallow’s Gourdtar – 195

Ring: Drake Ancestral Signet Ring – 84 (+ 18 Jewel)

Athame: Morganthe’s Bite – (+ 18 and +18 Jewel)

Deck: Mythic Paradox Deck – 51

Amulet: Universal Memento – 35

Robe: Quixotic Light Brigade Armor – 100

Overall Total: Damage 137% – Critical 839 (100%)

Stats like these would make Baba Yaga proud! Here’s the breakdown:

Calculations

Alternative Gear

Luckily, Myth only needs 2 critical talents in their pet to reach the 100% threshold. Because of this, there are a couple alternative pieces of gear you could replace and still maintain a full critical loadout.

Hat: Krokopatra Wonder Fez

Boots: Haughty Alphoi Boots

Amulet: Relic of the Shadow Palace (Gives +40% blade)

Athame: Dirk of Dimwood Vale

Robe: Kan Davasi Victor’s Gear

Deck: Rasputin’s Hypnotic Hand

Ring: Drake Ancestral Signet

Remember: Using these over the “best” gear loadout means you lose the maximum amount of damage you can run while keeping 100% critical.

Must Haves

– A double-critical pet

– Jack Hallow’s Gourdtar

Because of how the stats work out, myth has the luxury of replacing items to make up for loss of critical in their pet’s talents. As long as you have a pet with at least two critical talents and the Jack Hallow’s wand you can reach the cap.

Best of luck to all myth wizards!

Check out the rest of our Gear Guides, we have a guide for every school at Ravenwood Academy!