Spring Update Highlights

Greetings, Wizards of the Spiral. As we prepare for the Summer here at Ravenwood Academy, we’d like to highlight some of our favorite changes from the Spring 2021 Test Realm. Without further delay, let’s begin!

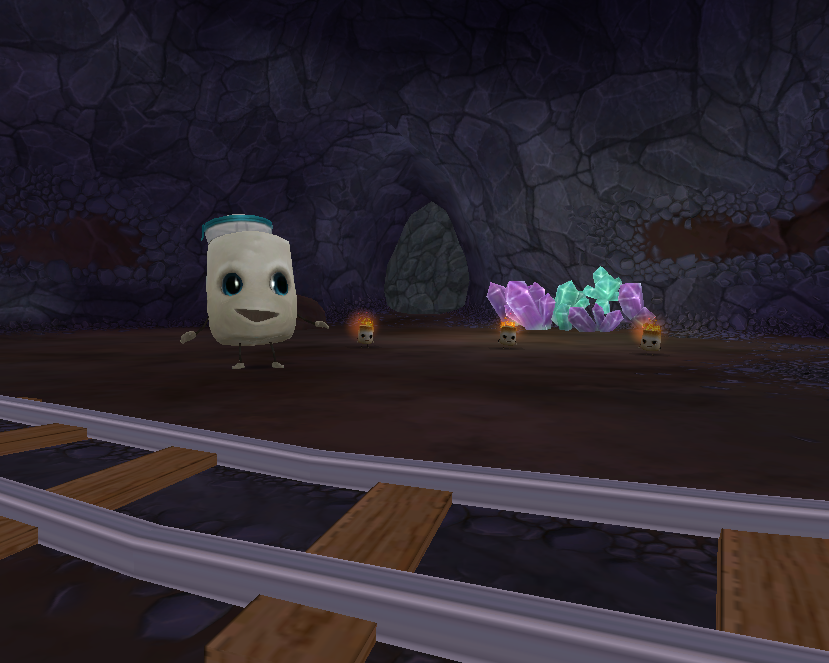
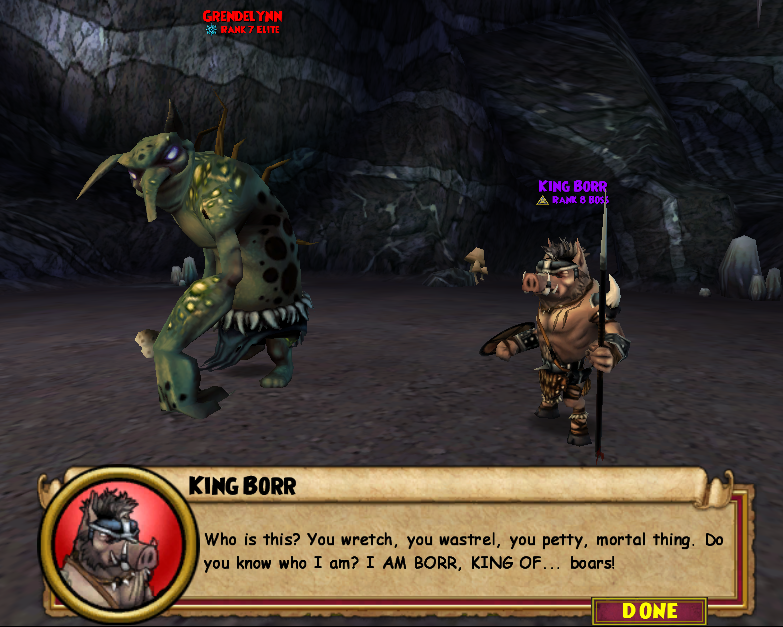
New Skeleton Key Bosses

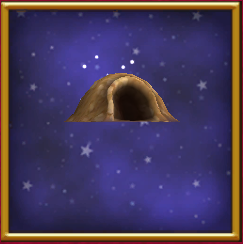
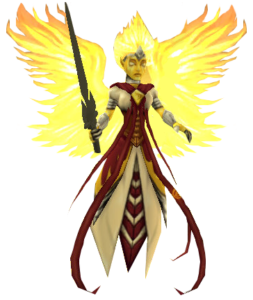
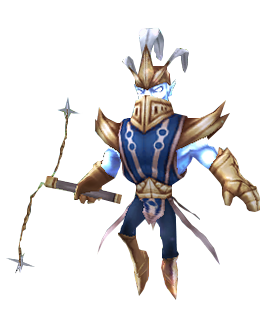
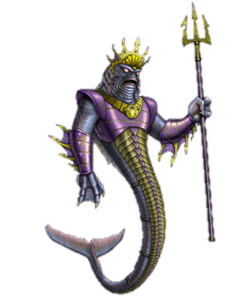
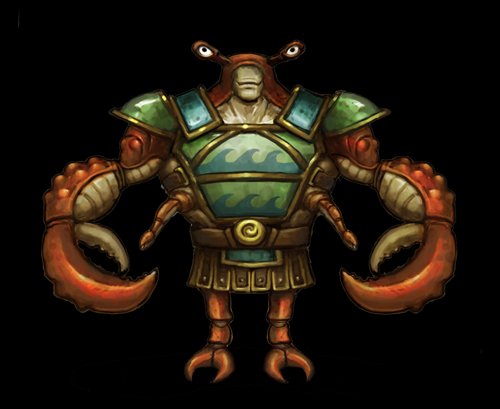
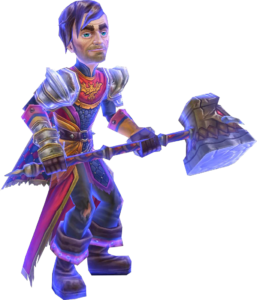
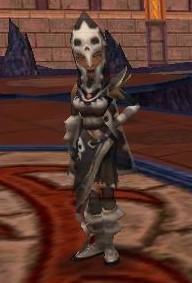
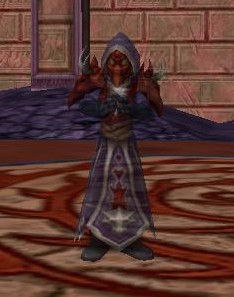
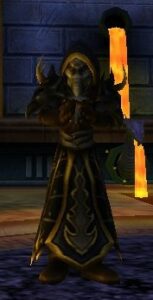
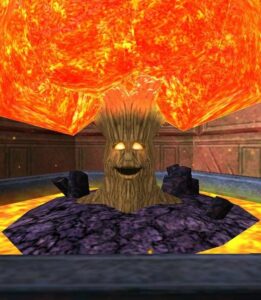
Two new Skeleton key bosses have arrived in Grizzleheim and Karamelle. The first boss, King Borr, resides in Savarstaad Pass. Meanwhile, the Stay-Puffed Marshfellow dwells in the Nibbleheim Mines.

The Stay-Puffed Marshfellow requires a Gold Skeleton key. At the same time, King Borr has variants for all three keys. The Nibbleheim Key Boss drops new unique Marshmallow Wands. Meanwhile, King Borr drops Spellements for the Grizzleheim Lore Spells. Life Wizards rejoice as there’s now another method to get Ratatoskr’s Spin!

New Social Feature

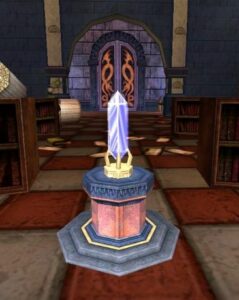
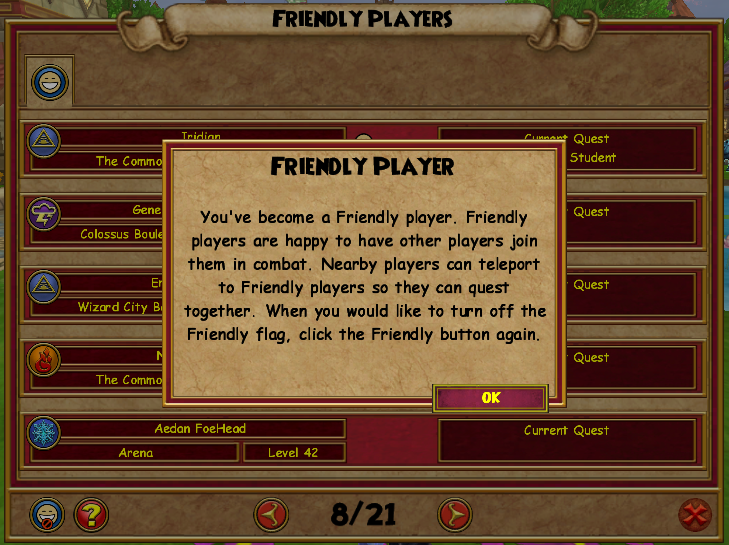
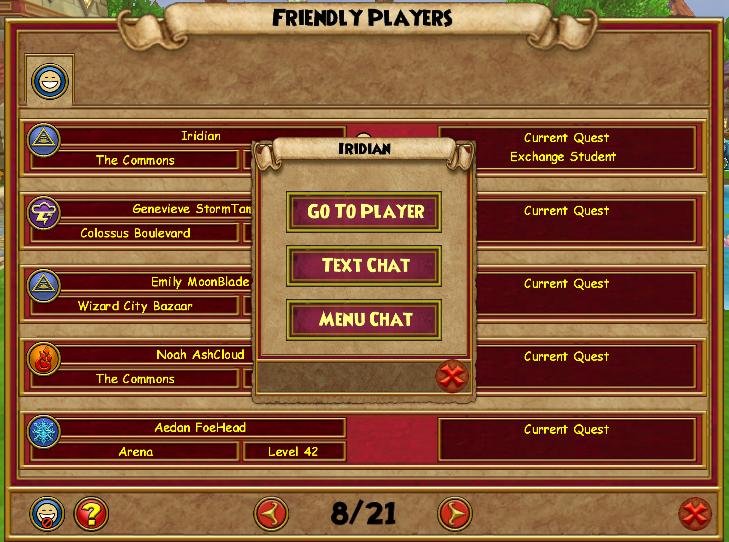
Recently added in the Spring Update was the new Social feature. Clicking the icon beneath your Friend’s List will bring up a list of all nearby Wizards. This list will show you all the Wizards currently in your same zone and their current quest.

Friendly Wizards are okay with other people joining them in combat. You can also chat and teleport to any nearby Wizard who has marked themselves as Friendly.

Finding a questing buddy is now easier than ever! Even better, we no longer must sacrifice those on our Friends List to make room. Finally, we can see if a player is fine with another person joining their PVE duel. No more awkward conversations when you enter a fight that was almost over.

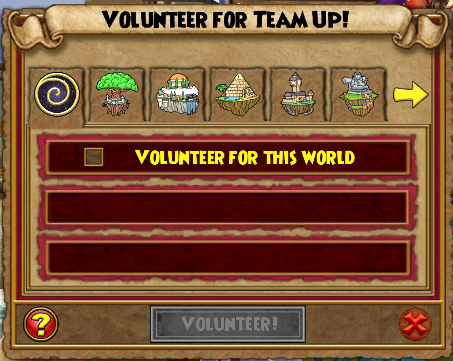
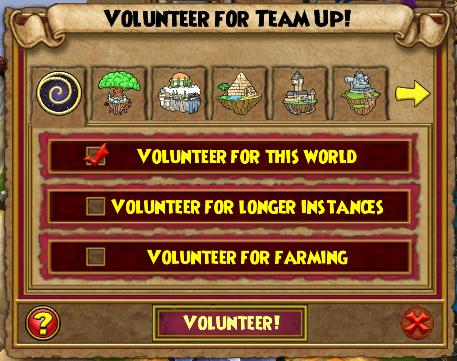
Team up VolUnteering

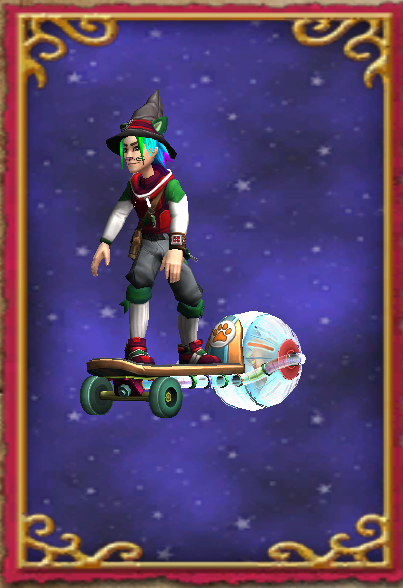
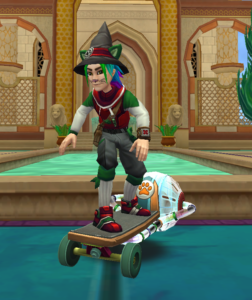
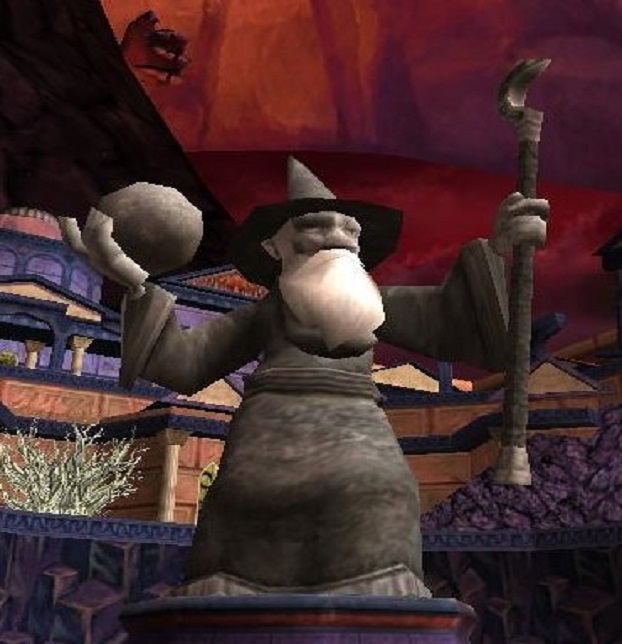
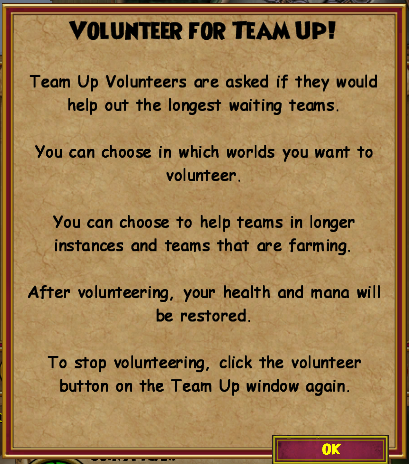
The Join a Team Kiosk has received an update in the form of Volunteering! Volunteering allows you to help other players without having to stay put. You can select the world and types of instances you want to volunteer for at the Kiosk outside the Bazaar. Here you can choose from any world you’ve unlocked to volunteer. From there, you can choose to volunteer to assist with farming or longer dungeons.

The teams who’ve been waiting the longest time for help will receive volunteers first. After you’ve helped your team complete the instance, your Health and Mana are replenished. From there, you’ll return to your previous location. This system allows players to help other players without selecting a new team to help each time. Excellent for any Wizard seeking to get the illustrious Team Champion Badge.

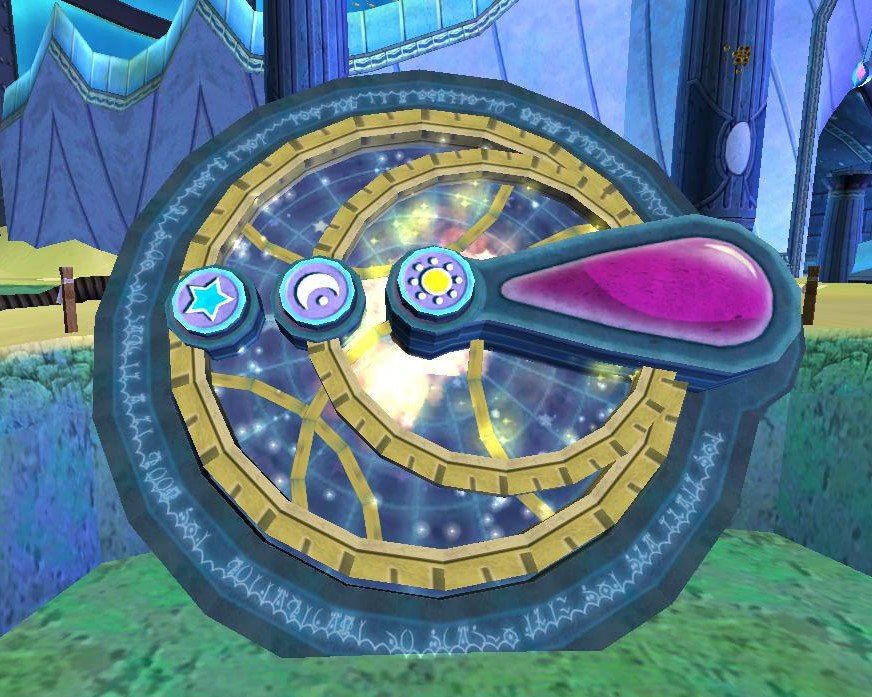
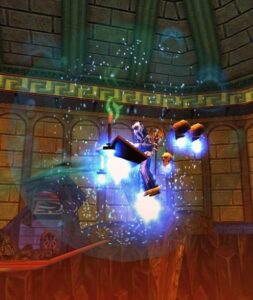
New Spell Animations

Many AOE animations were updated to hit all enemies, making them faster. Below is the list of AOE’s whose animations were updated. You can also check out the video below to see the changes made to them.

Fire: Meteor Strike, Fire Dragon, Rain of Fire

Ice: Blizzard, Frost Giant

Storm: Tempest, Storm Lord, Sirens

Myth: Humungofrog, Orthrus, Mystic Colossus

Life: Forest Lord, Rebirth

Death: Deer Knight, Scarecrow

Balance: Sandstorm, Ra
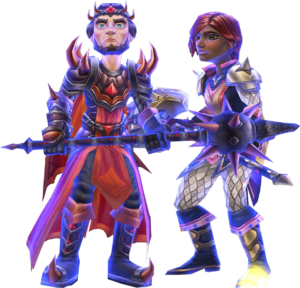
New Spells

It’s time to visit your professors because sixteen new spells have arrived in the game! There are two new spells for every school. But Life and Death received an extra, each in the form of damage boosting Globals. All these spells are available from the respective trainers in Ravenwood. You must be level forty-two to learn these spells. You’ll also need the prerequisites in your Spellbook.

Many of these spells were once popular treasure cards used in PVP. Their popularity has brought them to be permanent additions to our Professors’ curriculum. Don’t worry non PVP players; the Developers kept PVE in mind too for these spells. You might find them helpful outside the arena.
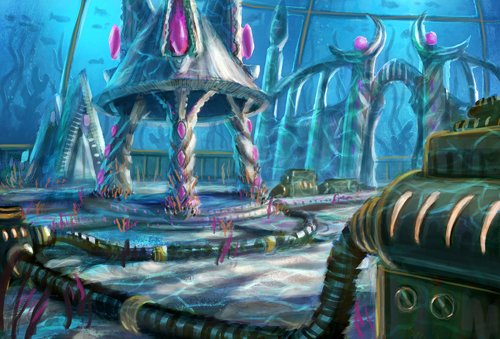
New Quest

“Old is New Again” is a new quest available in the Arcanum for Wizards who have completed “Everything and Nothing.” For those who don’t want any spoilers look away now. For those who don’t mind spoilers, the video below covers the entire quest.

Spoilers Ahead!

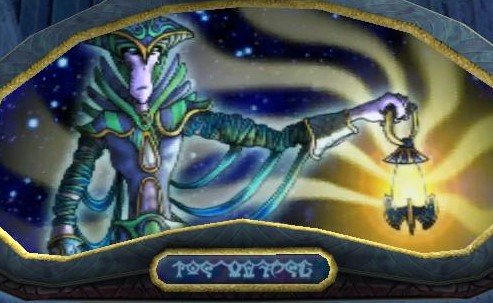
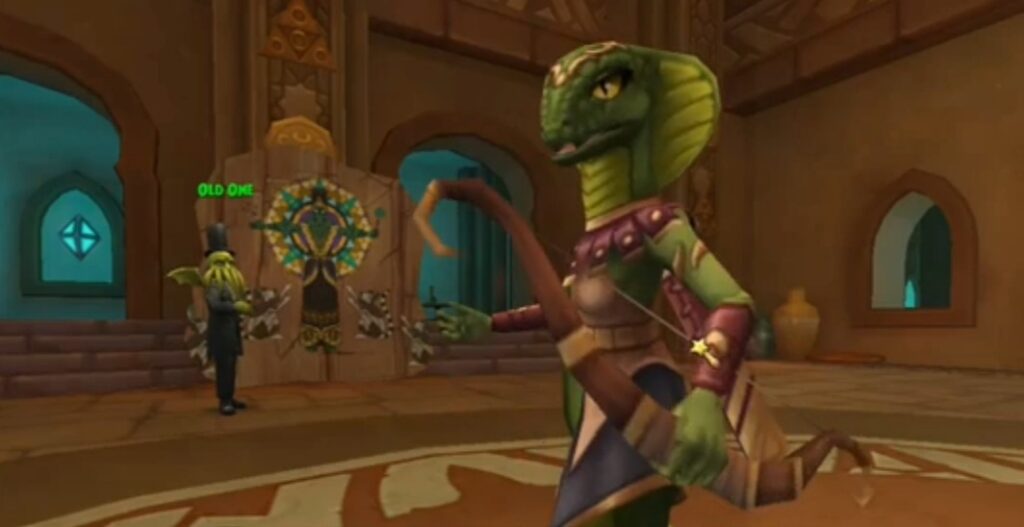
To summarize the quest. We receive a message from the Old One, who is seeking to recover a memory of a world called Lemuria. Scholar Zander helps us discover Lemuria is little more than a fairytale.
The Old One insists the world exists, and so we venture to Mirage to find proof. After some snakey-shenanigans, we realize we are the only ones who can see the Old One. From there, we recover a piece of a mosaic depicting the Lemurians kneeling beneath him.

The Old One reveals himself as an aspect of the Nothing. Exhausted, the he tells us we must find Lemuria before vanishing. Finally, we return to Bartleby for more information. The Grandfather Tree gazes back through history only to inform us that Lemuria disappeared centuries ago. 

We’re too late.

Food for Thought

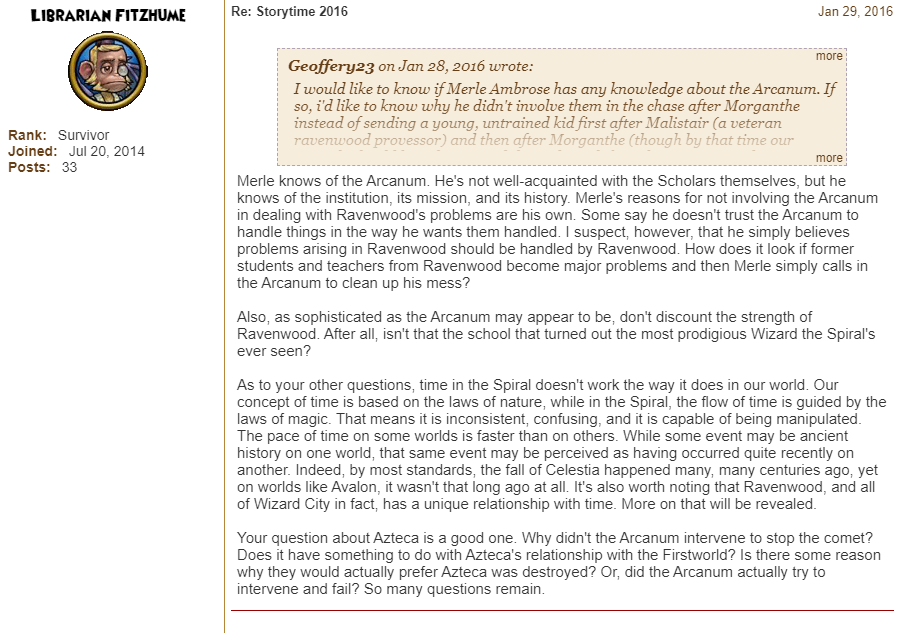
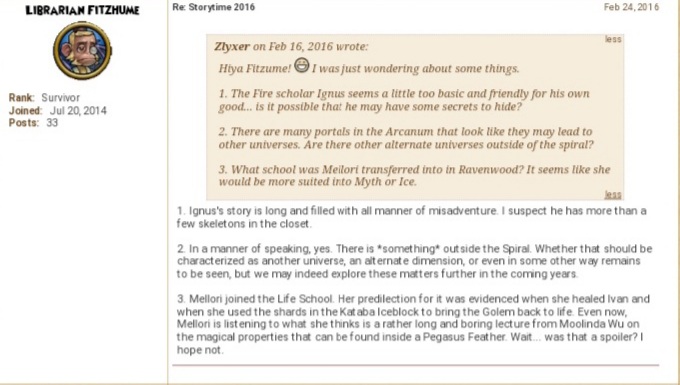
The quest takes us to Mirage, which houses the Sands of Time. According to Librarian Fitzhume on the Message Boards, we know time within the Spiral is governed by the flow of magic. Meaning time within the Spiral is flexible and subject to manipulation. We’ve seen it in Dragonspyre, the Five BOXES event, and Mirage. Does our return to Mirage hint at us going back in time to stop Lemuria’s disappearance?

We also know worlds can become disconnected from the Spiral and reconnected to it. We’re told about this in the level twenty quest “Grizzleheim.” Merle Ambrose tells us, “The Grizzleheim world-tree was once linked to the rest of the Spiral, but the contact was lost…. we thought it was destroyed. Bartelby now informs me that the portal to Grizzlehiem is now active, and travel there is possible.” This begs the question of how does a world lose its connection to the Spiral? How does it regain contact? Going a step further, how many worlds are floating undiscovered within the Void?

Regarding the Void

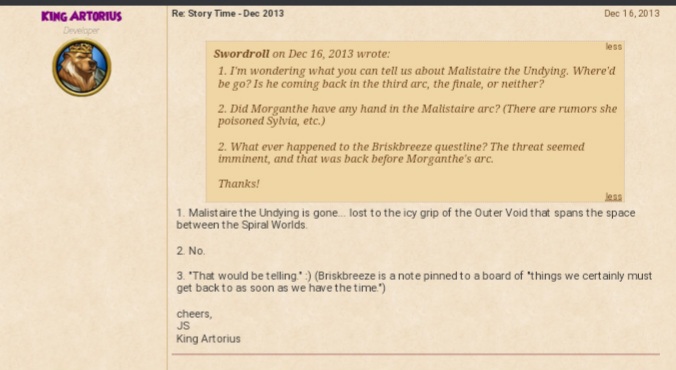
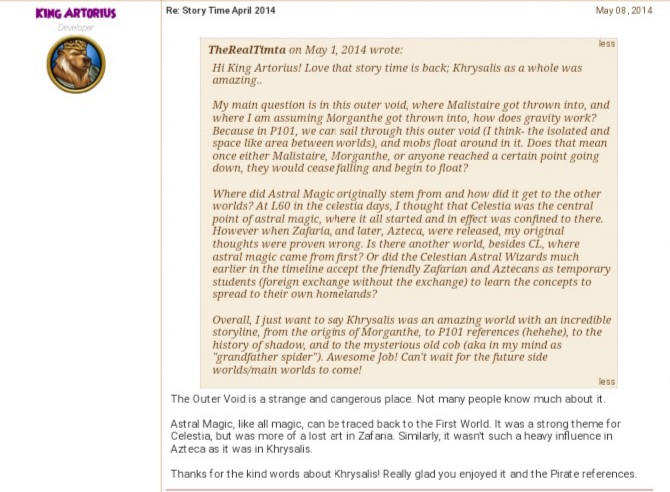
Which brings us to another question what exactly is the Void? In the Storytime posts from 2013 and 2014, King Artorius spoke about the “Outer Void.” The most we can glean from his responses is that the Outer Void fills the space between the Spiral’s worlds. It’s a dangerous, inhospitable place, and little is known about it. In Pirate101, when we sail from one world to another, one could claim we are traversing the Void, albeit not as empty as the name implies. Artorius does use the words “Outer Void” when he mentions it; this means, to me at least, that the Void has depth. 

Could it be what we see in Pirate101 and the Arcanum is partly a product of being so close to the Spiral? Are other fragments of the First World being pulled closer to the Spiral by the same magic used to create it? Who is to say the Void doesn’t grow darker and quieter the farther out you go? But to our knowledge, no one has ever traveled so far and returned to talk about it.

Previous slide
Next slide

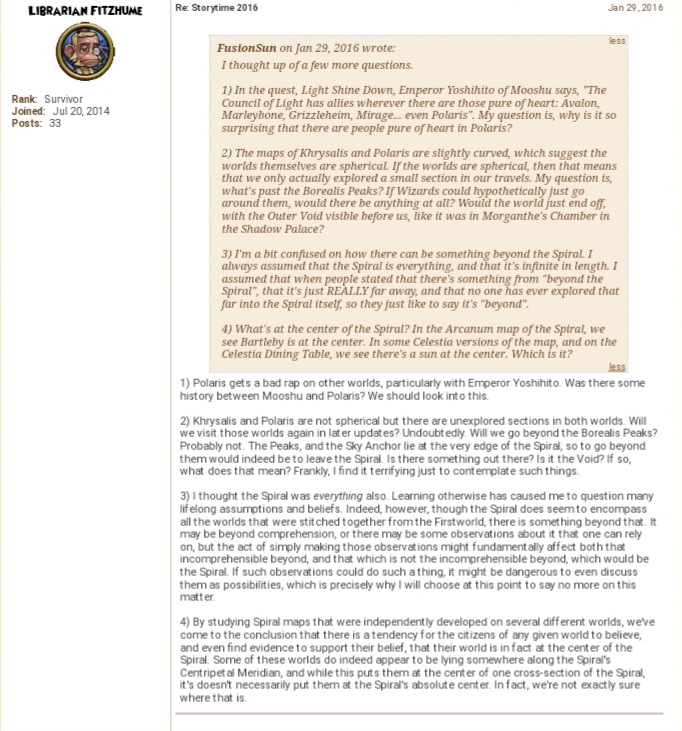
Again, according to Librarian Fitzhume in the 2016 Storytime on the Wizard101 Message Boards, it doesn’t appear that the Void is the end. According to Fitzhume’s responses, there is still something beyond the Spiral. Whatever it might be is beyond our understanding. It is worth noting there is no mention of the Outer Void here. 

Meaning the theoretical ‘something’ excludes the Void. Based upon this information, I’d like to think of the Void as a kind of padding. It surrounds and guards the Spiral, somehow part of the Spiral, and apart from it, like armor or a shell. It is keeping things that don’t belong in it out while also containing everything within. A fascinating subject, to be sure. I am interested in seeing how it develops going forward.

Thanks for Reading!

With that, I will draw this to a close. Thank you all so much for reading this article; I hope you enjoyed it. Feel free to browse the other guides and pieces here. Leave a comment below on what you think will happen as the Fourth Arc continues.

If you want to stay up to date on our most recent releases, you can follow us on social media. Ravenwood Academy has started creating YouTube videos for the Community. Check it out!

Until we meet again, I hope to see you in the Spiral!

-Morgan Shade

Critical Changes Explained

The New Critcal System Explained

Hello Wizards, Nathan Shadowbringer, and Scot Moonshade here! We’re going to explain the recent changes to Critical and Block. Today’s article will revisit the previous age’s Critical and delve into the new system. We will examine the formulas to calculate your Critical Chance and damage multiplier. Critical has undergone a lot of change in recent years, and this update brings a new era of Critical! Critical and Block were once a percentage-point based system. Now it’s changed to a dynamic framework involving both Critical and Block.

Disclaimer!

Before we begin, we need to make a quick disclaimer. According to Ratbeard’s Karamelle PvP Update #2, Critical in PvP is not calculated the same as in PvE. The formulas we used do not work for calculating Critical or Block in PVP. All the information below applies to PVE only. With that said, let’s get started!

Old Versus New

Before the 2020 Fall Update, Critical was well… more critical. There was a chance to critical and a chance to block—the Critical stat based itself on how high your rating was in the respective category. Landing a Critical would ensure that your attack would do twice the damage (or 1.33 times damage in PvP). The problem with the old system was that achieving a high Critical Rating was easier than Block. It was making Block obsolete compared to Critical. With the new changes, it’s more balanced.

The following variables represent the corresponding data sets:

c = Critical rating

b = Block rating

l = Level / 100, where l ≤ 1.

The changes to Critical involve two new formulas. Both equations depend on the attacker’s Critical and the defender’s Block. The first formula determines your Critical chance. Note that Critical chance and Block chance must always add to 100%. For example, if you have a Critical chance of 90%, your opponent would still have a 10% chance to Block. 

If your attack doesn’t Critical, or if the enemy blocks, the calculation ends there. In this scenario, the second formula isn’t necessary. But, if you do land a Critical hit, then the second equation runs. This determines the Critical Multiplier. This formula relies on the attacker’s Critical and the defender’s Block. Further examples are available in KI Developer Ratbeard’s Dev Diary.

Critical heals also use the Critical Chance formula. But they’re based on your Critical Rating and the Block of the person you are healing. The only difference is, they cannot Block a heal but instead can “resist.” The higher your Block, the less you’ll get from a critical heal. Fortunately, the schools that have more Block also tend to lean towards a tank-type playstyle. Tank builds have more Health and Resistance, so they can afford to lose some of that incoming healing from the Critical. Regardless, the amount of extra healing uses the same critical multiplier formula. Remember, it’s still impossible to block a critical heal!

Spell Alterations

Another important note to these changes is the way Vengeance and Conviction work. Vengeance is an Astral spell that increases your Critical chance by 20% for four rounds. This bonus only affects your chance to Critical. It doesn’t affect the enemy’s Block or your damage multiplier. Conviction increases your stun resistance by 90% and Block chance by 20% for four rounds. This 20% increase only affects the possibility to block a Critical. It doesn’t affect the enemy’s chance to critical, nor does it lower the multiplier.

Charts and Calculations

There are a few basic formulas that can roughly estimate Critical and Block ratings. These formulas are interchangeable, and most involve moving numbers and variables around. The following equation presented removes the need for complex fractions. Here are two general procedures for determining Critical chance:

Much like the Critical percentage formula, the damage ratio also follows a function. In this case, the damage multiplier is equal to 2 – 3 * Block / (Critical + 3 * Block). See the formula below.

Here is an estimate of your Critical Chance against mobs with ninety block (blue) and two hundred-forty block (red). The green line at the top represents the Critical Chance soft cap at ninety-five percent.

Using these formulas, you can now find optimal Critical numbers for mobs and bosses. Karamelle mobs have around 90 Block while Karamelle bosses have at most 240 Block. Except for the final boss, it would seem.

This is the approximate damage multiplier against a mob with 90 Block.
Here is the approximate damage multiplier against a mob with 240 block.

What Does this Mean?

It’s important to remember that everything we’ve shown you is subject to change. Critical and Block in PvP are calculated differently than PvE.

Using these numbers, you can find your optimal amount of Critical; 570 Critical will get you up to 95% Critical against most mobs. Using the formula for Critical Multiplier, we suggest 630 Critical as a good general goal. This way, against monsters with 90 Block, you’ll Critical 95% of the time and get a 1.7 multiplier against them.

As we enter the “Third-Age” of Critical, there’s potential for more diverse character builds. An example of this could be full-damage pets as opposed to pets that have Critical and damage. These changes also give new life to the may-cast Vengeance talent. This update creates better balance and a more dynamic flow between Critical and Block, allowing players to customize stats to their unique play-style. Thanks for reading; we hope this helps you understand the changes and how they affect your Wizard. If you have questions, you can always find us around the community. That’s all for now, until next time, we’ll see you in the Spiral.

-Nathan Shadowbringer & Scot Moonshade

Pet Trainer Bundle

Burrow your way to adventure with the fantastic Pet Trainer Bundle for Wizard101! This excellent addition to the Spiral brings you a faithful companion and gear to help you on your adventures! For $29.00 at Gamestop, you get a fantastic gear set, speedy mount, cute pet, and some unique housing items!

The Pet Trainer Bundle includes:

– Pet Burrow Teleporter

– Pet Door Teleporter

– Fur Wheeler Mount

– Pup Prodigy Pet

– Pet Trainer Attire

– Pawzooka Weapon

– One Month of Wizard101 Membership or 5000 Crowns

Doors & Burrows

Exclusive to this new bundle are the Pet Burrows and Pet Door teleporters. These special teleporters add more ways to play as your pet, allowing you to travel anywhere your little heart desires! Wizards are too big to fit! You’ll have to become one with your furry friend to venture through!

The Burrow will blend in with the nature outside of your castle, meanwhile, the door compliments any home interior. These teleporters are only usable while playing as your pet and are too small for Wizards to fit. Once you’re at home, set up the Teleporter while decorating your house. When chosen, a circle will appear that you’ll have to place; this is where you’ll get teleported to. After you’ve selected the location, you may choose the Teleporter again and place it.

With these teleporters, you can open up new possibilities for one-of-a-kind party games with your pets. You can create discrete hidden entrances to your other castles or secret passages to the best hiding places for Hide-and-Seek. They also make a great addition to any maze!

Hamster Power!

Next up, we’re going to take a look at one of the cutest mounts, the Fur Wheeler! Horse power is a thing of the past, because this new mount is full of energy. Why? It’s powered by none other than the Ravenwood Hamster! This mount will have you zooming around the Spiral with its +40% speed. All your friends are going to be jealous when they see you doing wheelies and tricks on this board. 

A Wizard's Best Friend

You also get a furry and faithful companion with this bundle! The Pup Prodigy Pet will be by your side through everything Wizard101 has to offer. Equipped with his glasses and a calculator, this is one smart pup. He’s a Balance School pet, equipped with an Accurate spell card as a baby. So you’ll never miss that dire hit to save your tail.

First-generation Pup Prodigies have a Pedigree Score of fifty-six and the following stats:

  • Strength: 210
  • Intellect: 240
  • Agility: 210
  • Will: 190
  • Power: 200

First-generation talents can include; Big Energy, which pairs with the Bundle’s gear set. Lively, that will increase Incoming Healing, an excellent thing for any maycast pet. Next, there’s Balance Assailant, granting a bonus to your Balance Critical Rating. Finally, there’s May Cast Balance Blade, which gives your pet a chance to help you by casting a universal blade. These are only a select few talents this pet can get.

Once you train this prodigy to Adult, you also gain another card: Disarm. This card removes one positive charm from your opponent. This pet lends itself well to expanding your energy reserves given its base Talent pool. Making the Pup Prodigy an excellent choice to take Fishing or Gardening. This pet would also make a decent Support pet or May Cast Heal pet.

Got to Train 'Em All

Moving on, we have the Pet Trainer Gear. This is by far the best energy set you can get in the game and the best part? You don’t have to struggle opening tons of packs for it! This outfit is ready for anything with all the tools needed to train your magical menagerie. You’ll definitely want this outfit the next time you’re at the Pet Pavilion. But why stop there? With all the Energy this outfit grants, you’ll have no problem tending your garden or going fishing!

The higher tiers of this outfit also offer a variety of Animus extraction cards. So this set may come in handy if you’re out gathering Animus! 

Previous slide
Next slide

This set provides the same amount of Energy as the Yule Logger Gear, and Light Elf sets. Both are heralded as the best Energy gear sets you can get, but they’re also seasonal items. Which means the there’s a limited window to get them each year. The beauty of the Pet Trainer Attire is that it’s guaranteed. Meaning you won’t have to spend countless Crowns opening packs or wait an entire year to get the best Energy set.

When it comes to this bundle’s style, I must say I’m impressed with the look. The Pawzooka is one of the more unique looking wands in the game. With a crosshair for insane accuracy and extra tennis balls, you’ll always be ready to play fetch.

The stats aren’t particularly glorious, as this set focuses on Energy. The lowest tier has 2% damage, a nice boost for first level wizards. The max tier option has 3% Peirce, +85 Critical, 8% damage, and 245 pip conversion. Not the ideal choice for combat at high levels, but the gear makes up for it with its fabulous look.

In Conclusion

That concludes the review of the Pet Trainers Bundle; it’s unique and has outstanding elements! The equipment is currently tied for the best Energy gear in the game. The Pup Prodigy is adorable and provides a great starting point for expanding your energy reserves. The Fur Wheeler mount is cute and fun, with it’s a nod to the Ravenwood Hamster. The Pawwzooka’s stats are a bit underwhelming, but it makes for a great stitch! Finally, the Pet Burrows and Pet Doors are nothing like what we’ve seen before. I’m excited to see what Wizards will do with them!
 
Thank you all for joining me on this review. I hope it helps you choose whether this is the bundle for you. Should you pick up this card and see how awesome it is for yourself, I’ll see you skating around the Spiral!
-Mana Tea

Pet Lending

“Pet Lending gives Wizards a powerful in-person hatching option to lend their pet for hatching to another Wizard. And as a bonus you can do this without being charged Gold or having your Wizard’s Hatching Slot timer started. It’s a wonderful opportunity to exchange adventure stories as you also exchange pet types!

New pet features wouldn’t be complete without rewards for having fun going through the process. You will get advance warning before the hatch process begins on what type and quality of reward you are expected to receive. The value of the reward will depend on the pet lending level and pedigree. Also, you will receive a badge for many of these lending actions!

Note that there is a limit to how many times you can lend a pet (based on your Wizard’s level).”

-KingsIsle Entertainment 

Pet Lending

The arrival of the 2020 Fall Update brings some exciting changes to the Hatchery. The most noteworthy feature is Pet Lending. A new mechanic that gives players more options in the Hatchery.
 
What is Pet Lending exactly? Pet Lending allows another player to hatch with your pet without costing you any gold. Lending also bypasses your Hatch Timer! Gone is the guilt of having to turn someone away because you’re still on a cooldown. Plus, you don’t have extra unwanted pets cluttering your inventory. You’ll even get a small reward each time you lend someone your pet. These benefits simplify Hatching and encourage powerful players to help their peers. This new mechanic makes hatching a snap! Whether you’re helping a friend or a new player, it’s never been easier to help someone create their dream pet.

Lending101

To get started, bring an adult pet and a reasonable sum of gold to the Hatchery. Hatchery prices tend to be half the price of using the Hatchmaking Kiosk. The cost of the Hatch is going to depend on the age of the pets involved. Hatching two Adult pets usually start around ten thousand gold. Meanwhile, hatching an Adult pet with a pet that’s Mega or older is around forty-five thousand gold. If you’re getting started, using younger pets will be to your benefit.
 
Next, find someone with a pet you want to hatch with. If you want more information on creating pets, read our Pet Training Guide and Petmaking101.
 
Once you are on the Hatching screen, you and your partner will see two options. One says “Hatch,” and the other says “Lend”. If you both choose Hatch, you will both pay a sum of gold to create a new pet egg for each of you. To use the Lend mechanic, one of you must choose Hatch and the other Lend.
 
Note how you can only lend a pet a specific number of times daily. You gain one lend every fifty levels. For example, if you’re under level fifty, you can lend once per day. But should you be between levels fifty to ninety-nine, you can lend twice. Finally, if you’re level one-hundred or higher, you get three lends.

Hatcher

If you’re being lent the pet, select the hatch option. From there, everything will proceed as usual. The cost to create the new pet will remain the same based upon the pet’s age. Keep in mind older pets will cost more to Hatch than younger ones. You can tell if someone is lending you their pet by looking beneath their pet’s stat block; it should say “Lending”.

Hatcher's Screen
Lender Rewards

Lender

Meanwhile, if you’re the one Lending the pet, you will select the “Lend” option. Don’t worry when you choose this route; your pet doesn’t actually leave your inventory. If you’re out of lends, the choice will appear greyed out, and a timer will show up to tell you when you can lend again.
 
When you lend a pet, you will not pay any gold, but you won’t receive an egg either. Instead, you will receive an amount of Gold and Hatch Peppers depending on your pet’s pedigree. The little stars in the bottom corner beneath your pet’s stats represent your reward. The better pet you offer, the better the bonus. Remember that your partner must be able to afford the Hatch. Most rewards are under one thousand gold, but you do have the chance to earn two Hatch Peppers.
Lender's Screen

Uses for Hatch Peppers

You can now use Hatch Peppers in a variety of pet-related crafting recipes. These recipes are all available from Doctor Purreau in the Hatchery. All these recipes are excellent additions to your Recipes Tab.

Craftable Housing Items

The Hatchmaker Kiosk recipe allows you to create your own personal kiosk for your castle. This will enable you to reach a Kiosk by teleporting back to your Wizard’s house. Mist Wood and Cat Tails are all over the Spiral, while Black Coal is purchasable from any reagent vendor. Acorns are a rare drop from piles of Mist Wood. Likewise, Mist Wood can be transmuted into Acorns. All these reagents are also found in the Bazaar except for Hatch Peppers.
 
To get all the ingredients, you’ll need two hundred fifty Hatch Peppers, which will take a while. So, your best strategy is to place five pets in the Hatchmaking Kiosk at once and wait. This could give any “failed” pets a use! As the saying goes, “One wizard’s trash is another Wizard’s treasure.” A certain Talent set might not be perfect for you, but that doesn’t mean that it’s not ideal for someone else.

Craftable Elixirs

Purreau also provides recipes for a small assortment of elixirs. These elixirs are the “Clear Hatching Slot,” “Hatch All Eggs in Inventory,” and “Next Hatch Free”. The first will reset your Hatch Timer back to zero like Purreau’s Potion Number Nine from the Crown shop. The second potion’s function is in its name. It will hatch all the unhatched eggs in your character’s backpack. Meanwhile, the last elixir will reduce the cost for your next Hatch to zero. Having these recipes is a massive help to players on a tight budget.
 
The reagents for these potions are easy to get. Each recipe only requires Hatch Peppers and Glass Vials and Black Coal, and various Rank one gems. The latter is sold by reagent vendors throughout the Spiral, but they also turn up in the Bazaar. The Hatch Peppers are going to take some time to get depending on which elixir you’re making. The costliest recipe is the “Next Hatch Free,” which requires two hundred Hatch Peppers. Meanwhile, the “Clear Hatching Slot” elixir is less steep, costing only one hundred. The cheapest elixir is the “Hatch All Eggs in Inventory,” which needs twenty-five to make.
Previous slide
Next slide

Craftable Mega Snacks

The best recipes on this list, are the rank eight Mega Snacks. Each snack requires only a few reagents; a rank one treasure card, a Glass Vial, and ten Hatch Peppers. These items are far from costly, acquirable from the Bazaar or various NPC vendors. Any treasure cards required are purchasable from Harold Argleston in the Library. Hatch Peppers are now easier to get with Pet Lending, granted it’ll still take some time to get enough of them. But if you lend out your pets , getting ten peppers should only take a few days. Combine this with checking in on your Couch Potato farm, and you can increase your yield of Mega Snacks. In truth, the trickiest reagent to get for some wizards is Glass Vials.
 
Glass Vials are only available in bulk from reagent vendors in Marleybone and beyond. But don’t despair! This reagent is obtainable from Burning Snap Dragons if you have the proper spells to help them grow. The seeds are sold by Marley in Mooshu and drop from many monsters across the Spiral. Because of this fact, Burning Snap Dragon seeds are often sold in the Bazaar. They are also found in a variety of Hoard and Lore packs from the Crown shop. So, they’re not impossible for Free-to-Play wizards to get but it will take some effort.
Previous slide
Next slide

Final Thoughts

I must applaud the Wizard101 Team for the feature they’ve added to the Hatchery. For years players have been in the game forums asking for more Hatch Slots. With this update, KingsIlse not only solved this problem, but they took things an extra step. They not only gave us a system that makes Hatching easier and more affordable. They included a system the reinforces and rewards players for helping one another.

No longer do we have to make the difficult choice between helping someone else with their pet or working on our own. Gone is the stress and struggle of finding someone willing to Hatch. Players no longer have to feel guilty for turning someone away or wait an entire day to Hatch.

Hatch Peppers are now much more comfortable to get and are more useful. Grinding and Gardening aren’t the only way to get Mega Snacks anymore. Which makes snacks of that caliber more available to players who struggle to get them. The same goes for the select few Elixirs we can now craft.

I am amazed by the impact of this little feature. Pet Lending has made the eternal quest to achieve the perfect pet that much easier. With that said, I look forward to what future updates will bring.

Thanks for Reading!

That’s all for now! Thank you for reading; I hope it helps you on your journey towards the perfect pet. I would also like to extend a special thanks to everyone who assisted in this article’s writing.
 
Feel free to explore the wealth of guides and information on Ravenwood Academy. If you want to stay up to date on the latest news, follow Ravenwood Academy on social media.
 
Thank you all again. See you in the Spiral!
 
-Morgan Shade

The Forgotten Lore of Celestia

Warning Spoilers Ahead!

Long ago, the Astral Wizards of Celestia created powerful magic using the energy of the Stars, the Moon, and the Sun.

The sorceress Morganthe, a Queen of the Shadow Web, wanted the secrets of Celestian magic at all costs. The Celestians refused her, so she raised a Dark Army and sent it against them. After decades of battle, the Astral Wizards realized their world would fall. They summoned the Storm Titan to defeat Morganthe’s legions and to bring their world safety.

The Storm Titan betrayed the Celestians by sinking their world beneath the Waves together with Morganthe’s invading forces. Realizing they were doomed, the Celestians raised mighty Domes to protect their treasured city from the waves, though it was too late. They perished along with Morganthe’s invading army. Celestia was lost to the Spiral, its Spiral Door closed forever.”

-KingsIsle Entertainment

From Fire to Water

Salutations once again Wizards and Pirates! Welcome to another installment of Forgotten Lore. We’ll be diving deep into the secrets you might have missed in your travels. Last time I told you the lost history of the fiery realm of Dragonspyre. Today I will tell you the secrets of Celestia. Let’s dive in!
 
Celestia was the first world of Wizard101’s second story arc launching in the summer of 2010. The new world introduced the three Astral schools to the game. This world inspires thoughts of the lost city of Atlantis.
 
There are secrets hidden throughout Celestia, written upon the walls. Hidden in plain sight lie interesting niches of its ancient society and culture. Celestia, much like Dragonspyre, is an ancient world that also fell victim to destruction by titanic forces. But the possible reality behind the reason for the summoning of the titan may surprise you. So sit back, relax and let me tell you a story…

Celestia and its People

They say that the Celestians were an incredibly advanced magical society. Many say they were ahead of their time. Its people were both powerful and wise. Peaceful, intelligent beings. They were devout in the pursuit of knowledge across a wide array of subjects not only astral magic. A culture of Wizards and inventors creating magical contrivances. Items to aid in their everyday lives. They were a culture of people who looked closely at the effects of their choices. Not only upon themselves but the Spiral as well.

The Origins of the Spheres 

However, the story of Celestia’s beginning starts with Bartelby and Raven. They say in the “Light of the Spiral” that Bartelby and Raven set two shinning spheres within the darkness. Bartelby’s was golden and illuminated the sky around it. Raven’s was silver and cold and unable to push back the darkness around it. From there the “Tome of the Sun” recounts the arrival of the sun avatar, Mithraya, and her command to build a great hall. It would later become the Trial of the Spheres. We know this as fact as Mithraya still resides in her Solar Sanctum to this day.
 
The Celestians would rise around it. Mastering the powers of astral magic and fiercely guarding its secrets. The people of Celestia would go on to become one of the most advanced societies in all the Spiral. Expanding their knowledge of the universe, creating a myriad of magical wonders. Always exploring into unknown. A Celestian, Phaeton, would oversee the construction of the Solarium, Lunarium, and Stellarium. These would serve as hallowed ground for the Celestians. Standing as houses of learning, and symbols of Celestian knowledge.

A Gap In Time

This is where the early history of Celestia ends. Anything between this period and the war against Morganthe vanished. As a result of Celestia sinking beneath the waves, everything disappeared. What might have been is generally unknown. Events that might have transpired? The marvels of the Celestian’s contrivances? The Celestians advances in the realms of magic, science, and society all disappeared. This is until new information emerges. Until then one thing is certain. Most of Celestia’s history lies not in its murky beginning, but rather in its unfortunate demise.

The Beginning of the End

Morganthe’s arrival spurred the beginning of the end for the Celestians. When she arrived, she demanded the secrets of astral magic from the Celestians. They were quick to deny her. Infuriated, Morganthe resolved to achieve mastery of the astral schools at any cost. So she amassed an army to take such knowledge by force. Thus, it was the beginning of the war between Celestia and the forces of the Shadow Web.
 
The siege of Celestia dragged on. Casualties began to pile on either side, and the Celestian’s strength began to wane. Morganthe’s forces had weakened them significantly. They were uncertain of how much longer they could hold off the enemy. So the Celestians turned to a fickle and unreliable ally, the Storm Titan.
 
Summoning a Titan is a risky business! No mortal beings have ever been successful in commanding one and lived to tell the tale. And the Celestians knew this. So, they created massive obelisks, visible around the District of Stars. Created to emit a magical barrier protecting some of their grand city from the Titan’s wrath. The Celestians beseeched the Titan to save their world and take them to a place of safety. Instead, the Titan betrayed them and dragged Celestia beneath the ocean. Wiping out the remaining Celestians and Morganthe invaders.

The Crustacean Empire

Time dragged on and slowly the submerged ruins of the once-great city came to be inhabited once more. A new Empire that would make quick allies of the barbaric Piscean and Lophian tribes. They built the center of their empire around the lost places of the ancient Celestian’s power. By doing so, the Empire would bring some level of peace to the sunken ruins. Supported by Piscean and Lophian mercenaries, Crustaceans maintained their power over the seas. Despite their best attempts, they were not particularly proficient in the art of building empires. The Crustacean Empire would go on to lose its strength, as its allies grew weary.
 
Some would still come in search of the now-lost city. As did the Queen Calypso, laden with treasure. Whether passing through or seeking to add to their haul, the ship and her crew crashed. Forever vanishing beneath the waves. Its treasures, seized by the Crustaceans, who used it to threaten the crew into submission.

The Rediscovery

Once again, time would move on and the location of Celestia became lost to the Spiral. That is, until a certain Thurston Plunkett rediscovered the world. With the support of the Spiral Geographical Society, Plunkett secured a ship and crew. He then led an archeological expedition to Celestia. They were hoping to learn it’s secrets. Plunkett thought they might even determine exactly what caused its disappearance.

The Skyship Explorer would be shot down upon arrival. Crashlanding on the Floating Land, the crew and expedition became lost and separated. Despite this setback, Plunkett and most of the remaining expedition would carry on. They began the construction of several exploratory underwater domes. Once completed and drained the archeological exploration of Celestia would begin. Unbeknownst to the expedition, in rediscovering Celestia they had angered the Crustacean Empire. They also opened the door once more to Morganthe and her forces. The Crustaceans and Shadow Web would come, to put a stop to the exploration. They would raid the uncovered ruins, splitting up the remaining Marleybonians. A distress call would go out across the Spiral and only a certain Wizard in Wizard City would hear it.

What Happened to the Celestians?

That would end the story of Celestia. But too many questions remain. What was the ancient city of Celestia like? What do the inscriptions all over Celestia mean? Why summon the Storm Titan if it was going to sink the city anyway?
 
Having gone to great lengths to find answers to these questions. I cannot so easily keep these thoughts confined to my mind so allow me to elaborate.
 
Keep in mind that what follows is strictly theory and may or may not be the actual in-game case.

Not as Dead as We Think...

I find it strange how little actual information we have on the Celestians themselves. Where is their history, their culture, their people? We have bits and pieces but very few full works. Being a society devoted heavily to the pursuit of knowledge and magic the amount of concrete information we have is shockingly small. On top of this, I find it strange that the Celestians would try to save their knowledge. While at the same time trying to keep it from Morganthe.
 
Celestia was under heavy siege by Morgantine forces who would stop at nothing to claim Celestia’s secrets. The Celestians allegedly realized they were doomed, so why try to save their knowledge? Why not spite Morganthe and ensure she would never have Celestia’s magic by destroying it all? Where is Celestia’s history? Why is the distress signal we receive from Plunket’s expedition written in Celestian? The answer to these questions is simple: the Celestians have or had plans to return.
 
Alaric Moonsunder, a Celestian ghost, stated that the Storm Titan was an unreliable ally, or was it? I would argue that the fate of Celestia was not so much an accident as it was a calculated decision. They were facing certain doom, with Morganthe’s forces threatening to take the secrets of Astral Magic by force. For the good of the Spiral, it would’ve made more sense for the Celestians to destroy everything. If only to keep it from Morganthe. The only logical reason, in the face of certain doom, anyone might try to save critical pieces of their society is if they intended to flee and come back for it later. According to KingsIlse the sinking of Celestia killed the Celestians along with Morganthe’s army.
 
The more I think about it the more I wonder, did the Celestians try to escape?

Gone but Not Forgotten

It would make logical sense to move everyone who could not fight to safety. Knowing their love of wisdom, the Celestians could (and likely did) take a large part of their expertise with them. The statue of Phaeton in the Solarium calls our style of magic primitive and crude but effective. Perhaps to imply our current understanding of astral magic is but the tip of the iceberg and that more advanced techniques exist beyond our knowledge.
 
Given how advanced the Celestians were with magic and knowing that their chart of the Grand Spiral allegedly contains worlds that are beyond our knowledge, they could have moved the more vulnerable population alongside their most sensitive secrets to a different world. One that was, and may still be, completely unknown to rest of the Spiral. In-game we don’t encounter any civilian ghosts. The Celestian spirits we come to interact with are soldiers or their constructs.

On top of this there’s the matter of Qyburn Stellargaze in the Arcanum. He remarked in his Bio back in February of 2017 that he hasn’t been home to Celestia in at least a millennium or two. Provided Qyburn is being serious with that remark, that would mean the Celestians are not only an ancient people but also long-lived ones as well. This adds an interesting layer to the entire situation, allow me to paint the entire picture.

morganthes invasion

Morganthe invades after being denied Astral magic. As the siege drags on, the Celestians move their civilians to the safety of another world. A world known only to the Celestians (likely one from their Grand Spiral chart). Being so long-lived they could simply wait out the Morgantine invasion if things didn’t go as planned. In the process the Celestians also take any of their knowledge that isn’t nailed down. Taking the most important and portable objects: books, tomes, scrolls, and etc., things which likely pertained to history, magic, and culture. While leaving behind the less critical things. Writings on less important and less sensitive subjects and things that couldn’t be easily relocated. Such as the Astral Archivist, obelisks, monoliths, carvings, pedestals, frescos, and so on. This would explain why we don’t encounter any civilian ghosts. It also explains why we don’t have a lot of information on Celestia’s history before Morganthe’s invasion.

If the Celestians won the war they likely planned to send some form of transmission. Letting their remaining people know that it was safe to return. That might explain why the Expedition’s distress signal appeared in Celestian characters. In case Morganthe or any other unsavory characters were listening they arranged to send a message only their people could read.
 
As the Celestian soldiers continued to fight off Morganthe’s forces, they began to realize they might not outlast her onslaught. To cut off enemy reinforcements the Celestians formulated a plan to summon the Storm Titan. Knowing the possible risks involved they constructed obelisks that would emit a protective magical barrier around the most important locations in their world, like the District of the Stars (which houses the Stellarium and Astral Archives).

If the Titan fought with them as planned Morganthe’s army wouldn’t stand a chance. But, if something went wrong the Celestian’s could retreat to the safety of their magical domes and let the Titan wreak havoc on Morganthe’s army. When the Titan betrayed the Celestians unexpectedly, there wasn’t time for the retreat. Both sides perished as a result, which might explain why we don’t see any Celestian spirits or Shadow Web spirits inside the District of the Stars.

The Last Nail

Because there was no one left, no message was sent and so Celestia faded into obscurity until the Marleybonians arrived. Perhaps we weren’t the only ones to receive Thurston Plunkett’s SOS. If any Celestians were listening, the mere mention of the Shadow Queen’s return, it would be more than enough to keep them where they are. If this theory is true there could be a remote population of Celestians in some hidden corner of the Spiral. Waiting, patiently, for the day they can finally return home.

Reading the Celestian's Writing

It is fascinating to note, that the various inscriptions found on walls, obelisks, and other objects throughout Celestia are not gibberish. These symbols are a monoalphabetic substation cipher, meaning for every letter of our alphabet there is a corresponding character that never changes. So, while the individual symbols are different any message or word written in the cipher will always directly correspond to the other set of characters, for example, the word “loom” is written and spelled with the same corresponding characters in either script. If you know all the characters or have the translation key to the cipher cracking the code is a cinch, and the inscriptions on the Stone of Mazzaroth give us just that.

The Stone of Mazzaroth 

While there are multiple scripts on the stone of Mazzaroth, the sentences are all the same “Sphinx of black quartz judge my vow”. These words weren’t chosen because they make an awesome mysterious message. They were chosen so that every letter of the alphabet would be used. This gives us an effective key to decode the messages hidden throughout Celestia and Grizzlehiem. We will look at Grizzleheim another day.
 
Our first major exposure to Celestian symbols is the SOS transmission from Sir Thurston Plunkett. At first, it might seem like a jigsaw of what appears to be meaningless characters. But the message we see before acquiring the stone does perfectly decode to its English version with or without the stone. Provided you’re particularly gifted in the ways of code-cracking. The message regardless of storyline progression says this:
 
“Mayday mayday this is Thurston Plunkett representing the Spiral Geographic Society seeking assistance our survey expedition is stranded on Celestia”.
 
“We are under attack”
 
“Send help immediately the Umbra Queen has returned it is the work of Mor…”
 
This message comes to us as a bit of a freebie, or rather proof the code works. Beyond that, we barely have any more direct contact or use for these symbols.

More Messages

Thurston’s SOS is not the only Celestian text you’ll ever lay eyes on in your journey. If you have a sharp eye you can find all sorts of things written throughout Celestia.
 
I should mention that the process of decoding these messages can be very tedious. The process often involved the use of weird camera positioning and photomancy. So we could get as close as physically possible to the writings. 
 
Furthermore, some of these decoded messages have been corrected to make more sense. While translating the code, one will find situations where there’s a noticeable absence of a word that should be present. It is almost always the word “The”. There might also be areas where two words merge or are stuck together. For example, the words void and star written together as Voidstar. Which in context to surrounding words causes the sentence to break and stop making sense. Besides that, there is also a distinct lack of punctuation and missing spaces in most of these messages
 
These issues aren’t necessarily glitches, oversights, or bad grammar. They are likely problems the game designers had. Trying to stretch, shape, fit, and render the characters onto objects with limited space. That said, here are all the messages I have found thus far and their respective locations so you can see them for yourselves.

The Celestian Base Camp

There are two major legible messages that you can find in the Celestian Base Camp. The first one is around the edges of the Grand Astrolabe which says:
 
*The sun is a hearth to warm against the cold*
 
*The stars are the birthplace of imagination*
 
*The moon is a signal of hope in the night*
 
The second message is around all of the Astral School Trainer obelisks. Base Camp, Stellarium, Lunarium, and Solarium. They say the following:
 
*The ending pillar*

The District of the Stars

The District of the stars contains a multitude of inscriptions on various objects. In the Chantry, there is a model of the Spiral surrounded by a ring of tablets with names of each world carved into them. Wizard City, Krokotopia, Mooshu, Dragonspyre, Grizzleheim, and Celestia. Inside the Astral Archives, you can observe a series of twelve paintings each labeled with their respective titles. The Warden, The Chariot, The Loom, The Messenger, and so forth. Finally, in the main area where you first arrive there’s a large obelisk in the center of the roaming Piscean mobs. Don’t worry you can this object can be safely approached from the left and right sides. When repaired, through the progression of the storyline, it reads as follows:
 
*Stars guide us through the void*
 
*Our passage written in the stars*
 
*We will never falter on the path*

Stormriven Hall

The last major location to find Celestian messages lies in Stormriven Hall. In the areas beneath the Pylon Bosses, you can find a pair of tunnels on opposite ends of the area. One collapsed while the other is completely open and tranversable. The writing found within translates to the following:
 
*The suns flame dispels doubt*
 
*The moon’s light inspires us*
 
*Our passage is in the stars*
 
*We swear to seek the truth*
 
*We must not fear the unknown*
 
*We will never falter on the path*
 
*In the dark the moon grants us hope* 
 
*Stars guide through the void*
 
*In the sun we find purity*

Bonus Piece!

Across the entirety of Celestia, on the trims of many floors, walls, and ceilings, you can find the words “Moon Sun Stars” written repeatedly in that order.

As a nice final touch, the message written beneath the name of the world in this image says:

*Beneath the waves the stars still shine*

While I may have searched Celestia from top to bottom for these messages, its very possible I may have missed some. If you have found any more messages in your adventures please share them below, I do enjoy these sorts of things.

Thanks for Reading!

That is all I have on the world of Celestia for the moment.
 
 I would like to give a shout out to Brad Baker who suggested we visit Celestia in the last article. I would also like to offer a special thanks to those here at Ravenwood Academy. They help edit, create images, and make this article possible. 
 
I implore you to read some of our other articles and share them with other Wizard101 fans! There’s also a Ravenwood Academy page on Facebook and Twitter. Like and follow them to stay up to date on the latest guides and articles. We also have a wonderful Ravenwood Community Discord server, just search Wizard101 in your Discord App.
 
I hope you enjoyed this article and if you did please comment down below as I enjoy reading what others have to say. I do believe our next stop in this series will take us to a favorite world of mine, Grizzleheim.
 
Until next time, stay tuned, see you in the Spiral!
 
~Shade
More Lore
Ravenwood Academy Facebook Page

Forgotten Lore of Dragonspyre

Warning! Spoilers Lie Ahead!

Dragonspyre is an ancient, haunted world in which renegade professor Malistaire has recently been spotted!

Once an advanced militant society, Dragonspyre had an esteemed Academy rivaling that of the Ravenwood School of Magical Arts in Wizard City. The inhabitants once held a special interest in Fire Magic.

Legend has it that in the summoning of a great Dragon, the world was destroyed and changed forever. Its great buildings and stone columns crumbled before the coming of the Dragon Titan.

Now, it has become a land of fire, lava, and ghosts.

-KingsIsle Entertainment

Welcome!

Greetings and Salutations Wizards and Pirates of the Spiral! I am Shade, allow me to welcome you to the first installment of “Forgotten Lore.” In this new series, we will explore the lore of the Spiral, and uncover secrets you might have missed. Let’s begin! 
 
Dragonspyre was the first new world added to Wizard101. Unveiled in early 2009, it came only four months after the game’s initial release. Looking at Dragonspyre through a real-world lens, its inspiration seems to come from ancient Rome. Its architecture has distinct Roman elements, such as columns and archways. Many of Dragonspyres areas use Roman words like Basilica, Forum, Athenaeum, and Necropolis. Meanwhile, its NPC’s take influence from the Russian Military.

It seems clear that the developers meant for Dragonspyre to be very different from the worlds that came before it. So, they opted for a fiery and foreboding dark fantasy theme. The destroyed state of the world might make one think of Pompeii. Which, as we know, was buried beneath volcanic ash when Mount Vesuvius erupted in 79 C.E.

Dragonspyre’s civilization is ancient, predating both Wizard City and Merle Ambrose. It was also home to Dragonspyre Academy. A rival of the Ravenwood School of Magical Arts during its time. This world is also the home-world of some key players. Cyrus, Malistaire, and Sylvia Drake (born Sylvia Spitfire) are all from Dragonspyre. It is also the home of the infamous Loremaster and houses the grand finale of Wizard101’s first story arc.

But how did Dragonspyre become what it is today? Why did these things happen? 

Given Dragonspyre’s current state of disarray, its lore has required some effort to reassemble. After investigating countless sources, I have re-constructed the most probable sequence of events

So, without further ado, sit back, relax, and let me tell you the story….

Dragonspyre and Century War

In the beginning, Dragons and Humans lived side by side, but humanity lived in constant fear. One-night, King Mene met in secret with the Queen of the Drakes, Gavarena. They allied Man and Drake. Together they would overcome the Dragons and drive them out. A new kingdom would be born. In light of their victory, they named this Kingdom Dragonspyre.

The Kingdom continued to grow after Mene’s passing. Later, King Jurgen expanded Dragonspyre’s borders. Man and Drake worked together to protect the realm. It was an age of peace but it was not to last. King Jurgen passed away suddenly, with no children. Without an heir to the throne, Dragonspyre fell into a civil war that lasted 100 years. This would be forever known as the Century War.

Kylgore and the Golden Age

The war came to an end by the efforts of Kylgore the Magnificent and a Drake, named Leneth the Great. They worked together to defeat a mighty black dragon in Dragonspyre’s outer ring. Exactly how Kylgore achieved this victory remains a mystery. After his triumph, Kylgore claimed the throne and put an end to the war. An age of peace finally descended on Dragonspyre.

Kylgore’s rule brought many changes to Dragonspyre. Significant advancements in culture were made, and explorations of the sciences began. New magical advancements, including the creation of Knowledge Crystals, began in Kylgores reign.

Kylgore and His Descendants

King Kylgore forged a friendship with Aurelius Ambrosius, leader of the Druidic Treeminders. As a gift, Aurelius gave Kylgore seven saplings from Ravenwood. The King planted the magical trees throughout Dragonspyre. They would later become the trees of Dragonspyre Academy. To commemorate their friendship, Kylgore ordered the construction of a statue of Aurelius.

The Beginning of the Academy

Generations passed, and the Kingdoms’ knowledge remained locked away, seen only by royalty. King Kylgore descendants, King Betrin and Prince Viggor, clung to that tradition. They hoped to keep their secrets from falling into unworthy hands. But then, Rydall the Conqueror infected his people with an alchemical plague. Mobs of the afflicted revolted in the city streets. Something had to change if Dragonspyre was to survive.
 
Duke Sebastian came forward and fought with the monarchy for the right to search the knowledge crystals for a cure. He sent a champion, Iona Pyrelance, to do battle against King Betrin. Iona won the battle! Duke Sebastian’s bravery caused the laws to be overturned. Knowledge would become accessible to the masses, and Dragonspyre Academy was born. All who qualified were welcome within its walls. The people, armed with this new knowledge, overcame Rydall’s Plague, and the rebellion finally ceased.

The Tragedy of Viggor's Legion

Some embrace change, while others fear it. While Rydall’s Plague ravaged his homeland, Prince Viggor set out in the hopes of building Dragonspyre’s Empire anew. With his Drake and General Greyflame at his side, they would lead an army of soldiers on a perilous journey. Their plan? To conquer the magical realms of the Ravenwood and the Treeminders who lived there. Viggor’s mission would start a war with the Treeminders. Turning a once peaceful people into a society as evil as the invaders they sought to drive out.

There were massive casualties in the conflict between the Dragonspyrians and the Treeminders. Destroyed were the Ravenwood, its magical trees (except for Bartelby), and Viggor’s army. A man named Gregor would be the final soldier to fall. The remains of the deceased forces would never return to Dragonspyre.

The Aftermath

The few surviving Treeminders remained to plant new magic trees. They buried their dead in catacombs deep beneath Wizard City. When it was over, the survivors fled to the worlds of Albion and Avalon. The lost Knowledge Crystals buried within the catacombs contain a record of those events.

Soon after, Dragonspyre Academy became the center for knowledge in the Kingdom. Much of their curriculum devoted to the study of war, combat, and pyromancy. Dragonspyre’s dislike of Wizard City could have come from the anger over Viggor’s tragic failure.

Aldared the Usurper

Like fire, knowledge can be dangerous when placed in the wrong hands. A graduate of Dragonspyre Academy by the name of Aldared proved this. He used his advanced knowledge to unseat the King of Dragonspyre and became known as Aldared the Usurper. His rule was as cruel as it was brutal, and the people despised him.

Founding of the Great Council

The people of Dragonspyre suffered under Aldared’s tyranny until a group of Wizards and Warriors laid siege to the Usurper’s palace. Katia Firewinter, Eliena (the legendary Drake), and Drannik the Shrouded Wizard were among them. Aldared was, at long last, cast down and his soul safely trapped within a Knowledge Crystal. Drannik attempted to seize control of the throne but was cut down by Katia. With the threat gone, she began working with her fellow mages and warriors to create a new government. The Great Council, also known as the Council of Wizards, Warriors, and King, would come from her efforts.

The Council of Wizards and Warriors

While Aldared may have died, his influence remained. Kildare, a Wizard of the Great Council, became corrupted by Aldared’s crystal. Valerik Brightsword discovered this treachery and defeated Kildare swiftly. While Kildare’s defeat came before he could do much harm, the damage was done. Fear and paranoia began to settle in among the members of the Great Council.

As time passed, the power of the King diminished, and members of the Council began to bicker for control. People were fearful of the Wizards, their magic, and their crystals. They spurred a great Warrior named Lyon to action. He led a group of fellow Warriors to demand control of all the spells in Dragonspyre.

Whether the reasons for Lyon’s actions were justifiable or out of a desire for power, no one knows. Regardless, the matter came to the attention of the Council. When the Council denied Lyon, he betrayed them in broad daylight.

Lyon challenged the leader of the Wizards, Rurik Flamesoul, to a fight. After a vicious battle, Rurik proved victorious. He would become the only Wizard to best a Warrior in open combat. His victory would secure the Wizard’s control over the magic of Dragonspyre.

The Fall of Dragonspyre

Time went on, and the Wizards began to fear those who challenged their power. Vladimir Darkflame, Dean of Admissions at Dragonspyre Academy, decided to take matters into his own hands. He gathered a group of conspirators, Andor Bristleback, Devora Shadowcrown, and Zora Steelwielder. Together, they orchestrated the coup of the century. They kidnapped the Academy’s Professors, and summoned the Dragon Titan. The traitors were apprehended and detained within the Labyrinth. But, the summoning of the ancient Fire Titan could not be undone.

The Titan rose from its slumber, and the razing of Dragonspyre began. The Dragon Titan summoned its army within the city walls, taking the defenders by surprise. Boris Blackrock, the Obsidian Golem, did battle against the Dragon Titan. Using the knowledge his mage creators left him, Boris faced the Titan in single combat. But, the Obsidian Golem fell, as would many others in the wake of the Titan’s chaos. To commemorate his sacrifice, Boris became the last great hero to be buried within the Necropolis.

The Final Assault 

Dragonspyre’s defenders retreated to the Academy as the Titan’s army advanced. When the Fire Titan led its final assault upon the Academy, everything was laid to waste. All that survived was the Fire Tree, Ashley, and the Fire School, whether this was out of mercy or respect no one knows.

 When and how the Titan’s onslaught came to an end is a mystery. What is certain is that the Dragon Titan has become a colossal stone statue coiled around the volcano. Its armies remain, waiting in vain for someone or something worthy of leading them. Dragonspyre is forever changed, and whether it will ever recover from its fate remains to be seen.


Endgame Arc One

Spoiler Warning!

It would be many years before Malistaire Drake returned to Dragonspyre. When he did he held in his hands the stolen Krokonomicon, and in his heart the vain hope of waking the Titan and restoring his beloved wife, Sylvia to life. Pulled toward the Crown of Fire, at the volcano’s summit, Malistaire began his ritual.

His twin brother Cyrus traveled alongside the Savior of Wizard City, to Dragonspyre. Cyrus attempted to reason with his brother, summoning the spirit of Sylvia to assist him. Unfortunately, this only angered Malistaire further and the necromancer banished his brother. The Savior of Wizard City would be forced to duel him for the fate of the Spiral.

After a perilous battle, the young Wizard triumphed (as predicted). Malistaire ultimately perished and was finally reunited with his lost love! Hand in hand, Malistaire, and Sylvia departed together for the Other Side. At least until Morganthe woke him up, and the whole Darkmoor incident, but that’s a story for another time.

Thanks for reading!

Well, that’s all on the world of Dragonspyre. For now, at least.

I’d like to give a special thanks to the team here at Ravenwood Academy who helped make this possible (as ghosts can be tricky things to photomance)!

Since this is the first article in this series, I’d like to know: would you like to hear more about the lore of the Spiral? If so, what would you like to see next? I would love to hear your thoughts and opinions in the comments below.

In the meantime, please feel free to explore the wealth of information Ravenwood Academy has to offer! If you want to stay up to date on our latest content, follow us on Facebook and Twitter. You can also join our Ravenwood Community Discord to meet fellow Wizard101 fans and enthusiasts! 

See you in the Spiral!

-Morgan Shade