Crafting101 – The Arcanum

Tonight we will craft Legendary and Focused school-specific wands and weapons for Ignus Ferric's crafting quest.

Welcome back to Crafting101, Young Wizard! Now that you have achieved your Promethean Crafter Badge, you are well on your way to become a Champion, Visionary, and/or a Revered Crafter. You may complete this crafting quest by teleporting to a friend or questing to this point.

Ignus Ferric

You will find Ignus Ferric in the Hall of Pyromancy within The Panopticon, The Arcanum. Once you talk to him, you will be assigned “Forging a Legend,” requiring you to read from The Repository and enter The Arcanum world crafting room. Upon completion, you will be seen as a Champion Crafter and earn 43,500 gold, which you will need later to buy the recipe for your Legendary weapon

After that, you will be assigned the quest “Legendary Tomfoolery.” This quest requires you to craft one Legendary sword specific to your school. Let’s take a look through the reagents required to craft these recipes!

Antiquities

For all of the recipes, 25 antiquities are required in each recipe. Antique Chalice, Antique Chest, Antique Coins, Antique Egg, Antique TeaPot, Antique Unicorn Statue are all considered “Antiquities.” You can find these in the sands of Mirage in places like the Alkali Barrows, Caravan Caterwaul Canyons, Eerem Palace, Istanboa, Rubal Wastes, Yakhal Mountain.

Stardust

Three Stardust is called for in all of the recipes. This is a rare harvest from Comet Tail, which you may find in Castle Darkmoor, and Sardonyx, Kondha Desert, and Crescent Beach, Khrysalis. The Transmute Recipe is listed below.

Astral Shard

There will be 10 Astral Shards required in every Legendary weapon. This is a difficult reagent to get because it is typically only a mob drop. Some mobs you might want to farm are the Cave Crawlers in The Hive, Khrysalis, Bacuda Commander and Sentinel in Kataba Iceblock, Polaris,

Ore

Fourty-five Ore is needed in the Legendary recipes. This is a common reagent, notably found throughout Wizard City, Krokotopia, and Dragonspyre. It can also be harvested from plants such the Dandelion, Fickle Pickle, Helephant Ears, and Snap Dragon.

Vine

In each of these recipes, 5 vines are called for. The Vine can be harvested from plants like Moonflowers, Huckleberries, Sunions, Maelstrom Snap Dragons, and Trumpet Vines. The mobs and bosses of Mirage also are able to drop this reagent as apart of their loot, so keep your eye pealed when questing. Brandon Mistborn sells this reagent for 400 Arena Tickets in Unicorn Way, Wizard City.

Golden Pearl

You will need 5 Golden Pearls for each Legendary weapon you craft. These are a rare harvest that you can find from pearls in Stormriven hall, The Grotto, The Portico, and Waterworks, Crab Alley. They may be harvested from Maelstrom Snap Dragon, Evil Magma Peas, Deadly Helephant Ears, and Fickle Pickles. The Gorilla, Minotaur, Magic Eggs, and Dragonfly all have this item as one of their daily rewards. The Transmute Recipe is listed below.

Ignus' Legendary Torchstaff

Meteor Strike

Ten Ra Treasure Cards are required in order to create our staff. This item is auctioned in the Bazaar for _ gold. This card is a drop from Ahnic Striders and Djeserit Dwellers in Krokotopia. Another way to obtain this card is by harvesting Burning Snap Dragons. As a Pyromancer, you have the ability to craft this card from Bernie for 500 gold.

Perfect Rubies

Thirty-five Perfect Rubies will be required for Ignus’ Legendary Torchstaff. Perfect Rubies cannot be found in the Spiral, which you may buy this reagent from Canica Sweet Chile, Archytas, or Noxolo Fasttrack for 100 gold per Ruby. You may also harvest this reagent from Ivy League and Maelstrom Snap Dragons.

Tarrak's Legendary Frostome

Frost Giant

Ten Frost Giant Treasure Cards are required in order to create our tome. This item is auctioned in the Bazaar. You may also receive this Treasure Card as a reward for battling mobs in the Winterbane Gauntlet. You can harvest this from the White Tiger Lilly. As a Thaumaturge, you have the capability to craft this card from Carcinos in the Crustacean Empire, Celestia for 1,500 gold. In contrast, Librarian Fitzhume has this card available for 1,500 each.

Perfect Sapphires

You will need 35 Perfect Sapphires for this recipe. Perfct Sapphires cannot be found in the Spiral, which you are able to buy this reagent from Canica Sweet Chile, Archytas, or Noxolo Fasttrack for 100 gold per Sapphire. You may also harvest this reagent from Ivy League and Maelstrom Snap Dragons.

Ione's Legendary Sword

Tempest

Ten Tempest Treasure Cards are required in order to create our sword. This item is auctioned in the Bazaar. One way to get this card is to battle the Deep Woods Imps in Savarstaad Pass, Grizzleheim or Djeserit Dwellers in Krokotopia. You may harvest this from Burning Snap Dragons, Deadly Helephant Ears, Fiery Boom Shrooms, Fish on a Vine, and Maelstrom Snap Dragons. As a Diviner, you have the ability to craft this from Torrence for 1,200 gold.

Perfect Amethyst

You will need to get 35 Perfect Amethysts in order to craft Ione’s Legendary Sword. Perfect Amtheysts cannot be found in the Spiral, which you may buy this reagent from Canica Sweet Chile, Archytas, or Noxolo Fasttrack for 100 gold per Amethyst. You may also harvest this reagent from Ivy League and Maelstrom Snap Dragons.

Zander's Legendary Staff

Rebirth

Ten Rebirth Treasure Cards are required in order to create our staff. This item is auctioned in the Bazaar. You may also receive this Treasure Card as a reward for battling mobs in the Winterbane Gauntlet. Through Queen Crape Myrtles, you are able to harvest this card. As a Theurgist, you are able to craft this Treasure Card from Carcinos in The Crustacean Empire, Celestia for 1,500 gold. In contrast, Librarian Fitzhume has this card available for 1,500 each.

Perfect Jade

You must aquire thirty-five Perfect Jades for thsi recipe. Perfect Jades cannot be found in the Spiral, which you may buy this reagent from Canica Sweet Chile, Archytas, or Noxolo Fasttrack for 100 gold per Jade. You may also harvest this reagent from Ivy League and Maelstrom Snap Dragons.

Baba Yaga's Legendary Mace

Orthrus

Ten Orthrus Treasure Cards are required in order to create our mace. This item is auctioned in the Bazaar. You may also receive this Treasure Card as a reward for battling mobs in the Winterbane Gauntlet. This card is harvestable from Silver Trumpet Vines. As a conjurer, you can craft this card from Carnicos’ recipe in The Crustacean Empire, Celestia for 1,500 gold. In contrast, Librarian Fitzhume has this card available for 1,500 each.

Perfect Peridot

Thirty-five Perfect Peridots will be used in this recipe. Perfect Peridots cannot be found in the Spiral, which you may buy this reagent from Canica Sweet Chile, Archytas, or Noxolo Fasttrack for 100 gold per Peridot. You may also harvest this reagent from Ivy League and Maelstrom Snap Dragons.

Qismah's Legendary Dagger

Scarecrow

Ten Scarecrow Treasure Cards are required in order to create our dagger. This item is auctioned in the Bazaar. You may also receive this Treasure Card as a reward for battling Hobgoblin fiends in High Road, Avalon. The Deadly Flytrap, Deadly Helephant Ears, and Rotten Beats give this card in their harvests. As a Necromancer, you are able to craft this Treasure Card from Carcinos’ recipe in The Crustacean Empire, Celestia for 1,500 gold. In contrast, Librarian Fitzhume has this card available for 1,500 each.

Perfect Onyx

We will need thirty-five Perfect Onyxes for Qismah’s Legendary Dagger. Perfect Onyxes cannot be found in the Spiral, which you may buy this reagent from Canica Sweet Chile, Archytas, or Noxolo Fasttrack for 100 gold per Onyx. You may also harvest this reagent from Ivy League and Maelstrom Snap Dragons.

Jaki's Legendary Bow

Power Nova

Ten Power Nova Treasure Cards are required in order to create our bow. This item is auctioned in the Bazaar. You may also receive this Treasure Card as a reward for battling the Fomori Giants in The Wild, Avalon. Harvesting the Fiery Boom Sroom may yield this card as a reward. As a Sorcerer, you have the ability to craft this card from Carcinos’ recipe for 1,500 gold in The Crustacean Empire, Celestia. In contrast, Librarian Fitzhume has this card available for 1,500 each.

Perfect Citrine

Thirty-five Perfect Citrines will be needed to create Jaki’s Legendary Bow. Perfect Citrines cannot be found in the Spiral, which you may buy this reagent from Canica Sweet Chile, Archytas, or Noxolo Fasttrack for 100 gold per Citrine. You may also harvest this reagent from Ivy League and Maelstrom Snap Dragons.

Completion

Now that you have all your ingredients, go to The Arcanum world Crafting Station and craft your legendary weapon. Once you have turned in the quest, you will be awarded one crafting slot, 10,000 gold, and your Visionary Crafter badge. Congratulations, young wizard! We will now continue on to become a Revered Crafter now in Ignus’ next quest, “Hi-Yo Silver Chest.”

Aethyr Ore

Twenty-five Aethyr Ore is required for our focused weapon. By questing, you will receive this reagent in several quests. This reagent can be gathered throughout Empyrea, notably found in places such as the Aerial Jungle, Inner Athanor, and the Aerial Shores. The Transmute Recipe is listed below.

Shining Scales

You will need 3 Shining Scales in this recipe. These can be found throughout while fishing throughout the Spiral, notably in the school-themed houses, bundle houses, and the worlds of Wizard City, Avalon, and Zafaria. Check out our guides on fishing to see what else you can get here.

Shocked Key

There will be 10 Shocked Keys needed in order to craft this our focused weapon. As titled on the card, “This key was found in a Silver Chest” is most likely how you will farm these. This reagent can also be harvested from Key Limes.

Flying Squid Ink

Forty-five squid ink will be needed for this item. By questing, you will be able to receive some of this reagent in side quests such as “Ancient Kalamar Secrets,” “A Reasonable Reaction,” “Fahrenheit 4500,” “Postal Stamping,” “Presporo’s Books,” “That New Black Magic,” “Underground Package Service,” and “Word Search.”  You may also farm it from the three bosses in the Secret Tunnel in Aeriel Jungle, Empyrea: Gannon, Madd’n, and D’viss.

Participation Trophy

Five Participation Trophies are required in our recipe. As labeled on the card, “A reagent bought with Arena Tickets,” you may purchase this reagent from Sir Nigel Higgenbottom in Unicorn Way for 800 Arena Tickets each. This may also be a possible reward from Daily Assignment quests.

Your Legendary Weapon

The weapon you crafted previously is an essential element to crafting your new one. The rarer reagents listed above will focus its power and enhance itself.

The Crystal Gems

You will need 35 more of your school-specific gem from the previous recipe. Locations have been mentioned previously.

Transmute Recipes

Golden Pearl

Golden Pearls can be created with 15 typical pearls. I have no doubt you already have this recipe from previous guides, but you may this recipe be sold for 600 gold by Avery Templeton in Survey Camp, Celestia.

Stardust

Stardust can be created with 15 Comet Tails. Comet Tails can be found in Crescent Beach, Sardonyx, and Kondha Desert, Khrysalis as well as Darkmoor and Aerial Shores, Empyrea. This recipe is sold for 5,000 gold by Zellozosia the HomeGilder.

Aethyr Ore

Aethyr Ore can be created with 15 Aethyr Dust. As you go about Empyrea harvesting the reagents for Aethyr Ore, you will also collect Aethyr Dust in the meantime. This recipe is sold for 10,000 by Lolligo in Aerial Shores.

Completion

Now that you have all your ingredients, go to The Arcanum World Crafting Station and craft your focused weapon. Once you have turned in the quest, you will be awarded 30,000 gold and your Revered Crafter badge. Congratulations, young wizard!

Thank you, Starlights, for joining me crafting and collecting reagents! Our next season of Crafting101 guides will feature the craftable houses, starting off with the Watchtower Hall.

Crafting101 – Khrysalis

Tonight we will learn how to craft an Ornate Burrower Chair for Stendhill Hammertail's quest, “Stop! Hammertail.”

Welcome back to Crafting101, young Wizard! The next step in your crafting journey is Promethean Crafter! This stage comes after you earn the Transcendent Crafter badge. Like most crafting quests, you may teleport to a friend to reach Stendhill Hammertail. Otherwise, you will reach Stendhill while questing through Khrysalis. Khrysalis is home to many great recipes, so be sure to keep an eye out for the many vendors you’ll meet on your journey!

Stendhill Hammertail

Find Oztomeca in Silent Market, Khrysalis. He will assign you the next quest, called “Stop! HammerTail” This quest has you craft one Ornate Burrower Chair. The recipe is available for 45,000 gold.

The Recipe

Below is a list of all the reagents needed to craft an Ornate Burrower Chair along with their locations.

Deep Mushroom

Ten Deep Mushrooms are first on our recipe. This is a common reagent found throughout Wizard City, Krokotopia, Mooshu, and Grizzleheim. You can harvest this reagent from Boom Shrooms, Burning Snap Dragons, Fickle Pickle, and Dandelions. They’re sometimes available in the Bazaar!

Perfect Jade

Six Perfect Jades will bedazzle the chair. You can buy this reagent from Canica Sweet Chile, Archytas, or Noxolo Fasttrack for 100 gold per Perfect Jade. You might also harvest this reagent from Ivy League and Maelstrom Snap Dragons.

Comet Tail

Eight Comet Tails will give the chair some glimmer. Like other harvests, Comet Tail can be collected in areas of Khrysalis. You can collect this reagent in Crescent Beach, Khonda Desert, Sardonyx, and The Shadow Palace. This reagent is also dropped from mobs in Khrysalis, such as The Common Killer. In the Bazaar, this reagent goes for 400 to 4000 gold.

Sunstone

Four dazzling Sunstones also contribute to the making of the chair. These are a rare harvest from Sandstone and can be found in either Khonda Desert or Last Wood. I would also search the Halley’s Observatory instance in Marleybone. Sunstone is sometimes a harvest reward from Maelstrom Snap Dragon, Evil Magma Peas, Fickle Pickle, and Deadly Helephant Ears. While sometimes it can be found in the Bazaar, Sunstone can be bought with 200 Arena Tickets from Diego the Duelmaster.

The Transmute Recipe is listed below.

Turquoise

Seven Turquoise will add accent color to the recipe. Turquoise will be the hardest reagent to get on the list. You may want to farm the bosses of Xibalba or other bosses in Azteca to get this reagent. Aquilan bosses, like the Gladiator in The Pit of The Noxii, also have excellent drop rates for Turquoise. You might be lucky and find some in the Bazaar!

Golden Pearl

Six Golden Pearls will give off that nice golden look. These are a rare harvest that you can find from pearls in Stormriven Hall, The Grotto, The Portico, and Waterworks, Crab Alley. They are also able to be harvested from Maelstrom Snap Dragon, Evil Magma Peas, Deadly Helephant Ears, and Fickle Pickles. The Gorilla, Minotaur, Magic Eggs, and Dragonfly all have this item as one of their daily rewards. It’s also available in the Bazaar!

The Transmute Recipe is listed below.

Ore

Five Ore will complete our recipe. This is a common reagent, notably found throughout Wizard City, Krokotopia, and Dragonspyre. It can also be harvested from plants such the Dandelion, Fickle Pickle, Helephant Ears, and Snap Dragon. This reagent is rarely in the Bazaar because of its demand, but you might be lucky to find a few!

Transmute Recipes

Golden Pearl

Golden Pearls can be created with 15 normal Pearls. These Pearls can be found in aquatic places, such as Crab Alley, Wizard City’s Stormriven Hall, The Portico, and The Grotto in Celestia. This recipe is sold for 600 gold by Avery Templeton in Survey Camp, Celestia.

Sunstone

Sunstone can be created with 15 Sandstone. This recipe is available from Avery Templeton for 150 gold in Survery Camp, Celestia.

Completion

Now that you have all your ingredients, go back to your Housing Crafting Station and begin making the Ornate Burrower Chair. Once you turn in the quest, you will be awarded 1 crafting time slot, 150 gold, 23,245 experience points, and your Promethean Crafter badge. Congratulations, young Wizard!

Thank you, Starlights, for joining me in crafting and collecting reagents! Catch our next edition of Crafting101 in The Arcanum with Ignus Ferric.

The Celestian Orchestra

Celestia, world of the shining stars, the reflecting moon, the powerful sun -and crabs- we invite you to the recently discovered in-tact ruins of the Celestian Opera House. Archaeologists have inspected the theatre to be in safe enough condition for public entry. Our finest Marleybonian musicians have decided to hold a special performance of a collection of works held by the Archivist for hundreds of years to play for you tonight.

Main Theme

Celestia’s main theme is divided into two primary sections. These two sections highly contrast with one another, changing tonalities when going into the second section. This divide between an A and B section is called binary form. One common attribute binary form has is that the A and B section are equal in length (read: duration), as they are here.

We begin the piece off with two contrasting timbres of the low brass and flute. Instruments add in building the piece’s momentum, such as the harp, glockenspiel, and horns.

The texture becomes stable as the horns completely take over the melody and a back-beat ostinato, or repeating figure, in the strings and percussion is added.

At 00:51 seconds into the piece, the key changes into the minor mode, giving us a mysterious mood change in stark contrast to the adventurous mood in the primary section. The repetitive ascending lines in the strings give us tension, leading us upward into the mysteries. The descending eighth note line propels us forward into the next ascending row. At timestamp 1:12, the horns come in with a melody.

Each time the horns sustain a note before rhythmic trumpeting, the woodwinds play a quick descending line as counterpoint. At 1:20, the harp takes that idea and develops upon it. The harp is the main focus and the section lacks any punctuating rhythms, unlike the previous moment. Timestamp 1:25 brings back the punctuation as well as syncopates the rhythm for the thrilling tensity. Above this is the violin, borrowing from the themes of Marleybone. Using a theme to represent the people of Marleybone is a leitmotifThis makes the music coherent with the world, showing how the Marleybonians have brought their musical voice and how it effects the world of Celestia.

Mysterious Theme I

Like sea life swimming in and out of the corals in a reef, the orchestral texture solemnly and constantly shifts, phasing in and out. The high piano keys and harp accompany the echoing solo, like a sea creature seeing another silhouette off  in the distance.

The texture shifts at 00:26 seconds, coming in with the timpani strike. The texture solidifies to be more traditionally orchestral. The cellos play the melody with the celesta doubling. The horns play an ascending line in the space of the melody. When it repeats, the strings and trumpets take over this counterpoint. At 00:42 seconds, the horns come back in lower, playing the melody as the trumpets play the counterpoint. The trumpets then lead us into the next section with their soli.

The next section at 00:52 seconds brings in a colder texture with the piccolo, harp, and celesta. The piccolo, as the highest voice, is the most noticeable to our ears. This develops a motif in different harmonic contexts that form a melody. The harp and celesta play arpeggios along with the bassoons. The horns play to lead into the different chord changes.

The unstable harmony builds tension, leading to the climax at timestamp 1:08. The horns and choir sustain their tones, giving the orchestra a full, supported sound. The celesta doubles the melody of the horns, adding a mysterious timbre. The timpani pluck of the harp marks the end of the adventurous section and leads us back into the cloudy mystery of the harp and celesta. The celesta plays the piccolo’s melody from before, giving an eerie tone.

Mysterious Theme II

Check out Maleficent’s transcription of this piece on Musescore! 
We begin with a very light and airy texture, utilizing the smooth and cold sounds of the flutes, harp, and celesta. The flute and violin harmonize with each other as the murmuring harp supports the overlaying texture.

The flute section plays two variations on a harmonized five-note melody. At 0:12 seconds, the cello enters as the celesta continues its overlying waltz figure and the harp continues its arpeggio pattern. The slight texture change effects the mood, becoming more peaceful and melancholy than mysterious.

At 00:24 seconds, the cello’s descending figure in the melody leads to a brief stop in the harmony of the music as the suspended cymbal leads us into the next section. This technique is common in dance music, where a brief break after building tension makes us desire a resolution.

The celesta and piccolo double the melody as the violin takes over the harp’s function from before. The horns and strings sustain chords, implying the dorian mode (a specific kind of minor mode). We sway back and forth between two chords, the tonic and the major IV chord. Typically a minor iv chord, the raised scale degree in dorian gives us the unique and regal harmonic colour presented in this section.

In stark contrast, our next section has modulated to the major mode, giving it a brighter mood. The upbeat waltz pattern in the horns and strings mellows the tone. The light melody on the flute is uplifting and delicate. The music paints a picture of the fragile crumbling ruins of Celestia and the delicate breeze in the leaves of the Floating Lands.

The glissando in the celesta at 00:50 seconds leads us into the contrast of orchestration in the section. The melody is carried to the violin, still being supported by the underlying waltz figure in the horns and pizzicato strings. Timestamp 0:58 gives us a cadential point, or rest within the music. The low strings and brass come together to play a descending figure, which as the tonic gets lower in the orchestra, the more at rest we are with it and the closer to the end we seem to become. Like Tchaikovsky’s The Nutcracker, the piece ends with a quick sixteenth note run in the celesta.

Calling back to the themes of Marleybone again, we are given a Mary Poppins-like texture with quick descending arpeggios in the celesta. The low strings and brass begin the melody as both sections high ends add in gradually, building the tension. Mysteriously, we end quietly with the celesta and violin in a cute and peaceful duet, calling back to the cello solo at the beginning. The flute ends the piece on the leading tone, which when harmonized with the pizzicato strings, implies the lydian mode, a mysterious and airy major mode.

Tribal Theme

The Tribal theme begins aggressively with a swift tam-tam (gong) strike and men’s choir. Hand drums accompany the singers primitive-sounding vocals in the intrada leading into the next section. Percussion of many colors adds vibrance to the flute’s main melodic line 00:11 seconds into the piece.

Timbres such as the marimba and xylophone are essential to the tropical sound of the piece. The bassoon takes over the flute’s melody in its mid-high register 00:21 seconds in. The xylo adds in, like a bandage to patch the transition.

At 00:34 seconds, the texture becomes more mysterious with a strong modal shift occurring at the same time. The flute takes over the melody, bringing a colder texture upfront in the ensemble. The harp has a glissando over a sustained chord in the vibraphone.

We come back into our happy texture at 00:38 seconds with harmonizing high strings and xylophone doubling a melodic line. As they fade out, the bass drum strikes, empowering the marimba’s ascending arpeggiated line.

Timestamp 00:43 brings us a hefty cadence point into the next climactic section. We see the return of the tribal voices in counterpoint of the strings and mallet percussion. In other words, the voices sing where the other melody’s voice is sustained on a note.

This thick orchestral texture relaxes into a flute solo at 00:56 seconds. This time, the melodic line is played in a lower register, bringing a sense of familiarity, but closure to the piece. Most pieces feel resolved in lower registers and more tense in the higher ones and this piece exemplifies that.

Finale Theme

The crash in the percussion initiates the orchestra. The woodwinds scramble together from motifs, or recognizable fragments in development. This continues as an ostinato as the low brass comes in with a simple melody. The high brass comes in at 00:19 seconds, continuing where the low brass left off. This melody introduces the main thematic material used in the piece, categorized by its short-long-short-long rhythm. This section ends with a bass drum hit as the ensemble plays a dramatic chord.

The suspended cymbal leads us into the next section at 00:32 as the rhythm changes into a triple meter. The woodwinds’ downbeat is emphasized more than the other two beats in each measure, giving the feeling of a waltz. The melody stated beforehand in the brass develops with this meter change. The short-long-short-long pattern shortens the longer note by a single beat so that the long note plays on each downbeat. As this occurs, the horns and trumpets have a call-and-response pattern with each other. As one group sustains a note in their melody, the other repeats it in the meantime. The melody is given to the flute, continuing the same rhythmic pattern

The melody climaxes at 00:52 seconds, as the timpani strikes. The high strings emphasize the downbeat of the melody the as the brass plays. All the while, the harp plays quick, descending arpeggiated runs while the flute rocks back and forth between notes.

In the transition section at 1:15, the flute and the harp duo together to create a mysterious ambiance before jumping right into the grand finale of the piece at timestamp 1:29. In the meantime, the mysterious mood distracts us from the fact that the rhythm is changing to duple meter, giving us four beats per measure. In this section, we see the full development from the short-long-short-long motif become short-long-short-up-down-up-down.

Thank you, Starlights, for joining me on this musical adventure through the music of Celestia.

Disclaimer:

All transcriptions of the music are from the original/classic mode music scrolls. Not all of my transcriptions are 100% accurate, but they are close and the rhythm is properly notated.

Crafting101 – Azteca

Tonight we will learn how to craft an Eagle War Shield for Oztomeca's quest, "Making the Grade."

Welcome back to Crafting101, young Wizard! After achieving Legendary Artisan, you will work to become a Transcendent Crafter. You may teleport to a friend to reach Oztomeca, like most other crafting quests. You could also quest to “Millions of Years in The Making” for access.


Oztomeca

You will find Oztomeca in Three Points, Azteca. Once you find him, pick up “Making the Grade.” This quest requires you to craft one Eagle War Shield. The recipe is available for 12,000 gold. On a side note, take a look at his Aztecan Castle Block recipes. They are some of the rarest blocks in the Bazaar!

The Recipe

Below is a list of all the reagents needed to craft an Eagle War Shield and how to find them.

Potent Trap

In order to craft the Eagle War Shield, you will need one Potent Trap Treasure Card. This is a difficult Treasure Card to get, but Aztecan bosses have a chance at dropping this card. You can quest through Azteca and check your loot. Otherwise, pick bosses, like the Caiman, to farm.

Ra

The shield also requires two Ra Treasure Cards. The Bazaar sells Ra Treasure Cards for 1200 to 2250 gold. You may also receive this Treasure Card as a reward for battling mobs in the Winterbane Gauntlet.

Agave Leaves

The next reagent required is two Agave Leaves. The Alto Alto and Mangrove Marsh are great locations to find Agave Leaves. The reagent is also sold by Brandon Mistborn, in Unicorn Way, for 400 Arena Tickets.

Agave Nectar

Next on the list is five Agave Nectar. This is a rare harvest from Agave Leaves. You might get lucky and pick up Agave Nectar when collecting Agave Leaves. Brandon also sells Agave Nectar for 2,500 Arena Tickets in Unicorn Way. The transmute recipe is later in the article. 

Scrap Iron

The recipe requires ten Scrap Iron. Marleybone has several drop locations for Scrap Iron. The Cenote in Azteca and the Science Center in Celestia are also good drop locations. If you want, you can also buy Scrap Iron for 499 Crowns in the Crowns Shop. There is also a transmute recipe later in the article.

Golden Pearl

Four Golden Pearls should be easy to find. Although they’re a rare harvest, there are several places you can pick up Golden Pearls. The harvest locations include Stormriven Hall, the Grotto, the Portico, and Crab Alley. Several plants drop it, including Maelstrom Snap Dragons and Evil Magma Peas. The Bazaar also sells Golden Pearls. The Transmute Recipe is below.

Leather Straps

The recipe requires ten Leather Straps. The easiest way to get this reagent is from the Bazaar. Otherwise, Orange Dandelions and Trumpet Vines drop Leather Straps. The Transmute Recipe is below.

Turquoise

Five Turquoise can be hard to find. While the Bazaar sells this reagent, it’s sometimes sold out. Aquilan bosses and Xibalba drop Turquoise if the Bazaar is out of this reagent.

Transmute Recipes

Agave Nectar

Agave Nectar requires 15 Agave Leaves. This recipe is available from Popol Vuh Whitepaper in Azteca for 1,000 gold. The recipe appears after questing in Alto Alto.

Scrap Iron

Scrap Iron requires 10 Ore and 10 Stone Blocks. This recipe is available from Felicia Worthington in Regent’s Square for 300 gold.

Golden Pearl

Golden Pearls require 15 typical pearls. This recipe sells for 600 gold from Avery Templeton in the Celestia Base Camp.

Leather Straps

Leather Straps require 5 Bones. This recipe sells for 150 gold from Eudora Tangletree in Olde Town.

Completion

Once you have the reagents, you can craft the Eagle War Shield using a Housing Crafting Station. Finishing the quest results in 17,300 experience and 250 gold. You also receive the Transcendent Crafter Badge. Congratulations, young Wizard!

Thank you, Starlights, for joining my crafting and reagents collection! Catch our next edition of Crafting101 in Khrysalis.

Crafting101 – The Wyrd House

Welcome back to Crafting101! Dark and eerie, the Wyrd house is perfect for Hallowe’en, Death Wizards, and anyone else who wants their own nook for the arts of witchcraft. You can buy this recipe from Padraig in High Road, Avalon for 60,000 gold.

Jars of Mushrooms

We will need two Jars of Mushrooms for this project. You will have to craft these. You may purchase the recipe from Tarold Wayfinder in Grizzleheim for 2,400 gold. The recipe is listed below.

Forest Lord Treasure Cards

Six Forest Lord treasure cards are required to craft our house. This will be a rare find in the Bazaar as Life wizards often use this treasure card until they can learn the spell itself. Gardening Sour Fickle Pickles or Queen Crape Myrtle, you can receive this. You can also farm the Locres Knight in Caer Lyon, right in Avalon.

Poison

Four Poison Treasure Cards are required to craft this recipe. The easiest way to attain these treasure cards is to either buy them from the Bazaar, or to garden Stinkweed, as mentioned in Ravenwood Academy’s own play free forever guide

Vine

Only one vine is needed for the house. Gardening is one of the most efficient ways of getting this reagent. As it is possible to get it by interacting with the Winter Wind Tower’s Horn of Plenty, you can garden all of the Huckleberries, as well as Deadly Helephant Ears, and variants of Trumpet Vines. Additionally, you can buy this reagent for 400 Arena Tickets from Brandon Mistborn in Unicorn Way.

Mist Wood

One of the most notorious reagents in the game, you will need forty Mist Wood in order to craft this house. You can simply run around Wizard City or other worlds like Grizzleheim until you have collected enough.

Grendleweed

The recipe calls for ten Grendleweed. You may obtain this through rare harvests of Frost Flowers as well as transmuting from Frost Flowers, found in worlds like Grizzleheim. The Transmute recipe is listed below.

Brick-Walled Pond

Two of this item will be needed. You can find it easily in the Bazaar. The Bazaar should be stocked with the item at 1,092 gold in the outdoor section.

Cephalopod Obelisk

We will need two of this item, easily found in the Bazaar. There should be roughly a hundred of them available at any given time in the decor section, sold for 1,056 gold.

Transmute Recipes

Jars of Mushrooms

Sold for 2,400 gold, you can purchase this recipe from Tarold Wayfinder in the fort crossroads of Northguard, Grizzleheim. In order to craft this, you need four Spirit Shield treasure cards, one Amethyst, four Shadow Oils, one Glass Vial, forty Stone Blocks, and ten Nightshade.

Grendleweed

Sold for 400 gold, you can purchase this recipe from Avery Templeton in Base Camp, Celestia. Simply fifteen Frost Flowers can be plucked from the world of Grizzleheim to create Grendleweed.

Congratulations, young Wizard, on crafting your Wyrd House! Please look through more of our Crafting101 series to assist you with your crafting needs.

Thank you, Starlights, for collecting reagents and crafting with me. Have a wonderful night.

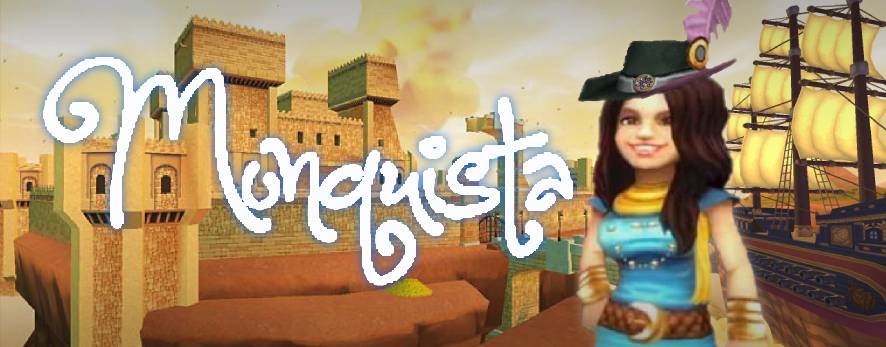
The Monquistan Choir

Despite its location in an isolated corner of the Spiral, Monquista, rich in gold and culture, is one of its most prominent powers. The Skull Island colonies enrich their people considerably. In line with Valencia and Marleybone, their society is posh and structured in which there is a noble class, a (daily changing) monarchy, and the Church. These powers fight vigorously with one another for control.
 
Please note I title tracks with their Wizard101 music scroll title and not the title of the You Tube video.

Skyway Theme

You can receive this music scroll from fishing chests in the Myth House, Sultan’s Palace, and Polarian Shipwreck

The Monquista soundtrack is most notable for its vocal counterpoint and harmony. This is complemented by stringed instruments like the guitar.
We begin with the full choir harmonizing together. The cello accompanies in a soulful motion, keeping the tempo and balance in the ensemble. Three pulses per measure is established, giving us a Mediterranean essence. 
We are greeted by the guitar at 00:18 seconds, the brass then joins in a perfect cadence. A classic resolution drives us into the next section. More strings join, creating counterpoint in the melodic contours between the pizzicato strings, the cello, and the voices
The tension rises though the chord progression. The cello hits a higher top note in each measure, leading us up to the entrance of the flute at 00:36 seconds. The contrasting chords in this section remind me of Tchaikovsky’s Swan Lake.
 
This continues until 0:52 seconds in when the high strings foreshadow other pieces to come. This connects the musical development and identity of Monquista. 

Royal Theme

You can receive this music scroll from fishing chests in the Myth House and Polarian Shipwreck

The piece begins with a regal texture, sharing likeness to Mozart’s Lacrimosa in melodic contour and structure. Beginning with the cello solo with the bass accompaniment, we feel the music in patterns of three, setting the tempo and mood for the entry of the choir.

At 0:26 seconds into the piece, the strings drop out, leaving the choir a capella. This leaves the music to sustain its somber, church-like tone until the string’s re-entry 0:38 seconds in, the cadential point, or moment the music’s tension seizes.

The flute begins 0:54 seconds into the piece, introducing the melody in a major modulation, or key change to a brighter key. We can hear the key change with the music’s relaxed tone instead of the somber and dramatic counterpart that came before.

Native Theme

You can receive this music scroll through fishing chests at the Death House, Nomad’s Camp, Polarian Shipwreck, Serpentine Escape, and the Winter Wind Tower.

The men of the choir sing in bass and baritone range, doubled by the guitar like the last track. This is the closest we’ve seen to monophony in the game’s soundtrack. In other words, each instrument plays in unison, without a simultaneous harmony. As the timpani strikes, the guitar drops out in favor of the strings section, thickening the orchestration
The horns crescendo into a new section. The strings take over, violins with the melody as the lower strings stabilize with long tones. The melody passes to the choir as the strings sustain beneath.
 
Like before, the orchestra crescendos into a new section. We receive a cadential point with a faint cry of the flute in the distance. The strings die down from sustaining chord progressions into lighter orchestration at timestamp 1:05
 
The guitar is accompanied by percussion in this new section. Every now and again we hear the flute’s cry once more. The melody passes from the choir to the strings, ending in a suspended chord, withholding a proper resolution.
 
We embark on the coda of the piece at timestamp 1:37. The beat is accented by the choir and tambourine. The strings interlude, leading us back to the beginning. 

Thank you, Starlights, for joining me on this musical adventure through the music of Monquista.

Disclaimer

Please note: I transcribed the music from the original/classic mode music scrolls. Not all of my transcriptions are 100% accurate, but they are close and the rhythm is properly notated

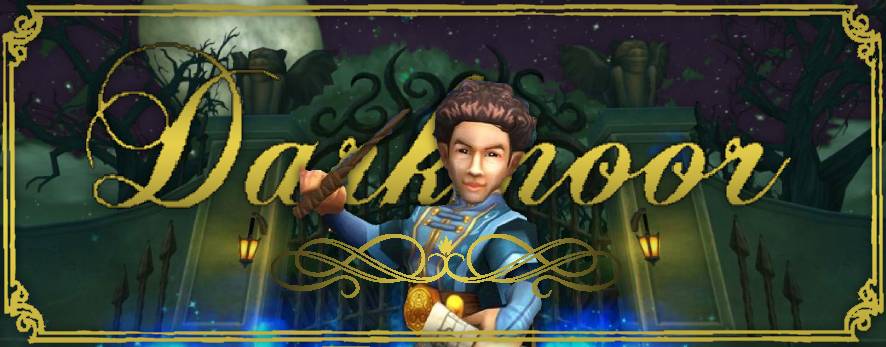
The Darkmoor Philharmonic

In the first Wizard101 arc we learn the story of Malistaire and Sylvia. Even in death their love holds them together. A dark and mysterious man in a supernatural castle who goes too far. In Gothic literature this is a common theme. This is only fitting for our Phantom of The Opera esq love story. Let’s us take a look at the magic behind the music in the haunted sequel of this epic love story.

Main Theme

The orchestration begins with an eerie celesta solo accompanied by a shrill violin. The bass instruments soon follow, supporting the established sound. This theme calls and responds throughout the ensemble. It travels to the oboe and harp then follows to the flute and pizzicato strings soon after.

The choir and chimes enter at 00:39 seconds in. They trade off beats as the brass and strings emphasize the modulation of a minor chord to a major chord. This repetition develops into a different minor chord. This sets the mood of the dark essence of a Gothic castle.

We continue with a waltz which uses the same texture as before until timestamp 1:13. This is where we enter a Marleybone style orchestration with more organic sections. A change from the block-style Darkmoor tends to use. Then we jump back into the familiar melody introduced at the beginning. The orchestration lightens with several solos before its return to the start.

Tense Theme

The timpani, contrabass, and bassoon begin this section in a low rumble. They solo before the harp’s tone cluster 00:10 seconds in that introduces the high strings.

The alto flute introduces a maniacal theme, doubled by the grandiose pipe organ. This instrument is a familiar feature in pop culture when exploring the Gothic era and its music.

Timestamp 00:27 surprises us by clustering the tones within its chord progression. In the midst of this dissonance, a waltz occurs. The melody is a whisper, stressing tension on the non-chord tones. The bass line becomes overpowering. This reflects the feelings of our Wizard in the quest to conquer Castle Darkmoor.

The next section sneaks in, with arpeggiation in the woodwinds, celesta, and pizzicato strings. The music sneaks around the castle in espionage and exploration. The beginning theme returns in solo instruments, like a hollow echo of what came before.

Reunited Theme

A short piece plays in the Darkmoor reunion scene when Malistaire and Sylvia reunite. This is where they may finally be at rest together.

At timestamp 00:15, the upper strings enter the scene with the first violin sustaining a high note. This reminds us of the start of the main theme. The second violins and violas harmonize on the offbeats, swelling into them. We progress into a major modulation before the music halts into silence.

We continue as before, except now moving onward to a darker minor chord. The timpani interrupts, crescendoing into a tutti section of the ensemble. The great pipe organ swells in a twelve-tone row. In this form atonality all twelve keys are equally presented.

The romantic music begins at 00:58. The romance derives from tension tones added to chord. This makes us feel that we are wanting resolve. It is this tension that makes us expect something brilliant to happen at the climax of the music. Often, it’s a kiss. Here, it’s the finality of death as Malistaire and Sylvia cross to the other side of the veil. Together forever.

Large brass fanfares and orchestral jubilation continue as we say goodbye to Malistaire. Third times the charm, am I right?

Thank you, Starlights, for venturing with me through the Gothic music of Castle Darkmoor.

Disclaimer

Please note: I transcribed the music from the original/classic mode music scrolls. Not all of my transcriptions are 100% accurate, but they are close and the rhythm is properly notated

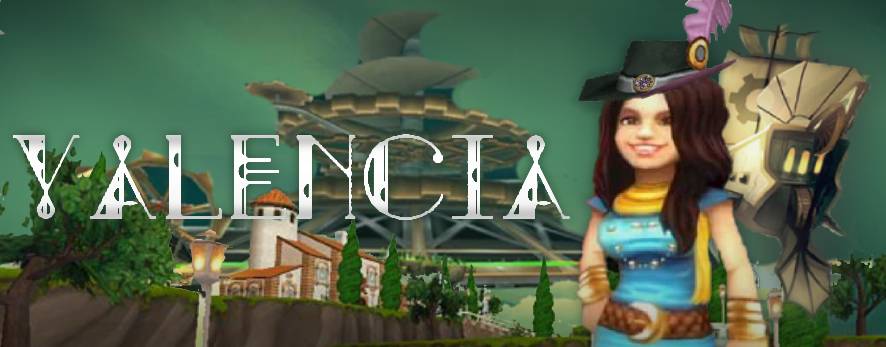
The Valencian Philharmonic

T

he home of the ruthless clockwork empire and our own Diego the Duelmaster. Valencia was once a land of pristine culture and beauty until the clockworks came onto the scene.
 
This is best shown through the music of Valencia. Elegant classical instruments such as the piano and strings identify the culture. Played in a tense style, they represent the threat of The Armada to our pirate.

Tense Theme

You may receive this music scroll from fishing in the Amber Estate, the Fire House, the Polarian Shipwreck, or The Acropolis

The intrada is unique and notable for its thin texture. Only the piano and high strings begin before the lower instruments join in, creating rhythmic contrast. We are next greeted with an arpeggio that has the same melodic contour as Skull Island’s Main Theme at 0:07 seconds.
 
Changing instrumentation and mood, the music develops alongside the story. This maintains the spirit of adventure. The music leads us to the idea of the strings and piano repeating one another in a game-like fashion.
 
In the next section at 0:25 seconds the beat is emphasised with bass and snare, like a military march. This is intentional and reminds us of Valencia’s dominant military power.
 
The next section at 0:50 seconds brings us back to Skull Island. The music paints the adventure of being a pirate in the lion’s den, with a choir sustaining chords behind it. The brass joins in as the piano continues, a feature of Valencian music we will continue to see later. The brass that welcomed us bursts forth accents where the melody does not play. This counterpoint presents throughout the music in classical Valencian style.
 
Combining the previous ideas, the piano joins the percussion in emphasizing the beat. The contrasting ideas of the Armada and the cultured Valencians are now one and the same. Valencia has been conquered.

Espionage Theme

The strings slyly play their chord progression leading us to a melody in the piano we hear in other tracks. This leads us back to the strings, and they keep trading off in this manner. Every time the pattern occurs, there is a slight variation in what they play. This keeps the music interesting in its development.

At timestamp 0:40, the piano and strings finally come together in harmony. They start a new chord progression together, leading into a new section. In a mournful style, the piano plays a new solo line as the strings quietly sustain in the background.

The piano repeats this line in an ostinato. More texture is added by other instruments of the ensemble. The pizzicato strings, clarinets, and string bass are most prevalent in the texture. They either contrast or harmonize with the melodic line.
 
The brass and strings unify together at timestamp 1:06. Bold and bright, this section contrasts with the moody sections before, like a beacon of hope.
 
The section at timestamp 1:16 is the realization of devastation. The atonal piano line seems to stop time itself before the clarinets come in. The line these reeds play is a common “Easter Egg” in many video games and movies. It is a reference to the Dies Irae, the clarinets are warning about tragedy and horror.
 
The line ends on a major chord, bitter-sweet. The next section is a morbid and joyous waltz, before leading back to the beginning.


Skyway Theme

You may receive this music scrolls from fishing in the Botanical Gardens, Fire House, Life House, Serpentine Escape

Throughout this piece the orchestra is light and exposed, like a mournful ballad.
 
Like a cog at work, the piano begins by hammering away at its lower end. This trades off to the higher register of the piano with an added delay effect. The English horn enters next with a sixteenth note run, playing twice before resolving to the next section.
 
Now the piano with its delay effect, takes over the melody of the piece, louder than before. After this hallucination-like solo at timestamp 0:42, the bass of the piano pairs up with the contrabass. The cellos play arpeggios and violins sustain chords over this more driving section. The bassoon and metal strikes enter, resolving the tension. 
Contrasting with the previous vigorous section, this section brings a breath of relief. This piece emotes anxiety, yet we see a melancholy side. The swelling strings and quiet murmuring of the machine that backs up the clarinet solo posses a relaxing ambiance.
 
Almost playful, the bassoon at 1:40 plays the theme we heard from the previous track. The mood changes here to balance the sad and mournful with hope as the adventure progresses.
 

Danger Theme

Silent but driving, the strings begin with an underlying ostinato. The other orchestration is layered throughout the first 0:38 seconds of the piece. We see this texture from the previous piece, but orchestrated to fit a new mood. The theme plays through the ensemble beginning with the bassoon, and carries to the horns.
 
This leads to a climax in the music as the strings, horns, and piano join in homophony. Playing similar melodies that harmonize into one.
The next section at 0:53 seconds leads back to a driving ostinato with strings and percussion. The horns have the melody in a short-short-short-long pattern that develops by changing chords. At 1:10, there is a chromatic mediant, a change to the chord not within the key we are in.
 
Timestamp 1:18 brings us a piano solo, ending the horns’ melody on a short note. A new motif emerges of even shorter notes that get passed to-and-fro from the piano and oboe. As the piece gets more wild, the low bassoon carries the motif, keeping stability. We hear the theme from previous pieces hinted at, reminding us of our pirate’s heroic nature.

Thank you, Starlights, for venturing through the music of Valencia with me. Have a wonderful night.

Disclaimer

Please note: I transcribed the music from the original/classic mode music scrolls. Not all of my transcriptions are 100% accurate, but they are close and the rhythm is properly notated

Skull Island’s Tavern Band

Somewhere in the Spiral, there’s a refuge for young pirates, orphaned when young who have turned to a life of crime. Marked by skull-shaped mountain, there is danger and treasure lurking all throughout the island region. Whether it’s hoodoo, dueling, brawling, treason, or smuggling, pirates ally with Captain Avery for their own safety and a large cut in the treasure of Captain Gold.

Main Theme

The pace is set immediately with a waltz-like rhythm with the percussion and quacking trumpets. The mood gives us the feeling that something is off, there is a mystery at hand and we’re just the pirate to look into it. This vibe continues as it moves into a 12/8 section 00:12 seconds into the piece, which means there’s three notes per beat. We are given one of the main arpeggios used throughout the soundtrack of Skull Island.

The arpeggio sets up our next section 00:20 seconds in, as the brass features the melody. We also carry over crescendoing chords sustained in the horns from the previous section. The harp twinkles down as the melody passes onto the low reeds, giving a dark and damp feeling, reminiscent of the sewer-like passages within the Skull Mountain.

The climax of the piece comes in at 00:52 seconds. We are no longer in a mysterious minor key, but now an adventurous major key. The violins stir the excitement on their high strings as the oboe plays the melody. The low voices crescendo as the piano strikes along on the downbeat. The resolution drives us forward with a feeling of hope in our adventures as a pirate.

We move on to a clambering call and response from the ensemble before a joyous celebration, alluding to Celestia’s crab march with the castanets and xylophone. 

City Theme

The mood of this piece is serious. Unlike the spookiness, joy, and film-like nature of the other pieces, we begin with a fife- like military march with flutes and drums. After the strings play the main melody, we move into a major key at 00:39 seconds. The strings play rolling hills of arpeggios as other strings instruments accent the first note of each bar.

As the violins descend their quick sixteenth notes, the dynamic of the piece raises and adds in with more instruments. Percussion notably accents the first beat of each bar along with the strings section. After a cymbal roll, we begin a waltz with the brass. The low brass and plucked strings keep the time as the horns play the melody, eventually passing to the accordion.

We enter a new, flourishing section at 1:17 as the brass sustains the chords as the quick violins play speedy figures. The fife adds in to the violins to accent their melody. We end the phrase in a dissonant cluster that seems to be magically cleared by the flute’s ascending glissando.

Skyway Theme

The Skull Island Skyway Theme is a stark contrast to the other pieces. It is bright and joyous and begins with a fanfare, compared to the damp textures the other pieces convey. There is a certain kind of silliness to the piece, like a young child earning their sea legs.

The melody gets passed around from instrument to instrument, taking turns with the texture. Along with that, there is notable hemiola. A hemiola is a complex rhythmic figure where two groupings of three notes can be played as three groupings of two notes, which gives the piece syncopation. A famous hemiola is “America” from West Side Story.

Haunted Theme

The mood of the piece is established right away with the bass end of the piano, swaying back and forth between the notes. Notice how on the harp part, it develops the main arpeggio I pointed out earlier. Also take note of the how the horn pitch bends downward, also like the Main Theme.

This change of mood and instrumentation is what enhances a story. By developing the music along with the story, the music becomes more complex by giving itself a narrative to follow.

 Vaguely like Stravinsky’s The Firebird, we hear the piano and horns play an aggressive melody before the tension breaks with a hauntingly beautiful waltz. The music fits well with the original story of Lasko, Manny, Mo, and Jack who were Ratbeard’s poisoned crew mates, murdered by Ratbeard himself. Lasko wanted his crewmates to have their final wishes before being released to the afterlife and one of them wanted to return a locket to their lost love.

Jungle Theme

The very first bit we hear in the music is the brass pitch bending upward rather than downward, developing a motive we’ve heard in previous pieces. As the brass starts the chord progression, the harp comes in with the arpeggio motif at 00:09 seconds in. This pattern continues as the bassoon comes in with a new idea 00:36 seconds into the piece.

The musical content is layered into the texture while the harp plays a new idea as an ostinato or repetitive figure. The percussion bangs away on the drums, representing the idea of danger in the jungle. This leads to the eventual arrival of the horn taking away the melody. The low strings heavily approach a new ostinato, replacing the melody. The harp and voices add-in, trading off the strings for the brass to lead the orchestra back to the beginning.

Thank you, Starlights, for venturing through the music of Skull Island with me. Have a wonderful night.

Disclaimer

Please note: I transcribed the music from the original/classic mode music scrolls. Not all of my transcriptions are 100% accurate, but they are close and the rhythm is properly notated

How to Create a Portal Hub

Dedicating one of your castles to store the portals to your other houses can be a laborious task, especially deciding you want to begin a project like this. If you’re not sure what I mean by a “portal hub,” I am referring to a castle that is the central hub to teleport to your other homes. Successfully completing a project like this is a big accomplishment for any decorator, for your friends to tour your amazingly decorated houses and simply teleport to the next once they’re done.

The Math

Before we begin, there is a lot of math to be done. For this guide, I will be doing the most complex option of how we can interpret this project (and very much so the most impressive!).

Open your list of houses and count all of the houses you want included in this project. I want my Balance House, my Storm House, my Death house, and my Midday Estate included in this project, plus my dorm. My Storm House will be the Hub, and my Dorm will teleport the visitor to the hub. Once the person gets to the hub, there will be several portals they can enter. This is described in the main flow chart. The Marleybone and Darkmoor houses will not be a part of this tutorial.

This means we will need one teleporter for the Dorm, three for the hub, and three more to put in the houses. Therefore, all together, we will need seven portals. We need two for every house we have, plus one for the dorm.

The Portal Plan

Next, we need to figure out the route these portals are going to take. The flow chart to the left makes it look easier than it feels when actually doing it.

We must set up three portals to go back to the dorm, the dorm portal to go to the hub, and the three hub portals to go to the houses. Remember, when you click on a portal without the mark in the corner of its box in the decorating menu, it means you need to select the location it will teleport to first. If it does indicate a point has been selected, you may proceed to place it. 

An Example

To the right is one possible combination a visitor may take. After teleporting to you in your dorm room, they go through the portal in the Storm House hub, and then the Midday Estate. When they decide to leave the Midday Estate, they will go back to the Dorm Room and begin again to see the other houses.

This visual shows where the portals are going to. The violet portal heads to the Storm House. This is color association. By using violet, it is a hint without needing to use a sign where they are about to go.

This works rarely. Most of the time, we need to put a sign nearby, or in the portal to show where people are going.

An extraordinary example of Paige Moonshade’s Portal Hub. Find her Wizard’s Watchtower on the castle tours!

It is always amazing to see houses on the tours that are connected together. Seeing portals linked together like this makes the house feels that its a part of something much larger, and is a product of greater quality. In projects like these, the more houses you have, the more work it will take to maintain it, but there’s a bigger pay off. In the image to the left, it looks amazing to see the portals of every single house in the game linked up together.

Thank you, Starlights, I wish you the best in your Portal Hub creations! Please remember to email your lovely interpretations of this guide to us at [email protected] because we would love to see them. If you have any issues following along with this guide, please get in touch with me in the comments below or on the Ravenwood Academy Discord!