Skeleton Key Spiral Tour

Do you have plenty of Wooden, Stone or Gold Skeleton keys?

Have you collected so many Skeleton Keys that you don’t know what to do with them? Or, maybe you just earned your first key and can’t wait to use it!?

This guide will take you on a tour of every Key Room in the Spiral. You will discover chances at rare and special drops and collect many cool badges on the way! So, let’s get going!

Wizard City – Olde Town – Roberto’s Sanctum

Roberto’s Sanctum is found in Roberto’s Lair in Olde Town, Wizard City. It requires a Wooden Skeleton Key to enter, and contains Roberto. Wizards first come here during the quest Unlocking the Truth to retrieve a family heirloom for Diego the Duelmaster.

Roberto brings you the first place to farm for 7 Day mounts like Enchanted Broom, Horned Sweeper, Purple Glider or a cool wands like Roberto’s Rapier. You may also receive an Adept’s, or Novice’s Socket Wrench, or a Wooden Skeleton Key which will enable you to return again.

Wizard City – Crab Alley – Crab Alley Wooden Key Room

The Crab Alley Wooden Key Room is found immediately upon entering Crab Alley from Triton Avenue in Wizard City. It requires a Wooden Skeleton Key to enter, and contains the boss, Spirit of Ignorance.

This is a good spot to farm for cool stitching gear like Rhapsodist’s Cap, and the Purple Fairy Wings mount. There is a good chance of getting Wooden or Stone Skeleton Keys.

Strategy: If a Wizard is late to join the duel, Feckless Soul will cheat-cast a spell that steals one pip. Use blades and traps to defeat this Boss.

Wizard City – Sunken City – Simon’s Workshop Stone Skeleton Room

Simon’s Workshop is in the Sunken City, near the entrance from Nightside. Defeating this cheating boss will earn the Simon’s Bane badge.

 Farm Simon’s Workshop for Hairstyles like The Dreamweaver, The Manticore, The Restless Titan, The Raven Eye, and more.Daniel’s Answer of Life, a wand with five percent pierce can be found here. Housing Items like White King Chesspiece, Pets like Fierce Hound, Snacks, Couch Potato Seeds and many 7 Day Mounts like Ancient Koy, Bat Wings, Hippogriff, and Purple Glider. There is also a chance of getting Stone Skeleton Keys.

Strategy: If a Wizard joins the duel after the second round the Boss will cast Mana Burn. Place the hitter in the last position, use first and second round to blade, trap and feint. Don’t blade yourself or he will remove them, blade the hitter. Hit on the third round to finish the battle.

Wizard City – Castle Darkmoor – Castle Darkmoor Gold Key Room

The Castle Darkmoor Gold Key Room is found in the stairway leading up to the observatory inside Castle Darkmoor, and requires a Gold Skeleton Key to enter. It can be accessed after the duel with Sir Blackwater and contains a Locked Chest.

Castle Darkmoor is an excellent place to farm for level 100 Mastery Amulets like the Death Mastery, Howling Werewolf’s Collar. The Mastery Amulets that drop here provide accuracy, damage, and a handy Shadow Shield. A few other notable drops include Gold Skeleton Keys and the Soulful Knight pet.

Wizard City – Castle Darkmoor – Upper Halls Gold Key Room

The Upper Halls Gold Key room is found on the spiral staicase following the first fight. It requires a Gold Skeleton Key, and contains the boss, Bunferatu. Defeating Bunferatu grants the Bunferatu’s Downfall badge.

This Room is a good place to farm for level 100 Rings with 10% Damage like the Spirit of Darkmoor’s Band or the Band of the Cold Grave. Pets, Snacks, there is also a chance of getting Gold Skeleton Keys.

Strategy: Place the hitter last. Blade the first two rounds, no traps. Trap and Feint on the third round, then hit on the fourth. You can use any blades or traps you have on the hit round.

Wizard City – Castle Darkmoor – Graveyard Gold Key Room

The Graveyard Gold Key Room is inside the Graveyard instance, in the first area with Yevgeny NightCreeper. It requires a Gold Skeleton Key to enter and contains the Boss, Aphrodite II. Defeating Aphrodite grants the Flower Power badge.

Aphrodite II drops the best level 100 damage ringsIt is also a good spot for Energy Gear and the Life spell Sacred Charge. There is a chance to get your key back, and you will need to farm with a full team of Wizards in order to defeat this Boss.

Strategy: Check out Ravenwood Academy’s guide including deck set-up tips and strategies for every position here.

Wizard City – The Catacombs – Fathomless Tomb

The Fathomless Tomb Gold Key Room is inside the Catacombs, in the left corridor opposite to Viggor’s Tomb. It requires a Gold Skeleton Key to enter and contains the Boss, Fellspawn. Fellspawn grants different badges depending on the number of times you defeat him!

This is the place to farm if you are looking for the Vanguard’s Gear like Vanguard’s Shocking Boots, it also drops Dragoon’s Sets and Gold Skeleton Keys.

Strategy: Do not use blades. Use Feint, Mass Feint or traps instead. Fellspawn has two phases; Storm and Moon. While he is in either phase, your Wizard cannot blade. When he is in his Moon phase your Wizard cannot place traps on him, but previously placed traps will not be removed. The ideal team uses two hitters. One to focus on the boss, and other to focus on minions. Bad Juju and other weaknesses can be helpful here to reduce this Boss’s outgoing damage.

Wizard City – Ravenwood – Krampusgarten (Wooden, Stone, Gold Lock)

The Yuletide Feasting Hall connects to the following three instances, where Krampus can be fought:

  • Krampusgarten (Wooden Lock)
  • Krampusgarten (Stone Lock)
  • Krampusgarten (Gold Lock)

Krampus can be found during the Christmas event in:

Ravenwood, Colossus Boulevard, Celestia Base Camp, and Walruskberg Harbor.

This Room is a good place to farm for the Krampus’ Tolltaker wand, Christmas Items like the Yuletide Wood Paneling, Pets like Maple Moose or SnowballChristmas Seeds, and Mounts like Blue, Green and Red Candy-Canes

Strategy: The hitter should enter last. The team should blade the hitter to finish with a single attack on the third round. Krampus will remove any blades you cast on yourself, but not blades cast on someone else. To avoid Beguile, use a single attack. The hitter may blade himself using Aegis. Do not use Feint of any kind.

Drop list

Krokotopia – The Oasis – Sapoti’s Landing Wooden Skeleton Room

Sapoti’s Treasure Chamber is accessed from the Skeleton Key Room known as Sapoti’s Landing. The chamber contains a master-thief named Sapoti and his minion, who managed to lock themselves inside. Defeating them earns the Sapoti’s Savior badge.

Farm Sapoti’s Landing for level 15 Wands like the Fenix Ashen Staff , which gives two percent damage. Other drops include the Foxy Dragon Pet, Krokotopian Housing Items and the Adept’s or Expert’s Socket Wrench. Wooden Skeleton Keys also return here.

Krokotopia – The Oasis – Ra’s Reading Room Wooden Skeleton Room

Ra’s Reading Room is accessed from Ra’s Landing inside the Library in the Oasis, Krokotopia. It requires a Wooden Skeleton Key to enter and contains the boss, Ra. Defeating Ra grants the Reading Room Roustabout badge.

This Room is a popular place to farm mounts like the Camel, Crokagator, Mander Palanquin, and the Moonlight, StarlightStarshine and Sunshine Ponies. Wizards also farm here for level twenty Crowns gear, and Crowns wands. Other drops include Krokotopian housing itemsAmber, pets such as Mummy Cat, and seeds including Key Lime or Sunion. Adept’s or Expert’s Socket Wrench and Wooden Skeleton Keys finish out the offerings found here.

Krokotopia – Kembaalung Village – Pagoda of Harmony Wooden Key Room

The Pagoda of Harmony Wooden Key Room is accessed from inside the Pagoda of Harmony instance, following the duel with Tsutsui. It requires a Wooden Skeleton Key to enter and contains a Locked Chest.

This room is a good place to farm for popular level 20 amulets like the Kembaalung Blizzard Charm. Rings like the Monk’s Ring of Dedication, Three percent damage wands, and Crowns pets like Red Panda or Lavender Foo Dog. There is also a good chance of getting Wooden Skeleton Keys.

Krokotopia – Kembaalung Village – Hollow Mountain Wooden Key Room

The Hollow Mountain Wooden Key Room is inside the Hollow Mountain instance. You will find it following the first fight with the Hoof Ninjas in Hamakala’s Mausoleum. It requires a Wooden Skeleton Key to enter and contains the Boss, Temple Phantom. Defeating the Temple Phantom grants the Phantom’s Menace badge.

Kembaalung is a good place to farm for the Gold, Blue or Silver Kirin Mount and the Band of Harmony Ring. The only ring that gives 2% universal resistance to Balance! There is also a chance of getting Wooden Skeleton Keys.

Krokotopia – Lower Zigazag – Lower Zigazag Stone Key Room

The Lower Zigazag Stone Key Room is in the Lower Zigazag, following the first fight with the Ravenous Teeth. It requires a Stone Skeleton Key to enter and contains the Boss, In’Zhizor. Defeating In’Zhizor grants the In’Zhizor’s Undoing Badge.

Farm here for 38% block and 2% pierce Wands like the Eternal Verses of Anubis. Damage Athameslike the 8% Ammit’s Claw of Revolution can also be found. Wooden Skeleton Keys sometimes return here, so bring your friends.

Krokotopia – Lower Zigazag – Lower Zigazag Wooden Key Room

The Lower Zigazag Wooden Key Room is located inside the Lower Zigazag instance, behind the second set of caged Manders. It can be accessed with a Wooden Skeleton Key, after defeating the Ravenous Teeth (Death), and contains a Locked Chest.

This Room is a good place to farm for some of the best level 60 Amulets like the Charm of the Soul Devourer. School specific Amulets that will give you health, 2% damage, and blade item cards. Pets like the Mummy Cat or Royal Ibis drop here, there is also a chance of getting Wooden or Stone Skeleton Keys.

Krokotopia – Upper Zigazag – House of Scales Stone Key Room

The House of Scales Stone Key Room is inside the House of Scales instance, following the second fight with the Condemned Soldiers. It requires a Stone Skeleton Key to enter and contains the Boss, Bellosh. Defeating Bellosh grants the Caged the Elephant badge.

The House of Scales is a good place to farm for the only level 60 Deck that gives 1% Accuracy with a Triangle Socket. You can also get the Mander Palanquin Mount, and there is a good chance of getting Stone Skeleton Keys.

Strategy: One Wizard should hit Bellosh every single round to prevent him from casting Ra. Then, kill him as fast as possible using any traps or blades you like.

Marleybone – Barkingham Palace – Main Hall Wooden Key Room

The Main Hall Wooden Key Room is found on the second level of the Main Hall instance and requires a Wooden Skeleton Key to enter. It can be accessed after the duel with Chief Whip and contains a Locked Chest.

This Room is a good place to farm for level fourty rings like the Marleybone Fog, athames like the Royal Athame of Duality, pets like the Wolf Hound or Dapper Corgi, and Wooden Skeleton Keys.

Marleybone – Barkingham Palace – State Wing Wooden Key Room

The State Wing Wooden Key Room is inside the State Wing, following the second fight with the Enfield Tricksters. It requires a Wooden Skeleton Key to enter and contains the Boss, Billy the Cutter. Defeating Billy the Cutter grants the Cutter’s Bane badge.

This is a good place to farm for level 40 rings like the Jackall’s Ring of Duality, which gives 5% Storm damage, or pets like the Dapper Corgi. There is also a good chance of getting Wooden Skeleton Keys.

Strategy: Don’t cast any shields or he will steal them, just blade and trap to finish in one round.

MooShu – Cave of Solitude – Cave of Solitude Wooden Key Room

The Cave of Solitude Wooden Key Room is in the Cave of Solitude Skeleton Key Room. It requires a Wooden Skeleton Key to enter and contains the Boss, Takanobu the Masterless. Defeating Takanobu grants the Master of the Masterless badge.

Farm here for the Catch of the Day Storm spell and the Katana of Takanobu’s Wrath wand, the only one percent universal resistance wand in the Spiral. There is a good chance of getting Wooden Skeleton Keys. Because of this, I suggest farming in groups of 3 or 4 Wizards to increase your chances of getting a key back.

Strategy: Have the hitter enter the battle last, and use FeintMass Feint or any traps you can stack as a team to defeat the boss and minions all at once. 

Zafaria – Waterfront – Waterfront Stone Key Room

The Waterfront Stone Key room is accessed from the Waterfront Skeleton Key room. This is the home of the Witch Doctor to whom Captain Hockins has come to have his curse removed. Defeating them earns the Hockins’ Hex badge.

The Waterfront is a good place to farm for the Pirate Rowboat mount and Burlap Boy pet, the Adept’s, Novice, or Expert’s Socket Wrench and Wooden, Stone or Gold Skeleton Keys.

Strategy: This Boss is nearly immune to every attack. I suggest that you use Shadow Shrike if you can. When a Wizard attacks directly, the Boss will give you a 10% Piercing Blade. If the next Wizard attacks he will then give you a 20% Piercing Blade. So, eliminate the minions first. Then attack the Boss until you start getting enough Piercing Blades to end the battle.

Avalon – Crystal Caves – Crystal Caves Stone Key Room

The Crystal Caves Stone Key Room is accessed from the Crystal Caves Skeleton Key Room. It requires a Stone Skeleton Key to enter and contains the Boss, Lambent Fire. Defeating Lambent Fire grants the Lambent’s Damper badge.

This room is a good place to farm for Burning Rampage, a Fire spell that is popular in PvP. This Boss has a good chance of dropping Stone Keys, so farm in groups to get the most chances.

Strategy: Check out Ravenwood Academy’s amazing Two-Turn Farming Strategy right here!

Azteca – Three Points – Eternal Sanctum Stone Key Room

The Eternal Sanctum is inside the Black Sun Pyramid Master Chamber, following the fight with Belloq. It requires a Stone Skeleton Key to enter and contains the Boss, Ixcax CursedWing. Defeating Ixcax grants the Ixnay on the Ixcax badge.

Not surprisingly, the Azteca Key Room is a good place to farm for Dinosaur Mounts. Mounts that drop here include: Ankylosaurus, Arcus Cloud, Crokagator, Feathered Raptor, Gold-Wrought Eagle, Jeweled Scarab, Triceratops, and the Tyrannosaurus Rex. There is a good chance of getting Wooden Keys or Golden Keys. You can also get housing items such as the Azteca Fire Pit or Aztecosaur Stela. Snacks, Amber, Cool Pets like Royal Ibis or Therizinosaurus and rare Treasure Cards like Monsoon Hound round out the selection of possible drops. 

Strategy: Use all blades and traps except regular Feints. You can use Potent Feint, just avoid un-enchanted Feint. Minions cast Beguile sometimes, so try to eliminate them first, then focus on the Boss.

Polaris – River of Frozen Tears – Icefall Cavern

Icefall Cavern is near the Sunless Shrine, in the River of Frozen Tears. This Gold Key room is accessed from the “Skeleton Key Room” sigil and connects to Omen’s Hideout, which contains the Boss, Omen Stribog. Defeating Omen grants the Omen’s Adversary badge.

Omen Stribog is a good Boss to farm for many things including the Luphilim’s Eternal Deck. Mastery Amulets like the Luphilim’s Grim Chain will give you health, 6% school specific resistance and a school blade.

Other notable drops include:

Crowns Gear like Seal Team Assault Helmet, Housing Items like the Polarian Well and Lydia’s Cold Table. AmberPets including the Floe Siren and Snowball. Mounts including Frostfang Tiger, Himoolayan Yak, Luphilim Wings, Owl, Snow Ram, White Stag, Winter Treant, WinterGlide Skates. There is a good chance of getting Gold Skeleton Keys, Artisan’s, and Master Socket Wrench.

Strategy: Eliminate the Sentinel first by stacking school-specific traps and Indemnity Feint. Do not use blades. It’s recommended to have a Fire school hitter, who casts Backdraft. Remember to use Shatter before hitting to remove all of the Sentinels shields. After defeating the Sentinel you can use blades. Stack blades and traps to finish the battle with an All-In-One attack. 

Mirage – Aggrobah – Vault of the Verboten Gold Skeleton Room

This room is accessed via the “Skeleton Key Room” sigil in the River District of Aggrobah. It connects to the Vault of the Verboten, which requires a Gold Skeleton Key and contains Verboten Mimic. Defeating this cheating Boss earns Wizards the Mimic Muter badge.

If you are looking for the best level 120 Critical Ring then this is your place to farm. Rings like Drake Ancestral Signet with 10% Damage and 84% Critical will help your Wizard to achieve maximum Critical.

Strategy: This Boss has five different forms that change at random. Every Boss form has different cheats, based on the cheats they had the first time we faced them. You can use Feint on almost all of them except Cyrus Drake and Luska. Just blade, trap and Feint to kill the boss and minions. Minions only materialize when the Ghost Dog or Mithraya forms appear. Bring Shatter in case Gobblestone shows up and casts his cheat; a stacked Tower Shield, Legion Shield, and Brace aura.

Empyrea – Zanadu Sewers – Corporal Tenni’syn Gold Key Room

Corporal Tenni’syn is a boss located in the Zanadu Sewers.

The Sewers are a good place to farm for 125 level Robe and Stitch Robes. Wizards looking for some extra Critical and Damage will farm here for robes like the Radiant Light Brigade Armor witch gives 23% Damage and 110% Critical. This robe is a good choice for every school except for Storm. You can also get Crowns Gear like the Comfort Zone Hat, or wands like the Mirrorsphere Relic. Jewels like the Shiny PIP Hematite, or the Sparkling Critical Citrine, Amber, Pets, Couch Potatoes, and rental Mounts like the Gobbler, Light Blades, Junk-Copter, and Royal Lioness. There is a chance of getting Artisan’s or Master’s Socket Wrench and Gold Skeleton Keys.

Strategy: Feints are allowed once per round. Death can spam Bad Juju to decrease damage. The Wizard with the most resistance should join first. Stack every Feint you can including Potent and Treasure Card Feint. Scion should kill after stacking blades and traps in the fourth round.

Empyrea – Northeast Aeroplains –  Aethyr Elemental Gold Key Room

Aethyr Elemental is a boss located in Northeast Aero Plains near the bridge. Defeating an Aethyr Elemental grants the Aethyr Eater badge.

Farm here for Robes, Mastery Amulets like the Immutable Zanadu Pendant, or Wands like Sycorax’s Crook of Tempests with 85% Storm Critical. Empyrean Housing Items, Snacks, Jewels, and Pets like the Dark Hound. The Aethyr Cloud Mount drops here. There is also a chance of getting a Grandmaster Socket Wrench, or a Wooden, Stone or Gold Skeleton Key.

Strategy: Use Indemnity Feint on the Boss. Stun Block the main hitter. Stack traps on the Boss, then blade the main hitter and the secondary hitter to finish the fight fast. 

Well, what a trip! That is every Key room in the Spiral from Wizard City to Empyrea. We hope you had fun and found something new. Let us know what your best drop on the tour was in the comments below, or over at Ravenwood Community.

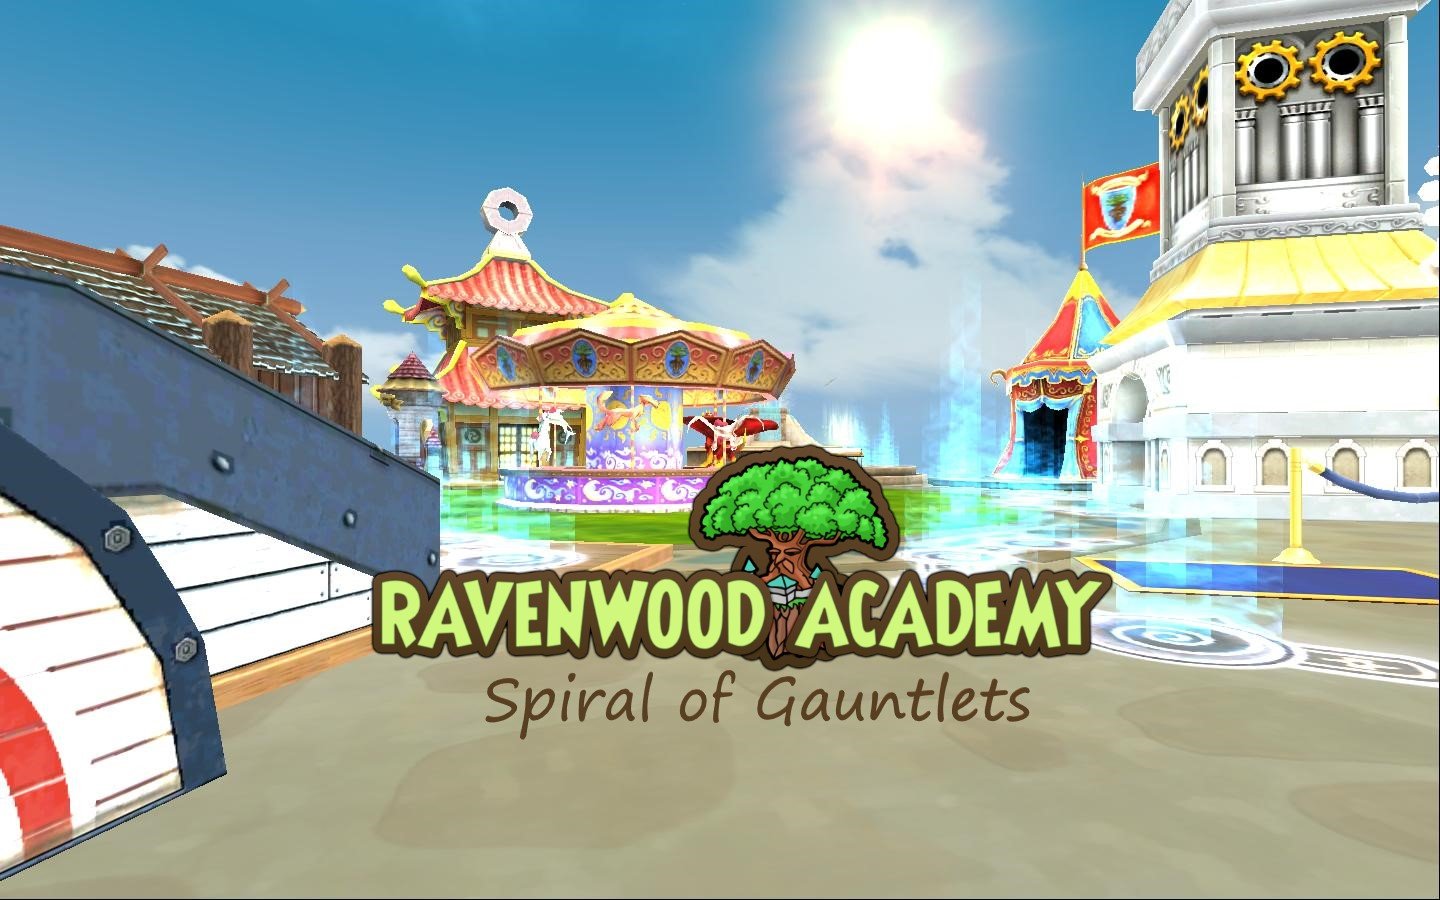
Ravenwood’s Spiral of Gauntlets

Community House Party!

This Saturday, June 27th, meet us at the Fairegrounds in realm Pixie at Noon EST for a lift to the party house where we will have Gauntlet runs and friendly PvP with the entire Ravenwood Community. Every housing gauntlet in the Spiral and 6 PvP rings are open at this free-to-play party. So, bring your friends and show them around!

Summer Fashion

But wait, that’s not all! This week, join us as we bring back a very special Ravenwood event.  Show off your fabulous summer stitch in the Summer Fun Fashion Competition for a chance at some amazing prizes!

1st Place – 5000 Crowns and a Charmers Mystical Flute
2nd Place – 2.5k Crowns and an Archangels Attire Set
3rd Place – A Sunflower Skimmer Mount

 If you want to be considered for this fashion event send an application in before this Wednesday at Midnight EST. Screenshots will be judged by the Ravenwood Academy Events team and published here for all the Spiral to see!!

Apply Here:
Fabulous Summer Fashion Application

Keep your eye on our Official Social Media channels for more details and updates as the event draws near. 

Our Official Porting Team will be at the Fairegrounds in Realm Pixie. Meet us there and a porting Wizard will bring you to the party!

Farm Castle Gauntlets with help from the Ravenwood Community Helping Henchmen and party with the community. Voice chat is available on Discord so you can hang out with your friends in real-time!

Follow Ravenwood Academy as Amber on Twitch to catch our events and other fun streams.

Available Gauntlets

The Accursed Play Gauntlet
The Great Clock Gauntlet
Grand Tourney Arena
Sinbad and the Iron Sultan Gauntlet
Spiral Cup Gauntlet
Midnight Sun Pagoda
Winterbane Hall
Fantastic Voyage Expedition
The Doomsday Krok Gauntlet

Porting Wizards

Look for the Official Porting Team at the Fairegrounds in realm Pixie!

Discord Moderator ManaSamantha LifeWhisper
Discord Admin HunterHunter StrongStone
Discord Admin CyclicGavin Bane
Discord Admin TraidAlexander FireBlood
Discord Admin ShadowAmber
Facebook Moderator Kenny – Michael Thunderblood

Add one of these Wizards to get a ticket to the party that will allow you to return all day long!

Helping Henchmen

Our community Helping Henchmen and Staff will be looking for teams that need a hand. We want everyone to have fun. Every level of Wizard is welcome and needed at the event. This might be a great time to start a new Wizard, or teach the game to a family member or friend. Don’t be afraid to ask out loud for a team, we will help you get matched up for maximum farming fun!

Follow our Social Media channels or join us on  Discord for more questions. We can’t wait to see you there!

Fire Guide to Max Damage

Guess which school has the highest damage boost of all the schools in the game?

Storm?

WRONG!

Fire currently boasts higher damage than Storm. Weird right? This is a trend that’s been happening since Polaris where the fire school gear has been getting higher damage than the storm school. Currently, the max damage the Fire school can output is 190%.

 Sadly, this damage is pretty much just for show, as you’ll find with the other max damage guides in this series.

So sit back and run around the commons showing off your total damage.

Disadvantages

Pretty much all of your other stats will be sacrificed for this build, but as I said before, this is a build to impress, not a necessarily a build you should use in a battle.

While Fire still boosts higher than Storm, Storm spells still have higher base damage, which sometimes goes over Fire’s total damage output in battle, or equals it. 

What you will need:

Hat: Fiery Paradox Hat (Dropped by Vigilant Sargun and Titan’s Trident in Empyrea)

Robe: Royal Fusilier’s Dress Robe (130+) (Dropped from the Yuletide Pack)

Boots: Fiery Paradox Boots (Dropped by Vigilant Sargun and Titan’s Trident in Empyrea)

Wand: Nimbari Centurion Scimitar (130+) (Dropped from the Nimbari Hoard Pack)

Ring: Duelist’s Daredevil Ring (130+) (PVP item Sold by Brandon Mistborn in Unicorn Way)

Athame: Edge of the Shadow Web (Dropped from Death Morganthe)

Amulet: Medallion of the Lower Zigazag (Dropped from Moh’Lharz in the Lower Zigazag)

Pet (2.0): Fire Dealer, Fire Giver, Pain Giver, Pain Bringer, Fire Boon, Mighty or Cautious Jewel

Deck: Ice Deckathalete’s Deck 4 (Deckathalon event)

Mount: Fire Ghulture (Ghulture’s Hoard Pack)


Gear Calculation Chart

Alternatives

If necessary,  you can switch out the ring and deck and you’ll still have super high damage (180+) that you can use in any battle. This will decrease your damage a little, but will allow you to use your damage outside of PVP and give you access to a TC and main deck.


Ring: You can use Mithraya’s Blazing Loop, available for level 120+


Deck: You can use the Case of Engulfing Flames, available for level 93+. 

Let’s ignite these flames together! Get it, Flames? Fire? 

Keep your eyes open for upcoming guides for all the schools very soon!

Let us know in the comments below if you have a way to boost your Fire even more without the aid of an NPC or elixir.

Check out the rest of our Gear Guides, we have a guide for every school at Ravenwood Academy!

Visionary Storm 100% Critical and Max Damage Guide

Ah the Storm school! The hardest hitting school and the easiest school to hit 100% critical. It is also the easiest school to balance super high damage with super high critical. Storm eclipses the other schools in that department but that’s not surprising since that’s what storm is all about, hitting high while trying not to die very quickly (intended shade). Currently, there are many methods to gain high damage and max critical with this school. We’ll explore the one that gives the highest damage while maintaining 100% critical. The current highest damage storm can achieve with 100% critical is 165% damage. The critical amount goes to 842 which is 100%.


Benefits

The Storm school is the hardest hitting school in the game. This means that they can end battles really fast. They have the highest critical in the game as well as the highest pierce. Their attacks are pretty deadly if they hit you directly. They also have quite a few spells that remove blades which is pretty cool, unless you’re fighting against one of course.

Problems

With this gear build, there are just a few problems you will run into. I would say not much is sacrificed compared to the other schools since this area is Storm’s specialty. If you run this gear you will have to sacrifice pierce, and a little bit of resist but you should be fine. Some schools will have to give up these factors along with accuracy but with this build, Storm usually maintains high accuracy. The other problem that you will encounter, which is not just native to this build, is health. Storm is notorious for their low health so this gear setup just reflects that.

What you’ll need

Robe: Malistaire’s Cloak of Flux

Hat: Stormy Paradox Conical

Boots: Stormy Paradox Boots

Wand: Sky Captain’s Boarding Hook

Pet: Triple damage Double critical pet with a Cautious Jewel

Athame: Aphrodite’s Storm of Thorns (with two (2) +18 critical Amethyst jewels)

Ring: Stormy Paradox Ring (With one (1) +18 critical Amethyst jewel)

Amulet: Flygob’s Medallion

Mount: Storm Ghulture

Deck: Stormy Paradox Deck

Total Damage: 165%
Total Critical: 842 (100%)

Storm Gear Setup

Calculations


Alternative Gear/Recommendations

So with the following gear on, Storm usually maintains 165% damage with 100% critical. The alternative gear will be shown at the end. You can also use the Lady of Spider’s Lure Amulet from Morganthe instead of the Flygob’s Medallion which will give you two extra blades.


What you’ll need

Robe: Malistaire’s Cloak of Flux

Hat: Stormy Paradox Conical

Boots: Stormy Paradox Boots

Wand: Wysteria Warrior’s Longsword (level 130+)

Pet: Triple damage Triple Critical pet

Athame: Aphrodite’s Storm of Thorns (with two (2) +18 critical Amethyst jewels)

Ring: Stormy Paradox Ring (With one (1) +18 critical Amethyst jewel)

Amulet: Flygob’s Medallion

Mount: Storm Ghulture

Deck: Stormy Paradox Deck

Total Damage: 160%
Total Critical: 838 (100%)

Storm Gear Setup

Calculations

Gear Calculations

Thanks for reading my guide on achieving 100% Storm critical in Wizard101. I hope it will help your Storm Wizard hit like a Hurricane as you explore the Spiral with your friends from Ravenwood Academy.

Check out the rest of our Gear Guides, we have a guide for every school at Ravenwood Academy!

PS. Credit to AtmoPlex on twitter for the wand screenshot!

Ice Guide to 100% Critical

You probably thought it was impossible to get 100% critical plus high damage with the Ice school, huh? Well, you’re wrong!

With Ice, this is the most difficult school to get 100% critical, even more so with balancing high damage with it. Ice doesn’t have the privilege of having high critical items compared to the other schools. For example, Jack Hallow’s wand sets all have 195 critical while the ice version is much lower. From my calculations, this Ice setup should give you 845 critical and 123% damage.

Benefits of the Ice School

The Ice school is a very powerful school in Wizard101. They have the highest amount of health and resist in the game. You’d think the Life school would take the trophy in that department. Ice is very flexible in the sense that they can defend, they can attack and they can assist their allies with shields in a battle. Usually, when I see an Ice character in PVP, I get scared since they can hit very hard with their spells yet defend themselves well.

Problems with this build

Well, Ice shouldn’t be a school that runs this build since their health decreases by a bit along with some other stats since the robe we’ll be using decreases health. We’re only using it because it increases damage by a lot. A substitute would be to use the Frosty Light Brigade Armor instead even though it will decrease the damage. At least you’ll still critical every Ice spell. I figured this school would be at a higher disadvantage than the others since KingsIsle built the Ice school to be a more defence-driven school which explains their resist and insane health. Personally, for this build, I’d replace some of the critical talents on the pet with more damage and replace the amulet with Morganthe’s Gem of the Grand Prophecy (gives 2 extra ice blades) but you can play around with it.

What you’ll need:

Robe: Glorious Avenger’s Armor

Hat: Icy Paradox Conical

Boots: Icy Paradox Boots

Wand: Polarian Explorer’s Pickaxe

Pet: Double damage quad critical pet

Athame: Shadow Spider’s Sting (with two (2) +18 critical Sapphire jewels)

Ring: Icy Paradox Ring (With one (1) +18 critical Sapphire jewel)

Amulet: Amulet of Neverwhere

Mount: Ice Ghulture

Deck: Icy Paradox Deck

Total Damage: 123%

Total Critical: 845 (100%)

Gear Setup

Gear Setup Note: You can alternatively use Morganthe’s Amulet (Gem of the Grand Prophecy) which gives 2 extra Ice Blade cards. It will just decrease the critical by 5 which still would register as 100%.

Gear Calculations

I hope you enjoyed my guide on how to unleash the critical potential of Ice school. Let it turn your snowstorms into  Blizzards, and let us know what you think in the comments below!

Check out the rest of our Gear Guides, we have a guide for every school at Ravenwood Academy!

Balance 100% Critical Guide

Ah the school of Balance! Arguably one of the hardest schools to beat in PVP. In addition, they can also achieve max critical and high damage. With this setup you can get around 130% damage and 839 critical.

Benefits of the Balance School

The Balance school is really amazing. They’re one of the most feared schools in PVP. Loremaster, Mana Burn and Supernova can all be deadly spells when used correctly. I usually always lose to Balance in PVP, so I hate going up against them.
 
Their wide variety of spells can prove to be very useful in certain situations. Yet, one disadvantage they have that isn’t shared with the other schools is a prism card. This forces them to fight Balance bosses without the option of a hit conversion spell. This can be very annoying in PVE. You’re forced to ask for help, which is not always possible since some dungeons are solo.

disadvantages of this build

 
 Of course when you boost certain stats, you run the risk of decreasing the others. In this case, pierce and power pip chance and resist might be reduced. You don’t really see many Balances running around with 100% critical these days. This is solely because they don’t really like sacrificing other valuable stats. However, it’s always nice to critical every hit you use.
 
For this build I would use the Morganthe’s Shadow of Amber amulet because of the extra blades. You can swap it out for the Darkmoor alternative if you’d like. It would increase your critical by 5 and increase your pierce a little.
 
Personally, I would adjust the pet slightly to allow for more damage. This would decrease your critical, but it would still be high enough to achieve regular critical hits. That’s the beauty about customizing your load out to your own specifications. You can adjust the damage and critical to suit you, as long as you don’t decrease one of them too much.
 
Another disadvantage is that the Balance school doesn’t have the 3% damage Ghulture mount. Unlike the other Ghulture mounts, it caps it at 2% which is unfortunate. This is because the Balance Ghulture gives universal damage, not school specific damage.


What You’ll Need

Robe: Virtuous Light Brigade Armor

Hat: Balanced Paradox Conical

Boots: Balanced Paradox Boots

Wand: Jack Hallows Guitar

Pet: Quad damage, double critical pet.

Athame: Athame of the Chosen one (with two (2) +18 critical Citrine jewels)

Ring: Balanced Paradox Ring (With one (1) +18 critical Citrine jewel)

Amulet: Travelling Dead’s Charm

Mount: Balance Ghulture

Deck: Balanced Paradox Deck

Total Damage: 129% (Rounded to 130%)

Total Critical: 839 (100%)

Gear Setup

Calculations

We hope you find this guide helpful in your journey as a Balance Wizard. What is your favorite way to use your Balance 100% critical set? Let us know in the comments below!

Check out the rest of our Gear Guides, we have a guide for every school at Ravenwood Academy!

Swing into summer friendship

Community Love

This May 2019 Ravenwood Academy is swinging into Summer with some great fun and friends. Nothing makes us happier than making new friends and sharing the Community Love. This month our friends from the Wizard101 Caffeine Team on Facebook will be joining us for a Community style House Party! It wouldn’t be a party without you! This is an all age community party, so come have some fun with us!

Previous slide
Next slide

We have everything a house party could need! Gauntlets, PVP, Hide and seek, and lots of friends to have fun with! 

See You There!

Join us Saturday May 25th at 4pm Eastern American Time. We will meet in the Myth Tower in Realm Troll. From there porting Wizards will bring everyone to the house party.If you can’t join us in Wizard101, the event will also be streamed on Ravenwood Academy’s Twitch channel.

Prizes

Codes and prizes will be dropped in the Twitch chat during the party. Be sure to tune into our Twitch live stream to learn how to win even more prizes! We listened to all of your suggestions. We will have Bundles, Crowns, Mounts & more! There will be fun for everyone!

We’re looking forward to this big house party and spending time with you! If you have any questions about this event, please email us at [email protected] or comment! 

FANSITE FESTIVAL FARMING 2019

Ravenwood Academy Fansite Festival farming event? Do you know what this is? No???? Well, it’s where all the Wizard101 and Pirate101 Fansites gather together to create something truly amazing for the community. 

This yearly event is organized by several members of the community who work hard together to coordinate with every fansite out there.

Ravenwood Academy is taking part in this year’s fansite Festival event.

Ravenwood Academy will be farming Lord Nightshade for Easter drops. Meet us in Realm Troll at 11 am Pacific Standard Time, Saturday, April 13th. 

Prizes!

Please tune in on our Twitch Channel https://www.twitch.tv/ravenwoodacademy at 11 am Pacific standard time for more information for prizes

If you have any questions regarding this event, please email us at [email protected]

We’re looking forward to having some fun with you, the community!

We had so much fun at the event with you all! Thanks to every Wizard we saw there. Congrats to everyone that won codes and prizes during the Twitch stream. The winners of the screenshot contest were:

1st: Steven Starbreaker prize Great Detective Bundle
2nd: Kane Moon prize Aeroplane Bundle
3rd: Erin Dragonheart prize Nimbari Hoard packs

Codes will be sent to your email!


Visionary Fire 100% Critical and Max Damage Guide

This is a guide on achieving high damage and 100% critical for Fire school at Visionary, currently max level 130. It is possible for all the schools in the Spiral to attain 100% critical. However, when you boost a particular stat, you decrease others. With this critical and damage build you will sacrifice resist, pierce and power-pip chance.

Note: All pets must be 2.0 (or max stats) for this guide to be successful.

Fire School

Ah the school of fire. This is my main school and I use this build questing anywhere outside of Empyrea. With my guide, Fire school can get 157% damage and 100% critical. This is one of the highest critical builds in the game, second only to Storm. 

Advantages of the Fire School

One of the main advantages of fire school is the d.o.t.s. or, damage over-time spells. With this build, fire dots or other spells can wipe out mobs in a single turn. You will also have over 6k health with this gear set. This high health is a huge advantage over the storm school, which boasts higher damage.

What You’ll Need:

The gear you need:

Robe: Radiant Light Brigade Armor

Hat: Fiery Paradox Hat

Boots: Fiery Paradox Boots

Wand: Kapudan’s Boarding Hook

Pet: Quad critical Double damage pet

Athame: Edge of the Shadow Web (with two (2) +18 critical ruby jewels)

Ring: Fiery Paradox Ring (With one (1) +18 critical ruby jewel)

Amulet: Talisman of the Daystar

Mount: Fire Ghulture

Deck: Fiery Paradox Deck

Total Damage: 157% 
Total Critical: 839 (100%)

Gear Build

 Calculations


Alternative Gear for high damage and 100% critical

 This setup is the previous Max damage and 100% crit that fire could have gotten before the new Sinbad and the Iron Sultan gear. This gives you 149% critical and 100% critical. 

What you’ll need

The gear you need:

Robe: Radiant Light Brigade Armor

Hat: Fiery Paradox Hat

Boots: Fiery Paradox Boots

Wand: Jack Hallows wand

Pet: Quint damage critical pet

Athame: Edge of the Shadow Web (with two (2) +18 critical ruby jewels)

Ring: Mithraya’s Blazing Loop (With one (1) +18 critical ruby jewel)

Amulet: Talisman of the Daystar

Mount: Fire Ghulture

Deck: Fiery Paradox Deck

Total Damage: 149% 
Total Critical: 844 (100%)


Gear Guide For Fire

Calculations

Check out the rest of our Gear Guides, we have a guide for every school at Ravenwood Academy!

Lucky Farming Day

Join us Saturday March 16th for our Ravenwood Academy Lucky Farming Event!

Meet your favorite community friends and staff members in Realm Leprechaun at 6 pm Eastern American Time at Lord Nightshades Tower. We will all farm Lord Nightshade together for lucky Saint Patrick’s day drops! In past years Nightshade has dropped items such as the Gold-Stringed harp and the Clover wand. There will also be other cool codes and lucky green prizes like Life Mastery Amulets, Treants, and Mystical Flutes!  See you then!

Prizes!

Treant 2 person mount
Life Amulet
Life Whirlwind mount
Sea turtle pet
Jade oni pet
Spiral Vine Rug
Charmer’s Mystical Flute
Shamrock of Spring wand
Farley’s Gardening Pack
Free Crowns

Please be sure to tune into twitch for more information during the event. If you can’t join us in game, you could still win a prize if you

If you have any questions regarding this event, please email us at [email protected]

A big thanks to, Kingsisle and Mathew “Sparck” Anderson for providing these amazing codes! 🙂