Crafting101 – Marleybone

Welcome to Crafting101 Wizard, or welcome back if you have been following along on this journey. Now that you have achieved your Apprentice Crafting Badge, I am sure you are excited to get the next badge, the Initiate Crafting Badge. Before you can begin this quest you need to get to Marleybone. In order to unlock Marleybone you will need to complete the last Krokotopia boss, Krokopatra. This purple Krokotopian boss is located in the Temple of Storms.

STEP 1 – FELICIA WORTHINGTON

Now that you have stepped out into Regent’s Square you are ready to track down Felicia Worthington to start the crafting quest. When you step out of the world gate room into Regent’s Square she will be down the road to your right. You will find the stylish lady hanging out beside the elevator to Digmoore Station. Once you find her and talk to her you will get the quest “Craft Services”.

STEP 2 – CRAFT SERVICES

Unlike the quest in Krokotopia, Felicia will tell you the 4 items she wants right off the bat instead of breaking it into two different quests. She wants 2 Stingers of the Scorpion and 2 Constellation Jewels. You will of course need to buy the recipes from Felicia, the Stinger costs 638 gold and the Jewels cost 675 gold. Since Felicia was kind enough to give us all the items we need to get to begin with, we can gather all the resources together! The Stingers will require 1 Citrine, 4 Glass Vial, 8 Scrap Iron, and 10 Mist Wood each, while the Jewels will require 1 Ruby, 2 Jades, 4 Glass Vial, 8 Scrap Iron, and 10 Stone Blocks. So in total for all 4 items we will need to gather 2 Citrines, 2 Rubies, 4 Jades, 16 Glass Vials, 32 Scrap Iron, 20 Mist Wood, and 20 Stone Blocks. This may seem like a lot of materials but if you gather items when you see them while questing you should get them all in no time!

STEP 3 – GATHERING THE REAGENTS

CITRINE –

You will need to get 2 Citrines in total. These reagents cannot be found and must be bought or farmed. You can buy these from Campbell Hodgson, the dapper dog beside Felicia for 15 gold a piece. By buying them you will spend 30 gold in total. If you have extra Ultra Dandelion, Ivy League, or Snap Dragon seeds these plants will drop Citrines.

RUBY –

You will need 2 Rubys in total. Rubies cannot be found in the Spiral, but you can also buy these from Campbell Hodgson for 15 gold per ruby. 30 gold will also be spent on these if you choose to buy them. Rubies can be harvested from Ivy Leagues, Snap Dragons, and Ultra Dandelions.

JADE –

4 Jades will be needed in total. You will have to buy or harvest these gems. Campbell sells these for 15 gold so you will spend 60 gold if you choose to go this route. Burning Snap Dragons, Snap Dragons, Ultra Dandelions, and Ivy Leagues drop these gems during harvest.

GLASS VIAL –

16 of these will have to be acquired. Glass Vials are yet again another item you will need to buy or harvest instead of find. Campbell also sells these for 125 gold per. You will spend a whopping 2,000 gold on Glass Vials if you choose to buy them. You can only find these by harvesting Burning Snap Dragons.

MIST WOOD –

If you do not already have a lot of Mist Wood, you will need 20 pieces of it. Mist Wood is common in the grassy areas of Wizard City or the sidewalks in Marleybone and Krokotopia. At the bottom of this list I have shown some of my favorite places to find many reagents in Marleybone, including Mist Wood. If you cannot find it you can buy it from the Bazaar if any is available for around 175 gold per. Dandelions, Fickle Pickles, Snap Dragons, Tiger Lilies, and Venus Fly Traps will drop these.

STONE BLOCK –

20 pieces of Stone Block is required for the items. Stone Blocks are fairly common to find, but not common at all in the Bazaar. Often times this reagent is sold out, so unless you want to spam refresh the Bazaar in hopes of being able to buy some of these, at 175 or so gold each, I would recommend trying to find them. Burning Snap Dragons, Snap Dragons, Fickle Pickles, Dandelions, and Tiger Lilies may drop this reagent at harvest.

SCRAP IRON –

Lastly, you will need to get a grand total of 32 pieces of Scrap Iron. I have some good news though, Scrap Iron can be found across the spiral and is fairly common in Marleybone. So while 32 pieces may seem like a lot, if you keep an eye open for reagents while questing in Marleybone, you should have them in no time! You can also buy them at the Bazaar for around 375 gold per 0-4 pieces. Burning Snap Dragons, Evil Magma Peas, Helephant Ears, and Venus Fly Traps will drop this reagent.

Here are some of my favorite places to find Reagents in Marleybone;

Near the teleporter hubs and teleporters there are often reagents to be found.

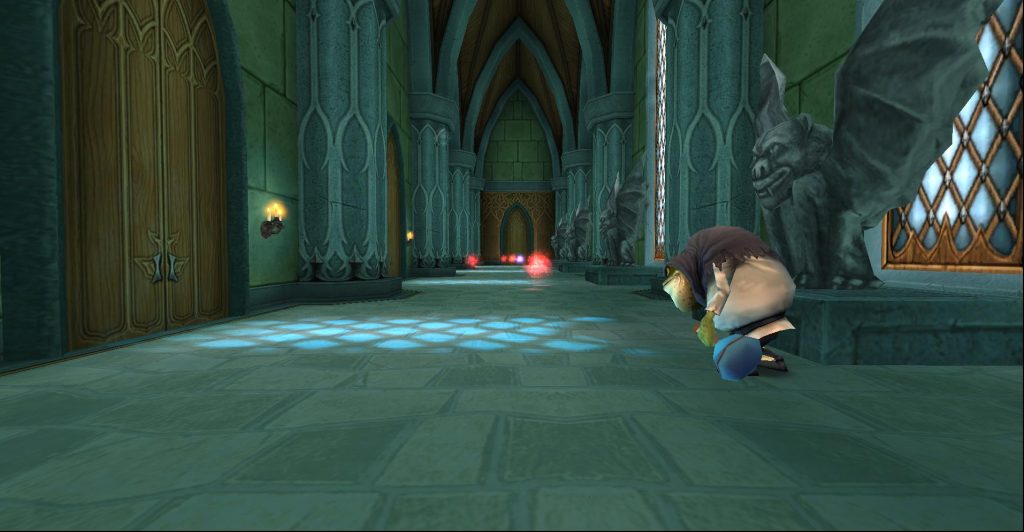
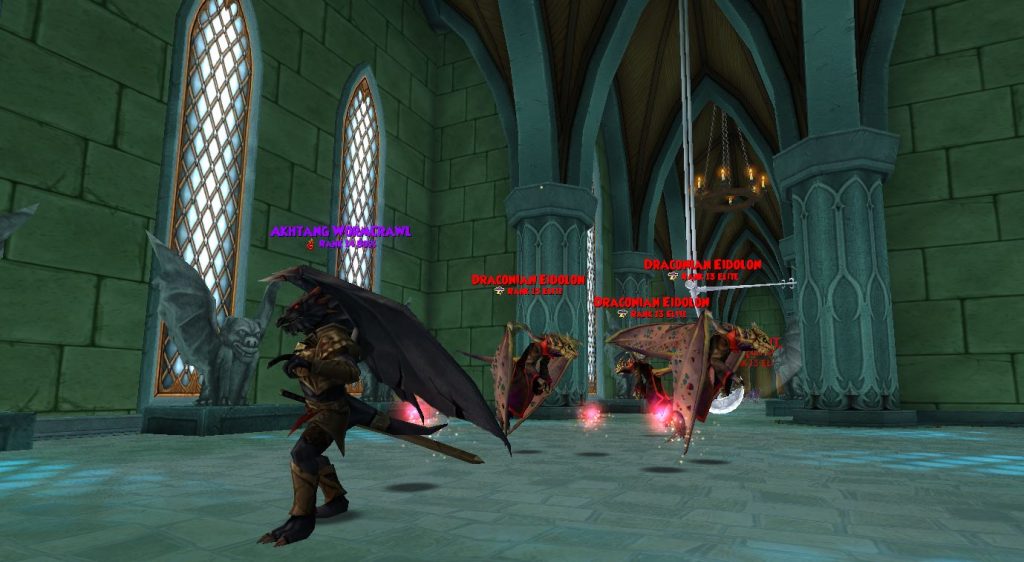
Near any of the walkways and clock towers or boss sigils there are plenty of reagents.

STEP 4 – COMPLETING THE QUEST

Now that you have all your ingredients, go back to your dorm and begin making the 2 Stingers and 2 Constellation Jewels that are required. You will have a 10 minute wait for members and a 20 minute wait for non-members in between some of the items. Once you have turned in your Stingers and Jewels, you will be awarded with 3,373 gold and your Initiate Crafter badge! You will also be given the next crafting quest, that will take place in Mooshu. Congratulations Wizard!

Crafting101 – Krokotopia

Welcome back to Crafting 101! Now that you have completed the first crafting quest, we are ready to move on to Krokotopia! In order to unlock Krokotopia, you must complete the story line in Wizard City and beat Lord Nightshade. Once you have unlocked Krokotopia, we are ready to begin!

STEP 1 – WUL’YAHM

Once you walk into Krokotopia and make your way into the Oasis, you will see two bridges to your left beside the pond. Take the 2nd one over to Wul’Yahm, he should have a golden question mark above his head. Talk to him to receive the next crafting quest “Ring in the New”.

 STEP 2 – RING IN THE NEW

Just like in Wizard City, you are not given the recipe for the item you must create. The Rings of Insight recipe will cost you 315 gold in Wul’Yahm’s shop. Once you have the recipe, you will notice it will cost you a few new items. The cost of one ring will be 1 Citrine, 6 Simple Vials, 4 Parchment, 6 Stone Blocks. You will also need 2 of these so in total you will need 2 Citrine, 12 Simple Vials, 8 Parchment, 12 Stone Blocks.

STEP 3 – FINDING THE REAGENTS

CITRINE –

As usual, the gem reagents such as Citrine must be purchased. In the Bazaar they will generally be more expensive, so I recommend buying them from reagent vendors. Behind Wul’Yahm there is a Desert Golem named Al Saf’Wan. He sells Citrine for 15 gold a piece. You can find Citrines also by gardening Ivy Leagues, Snap Dragons, and Ultra Dandelions. You will only need 2 Citrines for this quest.

SIMPLE VIALS –

Al Saf’wan sells Simple Vials for 40 gold each, you will need 12 so it will be 480 Gold. You can also get vials by gardening Orange Dandelions.

PARCHMENT –

Parchment is a reagent that can be found in the Spiral. It looks like a stack of paper on the ground. If you are having trouble finding all 8 of the parchment you need, you can buy it at the Bazaar when it’s available. It is often found in Krokotopia, so you should be able to find it as you are questing here. It can also be harvested from Fickle Pickles and Orange Dandelions. Here are some of the places I have found reliable for parchment in Krokotopia;

STONE BLOCK –

This reagent can be found in Krokotopia, and many worlds of the Spiral. The places shown above for finding Parchment are also great places to find Stone Blocks. You can buy them at the Bazaar or Crowns Shop. Stone Block can be harvested from Burning Snap Dragons, Dandelions, Fickle Pickles, Snap Dragons, and Tiger Lilies. Diego the Duelmaster also sells stone block for 50 tickets. You will need 12 stone block for this quest.

STEP 4 – COMPLETING RING IN THE NEW

With all the materials in hand, you can go back to your crafting table to create the Rings of Insight. Once you have crafted one of them you need to wait 10 minutes for members and 20 for non-members to craft the second ring. After the 10-20 minute cool down, you will be able to craft the next Ring and head back to Krokotopia to turn the quest in. Once you have spoken to Wul’Yahm you will be awarded experience, 855 gold, and your next quest – “A Set of Steak Knives”.

STEP 5 – A SET OF STEAK KNIVES

The last two items you will need to create are Poniards of Gallantry. The recipe should be purchased from Wul’Yahm for 261 gold. The recipe for these will require 6 Jade, 3 Simple Vials, 5 Deep Mushroom, and 6 Stone Blocks per. So in total you will need to get 12 Jades, 6 Simple Vials, 10 Deep Mushrooms, and 12 Stone Blocks.

STEP 6 – GETTING THE REAGENTS

We have already discussed how to get Simple Vials and Stone Blocks for the Rings of Insight above, so I will be discussing how to get the Jades and the Deep Mushrooms.

JADE –

Jade is a gem reagent you can buy from Al Saf’wan for 15 gold a piece. You will need 12 so you will have to spend 180 gold. The Gardening sources for Jade are Burning Snap Dragons, Snap Dragons, Ivy Leagues, and Ultra Dandelions.

DEEP MUSHROOM –

Deep Mushrooms are commonly found around the Spiral. They can be found in the grassy areas of Wizard City, especially in Olde Town and the Shopping Area. In Krokotopia I have found many of these in the Tomb of Storms along the walkways. If you do not want to look for Deep Mushrooms, you can buy them at the Bazaar. Boom Shrooms, Burning Snap Dragons, Snap Dragons, Dandelions, Deadly Fly Traps, Fickle Pickles, and Honey Bee Plants all have a chance of dropping this reagent. You will need 10 of these to complete this quest.

STEP 7 – COMPLETING THE QUEST

Now you have all the reagents for the Poniards of Gallantry and you can return to your house to create them. Just like before, you have a cooldown time after you create the first Poniard. Once you have finished crafting them both, you can return to Wul’Yahm and show him your work. He will reward you with experience, gold, and your Apprentice Crafter Badge! You will also get to keep the two rings that sell for about 15 Gold and give you a +3% Power Pip chance, and the poniards that sell for 52 gold and give you a 3% incoming health bonus. Congratulations on getting your next crafting badge!

Crafting101 – Wizard City

In Wizard101 there are many side activities that are not required but can add a little fun to your gameplay. These side activities can give experience, money, furniture, gear, and more. As you gain experience, you may even be able to craft your own permanent mounts!  Crafting is one of those activities that may seem a little tedious, but can yield great rewards! This guide will help you get through the first crafting quest in Wizard City and set you off on a crafting adventure.

 STEP 1 – EUDORA TANGLETREE

The first step is to find Eudora Tangletree in Olde Town. Once you enter Olde town you will go down the ramp past the Bazaar and take the first ramp to your left. Eudora will be on your left across a bridge beside Elmer Meadowgrass. Talk to her to receive the quest “Wizards in the Mist”

STEP 2 – WIZARDS IN THE MIST

This quest only requires you to collect 1 Mist Wood, which can be found almost anywhere in Wizard City. Mist Wood you already own and bought Mist Wood does not count, you HAVE to collect this once the quest is started. Just remember to keep an eye out in grassy areas for reagents while you’re out and about questing in Wizard City! Here are a few places I have found Mist Wood myself;

The grassy islands in the middle of combat roads is a prime place to find reagents of all kinds!

Unicorn Park in Unicorn Way has lots of reagents, including Mist Wood!

               Around the Boss Towers in Wizard City is one of my favorite places to get reagents!

STEP 3 – THE RAZOR’S EDGE

Once you have returned to Eudora Tangletree with your Mist Wood, she will reward you with 30 experience, and a Basic Crafting Station. She will then give you the quest “The Razor’s Edge”, which asks you to craft two Daggers of Absolution. Unfortunately, Eudora is not kind enough to give you the recipe for the daggers, you buy that from her recipe shop for 64 gold. As shown in the image below, it will cost us 2 Sapphire, 4 Black Coal, 2 Mist Wood, and 2 Cat Tails per dagger. So in Total, we will need 4 Sapphires, 8 Black Coal, 4 Mist Wood, and 4 Cat Tails to complete this quest.

STEP 4 – PLACING THE BASIC CRAFTING STATION

Now, before you can move on, you will need to go back to your home to place the Basic Crafting Station. Once it is placed, you can craft your recipes!

STEP 5 – FINDING THE REAGENTS

With the Basic Crafting Station ready to go, we can go into the Spiral to find the items needed for the daggers! There are many different ways you can get these items, and I will go over each item separately.

  MIST WOOD –

We already discussed where to collect Mist Wood, but you can also get this item from the Bazaar for around 30-33 gold. If you are a gardener, Mist Wood can also be found by harvesting Dandelions, Fickle Pickles, Snap Dragons, Tiger Lily, and Venus Fly Traps. This reagent is usually easy to find. You need 4 of these in total.

  CAT TAILS –

Cat Tails are common and are found in water. In the picture of Unicorn Park in Unicorn Way above, you can see one of these Cat Tails in the water to the right of the statue. Look in the rivers of the Commons and Unicorn Way, the pond beside the water wheel in Triton Avenue, and the rivers around Festival Park in Cyclops Lane. Keep an eye on the water! You can also buy Cat Tails in the Bazaar for around 170-175 gold. For you gardening wizards, the Cat Tails can be found by harvesting Dandelions, Honey Bee Plants, Tiger Lily, and Pink Dandelions. You need 4 of these in total.

  SAPPHIRE –

You will either need to either buy Sapphires from the Bazaar for around 75-80 Gold each or from the reagent vendor beside Eudora, Elmer Meadowgrass, for 15 Gold each. You will not be able to find these lying around the Spiral. You can harvest Sapphires from Burning Snap Dragons, Ivy Leagues, Snap Dragons, and Ultra Dandelions. You need 4 of these in total.

   BLACK COAL –

Black Coal will also not be sitting around the Spiral for you to pick up and will have to be bought. You can buy it in the Bazaar for 20-25 gold each or from Elmer for 5 gold each. Black Coal can only be harvested from Burning Snap Dragons and Snap Dragons. You need 8 of these in total.

STEP 6 – COMPLETING THE QUEST!

Now that you have all of the items needed, go back to your dorm or house and craft your first Dagger of Absolution. Notice that it will have a countdown of 30 seconds before you can create the other dagger. That is because you only have 1 crafting slot. Don’t worry though, after you finish this quest you will receive another crafting slot. You will get more slots as you complete more crafting quests.

Once you return the Daggers to Eudora you will get some gold, experience, and your Novice Crafter badge! Then you will be able to accept your next crafting quest in Krokotopia. Congratulations Wizard, your crafting adventure has begun!

Basic Deck Building

INTRODUCTION

This is a guide that is designed to help people build their decks accordingly, as a lot of people tend to overcrowd, under-pack, and/or leave out some useful cards.

This focuses on max level decks, however lessons learnt here can be applied to any level of play.

This guide is broken down into 4 categories of decks, of which each category will go into further specifics and detail: Offensive, Supportive, Healing, and Defensive.

Just remember that there is no rule to sticking to one certain build type. Logically mixing sets and types for maximum output within the game makes a whole lot of sense. A very basic idea of this is how Defensive and Healing can easily be mixed, for a little less here and a little more here. It’s not all about min-maxing.

We also recommend having multiple decks, and having each of them set up for their certain task. This will make going into battles easier and will ensure you won’t be That Guy who takes 5 minutes before every boss to “Fix your deck.”

Please note that we differentiate between a “boss fight” and a “dungeon”.  

A boss fight would be a single boss, no cheats etc.  A dungeon is, well… a dungeon!


OFFENSIVE

Single target hits ARE NOT always needed. While they may be useful in solo boss fights, all of the offensive schools have AOE hits that can rival a Single Target attack in damage. (e.g. Glowbug Squall VS Rusalka’s Wrath) Unless you’re in a boss fight alone, you typically only need a max of 4/5 blades, a few hits, and epics for those hits. And potentially some feints depending on the health of the boss.

  • This is an example of a basic, offensive Storm deck. With an amulet and pet blade, this can OHKO just about anything with a bugs or lord. Tempest would be used against really weak minions or to clean up low HP enemies.

  • This is an example of a basic, offensive Fire deck. The exact same principle as the storm deck, just fire!

Of course, the addition of traps, potents, and auras can all work to your advantage, too, should you require them.  However if you’re not alone, someone else can normally help out with these. There’s a lot of class specific traits too, Death’s LOVE to use frenzy but Storm tends to be a little too squishy for those drastic means. One thing I’d never recommend using are bubbles. For 2-4 pips, they’re usually not worth using! Try keep your Offensive decks slimmer and more concise. You don’t want someone dying because you couldn’t pull a hit!


SUPPORTIVE

This Class we’ve created is a little oddly named. But it is by far the most versatile and in some cases important role in the team. This role will consist of various uses, all very different yet important.

  • This variation of Storm deck would be used if you are required to spam hits in order to prevent a certain cheat. But it also allows for you to help set-up should the opportunity present itself.

  • This sort of deck is a set-up deck, including side. You aren’t hitting, merely making sure whoever is does so much damage everyone simultaneously says “overkill lol”. However should the enemy survive, your back up hit can clean up the 1k health or so.

Supportive by nature is there to support your team in whatever way is needed. You may be used to bypass a cheat system, set-up your attacker or help out with shields and healing. It’s an ultimate mix of whatever is needed by your team, but this is also the easiest build type to overcrowd your deck. Try and know what you’ll be doing more of before the fight, so you focus more on that. Important to note, if the main hitter is fully bladed and just waiting on pips or to pull, feel free to blade yourself up, just don’t hit. You don’t want to clear any feints or traps in place. Sounds obvious, but you’d be surprised!


HEALING

This one is fairly self-explanatory. You’re there to refill those little red spheres when they get low. This is by far the hardest role for anyone to just randomly pick up, and is normally very class dependent Eg: Life or Death

  • This is a pretty healing-focused Life deck. You worked your way up to 159% outgoing and you’re gonna make sure your team knows it! It’s just all about healing here. You’d also include some Pigsie, sadly I’m not that good.

  • This is a more balanced healing deck for Death. This allows them to pump out high intensity healing, but still provide some extra Support. This is more of a Supportive/Healing build. Healing in combo with traps, blades, feintsetc.

Healing is normally only really needed inside of dungeons. A core thing to note is you’ll want to expand on these decks further. Find what works for youReshuffles are also rather important. Running out of cards to heal your team is never a good thing!  It also wouldn’t hurt to incorporate shields into your deck, so support your team in a bulkier way, but that is for our next category!


DEFENSIVE

This is quite possibly the most useless of the classes, in modern Wiz that is. Nowadays the dream of an Ice or a Jade entering first to pull their aggression, with the rest of the team entering late doesn’t exist thanks to the wonderful addition of Late CheatsHowever it can still find use when used in combination with other class types. But the basic premise is shields, or debuff spamming the enemy.

  • This deck for Death would be used against a Storm boss. Of course this isn’t all you’d use, but these are the core ideas for this concept.

So you’ve got all your shields, and then all your weaknesses. Then you’re gonna wanna throw in some extra debuffs, soinfections, mantles etc. Lastly, adjust it to suit who you’re fighting, by changing out dispels and set shields! This class has basically been absorbed by Supportive and Healing builds in today’s game. But I figured I’d include it due to the cards being really useful and worthy of their own section. But these decks are basically used to increase your teams longevity, and make those pesky hits hurt a lot less! But alone they will be rather weak, so make sure to mix these in with other builds.


DUNGEON EDITS

This idea isn’t too hard to understand. Do some research on the Wiki and learn a bosses cheats. Then simply adjust your deck accordingly to help you better fight it!  You can find a variety of boss guides on this site to help you out! Below I’ll go through some nifty examples to help you understand:

  1. Omen Striborg: It’s kinda funny that the boss in this fight isn’t the challenge, it’s his minion with way too much health. However, you can’t blade! So no supercharge! But traps work, so get a fire to hit after using a backdraft or two, on top of a million traps.
  2. Rasputin: You’re gonna need to spam a lot of hits, as every time you do just about anything he’ll summon a minion.
  3. Malistaire: You’re gonna need to learn his cycle if you’re gonna wanna hit. He’ll clear all blades, traps, shields etc every 4 rounds. So pack multiple of each type of blade, you’re gonna need them. Also, Doom and Gloom is needed.
  4. Fight Club: This one is a pain to fight. You can’t blade other people, you have to spam hits, and you cannot feint. This dungeon is just not enjoyable all round.

So please, look up your bosses and cheats! You don’t wanna be that guy who triggers an enfeeble cheat the round you hit!

Darkmoor Strategy Guide

Hello Wizards, Amber Ravynsong here with the Darkmoor Strategy guide you all have been asking for. Darkmoor consists of three dungeons. First, Castle Darkmoor, then The Upper Halls, and finally The Graveyard. 3495 Crowns will purchase this area permanently, and 495 can get it for 6 hours. Start to finish, all 3 dungeons could be done in just under 2 hours if the strategy goes as planned. You are likely to spend a lot of time here farming for gear and helping friends do the same. Even more so if this is your first Exalted Wizard.


There are some new spells in the Spiral, and I run my strategy a little differently than some of the guides you may have read before. So, I will take you carefully through each boss and all 3 parts of the Area. If you follow this guide, you will have a much easier, quicker time getting through the dungeons, and getting those must-have Malistaire drops will be a whole lot more fun. So, let’s do this!

PART ONE, CASTLE DARKMOOR

Howling Chaney

The first boss we encounter in Castle Darkmoor is Howling Chaney. If you or your pet heals at all while in this battle, Chaney will hit you with Gnomes. That is Chaney’s only cheat, so stacking up some Feints and blades is the way to go. My preferred strategy is to stack a few Feints on the boss, then hit with something like Storm Lord, but blades are just fine here too. Chaney is easy, but don’t get used to it, there are bigger challenges to come.

SIR BLACKWATER

Next, we come to Sir Blackwater. Sir Blackwater will remove any single blades that you cast on yourself. “I Disarm you Wizard”If you are not life or fire you could self-cast spirit or elemental blades as he will only remove the last of the 3. If someone on the team is over-level, Aegis can be used for self-blading to thwart the cheat.

Even though Blackwater presents himself as Star school he has as much storm resist as any true Storm boss, so you will have to pack converts if you are Storm. Blackwater will Dark Pact to remove any weakness or universal traps such as Feint at the end of your casting round. Therefore, the only way to Feint this boss is to Feint the same round the attacker hits.

When we get to round 5, things start getting nasty with the boss casting pierce rings followed by Shadow school attacks within the same round. The ideal strategy here is to stack up as many blades on your attacker as possible in rounds 1-3. Have each team-mate besides the attacker cast a different Feint on the boss in round four while the attacker hits. If you follow that plan of attack, you should be done with Blackwater in short order.

After taking down Sir Blackwater, as you run up the stairs you will see a key door. Inside the room is a treasure chest only. The best drop you can get is a mastery amulet which also provides accuracy, a little damage, and a very useful Shadow Shield. If you were lucky enough to win a Gold Key in the last battle, use it here for sure.

The Howling Werewolf’s Collar is only one example of the Mastery Amulets that may drop here.

Continuing up the stairs, you will find yourself in the final area of Castle Darkmoor. There is a boss here you can fight if you fail the puzzle but this is not often done, as his drops aren’t worth mentioning and we still have many battles ahead. Run up to the crimson box and press X then up onto the platform pull down the center lever. You will see a spotlight on a far door which is the exit from part one, Castle Darkmoor.


PART TWO, THE UPPER HALLS


When you first enter the Upper Halls you will find a mob of Darkmoor Gargoyles at the end of a long hallway. It is not necessary for any reason to face this mob unless you are a completionist. They do not drop any important items and cannot be harvested for Animus at this time.

The first Wizard to approach them will be pulled into battle, but the rest of the team should simply run around this mob. Once the team has safely passed the first Wizard should flee and use dungeon recall. When approaching the mob the second time, the “pull” will not trigger and the first Wizard can run around the mob by heading straight for either side door.

This brings us to the first boss of the Upper Halls.

Akhtang

Akhtang is a Fire boss who likes to use Steal Charm to take your blades. So, no self-blades unless you have Aegis to enchant them. When any blade is cast Akhtang will “Rip it from you” This includes Elemental Blades, he will take the third blade from whoever received it. The only way around this is Aegis. This fight can be sometimes hilarious when the minions Insane Bolt and kill themselves, but that same attack can also hit you. Which is decidedly less hilarious.

This boss is quick and easy with the right plan. I suggest the Four Round Feint Kill strategy. Each round, a supporter casts a different Feint. The attacker will hit on round four. Blades are optional but appreciated. Shatter should be held in standby as a treasure card, just in case the boss decides to use a Storm Shield. We will use this same strategy next, and again in the Graveyard.

After defeating Akhtang you will be facing a Draconian mob. Unlike the Gargoyles before, these minions are worth fighting if you are collecting Animus. There is no cheat worth mentioning. They should be quick and easy to kill. However, you can also choose to simply run around them and continue to the next boss if you are in a hurry to get your new Spell.

Spirit of Darkmoor

The Spirit of Darkmoor is a Life/Fire/Myth boss and she resists those 3 schools. If you blade at all she will cast a Mass Scald. This attack can really add up to disaster for at-level defenses with all her pierce. So, I suggest no blades at all, to keep things simple and keep everyone alive. If you trap, she will hit you with an extremely powerful Myth wand attack. The only traps that do not trigger this cheat are mass traps such as Windstorm and Mass Feint.

This boss has lots of other nightmares in store for us if we let her live to cheat on round five. We don’t need to worry too much about that though, because we will use the Four Round Feint Kill strategy. Depending on your specific team, either divide up Feinting duties or try to heal and shield the Wizard with the Feints each round. We won’t talk about what happens on round five. If the worst happens, and you end up making it to round five, just flee and try again. For real. That rarely happens though, by round 4 we should be done and on to the next fight.

Shane Von Shane

Assuming you didn’t fight him instead of solving the puzzle this will be the first time you fight Shane Von Shane. You will face him again in the Graveyard, so remember the strategy and cheats we use here. If you or your pet heals, he will hit you with a very piercy 1k Vampire. That means, healing pets off. A healer can deliberately cast heals while facing Shane by first casting a death shield if the team needs that. This boss must be “spammed.” This means he must be hit every round by one teammate or he will start a series of cheats which end in your sure demise. The good news is, over time spells such as Scald, Deer Knight, Poison, and Elf do count as spam here for as long as the overtime tic is active. Our feint strategy won’t work here because any universal traps will be removed, even with Indemnity. The good news is, we can use other blades, traps, and shields freely with this version of Shane. It should be a pretty quick kill after a few rounds of blade stacking. Shane is the final boss of the Upper Halls, so after he dies if it’s your first time through you will be getting your spell on the other side of the porting lens.

PART THREE, THE GRAVEYARD

Welcome to the final part of Darkmoor, the Graveyard. This is the part of Darkmoor that you are likely to spend the most time in since the must-have Malistaire gear drops here.

YEVGENNY

The first boss inside the Graveyard gates is the zombie gatekeeper Yevgeny. Anytime a blade is cast this boss will stun the caster. On round five, Yevgeny will hit the Wizard with the lowest heath with a powerful Weaver. This often kills the receiving Wizard. The good news is, we can Feint. Again, we will employ the sure-fire Four Round Feint Kill strategy. If for some reason we get to round five, we will need to Shatter ahead of the hit. This boss is usually pretty fast, and the quicker the kill the better the drops. Be sure to check to see if you got one of the Graveyards prized drops, a no auction, school-specific damage athame.

SHANE VON SHANE

Yep, he’s back again, and this time with a mechanical robot body. This version of Shane has all the same rules as before with a few more. He is back this time as a Storm boss, instead of Death. If your attacker is Storm, convert is a must. Again, you will need a spammer and again you will want a Death shield before any deliberate heals. It is important to note, if you choose to blade, Shane gets a free Supercharge. In other words, if you choose to blade when his pips are high you are giving him free huge blades that could kill you. The best plan of attack here is to stack traps on the boss after converting. Then, add some blades when his pips are low, and Shane Von Shane won’t be a problem very long.

MALISTAIRE THE UNDYING

Malistaire is the final boss of the Graveyard and he holds the prized gear drops that everyone is after. The minions that spawn each time you face him are random schools. Malistaire will steal any universal blade or shield that is cast and he will remove any universal traps.

There are some exceptions to this rule that are important to note. If you are Balance and cast Bladestorm, he will only take your blade, not everyone’s blade. If someone on the team is over level 100 and has trained Indemnity, a universal trap such as Feint can be cast on this boss. If you are able to protect your blades with Aegis, they will withstand one cheat. Mass Feint will not be removed by Malistaire, and can stack with other traps.
 
After every fourth round, there will be an Earthquake. My preferred sure-fire strategy for a Wizard with at level gear and stats is as follows. Trap the boss for the first four rounds. Fifth and sixth round stack up some blades, and then hit on round seven or eight. Yes, counting rounds is necessary here.

They call him The Undying because when Malistaire dies the first time, he returns with even more health. It is the ideal strategy to cast Doom and Gloom on the kill round to counter-act this cheat, so be prepared with it in your treasure card deck unless you are the attacker. Ideally, after the boss dies someone lifts the Doom as soon as possible with Sanctuary or even just a school ring such as Darkwind. When Malistaire returns in shadow form, his dragon rebels against him and casts a 100% Feint. This makes killing him the second time that much easier. Use the same strategy as before to send him to the after-life for good this time, and good luck on drops.