Waterworks Guide

Most of us have done this dungeon, whether you were farming for mastery amulets, mega snacks, or your level 60 Legendary gear, Waterworks is your friend for all of that. In this article, I will explain how to beat Waterworks, what you’ll encounter, and what to expect. Without further ado, let’s get started.

Entrance

When you first enter the dungeon, you’ll be underwater. No enemies are present here. Pull the lever and go on to the first room. Stop at the entrance to plan out your strategy for the fights that follow.

Room 1

In this room, you will encounter four enemies. Two Fintooth Warlocks (Death, 2,560 health) and two Slithering Eels (Storm, 2025 health). They do not cheat, but they do have considerable resist toward their same school. The best strategy for this first fight is to have your team prepare blades for a hard-hitting hit all spell. They’re easy mobs that you can kill in 2 to 3 turns, max.

The next fight is a little harder, but it’s doable. Here, you will face two Hydromatic Drones (Ice, 2,735 health) and two Rivershell Guards (Storm, 2,095 health each). The Hydromatic Drones love to spam Frost Giant and Tower Shield to make your life a little more difficult. The best thing to do is to blade up as usual and use hit all spells. After you’re done with this battle, this concludes the first area. Pull the lever and you’ll be ready to move on to the next area.

Room 2

Puzzle: Here, you’ll be met with a puzzle. It’s fairly easy, but you must move fast. You will need to open all the blue clams to advance to the next floor. Avoid the yellow clams at all costs or you’ll summon four enemies, and while they aren’t hard, you will waste valuable health and time. After solving the puzzle, you will be granted health wisps, which are very handy for the boss ahead.

Boss Fight: After the blue clams have been opened, you’ll encounter the first boss in Waterworks, Luska CharmBeak. He is a balance squid with 21,150 health, but he has some pretty massive fire and death cheats. He drops the Waterworks Hat and occasionally, mastery amulets. How this boss works is pretty simple.

You can’t put any traps Luska or he will remove them and follow up with a massive Power Link or Skeletal Dragon that does 1100 per turn for 3 turns. AOE Traps such as Windstorm are fine, and pet traps will not trigger this cheat either. Multi traps like Fuel are not allowed by Luska. Only the first trap gets removed but it will still trigger the Skeletal Dragon.

You can only attack Luska if you have been “inked.” The wizard who is inked can hit Luska with any type of spell, but if you’re not inked, you can only attack with hit all spells. The wizard occupying the first spot will immediately be inked and as Luska’s health drops lower, he will ink the second wizard and soon enough, the third wizard. The fourth wizard will never get inked, so your best idea will be to put a support wizard last since they don’t need to hit. He can be an easy, straightforward boss if you have a hitter in the first spot and avoid traps. After defeating Luska, pull the lever and move on to the third area.

Room 3

Fight 1: Here, you will face two Fintooth Marauders (Death, 2,715 health) and two Wingfin Slicers (Fire, 2,190 health). They do not cheat. Blade up, use a hit all spell, and the mobs should be dead. After they’re dead, you’ll proceed to the next battle.

Fight 2: Here, you will face two Stormtide Elementals (Ice, 2,705 health) and two Rivershell Shamans (Balance, 2,430 health). Just as before, they are an easy mob battle. Blade up and use a hit all spell to eliminate them, then pull the lever and head into area four.

Room 4

Puzzle: In this room, before you battle anything, you’ll be met with a puzzle. It’s a simple puzzle to solve. When you read the instructions they will tell you “Start here to play follow the leader.” An eel will appear and will start touching various levers. Follow the eel and pull the levers in the same order. If you fail at the puzzle, you will face 4 Slithering Eel enemies, they are storm with 2,025 health each. After this puzzle is done, proceed to the next phase of Waterworks.

Fight 1: Here, you’ll face your last set of mobs. You will face two Riverclaws (Ice, 2,690 health) and two Celestian Constructs (Moon, 2,670 health). There’s nothing special to it, blade yourselves and use a hit all spell, but do remember that the Ice Riverclaws can use Frost Giant and Tower Shield. After defeating this set of mobs, pull the lever and head back to the main room to drain the valve.

Main Room

Final Fight: Pull the lever and you’ll be greeted by three bosses. Sylster Glowstorm (Star, 24,980 health), Water-Wing (Fire, 8,190 health) and the Spellhammer Sorcerer (Death, 6,560 health). The enemies might look easy enough at first, but they have some nasty cheats that you must consider.

Sylster Glowstorm: Sylster drops the Waterworks Robe and Boots, as well as mastery amulets. When the battle begins, Sylster will put up a Doom and Gloom bubble and say, “Traps go undetected in the Light”. This means you can’t hit Sylster (or any of his allies) unless there’s a trap on them. It’s important to note that the trap doesn’t have to match the school of attack you’re using. For example, I won’t trigger Sylster’s Ra cheat if there’s a Myth Trap on him, but I choose to hit him with Leviathan instead. Any trap will prevent the cheat.

After four turns pass, Sylster will change the bubble and say, “The blade goes unseen in the dark.” Just like the trap cheat in the previous cycle, you can’t hit Sylster (or any of his allies) unless you have a blade on. If you fail to abide by Sylster’s rules and use a trap or blade in the correct cycle, he will hit you with a powerful Ra at 2,000 plus damage. The Water-Wing uses a weak Rebirth that doesn’t give absorb, and the Spellhammer Sorcerer uses a weak Scarecrow, so their cheats are less of a threat. I recommend counting the rounds so you know when to use Blades or Traps. Hit all spells will not trigger Sylster or any of his allies’ cheats during either cycle, so if you lose track you can safely cast that.

Spellhammer Sorcerer: He will take over Sylster’s Doom and Gloom cheat cycle if you kill Sylster first. He uses a weak Scarecrow if you fail to hit him with a Trap or a Blade.

Water-Wing: He will take over Sylster’s Doom and Gloom cheat cycle should both his allies be defeated. His cheat is a weak Rebirth if you fail to hit with a Trap or a Blade.

Bonus Glitch

Are you tired of running Waterworks, again and again, hoping to get your gear?

In Waterworks there is a glitch to make Sylster re-spawn without running the entire dungeon again. In order to do this, the entire team must remain in the dungeon together. All you have to do is have three of your teammates wait in the room where the battle just completed while the fourth goes into another room inside Waterworks. When the fourth Wizard returns to the team, Sylster will return for another battle. If done correctly, you can have infinite attempts at Sylster’s drops without having to run the dungeon each time.

Final Thoughts: Overall, Waterworks is a fairly simple dungeon with a decent drop rate. Most get their Waterworks gear within a day of farming, which is good because Waterworks gear is crucial to have. That said, I wish everyone the best of luck in farming Waterworks and getting their Legendary gear!

 Written by Ross Shadparvar

Hunting for Beasts

Part of the Summer 2019 update,  is the addition of a new challenge!  It’s called the Beastmoon Hunt, and it’s not only a challenge but loads of FUN!  

I’ve been hearing that there are quite a few people that don’t understand it or are worried that it’s just a PVP event.  Well, I’d say it’s more like “Capture the Flag” with touch of PVP added.  You can join a hunt by clicking on the icon of Gamma in the upper right hand side of your screen.  But I highly recommend you go to the Arena, where the features of the Beastmoon Hunt are located.  You’ll want to start by chatting with Artemis New Moon.

Artemis New Moon is the NPC you will start out with.  She explains the basics of the hunt.

After joining a match, you will be transported to the Beastmoon Hall, where you will select the Beast Form you wish to play as (Balance Cyclops and Death Ninja must be unlocked by upgrading the tier at the Beast Form upgrade Kiosk). There are 10 Beast Forms available. 

When you have selected your form, I advise you speak with Actaeon, to see what extra cards you may purchase from him.  You can find Battle Coins in the gold chests that are scattered throughout the hunting grounds. You can also get them from harvesting Beastmoon seeds. 

Next to Actaeon, up some stairs, you will see a portal.  The portal will be either red or blue, depending on which team you were placed on.  When you enter the Beastmoon Hall, a timer starts on the portal.  You have 30 seconds from entering the hall until you can go through the portal to the hunting grounds. This gives you plenty of time to stock up on some extra spells.

Entering the Hunting Grounds

Upon entering the hunting grounds there will be a map in the upper right corner of your screen.  You will be able to see where your team mates are (but not the opposing team, unless they are in a battle).  Each corner of the map has a ring,each with it’s own designation, Moon, Eye, Sun, and Star.  The center ring is named the Spiral.   

Throughout the hunting grounds you will see Pip Wisps.  Collecting these pips will give you an advantage in the next battle you enter, allowing you to start with extra pips(Extra starting pips can make a big difference in a battle). They are only good for one battle, so you will need to get more after each battle.  

Battle Coins can only be used in the Beastmoon arena. Each team member can collect up to 100 Battle Coins.  They will be used for purchasing extra spells from Actaeon in the Beastman Hall.  You collect them from the Golden Beastmoon chests scattered through the Hunting Grounds, and from harvesting Beastmoon seeds (You receive these seeds as a reward after a hunt has ended).

Battle Rings are what you want to capture.  When you first enter the hunting grounds, they will all be grey. As they are captured by standing on them, they will turn that teams color. The first time a ring is captured it will only take 10 seconds to capture it. If you are trying to capture a ring that is the other teams color, it will take 30 seconds. An exception to that is if more of your team-mates also stand in the same circle, the timer ticks down faster. 

Scattered around the hunting grounds are Health Urns with health wisps in them. Walking up to an urn will restore a portion of your health. You do not automatically recover health after battle, so you will want to use these urns to get back to full health. You can also return to your base through your portal, to recover health.

Located at the top and bottom center of the map, are Yellow Teleporters. They will port you from the bottom of the map to the top or from the top to the bottom. You will want to utilize these to quickly get from one area to another. On the right hand side of the hunting is the teleporter to Blue team’s base and on the left side is the teleporter to Red’s base. You can only use your own team’s porter and base.

Point System

You will gain 1 point for every circle you capture. You also receive another point for each circle you control. If you capture a circle you will gain 1 point.  If you capture a second circle, while still having control of the first one, you will gain 2 points (2 for the circle you just captured and 1 for the circle you already control) for a total of 3 points.  The more you control, the more points you will receive.  It’s very important to control as many circles as you can.

Unlike an empty circle, circles that are challenged by battle will award a lot more points when you capture them. When you win a contested circle you will receive 5 points. The main circle in the center(The Spiral) will give you 15 points if your team wins a battle there against the other team! Winning a circle through battle will award you bonus points based on the amount of circles your team already controls, and, even more points for defeating the opposing team.

You will receive 2 points for defeating an opponent. Points are calculated at the  end of the battle, so just defeating one opponent but then losing the overall battle will not award you any points. You must win the battle to receive the points for it. When defeated your opponents return to their base and will receive a 30 second penalty before they can use the teleporter to return to the battle arena. The same applies to you as well, if defeated. 

If you flee, it will immediately award the opposing team 2 points, as it is counted as a defeat. Try not to flee unless there is a strategic move for it. If your team is ahead in points and your teammates need help in other circles, then it can be a wise choice. Just like with a defeat, you are sent back to the Beastmoon Hall for a 30 second cool-down, before being allowed to rejoin your teammates. Knowing when to flee or not, can be crucial to the outcome of the hunt.

Rewards

Lunari
Lunari are the coins you collect that are used for  all of your Beastmoon-related needs. You use them to level up your rank and to level up your tiers for the various beastforms. They will also be needed to purchase recipes for the special Beastmoon robes and Beastmoon seeds. You are awarded Lunari by winning battles in the Beastmoon event, participating in the Scroll of Fortune and as a reward in your Beastmoon Hunt Panel. You will receive Lunari based on how many points you earned for your team.  The more points you earn, the more Lunari you will receive.

Moonstones
Moonstones are special reagents that you will need to upgrade your Beast Form’s levels. They drop from the Beastmoon Hunt and from Beastmoon seeds.

Thread
An easy to get drop that you can receive from the event and seeds.  You will need this to craft the Beastmoon Robes, which are available from Actaeon. They drop from the Beastmoon Hunt but if you plan to craft the robes, you will need to get extras by gardening Beastmoon seeds. There are threads for all of the schools.

Beastmoon Seeds
Beastmoon Seeds are special plants that drop Battle Coins, Threads, Moonstones and Idols. You will need these to upgrade your Beast Form level and tier. The different Beastmoon seeds will drop different rewards. They can only be planted in  Beastmoon Planters. You will receive 2 planters after your first hunt (win or lose). You will then get a 3rd after your 25th Beastmoon match.

You can get the regular seeds by participating in the hunt, and you can also get them from the hunt rewards panel and from the Scroll of Fortune. Elemental and Spirit seeds are very rare drops. No worries though as you can purchase the recipe for them from Actaeon. The school specific Beastmoon seeds are the rarest of all. They are available only from the recipe purchased from Actaeon. School-specific Beastmoon seeds are one of the only ways to receive the  Beastmoon idols needed to get your Beast Form to level 5 and to level up your tier on your Beast Form.

Badges

There are badges galore to be earned by participating in this event. There are badges for unlocking Beast Forms, maxing out Beast Forms, and for unlocking tiers. There are also badges for winning and participating in matches. All total there are 60 new badges, 9 pages in all! How about that! Badge collectors will be hard at work collecting them all.

Handy Dandy Tips

  1. When entering the Hunting Ground, split into groups of 2. Each group will head to a different battle ring. Having more than one team member on the same ring makes the timer go quicker.  This will allow you to get control faster.
  2. Always make sure there is a healer on your team.  Familiarize yourself with the healing Beast Form in case no one else assumes that role.
  3. Collect as many chests as you can, so you have plenty of coins for extra cards.
  4. After capturing a battle ring use the colored rings in the pathways for a speed boost.
  5. You must stand on the battle ring, until the color changes for it to be captured.  If at all possible always try and have more than one player capturing the ring, so the timer counts down quicker.
  6. Healing Urns are located near each of the battle rings, always make sure you are at max health after battle.
  7. And most important of all, have FUN with it!

All in all, I find this to be a wonderful addition to the game and look forward to participating in it again.  I hope this has helped you understand the Beastmoon Hunt and gets you on your way to becoming a Beast-Master!  Let us know in the comments any tips you might have that I haven’t covered here or just about your experience with this amazing event.

7 Tips for New Wizards

Navigating the Spiral can seem overwhelming when you first enroll at Ravenwood Academy. There are so many things I wish I knew before I started playing. It would have saved me a lot of time and frustration.
 
Don’t struggle like me. In this article you’ll find gear, pets, gardening and more. Here are my top 7 tips for getting started in Wizard101.
 
If you have any more questions, there are tons of other Ravenwood Academy articles that can help you out!

1. SPEAK THE LANGUAGE

Wizards are so busy studying they have no time to type a world’s full name. That’s why you’ll find Zafaria being shortened to ‘zf’ and Krokotopia to ‘krok.’

Here’s a list of other common terms to help you navigate the Spiral.

  • Treasure cards or ‘tc’ – Cards that can be put in your side deck. These gold colored cards disappear after being cast one time.
  • Training Points – Points that can be spent to train spells from schools other than your own. This includes Astral and Shadow spells.
  • Critical or ‘crit’ – The chance a Wizard has of doing extra damage to opponents.
  • Block – The chance a Wizard has of blocking a critical attack.
  • Shadow pip or ‘shad’ – Refers to the pips required to cast shadow spells.
  • Max / max Wizard – This usually refers to a Wizard who is the maximum level at the time. Currently it’s 130.
  • Reagents – Ingredients used to craft certain items.
  • AOE Spells – An attack that damages all enemies.
  • Side deck – The part of your deck where treasure cards are stored.
  • Mega snacks – Rank 8/9 Snacks you can feed to your pet. This is how your pet gains talents that help your Wizard.

    Look for more articles on terms in the near future from Ravenwood Academy.


2. Suit up for battle appropriately

A common problem for new Wizards is the overwhelming selection of gear. When questing, you’ll get a lot of drops from battles. Most of it won’t be useful for your particular Wizard’s school. Players often ask, “How often should I change my gear? What gear should I use? Does this hat bring out my eyes?”
 
Before level 30, I don’t worry about stats much. Questing with gear that drops as you go should be enough to get you through the storyline. Upgrade your gear when something drops that matches your School with higher stats. Avoid socketing jewels unless you are sure the piece of gear will be useful long-term.
 
If you’re looking to outshine your fellow Wizards, I’ve got some level 5 recommendations. These will serve you well until level 30.
 
Most of the drops are from Wizard City’s final boss, Lord Nightshade. If you’re not willing to spend time farming for the gear, it’s also purchasable from the Crowns Shop. 

HAT

ROBE

BOOTS

Here is a more in depth guide on level 5 gear.

At level 30, Mount Olympus will be the next place to get gear. It’s the first dungeon in the side world Aquila. Zeus drops some quality items that most Wizards use until level 60. Cyrus Drake gives the first quest in the Aquila story line so make sure to pick that up! It’s called Quest for Glory.
 
The Sky Iron Hasta is a guaranteed drop from this dungeon. This wand gives Ten damage and a power pip, which is excellent for any school. The Zeus or Senator sets should be your goal. They give amazing stats for every school and add a little visual flair to your Wizard.
 
There are a few notable gear sets that you should go for at each level after this:


Level 60 – Waterworks or House of Scales Gear

Level 100 – Darkmoor Gear or alternatives (Exalted Krokopatra/Rattlebones)

3. Sometimes less is more!

A common mistake that many wizards make is stocking their deck with all their cards. You will waste rounds trying to find the card you need, giving the enemy the upper hand. As you get used to combat, you’ll realise you don’t need everything for regular questing.

The likelihood of you drawing the card you want increases when your deck has less in it.

 Know you don’t have to add every card you’re given!
 
I like to have aoe spells, a few blades and some single hits for bosses or clean up. My side deck contains blades as well as monstrous tc.
 
If you have the gold, I’d recommend picking up some of these treasure cards. Your attacks will be significantly more effective. Different kinds of blades stack, and enchants like Monstrous increase the base damage of spells.
 
For example, this is my myth deck at level 27.

Main deck

Side deck

4. Save your training points

One of the most common mistakes new Wizards make is wasting your training points. You get one training point every 5 levels. The only other way to get them is by completing the Professor Zeke quests around the Spiral. 
 
Training a ‘secondary school’ is ineffective in the games current state. If you face your own school in PvE, converts are there to help you.
 
Before level 50, there is little need to spend training points. The only spells I would go for with training points are Feint, Satyr and Tower Shield. If you’re looking to PvP you may need different spells. Research how to spend them wisely.
 
Once you unlock Celestia, it is a good option to spend your points on the sun and star school spells. You are able to train the enchants I mentioned before. Unfortunately you’ll have to have enough to train them all to get the highest one.
 
Unless you seek to collect moon school spells, they serve little purpose in the game. Wizards commonly regret spending their training points on them.
 
I recommend using a training point calculator to plan out how you are going to spend your points. Once you spend them, the only way you can get them back is with a hefty amount of crowns. Be careful!

5. BE HAPPY WITH YOUR IDENTITY!

When you first enroll at Ravenwood School of Magical Arts, you will choose your name and school. Be careful about this, you don’t get to change it later. To help you choose your school, here’s an outline of each

Ice – High health. This class is intended to be a tank. To balance this out, Ice does less damage than the other schools.

Storm – Has the highest base damage of all the schools. However, they have the least health and less accuracy.

Fire – High damage, can use damage-over-time-spells which are extremely effective in PvP as well as questing. They are powerful but have more health than storm.

Death – Considered by many to be one of the best schools for questing. They have good health and damage. Many Death spells damage the enemy while healing the Death Wizard.

Myth – Can summon lots of minions to help them in battle. Good health, damage and their spells have a lot of utility. 

Life – Heals others! If you’re a support player, this is for you. You can build life to be a tank and to protect your teammates. The downfall is that they do less damage, like Ice.

Balance – An amazing utility school. Has various buffs that can be applied to others. However, they don’t have very many themselves. If you’re not intending to solo quest, I’d consider balance.

6. BE HEALTHY FOR BATTLE!

If you walk into a battle with 300 health, chances are you’re going to end up with your head spinning. You may think it’s unavoidable in dungeons where health whisps are absent. Yet, your wizard training has prepared you for this situation. You’ve got potions that will restore your health and mana.
 
What happens when I use them all?
 
You can refill your potions two different ways. The first is to play mini-games at the Fairground in Wizard City. If you don’t have time for that, you can refill them with gold from Hilda Brewer outside the Fairground.

7. You’ll need your crowns later

Crowns are valuable, you don’t want to spend them all in the first 50 levels. 

I suggest investing in a mount you like since running everywhere slows down the game. If you’re struggling with questing, consider the level 5 gear above. However, all of that gear is also droppable by relatively easy bosses.

Stitching is an inefficient use of crowns at a lower level because you change your gear so frequently. Sitching and unstitching costs 100 crowns each. 

This applies to pack gear as well, it gets better every 10 levels.

You’ll need crowns for chest rerolls, energy, pet training and much more! Spend them wisely

I hope these tips give you a better idea of how to play Wizard101! You can find more tips on Ravenwood Academy and at the Wizard101 Official Forums. The Official Forums are a great way to make friends and Interact with the community too. Take a look at these other great articles for new Wizards on Ravenwood Academy.

Good luck with your adventures!

Gardening101

This article will introduce you to gardening in Wizard101. We will start with the basics a new Wizard101 gardener needs to know.
 

Why start Gardening?

There are a lot of reasons to start gardening in Wizard101.  The most common reason a young Wizard might garden is for pet snacks.  Pets play a very important role in your gear and stats, and to train one you’ll need snacks. Gardening is one of the best sources of Mega Snacks in the game!
 
Another popular reason is for reagents. You can harvest rare reagents including Amber, Blood Moss, and Springs by gardening.
 
Plants can also give gold and treasure cards. A well-maintained garden can supply your Wizard with constant gold!


Plant Stages


Seedling: A seedling is the plant as soon as you’ve planted it.  It won’t develop needs, and there’s not much to do but wait.


Young: The first stage of growth.  It will take longer to reach the next stage and will have needs you have to attend.


Mature: This stage takes the longest, has the most needs and requires the most work to maintain. In this stage you also start collecting rewards from your garden.


Elder:  At this final stage your plants will no longer require any tending and can be left for as long as you like.  It is here that you get the best rewards.


Wilting: This is the first stage of a dying plant and it occurs if you fail to meet a seed’s needs.  You can correct this stage by meeting the seed’s needs, but the plant will reset to the Young stage.

Dead:  This is the stage your plant will reach if you completely ignore it. It will cost 30 energy and the Revive spell to get it back if you let it reach this stage.

Soil Types

 
In Wizard101 we can’t plant any seed on any soil plot size. Each seed has a specific soil size. It is important to know that each size comes with an Enchanted version that some plants may need.


Small Soil

Medium Soil

Large Soil

Growing Spells

Sunlight

Water

Pollination

Magic

Music

You will often find your plants needing one or more of these five things. These are growing spells, they allow your seed to grow to higher stages.
 
You can access better versions of these five spells at higher gardening ranks. You will meet Farley’s many cousins in other worlds of the Spiral as you level up in game. These higher ranked spells will allow you to tend many plants with the use of one spell.

Pests

Pests are just that, pests!  They’re little bugs or other annoying beings that like to come and eat away at your healthy plants. 
 
Taking care of your plants by killing pests is a necessity.  Wizard101 pests can range from ranks one to seven. Stronger pests need stronger spells to treat them.
 
Learn these spells from Farley and his cousins like the other gardening spells you have learned.

Concepts to Understand

Likes

Dislikes

Needs

A ‘like’ boosts your plants growth speed.
 
A plants likes can be many things. For example, a furniture item, another seed, and even some houses can be ‘likes’.
A ‘dislike’ decreases your plants growth speed.
 
These can be anything from a furniture item, another seed or a specific house.
A ‘need’ is something your plant needs to prevent it from dying.
 
These include water, sunlight, music, magic, pollination and pest control.
 

Beginners Tips

There are many little things I wish I knew when I started gardening. Knowing these will make your life easier, so let’s have a look.
 

House:  Some houses provide an immediate Like to plants. The current houses to offer this benefit are the Red Barn Farm and the Botanical Gardens.  


Energy:  Do not try to plant a large garden without energy gear. Large gardens drain a ton of energy, and you’re going to need all you can get.

Liked plants can be dead:  This is a weird one. A plant that you use only as another plants “Like” doesn’t need to be alive to give the “Like” benefit.

What to Start With

At Level 1 your primary goal should be to advance in gardening levels as fast as possible. This is so you can start having bigger gardens and using better seeds.
 
An easy to grow Level one seed that gives 3000 XP at elder is Key Lime. Key Limes also drop gold and Shocked Keys. They have easy to meet likes, such as a Water-Mole Statue and a Tropical Garden Gnome to help them grow faster. Key Limes are my first choice for any new gardener.
 
 
I hope you find this guide helpful. Now take your new found gardening knowledge into the Spiral and sow some adventure!
 

Wizard101 Pet Training Guide

Hello, this is Community Moderator Bean with my Wizard101 Pet Training Guide. This method works with any pet and will clean 95% of the pet’s Talent pool. It rarely results in fails when done step by step.

Hatchmaking 101

Step One

Look through the Kiosk to find a pet with item cards you like. I prefer pets with a blade. There are many different options, and I’ve given you a few examples here.

Step Two

Using the search feature in the Kiosk, enter the two most desired Talents you want. Once you’ve done this, look for a pet that has all the talents you want. You may have to search through many pets to find the exact Talents you desire. Never settle for a pet that isn’t 100% what you want.
Example: Triple Double Mighty 
 
  • Your school-Dealer
  • Your school-Giver
  • Pain-Giver
  • Spell-Proof
  • Spell-Defy
  • Mighty Jewel in the socket 


Mighty is a “selfish” talent that can boost damage or resist talents.

Step Three

Make sure the pet you choose to hatch with is at max sap/numbers or is
close to max sap/numbers.

*SAP is Strength, Agility, and Power*

Max numbers are 255, 250, 260, 260, 250. Max numbers are important, they make the difference between a +9 and +10 damage Dealer Talent.

Step Four

Hatch but ONLY take the initial hatch to adult.

Step Five

Hatch again with the same or a similar pet.
Hatching with the same kiosk pet is optimal so that the talent pools do not mix. Hatching with different pets can result in unwanted talents, or “fails”.

Side note, the first couple hatches will have fail/ unwanted talents. Do not discard this pet, by re-hatching and only taking the pet to adult, you’ll clean the pet’s gene pool.

Step Six

Repeat steps four and five until you have a pet with two of the five talents you want. Make sure the pet’s SAP is close to maximum.

Keep this one as a BASE pet, do not ever train this past adult. It will take a couple of hatches to make a successful base pet.

Depending on what pet you’re choosing to make, do not get discouraged if the first couple hatches fail. This is why re-hatching at adult is recommended. To make sure you don’t waste any pet snacks and so the fewest undesired talents get transferred onto the pet.

Step 7

Hatch your base pet one last time. Then, take the new egg and train it to Mega.

Step 8

If the pet you’re taking to Mega fails; trash it and use your base pet to hatch another pet to take to mega.

You’ll know when you have your final base pet when the following applies:

  • The pet’s talents pools are similar or completely the same.
  • The pet’s stat number are the same or similar.
  • The past three to five hatches have succeeded. 
  • The previous hatches have consistently manifested between two and five or the desired talents.

When this list applies to your base bet, you’ll be ready to take the next hatch to Mega.

Kiosk 101

When you use the Kiosk, try to hatch with the same pet, mixing pools can result in fails. But, be mindful, if you cannot find the same pet it is for one of the following reasons:

1. It’s on a timer, once a pet is hatched with, there is a one hour cool-down timer until it can be hatched with again.

2.The pet has spent the maximum amount of time in the Kiosk, which is two weeks. Once a pet reaches two weeks it is removed from the Kiosk.

3. The Kiosk pets has reached its limit of 10 hatches for those 14 days. Once a pet reaches ten hatches, it can’t hatch again until it’s removed and then placed back in the Kiosk. 

Hatching Costs

It should be noted the price of hatching is vastly different between the Hatchery and the Kiosk.

On average Hatches done in the Hatchery cost anywhere from 22k to 47k gold.

Meanwhile, Hatches done at the Kiosk cost anywhere from 75k to 103k gold.

Training 101

Congratulations on your new pet! A Wizard’s pet is their greatest ally; for your new companion to reach their fullest potential, you’ll need to train them. To raise your pet’s level, you’ll need to play one of the six minigames in the Pet Pavilion located off the Commons.

Energy

While you train your pet, you will notice the amount of energy for each minigame increases as they level up. The energy cost goes up two points for every level after Baby, with Teen costing four energy, an Adult needs eight, and so on. The oldest pets are Ultra, which costs fourteen energy per game.

Minigame Mastery

With the arrival of Minigame Mastery, you can skip minigames. After you’ve won a minigame twenty-five times, you will receive mastery. Meaning, you can pay the energy but miss the game. You will not receive any experience for skipping, but you will be able to feed your pet a snack right away, making training pets much quicker.

I would recommend the Dance Game, but you are welcome to choose whatever game you prefer. Skipping the game costs the same amount of energy it would take to play the game. You’ll still be able to play the minigame if you choose to.

Maxing out Talents

How do I make my pet’s talents more powerful? 

Your pet’s manifested talents improve based upon the stats associated with them. For example, you have a pet with damage talents, but you didn’t train the stats that correspond (Strength, Will, and Power). They will not improve until you train those stats, which can happen by playing minigames or feeding your pet snacks. If you are unsure of which stat effects what talents you can hover your cursor over the talent and it will tell you.

Questing

My pet leveled up outside the Pet Pavilion. How?

With the arrival of 2020 Spring Update, pets now receive a few experience points for every main storyline quest you complete with them equipped. It is theoretically possible to train a pet to Mega this way, but it will take a very long time.

Mega Snacks 101

Mega snacks are a snack that you can receive by farming gauntlets, dungeons, and gardening. These snacks give at least +25 points each, and they are “No Auction” meaning you cannot sell them in the Bazaar.

gardening

Gardening Couch Potatoes and Evil Magma Peas are the best way of obtaining mega-snacks.

Couch Potatoes are a Rank 3 plant that drop many different types of items that you can stock up on for gold. For example the snacks that give +10 expeirence points, Empowers, and lots of sellable Treasure Cards. These plants can also drop their own “likes” which boosts their growth rate. These drops include Tropical Garden Gnomes, Litter, and the Sandwich Station. All of which can all be purchased at the Bazaar in Olde Town. The Mega Snacks that Couch Potatoes drop, are listed below:

Golden Wheat Bread: +40 points each
Captain Canteloupe: +45 points each
Fancy Yogurt: +50 points each

Evil Magma Peas are a Rank 4 plant that drop lots items that you can stock up on for gold as well, such as sellable Treasure Cards like Cleanse Charm, Earthquake, etc. They also drop reagents that are very useful for crafting (black pearl, sandstone, sunstone, etc…). These plants can also drop their own “likes” which boosts their growth rate. These drops include Tropical Garden Gnomes, Djembe Drums, and the Egg Basket, all of them be purchased at the Bazaar in Olde Town. The five Mega Snacks this plants drops are listed below:

Golden Wheat Bread: +40 points each
Cherry Tomato: +40 points each
Mystic Dragon Fruit: +45 points each
Captain Canteloupe: +45 points each
Fancy Yogurt: +50 points each

Dropped Mega Snacks

The Starburst Spiders from Mirror Lake drop the Pixie Stix snack. These snacks only do +30 each, and only two are obtainable per run. 

Winterbane Hall is a housing gauntlet that drops 6 different mega snacks. These snacks on give +25 each; but, many more drop per run. You don’t need a membership to do this gauntlet, but you’ll likely need a few friends to help you.

Crafted Mega Snacks

There are the only four craftable Mega Snacks currently. Each recipe requires 2,000 gold, five specific treasure cards, 4-5 Pristine Vials, and one fish. Which may require you to spend some time fishing in the Spiral to collect all the ingredients. 

Mystic Dragon Fruit can be found in Dragonspyre and is sold by Darina BloodFlame.

The Captain Canteloupe recipe is sold in Celestia by Clarence Cavendish.

The recipe for the Cherry Tomato is sold by Jackie WhisperFlame in Wizard City.

Finally the recipe for Golden Wheat Bread can be found Krokotopia, and is sold by Shazz’am.

Jewels 101

There are many ways to get jewels for your pet’s socket. Whether through farming or crafting, some can even by purchased through gift cards. Always research your jewel before taking your pet to Ultra. Some jewels do not need your pet to be Ultra.

Farming and Crafting

 Most of the pet jewels in Wizard101 are farmable or craftable. Many monsters and bosses drop a variety of pet Jewels. Ask the community if you aren’t sure where a certain Jewel drops.
 
You can also craft Jewels, Lowe Springfield sells jewel recipes in the Pet Pavilion. Keep in mind that these crafted Jewels are randomized. You’ll more than likely have to make more than one to get your desired jewel.

Ultra Jewels

Raising your pet to Ultra gives you a chance to receive one Tier 1 Selfish Talent Jewel like Mighty. These Selfish Talent Jewels give +65 to their respective stats. So, they can raise damage, resist, crit, pierce, etc. talents by a few points. The only other way to get in these Selfish Talent Jewels is to craft them or train them as a Talent on your pet.

Kroger Jewels

“Kroger Jewels” are cards sold at Kroger, Vons, Safeway, etc. for USD 20. These giftcards offer a double-talent Jewel, which cycles each month. These cards are redeemable in later months, for different Jewels. For example, if you bought your card in September, you can redeem it in July if you want the July Jewel instead. Not only do you get a Double Talent, Unshatterable pet Jewel, but also an Energy Elixir and a choice of 10,000 crowns or two-month membership. You can sometimes receive a Kroger Jewel through the seasonal Scroll of Fortune.

common pets 101

Pets that are usually referred to as “Double Triple”, “Ward pets”, “Jade pets”, etc. are known as that because of their common use. These are the staple pets that you’ll always find in the Kiosk.

Triple Double

A “Triple Double” is a pet with two universal resistance and three damage talents for your school. The name states what talents the pet has. Double Triple pets manifest; Pain-Giver, Spell-Proof, Spell-Defy, and a matching Dealer and Giver. Example: Death-Dealer and Death-Giver. These two talents are school interchangeable. If you’re working on a Double Triple for a specific school, insert the school name before Dealer or Giver.

Jade Pets & May-casts

“Jade Pets” or “May-casts” are made to compliment a Jade Wizard, a healer tank in Jade Gear. These pets usually have two universal resistance Talents with a combination of May-Cast or healing talents. 

Ward Pets

“Ward Pets” have two universal resistance talents and three ward talents, these pets are mainly for PvP. Wards talents grant a +15 resistance to a specific school, like Balance Ward. These pets appear in PvP because this type of pet gives +30 resistance to three schools. You can change the school of your desired ward by changing the school typed before -Ward. Example: Spell-Defy, Spell-Proof, Ice-Ward, Fire-Ward, and Myth-Ward.

Happiness

Happiness is the latest addition to pet stats in the Spring 2020 update.
 
Happiness includes being able to transform into your pet whenever you want. But your pet’s happiness will decrease every 5 points for every minute of usage. 
 
My pet’s happiness is getting low. How do I raise it? You can feed your pet with the new HUD for pets in the lower-left corner of your Wizard101 screen.
 
 
How is my pet’s happiness calculated? Your pet’s happiness is equal to the sum of your pet’s stats in which you’ve trained. Since this example, the pet isn’t trained in intellect. The pet’s happiness will be 1026 until the intellect increases. Your pet’s Happiness will improve by the total points the pet has improved every time you train it.

Thanks for Reading!

Thank you for reading this guide, I hope it help you on your way to creating your perfect pet! If you liked this guide be sure to look at the other articles and guides that Ravenwood Academy has to offer, like our Energy Saving Tips Article.

Looking to stay up to date on the latest information? Follow Ravenwood Academy on Facebook and Twitter. There’s also a Ravenwood Academy Discord if you’re seeking fellow Wizard101 enthusiast! Any further pet related inquires may be directed to me, Bean#5406, on our Ravenwood Academy Discord.

Thank you all again!

~ Bean

Back To School Stitch

Amber and friends by Mellow#3210

Make sure your Wizard is looking their best for a new year of spell-slinging with Ravenwood Academy’s Back to School Stitch Contest!

Will you take home the prize for the fieriest Fire, the most electrifying Storm, or the chillest Ice of the year? Enter Ravenwood’s school-themed stitch contest to find out and win fabulous prizes! 

Prepare your Wizard for fall by designing a school-themed stitch for your main character. Only one entry per person is allowed, so choose wisely!

Take a screenshot of your Wizard and post it in the Ravynwood Community’s Discord contest channel, tag us on Twitter, or email it to [email protected]. We will be looking for stitches that combine things in unexpected or rarely seen ways to show the spirit of your Wizards school. Enter by midnight PST on 9/30/2022 to qualify! 

One winner representing each school will receive:

First Place: The awesome new Peppergrass Glen Bundle, a Charmers Mystical Flute, and the rare, stunning Wings of Whimsy 30-day mount!

Second Place: 10,000 Crowns and a Fogstaff!

Third Place: 10,000 Crowns

Good luck. We can’t wait to see how you embody your favorite school in Wizard101! 

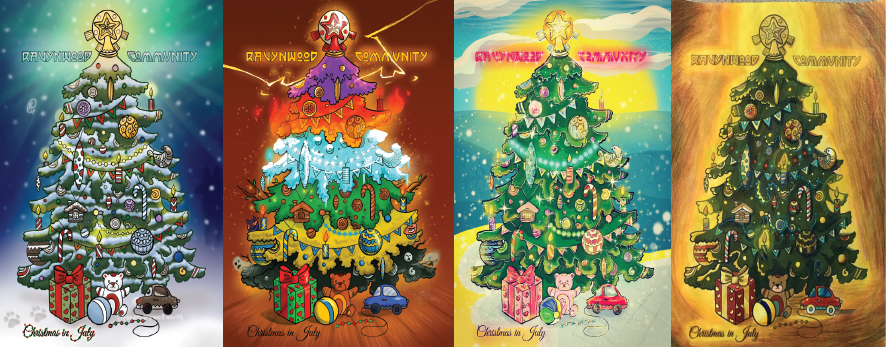
Christmas in July Winners

Congratulations to the winners of our Christmas in July contest! Our community has some fantastic talent, and the entries were incredible! It was a struggle to choose, but the results are in. Check out the winners below.

Christmas Classic Colors

A Classic Christmas Tree surrounded by snow with the northern lights shining above.
Classic Christmas by Rose#6201

Second Place Classic Colors: Neoplasm#1571

Creative Colors

A Wizard101 Christmas tree with each layer representing a school of magic.
A Wizard Tree by 1oshuaBlue#5319

Second Place Creative Colors: Celestia Christmas by Layla#5491

Best Digital

A Christmas tree with a glowing star sits on a sandy beach with the ocean and a large warm yellow sun in the background.
Christmas in JULY by Skazka#0556

Second Place Best Digital: Heap Christmas by Heather, Local Oracle🔮#1142

Best Physical

A classic Christmas tree bathed in golden glowing light.
Glowing Tree by BAVV#2630

Second Place Best Physical: Ryan GhostBlood

Wolf of Winter Drawing

As a thanks for all of the amazing entries, everyone who entered qualified for the random Wolf of Winter drawing. The winner of the drawing is Twizard  @alura_dawn! 

There are so many more entries to explore, including our second-place winners! Don’t miss the Black and White “Heap” themed entry, the underwater Celestia tree, and too many other impressive creations to list! Be sure to head over to the contest channel on Discord to check them out.

Thanks to everyone that entered. If you are a winner, check your Direct Messages or email for your prize! Until next time, see you in The Spiral! 

Amber Ravynsong and her friends in their Christmas gear celebrating Christmas in July in the Commons. of Wizard101

Christmas In July

Christmas in July Coloring Contest

Amber Ravynsong and her friends in their Christmas gear celebrating Christmas in July in the Commons. of Wizard101

Beat the heat and stay cool this July with the Ravenwood Academy Christmas In July Coloring Contest!

To Enter: First, download the Ravynwood Christmas Tree coloring page found below, then make it your own with crayons, watercolors, digital paints, or anything you can dream of!

Then, take a picture or make a copy of your image and upload it to the Ravenwood Academy contest channel on Discord at:

discord.gg/wizcommunity

If you don’t have access to the most poppin’ Wizard101 Discord server in the Spiral, you can post your image and tag us on Twitter @Ravynswood, or email it to us at [email protected]. Winners will be chosen by vote of the Ravynwood staff team for the following categories:

Christmas Classic
Creative Colors
Best Digital
Best Physical

First Place Winners will receive A Peppergrass Glen Bundle and a Reindeer Sleigh Mount.

Second Place Winners will receive 10,000 Crowns and a Reindeer Sleigh Mount.

Every entry we receive will qualify for a bonus drawing for 10,000 Crowns and a rare Wolf of Winter mount! So, do your best and have fun! Get your entry to us by August 1st, 2022 to qualify. Any Wizard could take home a prize regardless of their ability.

We can’t wait to see your dreams of winter on such a summers day!

Catacombs Farming Guide

Welcome!

Hello everyone! Discord community member Hannah here, or Emmaline GhostSong as you may know me in-game. Chances are, you’ve heard that Dragoon Gear is the over-all best for any max-level Wizard. But what is it, and how do you get it? If you have these questions, this is the guide for you.

To craft your Dragoon gear you’ll need to be a Visionary Crafter first. Then, you can gather the reagents and recipe. The reagents you’ll need come from two bosses. Today I have two different strategies for Prince Viggor and King Detritus. These bosses drop the Alchemical Extracts, Salts, and Crystals you will need.


These bosses are essential for farming level 130-140 gear for most offensive builds. Each piece of the Dragoon set requires 300 Alchemical Extract, 50 Alchemical Salts, 5 Alchemical Crystals, and a piece of Vanguard gear. Any school’s Vanguard gear will work to create your preferred Dragoon set.

You can also craft the Vanguard gear if you’re not getting them as drops. Each requires 180 Alchemical Extracts, 30 Alchemical Salts, and 3 Alchemical Crystals. That number can sound intimidating for the new Visionary Wizard.

 
Gathering all those reagents can seem like an impossible task. But don’t stress – it’s easier than it sounds! This guide is here to teach you some of the best strategies to farm these materials. Let’s get started!

Abandoned House Strategies

King Detritus is the first boss of the Wizard City Drains after completing Empyrea Part One. He is the Abandoned House dungeon’s final boss, which is an excellent spot for Alchemical reagents. Each run drops ten Alchemical Extracts – one from the first mob fight and nine from the boss. King Detritus also drops other Alchemical reagents, Vanguard Hats, and much more. During the Double Reagents member event, you can get up to seventeen extracts per run!
 
Suppose you do not have this dungeon unlocked. No worries! The Abandoned House is a free-to-play dungeon that any Wizard can teleport inside. I have seen many Wizards start farming King Detritus for extracts as early as level 120. So, the Abandoned House is a very frequented area for high-level free-to-play Wizards.

Mob Battles

There are two mob fights before the boss. The first fight will drop one Alchemical Extract, and the second doesn’t drop anything of note. The mobs range in health, depending on which type spawn. Have one or two Wizards pack a first-round AOE hit, plus a blade or Mass Feint depending on your teammates. This setup should defeat all enemies in one round.

Fighting the Trash King

The most common strategies for farming the Abandoned House are the two round and four round strategies. The two-round approach is usually best when you have a consistent four-person team. Meanwhile, the four-round is better when using the Team Up Kiosk. If you are new to farming King Detritus, you may want to try both to see which one works best for your play style.

2-Round Strategy

This strategy requires a hitter, a Storm Wizard with around 160+ damage. You’ll also need three support Wizards. Your hitter must be in the last position (4th), and everyone needs to join in the first round. Your team should coordinate three different types of Feints; some examples are Mass Feint, regular Feint, regular Potent Feint, TC Feint, pet-card Feint, etc. For the second round, you need any three types of blades that stack. Again, these can be any blades depending on your team, but they must be stackable.
 
Remember, never put more than seven cards in your deck for this strategy to work. You must get all three Feints down on the first round. Casting Feints after the first round will result in the minions removing all of the Feints that have been cast. Without the three Feints, it is challenging to defeat the boss in the second round. One of your support Wizards should pack a Cleanse Charm, as sometimes the minions cast Virulent Plague. If needed, this can go in place of their second-turn blade but never in place of their first-turn Feint.

First Round

1st: Feint

2nd: Feint

3rd: Feint

4th: Blade or Frenzy

Second Round

1st: Blade

2nd: Blade

3rd: Blade

4th: Epic Storm Lord (or Epic Glowbug Squall, if they have a shadow pip)

I personally find this strategy to be the most reliable and easiest way to farm for Alchemical Extracts. Your team will fall into a rhythm after a few runs. Each run will take about ten minutes and yield ten Alchemical Extracts.

4-Round Strategy

If you only want to do a few runs, can’t find a team, or prefer more laid-back farming, you may want to try the four-round strategy. This strategy is best when using the Team-Up sigil for Abandoned House. It is adjustable for up to five rounds if necessary and works with various school attackers.
 
The way this strategy works is by sending in only one player for the first round. This Wizard will cast a Potent Feint. Once the first round has started, the remaining Wizards will join. This ensures that only one minion spawns.
 
On the second and third rounds, blade the hitter. On the third round, the one and only minion will sacrifice itself. So when the 4th round starts, the only enemy left is King Detritus. Because there is no minion, your team can cast their Feints now. The hitter will traditionally cast their school’s King Artorius spell in the fourth round. But any good seven to eight pip attack spell will do the job.
 
While the 4-round King Detritus strategy is a bit longer, it can be less stressful when using Team-Up.

Prince Viggor Strategies

Prince Viggor, located in Viggor’s Tomb, is part of the Catacombs questline. Many Wizards farm Prince Viggor, as he always drops three Alchemical Salts per fight. He also has a chance to drop other Alchemical reagents, Daybreaker and Nightbringer Spellements, and Vanguard boots. There are two main strategies for Prince Viggor; this guide outlines both strategies.

The first strategy takes two rounds but is challenging to pull off and requires two or three Fire Wizards. The second strategy takes three or four rounds but is much more flexible. If you do not have this dungeon unlocked, any Wizard can teleport to their friend inside. But you must have a membership or purchase the Catacombs with Crowns for access.

Mob Battle

This dungeon has one mob fight before the boss. Rydall’s Plague is a group of four Death mobs with 3,590 Health each. Have two players pack an all-one-enemy spell that they can use on the first round, such as Meteor Strike or Tempest. One of your support Wizards should carry TC Cleanse Charm; if Rydall’s Plague goes first, they always cast Virulent Plague. Your other support Wizard should pack a blade or Mass Feint if they have it.

2-Round Strategy

Your Team

For this strategy, you’re going to need the following:

  • One Wizard of any school. They can be a support Wizard with high resistance. This slot is the only flexible part of your team for this strategy.
  • One Fire support. This Wizard will cast Backdraft.
  • One Fire attacker. Their damage should be 160 or higher. They need to have 100% Power Pip and Accuracy.
  • A Wizard with a Dalia’s Smoldering Hairdo hat from the Professor’s Hoard Pack. This must be a level 40+ version that gives the Incindiate card. A Pyromancer or another Wizard with a Fire Mastery Amulet will do the job. They should also have a 100% Power Pip chance & good Accuracy.

Fighting Prince Viggor

All players need to go into the battle in the first round, in the correct order, without being late. That is quite tricky but do-able. Your hitter must be in the third position, and your player with the Dalia hat must be in the fourth position. The players in the first and second positions are interchangeable.

Each player should have no more than seven cards in their deck, and everyone will need a different stackable blade. Your support Wizard should have a Feint as well as Indemnity enchantment on hand. The Indemnity prevents Prince Viggor from removing the Feint with a cheat.

Viggor and his Ice Minion also like to cast a -55 Tower Shield. So one support Wizard should have TC Shatters or Pierce on hand. They will cast Shatter or Pierce in the second round rather than blading. You’ll still kill without the extra blade, but you won’t have a chance without removing the Tower Shields.

First round:

1st: Indemnity Feint

2nd: Blade

3rd: Blade or Frenzy

4th: Blade

Second round:

1st: Blade or Shatter/Pierce

2nd: Indemnity Backdraft

3rd: Epic Scald

4th: Incindiate

When this strategy works according to plan, you can expect to do around 80,000 damage to Prince Viggor. One of your Wizards may sometimes need to do a backup Meteor Strike on the third round, but most often, you can 2-round!

Traditional Strategy

Speed is the most significant advantage of using the two-round strategy. Yet, it requires excellent coordination and is easy to mess up. If your team can’t execute the two-round strategy, you might try the traditional method. You will find this strategy is more flexible and has room for error. I usually do four rounds with my team. You may find three to five rounds will work for you. This strategy is adjustable.

Your Team

You’ll need the following for this strategy:

  • One tank or support Wizard. They will ideally have high resistance to tank some extra hits. They need to be able to cast Indemnity enchanted Feint.
  • Two other support Wizards. One of them may want to have their hitting gear on for the mobs or a potential backup hit.
  • One attacker. This can be any school, except for Myth or Death as Prince Viggor has a high resistance to those schools and may remove prisms. Storm and Fire are ideal schools to hit in this battle.

Your Decks

Your tank Wizard must pack Feint plus an Indemnity enchant.
 
All three of your support Wizards should coordinate to pack several stackable blades for your hitter. You could use elemental blades, dark pacts, school blades, pet blades, an so on. At least one support player should also pack TC Shatters and cleanse charm. You may pack traps. Yet, all traps must have an Indemnity on them. Do not cast them if Prince Viggor summons a Storm or Myth minion – so this should be a last resort only.
 
Your hitter needs a good attack all spell. When I hit on my storm, I use Storm Lord – as well as Frenzy or another aura, and usually one or two blades for themselves.

Fighting Prince Viggor

For the first round, have only your tank Wizard go in and cast Indemnity Feint. This tactic minimizes the amount of minion hits your team gets. Once the first round has started, the rest of your team can go in with your hitter in the fourth position.
 
Next, spend one to two rounds blading up your hitter. It may take a couple of tries for your team to see exactly how many rounds you need. I hit on the fourth round, but I find it is possible to kill on the third for some Wizards.
 
On the round you hit, use Shatter on Prince Viggor. The only time I don’t do this is if our team goes first and he doesn’t already have a shield on. If he doesn’t have a shield, but the opposing team goes first, cast Shatter anyway.
 
With the Feint, a couple of rounds’ worth of blades, and the Shatter, your hit should take Viggor and his minions out in one go. If, by some chance, you have a straggler, have your backup hitter cast a quick AOE. This strategy is a reliable way to farm Alchemical Salts – and if you’re lucky, Vanguard boots!

After Farming

Now that you know the strategies, you’re well on your way to crafting Dragoon gear. Pick up the recipes from Zasha Emberforge and get crafting! I recommend spending most of your time at King Detritus for Alchemical Extracts. Once you get most of your extracts, pop over to Viggor for a few runs to catch up on salts.
 
The meta PVE set for level 130-140 in most cases asks for the Dragoon Hat, Boots, and Amulet. Dragoon gear gives a lot of Health, and the robe and athame are staples in high HP builds for Ice Wizards. The stats of all Dragoon pieces are below but don’t forget about the set bonus! With three pieces, you get extra damage, which is a big part of what makes this gear so powerful. 
 
Also, some pieces come with great spells. The hats come with a zero-pip mass trap, the boots with an item card Sharpened Blade and Potent Trap, and the amulet with an overpowered four-pip AOE spell. Take a look!

The Stitch and the Recipe

The Gear Stats

Fire

Storm

Ice

Death

Myth

Life

Balance

Thanks for Reading!

Thank you for reading my guide on Dragoon Gear farming. I hope you’ve enjoyed this guide and that you have a better understanding of how to get this popular level 130+ gear. If you have any questions, leave them in the comments, or find me around the Spiral or Discord. I wish you the best of luck on your Catacombs adventures!
~Hannah/Emmaline Ghostsong

Spiral of Gauntlets 2021

Spring is here and the Ravenwood Spiral of Gauntlets is back for 2021! Every housing gauntlet in the Spiral and a few friendly PvP rings are open at this free-to-play party. Bring a new friend and show them the game, or hang out with some friends from the Ravenwood Community Discord

Available Gauntlets

The Accursed Play Gauntlet
The Great Clock Gauntlet
Grand Tourney Arena
Sinbad and the Iron Sultan Gauntlet
Spiral Cup Gauntlet
Midnight Sun Pagoda
Winterbane Hall
Fantastic Voyage Expedition
The Doomsday Krok Gauntlet

To join the party, join one of the branches of our community. Watch for the announcement saying the house is open, then message any online staff member your True Friend Code.

After that, you will be able to port to the party house with the friends on your friend list all weekend long! Farm the Accursed Play Gauntlet for Pigsie Treasure Cards, run Winterbane for Mega-snacks, or get your Energy gear at the Spiral Cup. These are only some of the treasures the Gauntlets hold. There are many more to be discovered. Tweet us your drops and screenshots or post them on Facebook or Discord for a chance to have your image featured in a Ravenwood Events virtual scrapbook for the year. We can’t wait to see you there.