Waterworks Guide

Most of us have done this dungeon, whether you were farming for mastery amulets, mega snacks, or your level 60 Legendary gear, Waterworks is your friend for all of that. In this article, I will explain how to beat Waterworks, what you’ll encounter, and what to expect. Without further ado, let’s get started.

Entrance

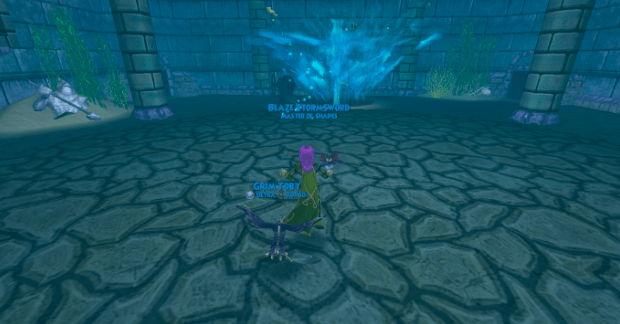
When you first enter the dungeon, you’ll be underwater. No enemies are present here. Pull the lever and go on to the first room. Stop at the entrance to plan out your strategy for the fights that follow.
Room 1

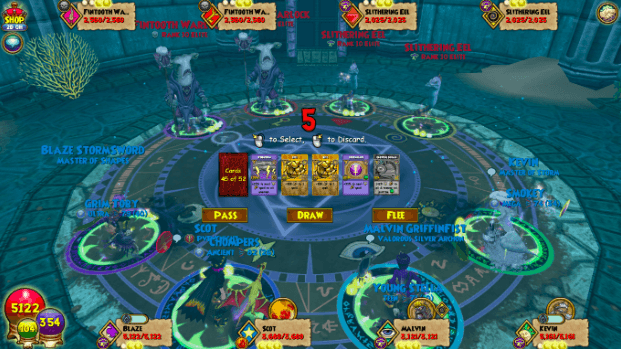
In this room, you will encounter four enemies. Two Fintooth Warlocks (Death, 2,560 health) and two Slithering Eels (Storm, 2025 health). They do not cheat, but they do have considerable resist toward their same school. The best strategy for this first fight is to have your team prepare blades for a hard-hitting hit all spell. They’re easy mobs that you can kill in 2 to 3 turns, max.
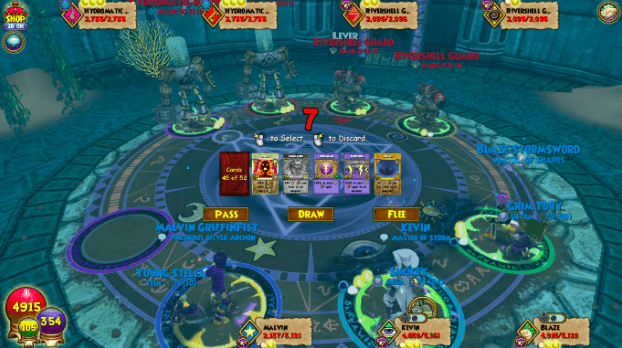
The next fight is a little harder, but it’s doable. Here, you will face two Hydromatic Drones (Ice, 2,735 health) and two Rivershell Guards (Storm, 2,095 health each). The Hydromatic Drones love to spam Frost Giant and Tower Shield to make your life a little more difficult. The best thing to do is to blade up as usual and use hit all spells. After you’re done with this battle, this concludes the first area. Pull the lever and you’ll be ready to move on to the next area.
Room 2

Puzzle: Here, you’ll be met with a puzzle. It’s fairly easy, but you must move fast. You will need to open all the blue clams to advance to the next floor. Avoid the yellow clams at all costs or you’ll summon four enemies, and while they aren’t hard, you will waste valuable health and time. After solving the puzzle, you will be granted health wisps, which are very handy for the boss ahead.

Boss Fight: After the blue clams have been opened, you’ll encounter the first boss in Waterworks, Luska CharmBeak. He is a balance squid with 21,150 health, but he has some pretty massive fire and death cheats. He drops the Waterworks Hat and occasionally, mastery amulets. How this boss works is pretty simple.
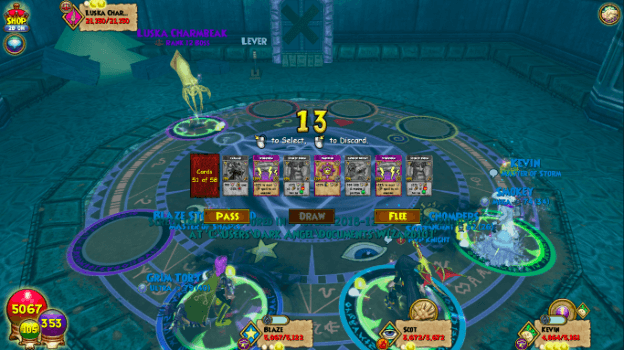
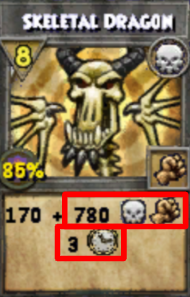
You can’t put any traps Luska or he will remove them and follow up with a massive Power Link or Skeletal Dragon that does 1100 per turn for 3 turns. AOE Traps such as Windstorm are fine, and pet traps will not trigger this cheat either. Multi traps like Fuel are not allowed by Luska. Only the first trap gets removed but it will still trigger the Skeletal Dragon.

You can only attack Luska if you have been “inked.” The wizard who is inked can hit Luska with any type of spell, but if you’re not inked, you can only attack with hit all spells. The wizard occupying the first spot will immediately be inked and as Luska’s health drops lower, he will ink the second wizard and soon enough, the third wizard. The fourth wizard will never get inked, so your best idea will be to put a support wizard last since they don’t need to hit. He can be an easy, straightforward boss if you have a hitter in the first spot and avoid traps. After defeating Luska, pull the lever and move on to the third area.
Room 3

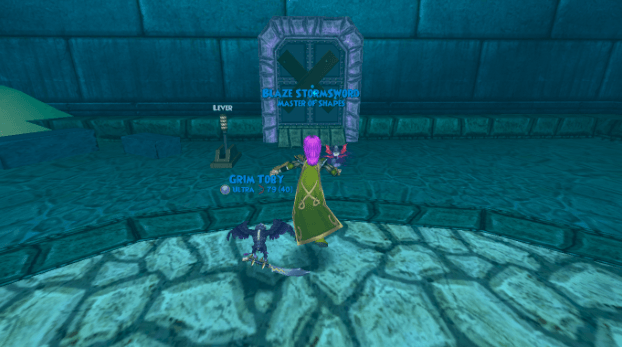
Fight 1: Here, you will face two Fintooth Marauders (Death, 2,715 health) and two Wingfin Slicers (Fire, 2,190 health). They do not cheat. Blade up, use a hit all spell, and the mobs should be dead. After they’re dead, you’ll proceed to the next battle.
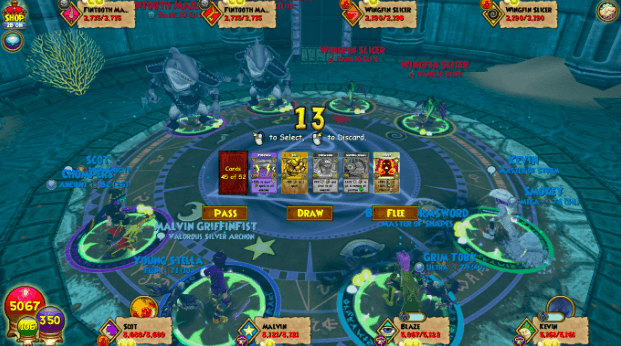
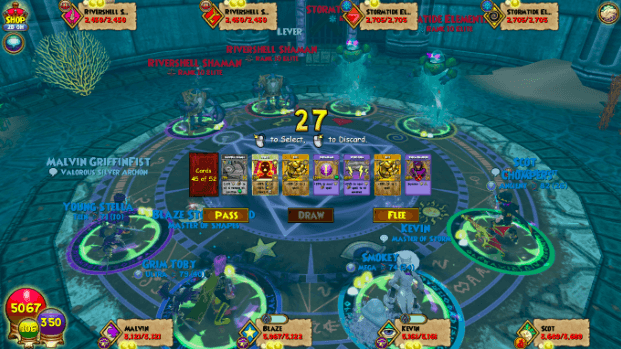
Fight 2: Here, you will face two Stormtide Elementals (Ice, 2,705 health) and two Rivershell Shamans (Balance, 2,430 health). Just as before, they are an easy mob battle. Blade up and use a hit all spell to eliminate them, then pull the lever and head into area four.
Room 4

Puzzle: In this room, before you battle anything, you’ll be met with a puzzle. It’s a simple puzzle to solve. When you read the instructions they will tell you “Start here to play follow the leader.” An eel will appear and will start touching various levers. Follow the eel and pull the levers in the same order. If you fail at the puzzle, you will face 4 Slithering Eel enemies, they are storm with 2,025 health each. After this puzzle is done, proceed to the next phase of Waterworks.
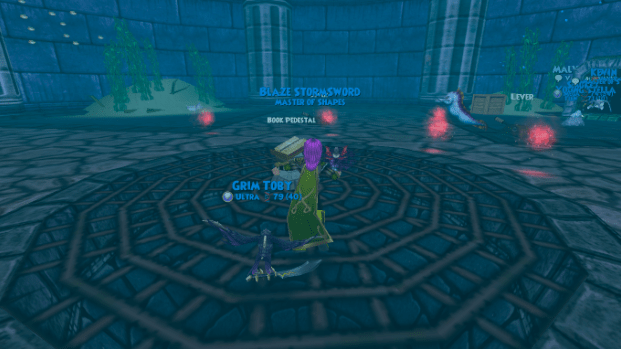
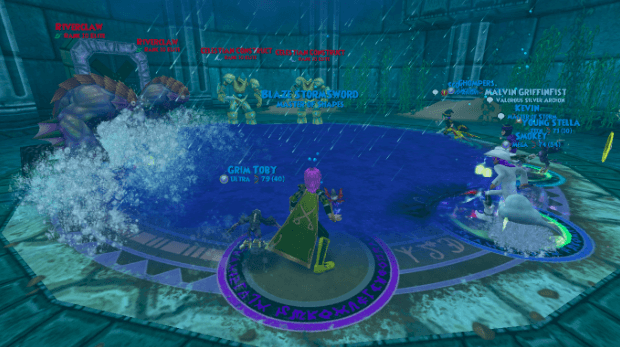
Fight 1: Here, you’ll face your last set of mobs. You will face two Riverclaws (Ice, 2,690 health) and two Celestian Constructs (Moon, 2,670 health). There’s nothing special to it, blade yourselves and use a hit all spell, but do remember that the Ice Riverclaws can use Frost Giant and Tower Shield. After defeating this set of mobs, pull the lever and head back to the main room to drain the valve.
Main Room

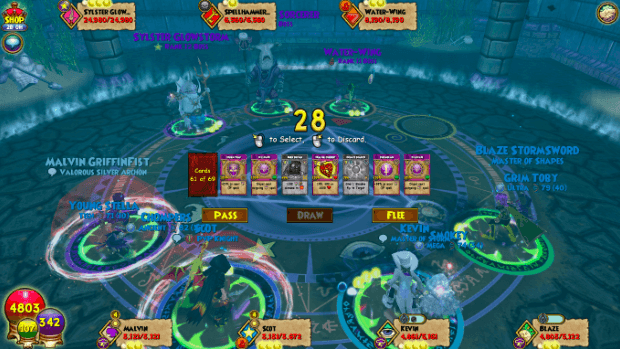
Final Fight: Pull the lever and you’ll be greeted by three bosses. Sylster Glowstorm (Star, 24,980 health), Water-Wing (Fire, 8,190 health) and the Spellhammer Sorcerer (Death, 6,560 health). The enemies might look easy enough at first, but they have some nasty cheats that you must consider.

Sylster Glowstorm: Sylster drops the Waterworks Robe and Boots, as well as mastery amulets. When the battle begins, Sylster will put up a Doom and Gloom bubble and say, “Traps go undetected in the Light”. This means you can’t hit Sylster (or any of his allies) unless there’s a trap on them. It’s important to note that the trap doesn’t have to match the school of attack you’re using. For example, I won’t trigger Sylster’s Ra cheat if there’s a Myth Trap on him, but I choose to hit him with Leviathan instead. Any trap will prevent the cheat.

After four turns pass, Sylster will change the bubble and say, “The blade goes unseen in the dark.” Just like the trap cheat in the previous cycle, you can’t hit Sylster (or any of his allies) unless you have a blade on. If you fail to abide by Sylster’s rules and use a trap or blade in the correct cycle, he will hit you with a powerful Ra at 2,000 plus damage. The Water-Wing uses a weak Rebirth that doesn’t give absorb, and the Spellhammer Sorcerer uses a weak Scarecrow, so their cheats are less of a threat. I recommend counting the rounds so you know when to use Blades or Traps. Hit all spells will not trigger Sylster or any of his allies’ cheats during either cycle, so if you lose track you can safely cast that.

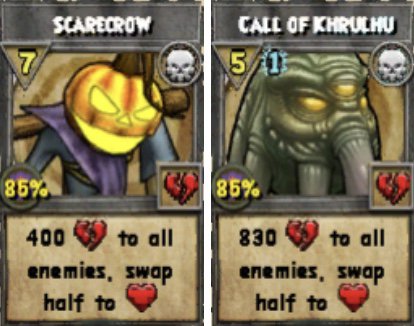
Spellhammer Sorcerer: He will take over Sylster’s Doom and Gloom cheat cycle if you kill Sylster first. He uses a weak Scarecrow if you fail to hit him with a Trap or a Blade.

Water-Wing: He will take over Sylster’s Doom and Gloom cheat cycle should both his allies be defeated. His cheat is a weak Rebirth if you fail to hit with a Trap or a Blade.
Bonus Glitch

Are you tired of running Waterworks, again and again, hoping to get your gear?

In Waterworks there is a glitch to make Sylster re-spawn without running the entire dungeon again. In order to do this, the entire team must remain in the dungeon together. All you have to do is have three of your teammates wait in the room where the battle just completed while the fourth goes into another room inside Waterworks. When the fourth Wizard returns to the team, Sylster will return for another battle. If done correctly, you can have infinite attempts at Sylster’s drops without having to run the dungeon each time.

Final Thoughts: Overall, Waterworks is a fairly simple dungeon with a decent drop rate. Most get their Waterworks gear within a day of farming, which is good because Waterworks gear is crucial to have. That said, I wish everyone the best of luck in farming Waterworks and getting their Legendary gear!

 Written by Ross Shadparvar

Wizard101 Pet Training Guide

Hello, this is Community Moderator Bean with my Wizard101 Pet Training Guide. This method works with any pet and will clean 95% of the pet’s Talent pool. It rarely results in fails when done step by step.

Hatchmaking 101

Step One

Look through the Kiosk to find a pet with item cards you like. I prefer pets with a blade. There are many different options, and I’ve given you a few examples here.

Step Two

Using the search feature in the Kiosk, enter the two most desired Talents you want. Once you’ve done this, look for a pet that has all the talents you want. You may have to search through many pets to find the exact Talents you desire. Never settle for a pet that isn’t 100% what you want.
Example: Triple Double Mighty 
 
  • Your school-Dealer
  • Your school-Giver
  • Pain-Giver
  • Spell-Proof
  • Spell-Defy
  • Mighty Jewel in the socket 


Mighty is a “selfish” talent that can boost damage or resist talents.

Step Three

Make sure the pet you choose to hatch with is at max sap/numbers or is
close to max sap/numbers.

*SAP is Strength, Agility, and Power*

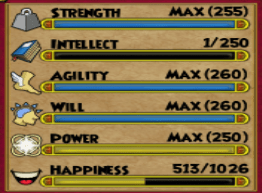
Max numbers are 255, 250, 260, 260, 250. Max numbers are important, they make the difference between a +9 and +10 damage Dealer Talent.

Step Four

Hatch but ONLY take the initial hatch to adult.

Step Five

Hatch again with the same or a similar pet.
Hatching with the same kiosk pet is optimal so that the talent pools do not mix. Hatching with different pets can result in unwanted talents, or “fails”.
Side note, the first couple hatches will have fail/ unwanted talents. Do not discard this pet, by re-hatching and only taking the pet to adult, you’ll clean the pet’s gene pool.

Step Six

Repeat steps four and five until you have a pet with two of the five talents you want. Make sure the pet’s SAP is close to maximum.

Keep this one as a BASE pet, do not ever train this past adult. It will take a couple of hatches to make a successful base pet.

Depending on what pet you’re choosing to make, do not get discouraged if the first couple hatches fail. This is why re-hatching at adult is recommended. To make sure you don’t waste any pet snacks and so the fewest undesired talents get transferred onto the pet.

Step 7

Hatch your base pet one last time. Then, take the new egg and train it to Mega.

Step 8

If the pet you’re taking to Mega fails; trash it and use your base pet to hatch another pet to take to mega.

You’ll know when you have your final base pet when the following applies:

  • The pet’s talents pools are similar or completely the same.
  • The pet’s stat number are the same or similar.
  • The past three to five hatches have succeeded. 
  • The previous hatches have consistently manifested between two and five or the desired talents.

When this list applies to your base bet, you’ll be ready to take the next hatch to Mega.

Kiosk 101

When you use the Kiosk, try to hatch with the same pet, mixing pools can result in fails. But, be mindful, if you cannot find the same pet it is for one of the following reasons:

1. It’s on a timer, once a pet is hatched with, there is a one hour cool-down timer until it can be hatched with again.

2.The pet has spent the maximum amount of time in the Kiosk, which is two weeks. Once a pet reaches two weeks it is removed from the Kiosk.

3. The Kiosk pets has reached its limit of 10 hatches for those 14 days. Once a pet reaches ten hatches, it can’t hatch again until it’s removed and then placed back in the Kiosk. 

Hatching Costs

It should be noted the price of hatching is vastly different between the Hatchery and the Kiosk.

On average Hatches done in the Hatchery cost anywhere from 22k to 47k gold.

Meanwhile, Hatches done at the Kiosk cost anywhere from 75k to 103k gold.

Training 101

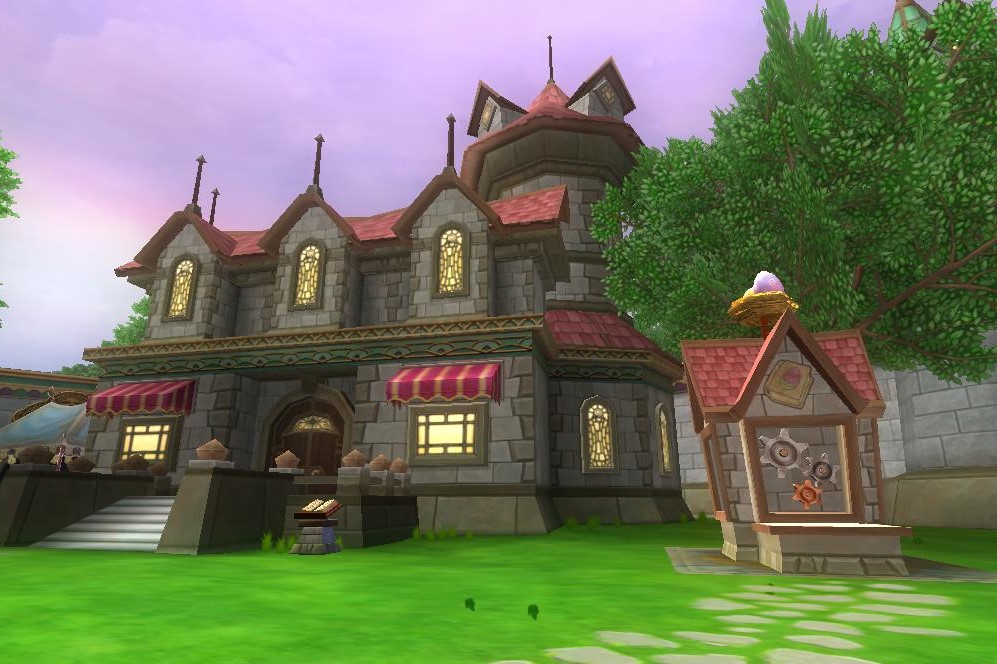
Congratulations on your new pet! A Wizard’s pet is their greatest ally; for your new companion to reach their fullest potential, you’ll need to train them. To raise your pet’s level, you’ll need to play one of the six minigames in the Pet Pavilion located off the Commons.

Energy

While you train your pet, you will notice the amount of energy for each minigame increases as they level up. The energy cost goes up two points for every level after Baby, with Teen costing four energy, an Adult needs eight, and so on. The oldest pets are Ultra, which costs fourteen energy per game.

Minigame Mastery

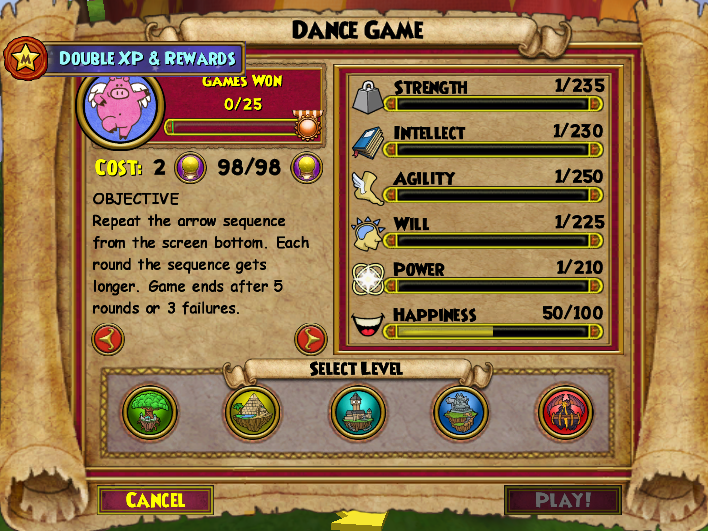
With the arrival of Minigame Mastery, you can skip minigames. After you’ve won a minigame twenty-five times, you will receive mastery. Meaning, you can pay the energy but miss the game. You will not receive any experience for skipping, but you will be able to feed your pet a snack right away, making training pets much quicker.

I would recommend the Dance Game, but you are welcome to choose whatever game you prefer. Skipping the game costs the same amount of energy it would take to play the game. You’ll still be able to play the minigame if you choose to.

Maxing out Talents

How do I make my pet’s talents more powerful? 

Your pet’s manifested talents improve based upon the stats associated with them. For example, you have a pet with damage talents, but you didn’t train the stats that correspond (Strength, Will, and Power). They will not improve until you train those stats, which can happen by playing minigames or feeding your pet snacks. If you are unsure of which stat effects what talents you can hover your cursor over the talent and it will tell you.

Questing

My pet leveled up outside the Pet Pavilion. How?

With the arrival of 2020 Spring Update, pets now receive a few experience points for every main storyline quest you complete with them equipped. It is theoretically possible to train a pet to Mega this way, but it will take a very long time.

Mega Snacks 101

Mega snacks are a snack that you can receive by farming gauntlets, dungeons, and gardening. These snacks give at least +25 points each, and they are “No Auction” meaning you cannot sell them in the Bazaar.

gardening

Gardening Couch Potatoes and Evil Magma Peas are the best way of obtaining mega-snacks.

Couch Potatoes are a Rank 3 plant that drop many different types of items that you can stock up on for gold. For example the snacks that give +10 expeirence points, Empowers, and lots of sellable Treasure Cards. These plants can also drop their own “likes” which boosts their growth rate. These drops include Tropical Garden Gnomes, Litter, and the Sandwich Station. All of which can all be purchased at the Bazaar in Olde Town. The Mega Snacks that Couch Potatoes drop, are listed below:

Golden Wheat Bread: +40 points each
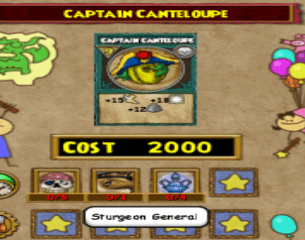
Captain Canteloupe: +45 points each
Fancy Yogurt: +50 points each

Evil Magma Peas are a Rank 4 plant that drop lots items that you can stock up on for gold as well, such as sellable Treasure Cards like Cleanse Charm, Earthquake, etc. They also drop reagents that are very useful for crafting (black pearl, sandstone, sunstone, etc…). These plants can also drop their own “likes” which boosts their growth rate. These drops include Tropical Garden Gnomes, Djembe Drums, and the Egg Basket, all of them be purchased at the Bazaar in Olde Town. The five Mega Snacks this plants drops are listed below:

Golden Wheat Bread: +40 points each
Cherry Tomato: +40 points each
Mystic Dragon Fruit: +45 points each
Captain Canteloupe: +45 points each
Fancy Yogurt: +50 points each

Dropped Mega Snacks

The Starburst Spiders from Mirror Lake drop the Pixie Stix snack. These snacks only do +30 each, and only two are obtainable per run. 

Winterbane Hall is a housing gauntlet that drops 6 different mega snacks. These snacks on give +25 each; but, many more drop per run. You don’t need a membership to do this gauntlet, but you’ll likely need a few friends to help you.

Crafted Mega Snacks

There are the only four craftable Mega Snacks currently. Each recipe requires 2,000 gold, five specific treasure cards, 4-5 Pristine Vials, and one fish. Which may require you to spend some time fishing in the Spiral to collect all the ingredients. 

Mystic Dragon Fruit can be found in Dragonspyre and is sold by Darina BloodFlame.

The Captain Canteloupe recipe is sold in Celestia by Clarence Cavendish.

The recipe for the Cherry Tomato is sold by Jackie WhisperFlame in Wizard City.

Finally the recipe for Golden Wheat Bread can be found Krokotopia, and is sold by Shazz’am.

Jewels 101

There are many ways to get jewels for your pet’s socket. Whether through farming or crafting, some can even by purchased through gift cards. Always research your jewel before taking your pet to Ultra. Some jewels do not need your pet to be Ultra.

Farming and Crafting

 Most of the pet jewels in Wizard101 are farmable or craftable. Many monsters and bosses drop a variety of pet Jewels. Ask the community if you aren’t sure where a certain Jewel drops.
 
You can also craft Jewels, Lowe Springfield sells jewel recipes in the Pet Pavilion. Keep in mind that these crafted Jewels are randomized. You’ll more than likely have to make more than one to get your desired jewel.

Ultra Jewels

Raising your pet to Ultra gives you a chance to receive one Tier 1 Selfish Talent Jewel like Mighty. These Selfish Talent Jewels give +65 to their respective stats. So, they can raise damage, resist, crit, pierce, etc. talents by a few points. The only other way to get in these Selfish Talent Jewels is to craft them or train them as a Talent on your pet.

Kroger Jewels

“Kroger Jewels” are cards sold at Kroger, Vons, Safeway, etc. for USD 20. These giftcards offer a double-talent Jewel, which cycles each month. These cards are redeemable in later months, for different Jewels. For example, if you bought your card in September, you can redeem it in July if you want the July Jewel instead. Not only do you get a Double Talent, Unshatterable pet Jewel, but also an Energy Elixir and a choice of 10,000 crowns or two-month membership. You can sometimes receive a Kroger Jewel through the seasonal Scroll of Fortune.

common pets 101

Pets that are usually referred to as “Double Triple”, “Ward pets”, “Jade pets”, etc. are known as that because of their common use. These are the staple pets that you’ll always find in the Kiosk.

Triple Double

A “Triple Double” is a pet with two universal resistance and three damage talents for your school. The name states what talents the pet has. Double Triple pets manifest; Pain-Giver, Spell-Proof, Spell-Defy, and a matching Dealer and Giver. Example: Death-Dealer and Death-Giver. These two talents are school interchangeable. If you’re working on a Double Triple for a specific school, insert the school name before Dealer or Giver.

Jade Pets & May-casts

“Jade Pets” or “May-casts” are made to compliment a Jade Wizard, a healer tank in Jade Gear. These pets usually have two universal resistance Talents with a combination of May-Cast or healing talents. 

Ward Pets

“Ward Pets” have two universal resistance talents and three ward talents, these pets are mainly for PvP. Wards talents grant a +15 resistance to a specific school, like Balance Ward. These pets appear in PvP because this type of pet gives +30 resistance to three schools. You can change the school of your desired ward by changing the school typed before -Ward. Example: Spell-Defy, Spell-Proof, Ice-Ward, Fire-Ward, and Myth-Ward.

Happiness

Happiness is the latest addition to pet stats in the Spring 2020 update.
 
Happiness includes being able to transform into your pet whenever you want. But your pet’s happiness will decrease every 5 points for every minute of usage. 
 
My pet’s happiness is getting low. How do I raise it? You can feed your pet with the new HUD for pets in the lower-left corner of your Wizard101 screen.
 
 
How is my pet’s happiness calculated? Your pet’s happiness is equal to the sum of your pet’s stats in which you’ve trained. Since this example, the pet isn’t trained in intellect. The pet’s happiness will be 1026 until the intellect increases. Your pet’s Happiness will improve by the total points the pet has improved every time you train it.

Thanks for Reading!

Thank you for reading this guide, I hope it help you on your way to creating your perfect pet! If you liked this guide be sure to look at the other articles and guides that Ravenwood Academy has to offer, like our Energy Saving Tips Article.

Looking to stay up to date on the latest information? Follow Ravenwood Academy on Facebook and Twitter. There’s also a Ravenwood Academy Discord if you’re seeking fellow Wizard101 enthusiast! Any further pet related inquires may be directed to me, Bean#5406, on our Ravenwood Academy Discord.

Thank you all again!

~ Bean

Halloween Spirit Contest

Happy Halloween, Wizards!

Ravenwood Academy is excited to bring you our Halloween Spirit Contest! We know you’re getting sPoOkY around the Spiral and want to see it!

Take one screenshot of you and your friends getting into the Halloween spirit in Wizard101. Spooky stitches, mysterious mounts, creepy castles – how do you celebrate Halloween in the Spiral?

Post your screenshot in the Ravenwood Contest channel on our Official Discord server to enter the contest by October 31st at Midnight, US Pacific. You can enter by yourself or with a group of friends but only the person who posts the entry will qualify for the prize. Remember, all entries must be your original image and follow our community rules.

Winners will be judged by our staff team and announced by November 7th. Prizes are as follows:

1st Place: Spooky Carnival Bundle
2nd Place: 10,000 Crowns
3rd Place: All Souls Pegasus Mount

We can’t wait to see your pictures – good luck, Wizards!

Pip Wizardry 2020

Pip Wizardry 2020!

Hello Wizards, this is Nathan Shadowbringer here to help you calculate the actual damage of spells per pip!
 
This article will be updated if spell changes happen down the line. Eventually, I plan for this list to include even Loremaster and crafted spells.
 
We will start with the highest Pip spells, and works our way down to the lowest ones. You will notice some of the spells are not a whole number. Why is that, you ask? Currently, Shadow-enhanced spells that use Shadow and standard Pips – have been changing. In the summer 2020 Test Realm, KI has confirmed that one Shadow Pip now equals 3.6 pips. This number is subject to change. 
 
Before the 2020 Summer Update, Shadow enhanced spells had severe damage compared to non-shadow-enhanced spells. These spells went through changes to balance them. Shadow Pips previously never had an absolute value, but now they do thanks to the new spell changes! They are still powerful, but now within reason to normal spells of a similar rank.
 

Calculating Damage Per Pip

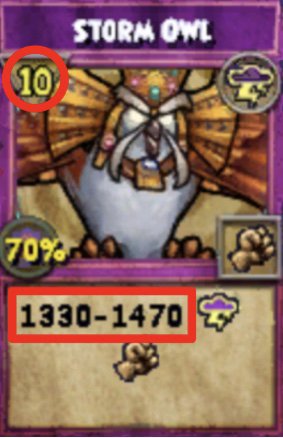
First, if the spell has a damage range, we must find the average damage. For example, let’s take the spell Storm Owl. Storm Owl is a ten Pip spell, that can do anywhere between 1330 – 1470 damage. Which, on average, is about 1400. I would divide 1400 by 10 to get the spell’s loss per Pip or DPP. Storm Owl would come out to be 140 DPP.
 

This can be represented by the formula: (damage)/(x-y). 

Here you would take the spell’s average damage (based upon the values on the card), and divide it by the difference of its Pip cost (represented by the letter x) and its utility Pip cost (represented by the letter y) which we’ll get to in a moment.

So the math for Storm Owl would look like this:

(damage)/(x-y)

(1400)/(10-0) 

1400/10

= 140 

It seems simple, right? Not always. To get a spell’s true DPP, we have to factor in Pip reductions, and damage multipliers.

What Are Pip Reductions?

A Pip reduction is something factored into a spell’s DPP calculation. These reductions happen when a spell has an added effect or utility attached to it. When calculating DPP, some Pips may get subtracted. 

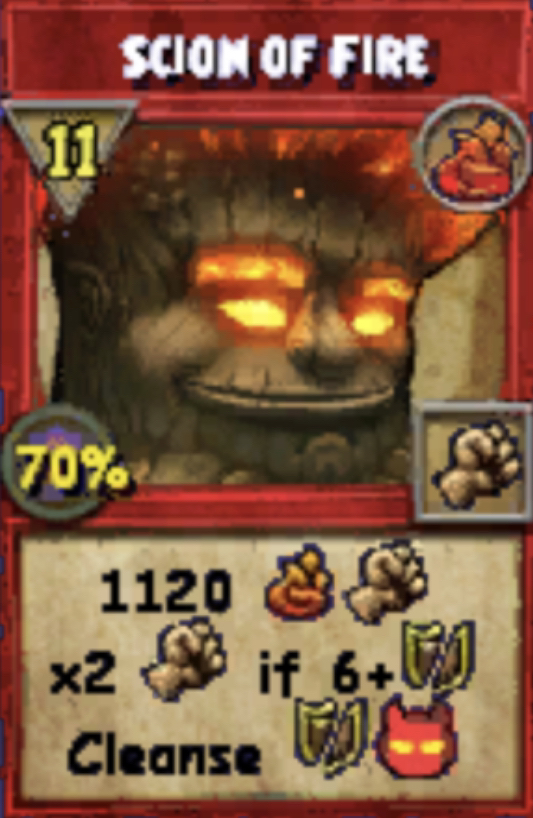
For example, one type of Pip reduction is the scion condition. Scion spells cost 11 pips, and do x2 damage if a particular condition is met depending on the spell. Because Scion spells can do x2 damage, reducing their initial damage. Their base damage is around the damage of a ten Pip spell. See where I’m going with this? 

The Scion Condition results in -1 Pip when calculating damage per pip. Yet, the Scion condition is not the only Pip reduction. There are, in fact, many more. 

Types of Pip Reduction

The following list contains the types of Pip reductions along with how many Pips they reduce.

  • Special: 10% Pierce blade: -0 Pips
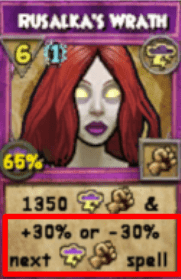
  • Rusulka’s Wrath blade/weakness: -0.5 Pips
  • 800 Absorb: -1 Pip
  • Disarm: -1 Pip
  • Guiding Light: -1 Pip
  • Infection: -1 Pip
  • Pierce: -1 Pip
  • Remove 2 pips: -1 Pip
  • Scion Condition: -1 Pip
  • Steal 1 pip: -1 Pip
  • Stun: -1 Pip
  • Summon minion: -1 Pip
  • Trap: -1 Pip
  • Tower shield: -1 Pip
  • Bubble change: -2 Pips
  • Double Disarm: -2 Pips
  • Double stun: -2 Pips
  • Gain 1 pip: -2 Pips
  • Plague: -2 Pips
  • Pierce before hit: -2 Pips
  • Smokescreen (40% accuracy debuff to all enemies): -2 Pips
  • Spirit Shield + Elemental Shield: -2 Pips
  • Stun all: -2 Pips
  • 45% Weakness: -2 Pips
  • AOE 45% Weakness -3 Pips

What This Means

These Pip reductions may NOT all be accurate, because determining the number of Pips a utility takes away is tricky. KI developer Mattnetic has said some utilities may cost less and others more. The issue is finding out which ones. Most pip reductions appear to be -1 one Pip, with AOE utilities such as Plague counting as -2. One for the utility, and one for the AOE effect. However, that still leave some loose ends, so allow me to to tie those up right now.

Because all King Artorius spells to get a 10% Pierce charm, the Pierce charm is not counted as a utility. Thus, every King Artorius spell gets it for free.

Rusalka’s Wrath gives either a 30% storm blade or a 30% Storm Weakness to the caster. Considering it has a chance to positively and negatively affect the caster, it was given 0.5 pips instead of 1.

Because the typical bubble would cost two pips, the Pip reduction is counted as two Pips.

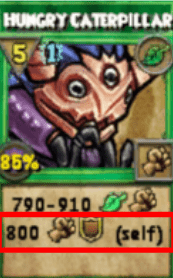
Calculating the Pip reduction for an 800 Absorb was difficult. The actual Absorb spell is three pips for a 400 Absorb; therefore, wouldn’t it be counted as six Pips for an 800 Absorb? If so, then the DPP of Hungry Caterpillar would be extremely high. But that wouldn’t be, right? Would it? These things can be quite challenging. 

What Are Damage Multipliers?

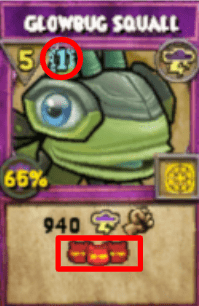
You factor in a damage multiplier after you calculate a Pip reduction. For example, a standard damage multiplier is an AOE, or area of effect. An AOE spell is when a spell hits all enemies. Let’s take the spell, Glowbug Squall. This spell is an AOE, and it does 940 damage to all enemies. It costs five regular Pips and one shadow Pip. A Shadow Pip currently equals 3.6 Pips; therefore, Glowbug Squall would be 8.6 Pips in total.

AOE spells have their damage multiplied by 0.75, or 3/4. To account for this spell being an AOE, we get the inverse of 3/4 and multiply by 4/3. Instead of dividing 940 by 8.6, we would multiply 940 by 4/3 first to get 1253.3. Now, we divide by 8.6. Finally, this makes the DPP of the spell Glowbug Squall 145.7.


Calculating Drain DPP

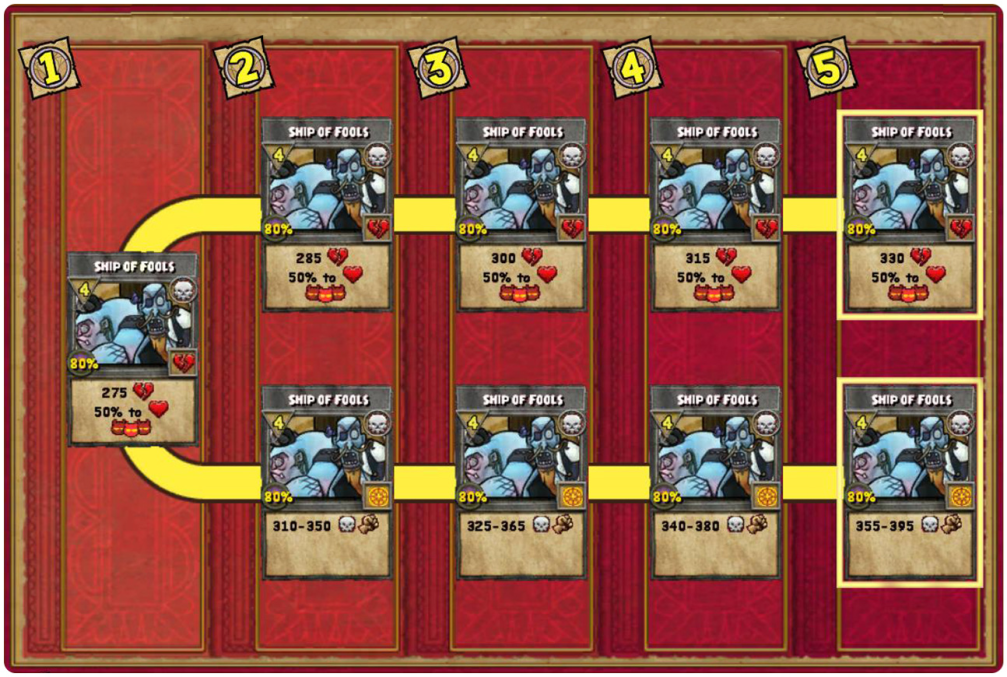
Calculating the damage multiplier for drains was difficult. Thanks to the new spell, Ship of Fools, we can now figure it. Ship of Fools has two routes you can go and upgrade using spellements. One is damage, and the other is a drain.
 
We can now accurately compare drain damage to typical damage. For example, the final tier of Ship of Fools. We found drains to suffer a 0.88% damage dropoff compared to pure damage. The final drain tier for Ship of Fools deals 330 damage. The final pure damage tier for ship of fools deals 375 damage. 330/375 is 22/25, 0.88, or 88%. 
 
This rate stays consistent for each upgrade of Ship of Fools. Therefore, before we calculate a drain spell’s DPP, we have to multiply its damage by the inverse of 22/25, which would be 25/22, to find the true DPP.
 

Calculating DOT DPP

One more type of damage multiplier is “damage over time” or DOT. These spells have initial damage, and then the damage dealt over three rounds. Because this damage takes longer to deal, the damage is 25% higher than the average spell—DOT’s damage multiplies by 1.25. So, to find DPP of spells with DOT’s divide by 1.25 to get the final DPP value. 

X rank spells like Tempest and Snowball Barrage are not affected by the AOE multiplier. Because they already have their damage per Pip value listed on the card.

What do the Devs say?

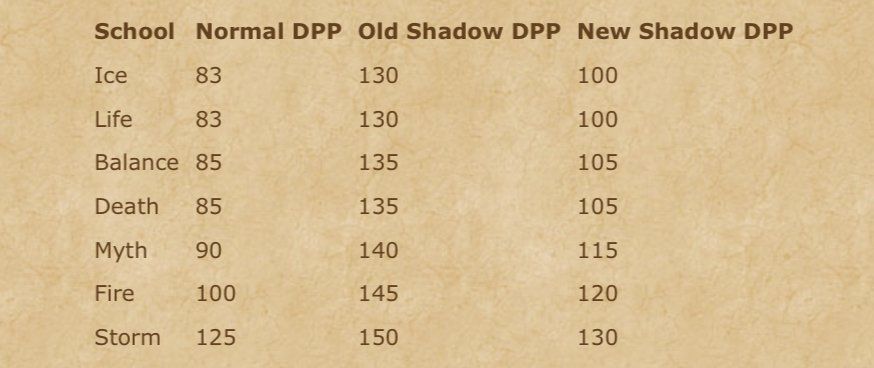
The first chart here is from Ratbeard’s Dev Dairy, it shows the individual base DPP for each school of magic. In addition to the new and old DPP for each school’s Shadow-enhanced spells. 

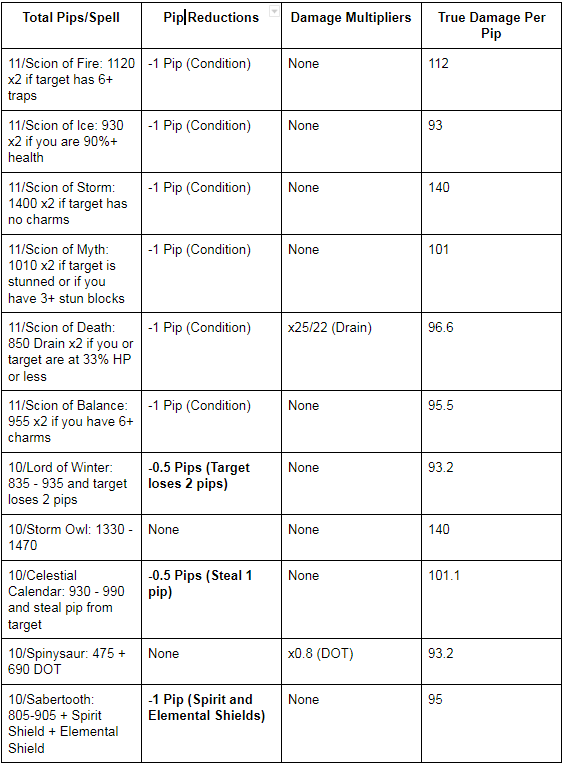
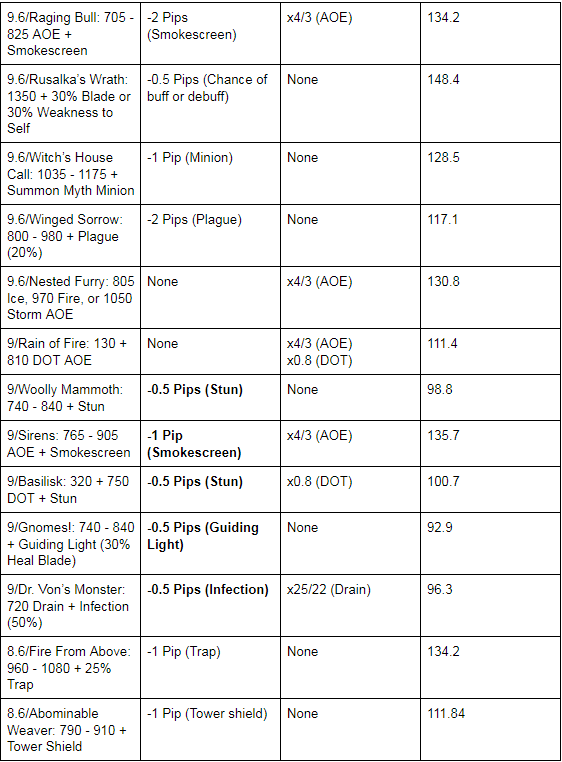
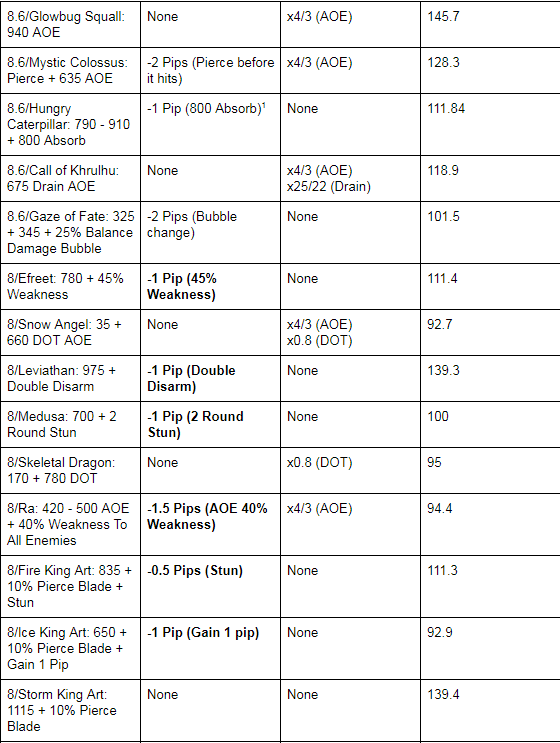
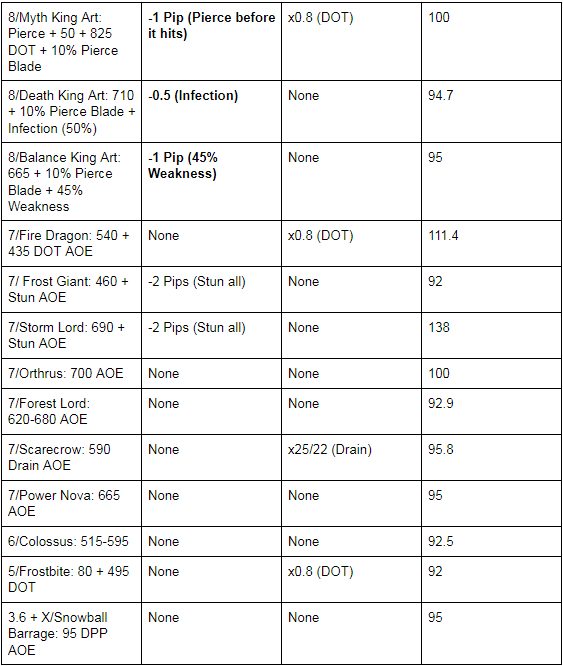
With the damage per pip chart below, you will start to notice things with some spells above rank 7. The damage per pip curve caps off at eight Pips. It does not increase further. To account for this, rank eight spells and above get utility for cheaper then what a rank seven or lower would. They get these utilities at a 50% discount, compared to a rank seven or below spell. 

There is one utility that does not get this discount, the Scion Condition, which remains at -1 Pip, not -0.5. The discounted utilities are bolded on the chart.

Another thing to note is rank seven spells DO NOT get penalized for being an AOE. They are purposefully over the damage curve. None of the things mentioned above apply to Shadow enhanced spells.

Formulas: (x = number of Pips and y = utility Pip cost)

AOE: [(damage)(4/3)] / (x – y)

DOT: [(damage)(0.8)] / (x – y)

Drain: [(damage)(25/22)] / (x – y)

If you’re interested in learning more about DPP you can check out Ratbeard’s Dev Dairy on the subject with this link! https://www.wizard101.com/game/dev-diary/spell-balance-audit

Final Notes

Moving forward the it’s important to keep this information in mind:

  • One Shadow Pip equals 3.6 pips
  • Storm base DPP is 125
  • Fire base DPP is 100
  • Myth base DPP is 90
  • Death and Balance base DPP is 85
  • Life and Ice base DPP is 83
  • DOTs have a damage multiplier of 1.25
  • Rank 7 spells are intentionally above the curve in DPP (no x4/3 AOE multiplier when calculating DPP)
  • DPP scales slowly as spells start to cost more Pips
  • Shadow enhanced spells have a higher DPP compared to regular spells.

We hope this article helps you to understand the logic behind the recent changes to the game and how they will help balance things going forward. Personally, I am excited to see what new spells will be possible now.

Thanks For Reading!

Special thanks to Shawn Fire and Dustin from the Ravenwood Community Discord for assisting me in the many calculations throughout this article. I would also like to thank KI developer Ratbeard for responding to my questions about DPP so quickly, he was extremely helpful! And, thank all of you for reading. I hope you enjoyed this article as much as I did writing it. If you did, please check out the other guides and information Ravenwood Academy has to offer. Let us know what you think and what your calculations find in the comments below, or at the Ravenwood Community!! 
 

Legendary Death PvP

deathsmallest

Getting to Warlord

InfernaGaming here with a deadly new PvP strategy for Death Wizards. The main goal for Legendary Death in the arena is hit hard and hit fast. For this strategy you will use Myth mastery. Part of the reason I chose Myth as a secondary school was to get rid of the enemies blades and shields whenever I could.

Gear

My Wizards stats ended up at 110 Damage, 22 Pierce and 29 Resist.

– Waterworks Hat
– Waterworks Robe
– Dworgyn’s Dire Boots
– Immortal’s Lore Wand
– Duelist Ring
– Duelist Athame
– Myth Mastery
– House of Scales Deck
– Triple damage pet
– Vulpine Avenger Mount

Main Deck

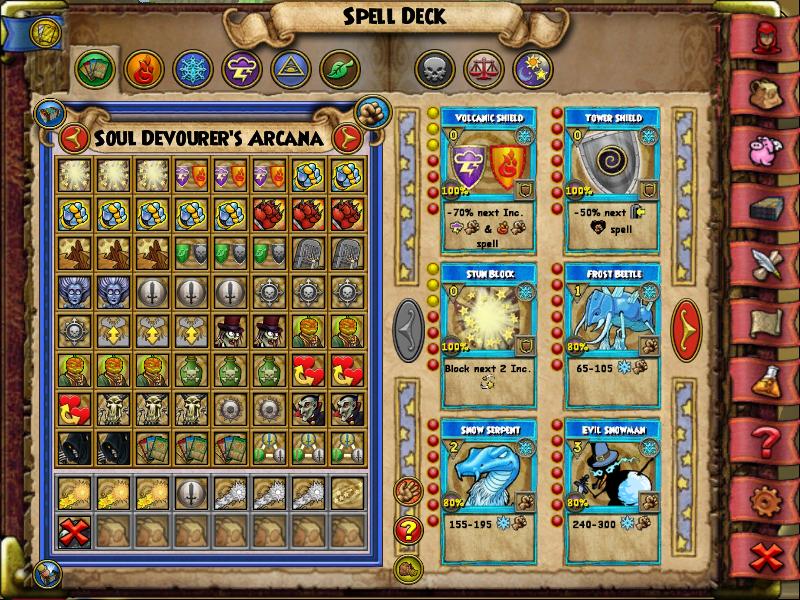
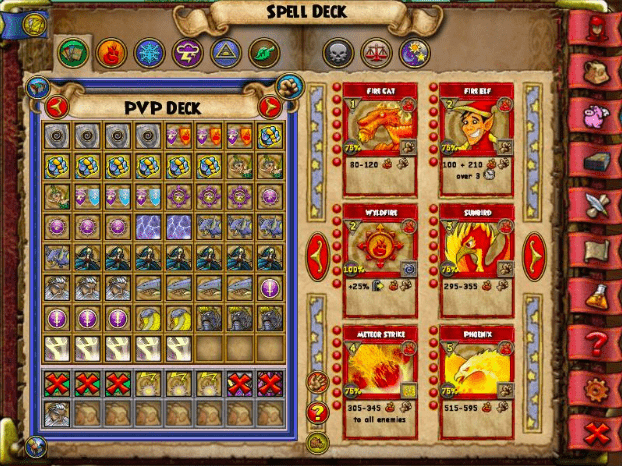
3 Stun Blocks, 3 Thermic Shields, 7 Gargantuan, 3 Monstrous, 3 Earthquake, 3 Ether Shield, 2 Animate, 2 Banshee, 3 Death Blades, 4 Doom and Glooms, 2 Feints, 2 Ghouls, 5 Headless Horseman, 3 Poison, 3 Sacrifice, 3 Skeletal Dragon, 2 Death Dispel, 2 Vampires, 2 Wraiths, 3 Reshuffles, and 3 Spiritual Blades.

Treasure Cards

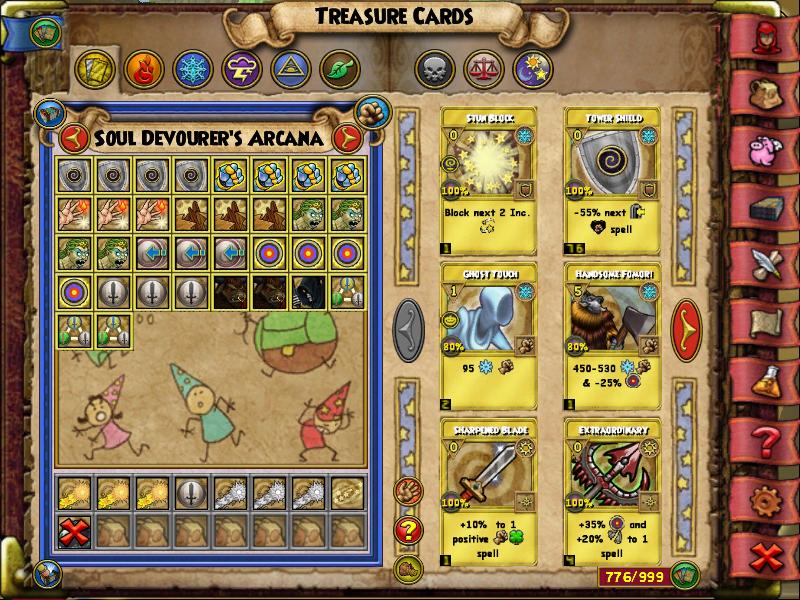
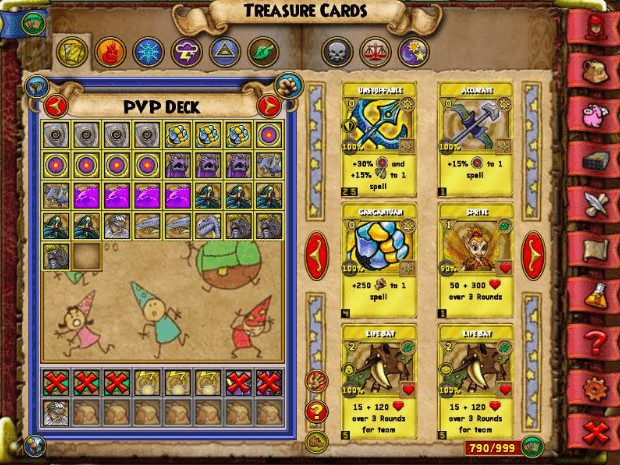
4 Tower Shields, 4 Gargantuan TC, 3 Triage, 3 Earthquakes (enchanted preferably), 4 Medusa, 3 Shift TC, 4 Infallible, 3 Death Blade TC, 2 Deadly Minotaur TC, 1 Wraith, and 3 Spiritual Blades.

Strategy

The strategy is simple. Start by blade stacking using Spirit Blades because they have both Myth and Death blades. Over-time hits like Poison and Skeletal Dragon will remove shields and chip away at your enemies health. This will also prevent any future shield the opponent might cast, leaving them open.
 
If you catch your opponent with no stun blocks, Medusa would play next very well. This attack with a two-round stun can prove quite deadly.
 
After Medusa, you can catch them open. Feint into a Headless Horseman, ending in a huge hit. If my opponent casts a lot of shields, I would Earthquake or Deadly Minotaur into a Headless. An Earthquake also works very well against minions, and will usually kill them with this setup.
 

This is all possible because of blade stacking, and high damage stats. Triage and Shift will come in handy as a defense against Wizards who hit with over-time attacks. With these treasure cards, you can survive a game-ending over-time attack like Burning Rampage.

I hope this guide will get your Death started in the arena! Let us know how this strategy works out for you in the comments below.

Legendary Ice PVP

Today’s topic is going to be pretty chill as we get into Legendary Ice PvP. The best level for Legendary Ice is definitely 66. My character was level 66 for the purposes of this article. Now, why Legendary ice? As ice you have loads of health a lot of resist so tanking long enough to stay alive and hit isn’t usually a problem. I had a fun time getting to Warlord.

I went with a well balanced setup. I chose to play to this schools strengths with lots of resist, decent damage, and pierce. For ice, it’s easy to get these stats especially with a ward pet. My basic strategy for this school was to save pips and use a combo.

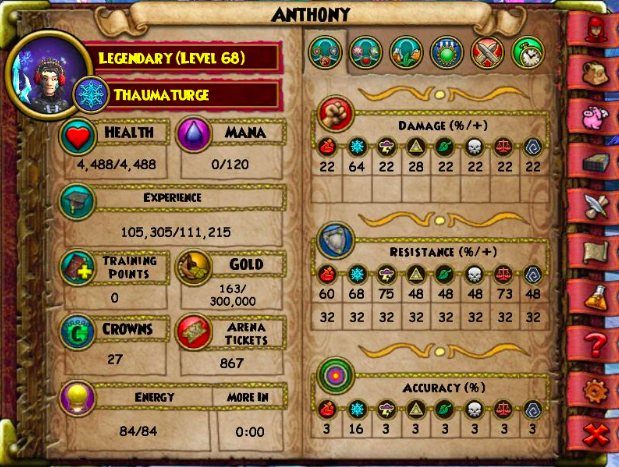
My stats for this wizard ending up being 64 ice damage, 68 resist to ice, 63 to storm, 73 to balance, 60 fire resist and 48 universal.

Gear

For this setup use House of Scales or Waterworks hat for the excellent well-rounded stats. The Shivering Breath Robes is best for damage, critical and resist. You can craft this robe in Zafaria. My set up also uses the Professor’s Hoard pack boots. An Immortal’s Lore pack wand for it’s damage and pierce. The Duelist ring and athame for damage and pierce. A Life Mastery amulet and a resistance pet. As for the deck, I use House of Scales for the accuracy boost.
 
You will also need to get Winter Moon and Reindeer Knight. These spells will help with stuns, get rid of minions, and keep pressure on your opponent.
 
I actually made Leaderboards on this character, as I kept pushing. It was fun, and I enjoyed it.

ScHool Specialty

Your goal as an Ice is to keep applying pressure. Chip away at their health with attacks. Using over time attacks will deal damage, and suppress their attacks as well. Blades are your best friend.

Deck Setup

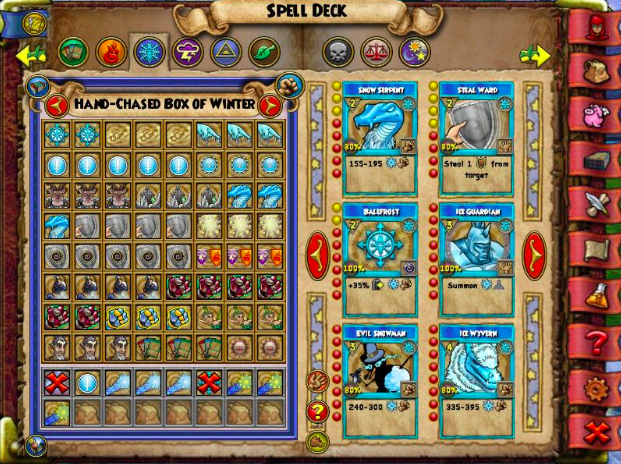
3 Freeze, 3 Frostbite, 5 ice blades, 3 ice dispels, 3 Reindeer Knight, 3 Snow Angel, 4 Steal ward, 3 Stun Block, 5 Towers, 3 Volcanic shield, 2 Balefrosts, 4 Winter Moon, maxed out Colossal enchants, 3 Gargantuan enchants, 3 Snow Serpent, 3 Fairy, 3 Satyr, 3 Reshuffle, and 2 balance dispels.
 

Treasure Card Deck

3 Ice blades, 4 Tower Shields, 5 Gargantuan, 3 Sanctuary, 1 Shatter, 3 Cleanse charms, 2 Reshuffle, 3 Elemental blades, 2 Weakness, 2-3 triage, and 1-2 lord of winter.
 

General Strategy

The main strategy is to outlive your opponent and continue attacking. This is slow gameplay and it will add up with combos. I always blade into an overtime attack when I can. I have 3 different types of over time attack. One is a single target and Two are all one enemy attacks. I fought a lot of Wizards with minions, with all one enemy attacks it was convenient for me to kill them.
 
What if you get hit by a Myth with shift? That’s why we have resist to our own school. That way you can survive your own hit, and be able to heal back. I don’t go too crazy with blades when I DoT (Damage Over Time). Usually, I save that for when I get an open shot to hit with Wintermoon, lord of Winter, or any other direct damage hit. The DoTs are also meant to get rid of shields, and DoTs work well against spammers.
 
Heal when your health gets low, you’re going to be tanking a lot. You’ll have the pip advantage to do so when you’re setting up to do those constant attacks. Use Sanctuary or Balefrost when they Doom, they will always try to stop you from healing.
 
That wraps up this article on Legendary ice PvP. I hope you enjoyed it. If you have any questions, reply in the comments section below. Thanks for reading!

Legendary Storm PvP

Hello, and welcome to Legendary Storm PvP. I know, shocking. Why Legendary Storm PvP you may ask? When I was playing Wizard101, back when PvP was popular among my friends, we all liked Legendary PvP. The not so high stats, the no use of shadow pips, the little grind we did to get House of Scales or Waterworks gear was all fun. As a Legendary Storm, it was definitely a journey. Why Storm and why not Balance though? Good question. I liked that nobody ever really chose this school to solo, nor do I need to be just like everyone else and make one. I liked Storm for its high damage and pierce and the way it handles itself.

PvP as a Legendary nowadays is easy, fun, and sometimes unpredictable. I can guarantee I don’t win every one of my matches, but most. To those reading, you have to either farm Loremaster for some spells, craft or buy packs, depending on your preference. As some spells are wanted in PvP. For example, my storm has Queen Calypso, a card I use to bring out the utility of my spells, and the Damage Per Second it provides. I suggest crafting to those who don’t want to farm or buy packs, as it is one of the fastest ways to get the spells, believe it or not.

Gear and Stats​

My Storm specializes in quick attacks, ending the rounds easily, and has high damage and pierce at 65. For a Storm, I would suggest going for high damage and pierce over critical, because of the critical nerf.

The gear that would be a good set up for Damage and Pierce would be:

  • Robe: House of Scales – Lower Zigazag Vestment
  • Hat: House of Scales – Lower Zigazag Headdress
  • Boots: Professor’s Hoard Pack – Halston’s Stormy Slippers
  • Wand: Immortal’s Lore Pack – Aquilan Velite Lance
  • Ring: Vendor: Brandon Mistborn – Duelist’s Daredevil Ring
  • Athame: Vendor: Brandon Mistborn – Duelist’s Fatal Razor
  • Amulet: Lower Zigazag – Condemned Soldier’s Charm
  • Mount: Avalon Outlaw’s Bundle – Vulpine Avenger Mount for pierce OR
  • Mount: Ghulture’s Hoard Pack – Storm Ghulture for damage
  • Pet: Any pet with all 5 talents being damage for maximum damage output, and socketing a Spell Proof Jewel

Pierce Jewels are needed on your Ring and Athame.

  • Circle Jewel: Plain Piercing Amethyst +3% pierce
  • Tear Jewel: Plain Health Opal +65 health
  • Triangle Jewel: Plain Pip Opal +6% power pip chance
  • Square Jewel: Plain Defense Opal +16 universal resist
  • Triange Jewel: Plain Accurate Amethyst +7 storm accuracy

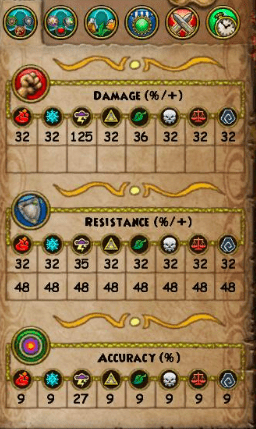
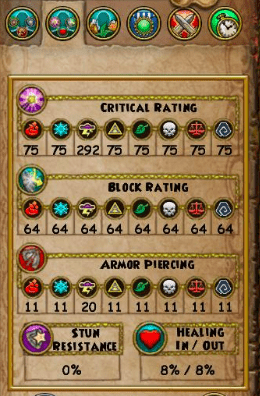
With all the gear and jewels equipped your storm should have 125 Damage, 32 resist, 27% accuracy, 54% critical chance, 20% pierce and 79% power pip chance. We will also be using Infallible before we hit which gives an additional 15% accuracy and pierce over 4 rounds.

Spells Trained through Training Points​

  • Ice School  – Tower Shield
  • Sun School – Gargantuan
  • (Prepare for the weird one) Fire School – Phoenix, Infection, and Stun Block.

Main Deck Set Up​

  • 6 Queen Calypso’s
  • Max Damage enchants, thus being Gargantuan
  • 3 Lightning Bats
  • 5 Wild Bolts
  • 4 Tower Shields
  • 3 Volcanic Shields
  • 3 Glacial Shields
  • 3 Pixies
  • 3 Darkwinds
  • 2 Storm Dispells
  • 3 Storm Shark
  • 2 Insane Bolts
  • 3 Storm Lord
  • 2 Storm Snakes
  • 4 Storm Blades

Side Deck Set Up​

Now, for that phoenix spell I mentioned earlier – you are going to want to enchant a lot of them from the Mutate Phoenix spell.

The Spell Thunderbird has such high utility, as it gives you x3 +30% traps universally, pack 3 of them.

  • 2 Storm Lord
  • 4 Tower Shields
  • 5 Infallible
  • 3 Kraken
  • 5 side Queen Calypso
  • 3 Triton
  • 2 Storm Shark
  • 3 Triage
  • 2 Gargantuan

Strategy​

The goal is to hit as fast as possible, preferably trying to pull an infallible first round to get that maximum amount of Pierce through the first couple of hits. If you can get infallible up, you can then hit with multiple Queen Calypsos and small hits, dealing good damage, and keeping them on the defensive.

If your opponent hasn’t stun shielded, that’s where Storm Lord comes in play. Switch back from playing offensively and defensively as you will need to make sure you can be able to out damage per second them and survive. Don’t just hit randomly, as we’re built on strategy. Make combined hits that make sense.

For example, you have the pips needed for the 5 pipped Thunderbird. You cast that into a Queen Calypso, giving you a +30% and a +20% traps on your opponent, making use of that utility you have.

Avoid spamming cards like a wild bolt or insane bolt as you are wasting pips. Use a Wild bolt to get off a shield, or start off with a hit, or need to get rid of a card.
Infection is for your heal spammers, and with all the pierce you have, it’s fine to hit through shields. All your other hits, use in situations where you know your opponent is open, and you can do mass damage. All spells and all battles aren’t all the same. Different situations occur, just have to be patient and committed to learn and understand what to do in different situations.

I hope you’ve enjoyed the guide. If you got any questions, my Discord is 𝕴𝖓𝖋𝖊𝖗𝖓𝖆𝕲𝖆𝖒𝖎𝖓𝖌 #1999, and I will gladly answer all questions related to storm Legendary PvP.

Dorm Decorating: Death School

I ’m sure everyone remembers struggling to figure out what to do with their first dorm room. I had no idea what to do with the original furniture. Honestly, it just wasn’t for me, but after a week or so of fishing, questing, and collecting treasure cards, I had figured out how to make the most of my dorm.


First, I started by removing all of the furniture and by selling it in order to buy some furniture I could work with for the style I had in mind. I had to think “What’s a good color scheme?” and “What items are an absolute necessity for a dorm?” and most importantly, “How could I fit everything together to work the best for my dorm?”

Well, after a few hundred trips to the Bazaar (on the fine edge of an exaggeration), I had gathered enough decor to achieve my goal. Some of the first few items I chose were the Wyrm Crowned Bed, the Long Narrow Table, and the Portrait of the Bone Dragon. After I had picked out the larger items, I started searching for others that would work well with them.

I decided on some Aero Dwarf Chairs for the center of the room; this would be the first thing your Wizard would see each and every time you entered. I wanted to make my focus simplistic and fill the outer edges with more decor.

One of the most important things to go by when decorating is to ask yourself “Does this look cluttered?” I don’t know about you, but I definitely like to keep things tidy, especially in my Wizard’s home.

One of my favorite parts of setting up my dorm was glitching. If you’ve never tried it before, it might surprise you how easy it is! This was my first time glitching while decorating and it turned out flawless, in my opinion. All you need to get started is one Maple Bookcase and a Black Checker, the best part is how they always have both of these items in the Bazaar!


To achieve the decorating glitch, first set down whatever object you want to float on the floor, then place the bookcase next to it. Then, you place the Black Checker on whichever shelf you want your item to be when it is in the air. Then, grab your Black Checker on the shelf and move it so your bookcase sinks into the floor. Once it’s there, you can move the item into the bookcase and then move the maple bookcase again, and your object is in the air! After this, to remove your bookcase, you grab the checker again and move it so your item stays in place.

My favorite glitch in this dorm room is definitely my Small Fry Keeper Tank. For this glitch, I used my Maple Bookcase to glitch some Purple Dewberries into the tank. Then I used it again to set it up in the window and out of the way! By using the glitch, I saved walking space in my dorm. Plus, it looks amazing, even if I do say so myself. To finish the tank off, I placed a Blue Angel plant on top of the tank to add a splash of blue to the area.

Every Wizard needs a study area, and for this, I completed three separate glitches. I decided to put the Telescope in the window sill with the Castle Magic Help tome beside it. It only made sense to look at all those beautiful Wizard City sunsets up close from the comfort of my dorm! Looking toward the desk area, I glitched the Arcane Rebooter (from Wizard101’s 10th-year-anniversary code) onto the table because it was almost too big to fit otherwise. That glitch definitely freed up more space on the desk too! I added a few specimens in jars, a Bottle Burner, Test Tubes, and a Venus Flytrap plant to complete the look. I found the flytrap in the Bazaar, but you can also get it from Fishing Chests!

I decided to not put too much of an emphasis on the doorway and to keep it fairly simple, I added the Nimbari Sword Rack, one of my favorite decorations in the game. The Dragon Skull, the Black Rock Fragment, and a couple of Glowing Mushrooms to keep things interesting.

Last but not least, I glitched the Wyrm Crowned bed into the wall and placed more glowing mushrooms underneath it! This is a really small bed in the game, so adding the mushrooms turned it into its own focal point! Next to the bed, I have the Elegant Hat Stand, and the Special Hat stand each covered in Darkmoor Cobwebs. You can thank my pet Moose for that one.

I hope you guys enjoyed the read because I loved writing it for you! I hope you all have a blast glitching and creating your very own personalized dorm!

This article was submitted by Guest Author, Jen Skullbreaker

Dorm Decorating: Xmas Edition

It’s Christmastime in the Spiral once again! I’m sure all of you are just about as excited as I am (as if that’s even possible!). It’s the most wonderful time of the year and you can show your Christmas cheer with an exciting and original Christmas themed dorm room!

I am completely new at glitching and Castle Magic, but I’ve picked up a bunch of fun tricks this season to share with you all! For my dorm, I didn’t want to use any of the Christmas themed trees we all love so much. Instead, I decided to make my own original Christmas tree.

For my Christmas tree, I chose to use six of the Blue Holiday Ornaments and glitched them into the air using my trusty Maple Bookcase and Black Checker. For this glitch, all you have to do is set down whatever object you want to float and then place the bookcase next to it. Then you place the Black Checker on whichever shelf that you want your item to be in the air. You grab your Black Checker on the shelf and move it so your bookcase sinks into the floor. Once it’s there, you can move the item into the bookcase and then move the maple bookcase and your object is in the air! After this, to remove your bookcase, you grab the checker again and move it so your item stays in place.

I found all of the ornaments used for this in the Bazaar (and for quite a cheap price). All around my tree I have floating presents using the aforementioned ornament glitch. I thought this would be a really magical focal point and it turned out better than I had imagined. Speaking of the actual Christmas tree, it’s the Snowy Polarian Tree shrunk down twice along with the ornaments using Castle Magic. As you’ve probably noticed by now, my not-so-Christmas tree topper isn’t actually on the top of my tree. I did this because outside of Photomancy, the tree is too tall for it to show. For this, I just grabbed a handy Star Staff and enlarged it five times with Castle Magic as well.  

To the left of my tree, I made a cozy sitting space featuring one of the goodest of boys. Right next to him, I glitched a Regular Keeper Tank with a Red Cap Carpe (the perfect Santa fish!) into the floor using a rug and the Maple Bookcase. For this glitch, you start by placing your tank in your dorm and then set out your Maple Bookcase with the Black Checker on the lowest shelf. Once that is done, you grab the checker and move the opposite end on the bookcase into the tank. Grab the Maple Bookcase and set it down so that your tank is up in the air. After this you grab the checker once more and move it so that the bookcase is no longer touching the tank, which is now floating. Then you pick up your bookcase and then place it once more. This time you will put your checker on the second shelf and place a medium rug (either the Medium Magenta or Medium Purple). You then move the checker so your bookcase sinks once more and place the opposite end on the long side of your rug. Next, you move the bookcase and make sure that the rug is placed evenly inside of the tank. As you’ll see now, the rug fits perfectly where the wooden bottom stops and the blue base starts. Once this is done, remove the bookcase by grabbing the checker and place it somewhere else in the room. Pick up the bookcase. Grab the rug and move it anywhere in your room where you want your tank and you’ll see that the tank is sunk into the floor without the bottom wooden piece showing!

Inside the tank, I have a shrunk down Snowman and a Snow Pile. Remember that when glitching items inside of the tank, you need to place them where the tank will be first, which can get tricky if you need to float each item. That’s why sinking the tank is a perfect option if you want some extra flair! For the Snowman and Snow Pile, I shrunk them both using Castle Magic Reflectors and Start Detectors with the shrink cards in place (this is all trial and error, depending on how small you want an item. Using a Magic Reflector, you can use castle magic on up to eight items and you can shrink or grow a single item at least eight times!).  On top of the tank, we have another Snow Pile shrunk down. I also included some Yuletide Candy Canes and peppermints for all of the guests to enjoy.

One of my favorite glitches of all time would have to be putting the Silver Chest over the plain wooden one for your bank. It was revolutionary for me when I first tried it and it worked so well! I simply used two medium rugs and the chest. All you must do is place one rug on top of the other at different angles and rotate the first one until it is under the wooden chest. Once that’s done, you set down your Silver Chest (which is the one found under the furniture tab in the Bazaar) directly on top of your wooden bank chest.  You’ll never have a plain chest for your bank again!

Next to the chest, we have a matching table with the Cookies and Milk glitched on top using the Maple Bookcase once again since they wouldn’t fit normally, you always have to give a little something back to Santa! (even if he is trapped in your fish tank at the moment).

Next to my glitched chest, I used up my spare Blue Holiday Ornaments and glitched them into the air and placed the Azteca Basket underneath. For that, I used the Maple Bookcase and Black Checker glitch with the bottom shelf, one with the second shelf from the bottom. All ornaments were shrunk two sizes down and I enlarged the basket by a size. All the String Lights were enlarged twice with Castle Magic as well. Last but not least, in the window, I placed the Gingerbread House to finish off my dorm.

I hope you all enjoyed my article on How to Make the Most of your Dorm: Christmas Edition! Decorate those dorms and have a very magical Merry Christmas!

This article is by Community Contributor, Jen Skullbreaker

Krampus Guide

It’s Christmas in the Spiral! You know what that means? You now have access to the skeleton key boss, Krampus. You can find the dungeon entrance in Wizard City Ravenwood behind the Ice Tree, Kelvin.


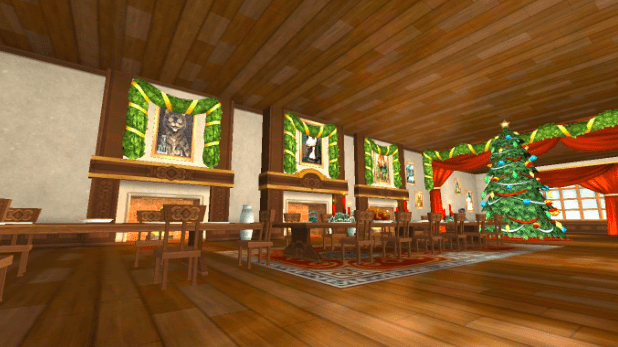
When you enter, everything will be decorated and pretty for Christmas.

Until you are caught running in the Halls. Everything turns dark. Now you’ve made Krampus angry and have 3 options to choose from.

  1. Wooden Key Krampus
  2. Stone Key Krampus
  3. Gold Key Krampus
Or, runaway and beg for forgiveness. But we all know that won’t work! So you’re better off confronting him. You might be scared, but no worries! I’ll teach you how to conquer him!

Wooden Key

Behind the Wooden Key option, you will find a Krampus, Rank 6, with health maxing at 4,900.

He Resists to:

  • Fire – 15%
  • Balance – 10%
  • Death – 10%
  • Storm – 10%
  • Myth – 10%

He Boosts to:

  • Ice – 15%
  • Life – 15%

You will not be able to Stun or Beguile him.

Stone Key

Behind the Stone Key option, you will find a Krampus, Rank 11, with health maxing at 15,072.

He Resists to:

  • All schools – 20%

He Boosts to:

  • Ice – 30%
  • Life – 30%

You will not be able to Stun or Beguile him.

Gold Key

Behind the Stone Key option, you will find a Krampus, Rank 15, with health maxing at 30,144.

He Resists to:

  • Fire – 50%
  • Death – 50%
  • Balance – 30%
  • Myth – 30%
  • Storm – 30%

He Boosts to:

  • Ice – 30%
  • Life – 30%

You will not be able to Stun or Beguile him.

Cheats

  1. Maycast shadow Steal Charm on any blades casted on yourself
    – You can use Aegis the first time to get around this cheat. Any other time could get your unprotected blades stolen.
    – You can also cast Blades on other Wizards. Be warned that he could take your blades if you have any.
  2. Removes Feints
    – Indemnity will not work. Cheat is triggered twice.
  3. At the beginning of every 3rd round, he will dimension shift any traps
  4. Every 5th round minions will be summoned.
  5. Late Rules:
    Wooden: Will cast an enhanced power link
    Stone: Will cast Scald and a -75% accuracy Smoke Mantle
    Gold: Will cast DoT for 1,596 Fire damage over 3 Rounds and a -75% version of Smoke Mantle on the Wizard.

Strategy

Hitter: Buff up using non-blades. For example, traps and Windstorm or Star school aura spells.

Supporters: Blade up the hitter and get them set up to hit before the 5th round to prevent having to deal with the minions. Supporters should also heal and shield to prevent defeat.

Make sure the person Hitting goes last

Round One: Supporters should begin to set up by casting Elemental or Spirit Blades/Traps and any other Blades/Traps that the hitter can use. The hitter should use any of their school traps.

Round Two: Enchant Blades and Traps using potent/sharpen to increase the damage.

Round Three: One support team member can use the hitters’ school global spell, ex. Time of Legend, or Darkwind, and the rest can continue blading up the hitter. The hitter can use their preferred Star School damage spell, e.g. Frenzy, Berserk etc.

Round Four: This is the round you will want to use any last buffs you have while the hitter attacks with their strongest spell. Preferably a shadow hit if they can and no DoT spells. If you do not have Shadow magic yet and you are the hitter, use your highest damage spell to hit.

Now you know how to beat Krampus, go save Christmas before It’s too late!