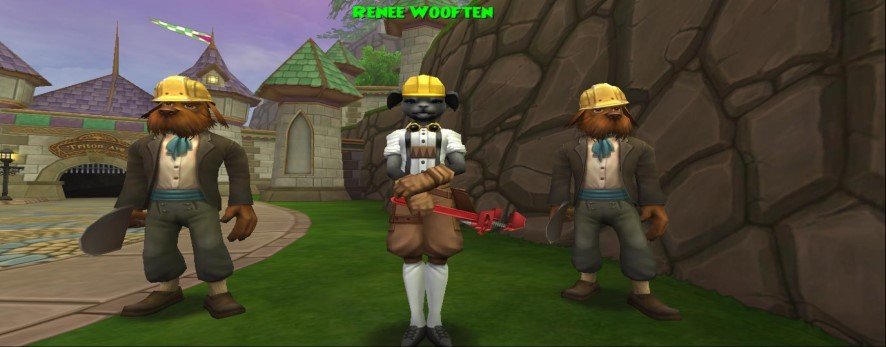
Renee Wooften Interview

Recently, the Ravenwood Academy staff had the pleasure of spending some time with Renee Wooten aka Renee Wooften, one of the Associate Producers at KingsIsle. After spending 3 years answering customer inquiries, in-game issues, billing concerns, and bug reports and then becoming an Associate Producer we decided that she had an interesting perspective we would like to hear more about. We really appreciate her taking the time to answer our questions and can’t wait to see what exciting things she brings to the team in the future. Also, what IS she up to in Olde Towne at that tunnel??? Let’s see if we can find out. 

Q. Empyrea Part 2 added Whirlyburly, can you tell us if there are any plans to build on and expand it to make it more appealing?
A. We always envisioned Whirlyburly to be something that we wanted to expand upon depending on how players received it. I hope we get a chance to expand upon it and would love to continue getting feedback from players on the forums!

Q. Can you tell us if there are any plans for updates to keep the current influx of players interested, or will we be continuing to mainly see the big half-year updates?
A. We always strive to balance out quality of life and content updates. Quality of life is typically revisiting systems that are already in place and how we can make them more enjoyable or accessible to players. 

Q.  Have you heard of any plans to create further side content? (like pvp, whirlyburly, fishing, gardening)
A. We are in constant conversation about creating new side content. 😉

Q. Will we continue to see graphics updates in the worlds past Wizard City?
A. Currently, there are no plans to expand past Wizard City. This does not mean it could not potentially change in the future.

Q.Will we see more of these crowns events? Will we get other different types of events in the future? 
A. We are always trying to brainstorm different events and have always wanted to reward our players that choose to not be members, but also maintain the value of having a membership. We are looking into making adjustments to future events in hopes to make it more rewarding based on feedback from the community. 

Q. Will we ever see a new side world like Grizzleheim and Wysteria?
A. There’s always a possibility. 🙂

Q. Can you give us any hints about what other exciting surprises are coming to the Spiral in 2019?

A. We are currently still working on a solid plan for the year, but it’s going to be exciting and ambitious once again. Hopefully we’ll have more to share in the coming months.

Crafting101 – Dragonspyre | Pt 1

We’re back with another Crafting101 issue. Lets explore the crafting quests in one of my favorite main worlds, Dragonspyre!

Balthazar Dragonthorn

The next crafting badge you can earn is your Master Artisan badge, but first, you must complete all of the crafting quests Balthazar Dragonthorn gives you. Balthazar is found to your right after you cross the bridge entering the Atheneum.

The first quest he gives you is called Two-Ring Circus. For this quest, you will need to craft 2 Rings of Apotheosis. To craft these rings, you will need an Equipment Crafting Station. It is available for 1,500 gold in the Furniture stores in Krokotopia, Marleybone, Mooshu, and Dragonspyre.

Balthazar’s crafting quests are more difficult than Toshio’s were. He not only asks you to craft the 2 rings of Apotheosis but also 2 robes specifically for your school and 2 pieces of furniture. This quest will require the Housing Crafting Station which is available for 1,500 gold from the Furniture Stores in Wizard City, Krokotopia, Marleybone, Mooshu and Dragonspyre.

The Recipes

The recipes themselves aren’t too difficult to complete. The biggest obstacle is gathering the rare reagents such as Diamond, Nightshade and Blood Moss which can be difficult to find or aquire.

The first recipe, Ring of Apothosis, only has three ingredients. Balthazar starts you off with something simple.

Below is the Recipe for Ring of Apotheosis. With needing to craft 2 rings, you will need to double the reagents.   

Below is a picture of your second crafting quest recipe. The robe you are given in this quest all depends on what school you are. I am a Life Wizard so I was given the Needle and the Vine quest. Other schools will get:

  1. STORM – Needle and Rain: Craft 2 Raintree Uniforms
  2. ICE – Needle and Frost: Craft 2 Thunderchill Cloaks
  3. FIRE – Needle and Flame: Craft 2 Grimblaze Vestments
  4. DEATH – Need and Bone: Craft 2 Duskwind Tunics
  5. MYTH – Needle and Fate: Craft 2 Bright Surcoats of the Paragon
  6. LIFE – Needle and vine: Flamesoul Cloak
  7. BALANCE – Needle and Luck: Craft 2 Cloaks of Weighty Grief 

The only recipe available for purchase from Balthazar is the Flamesoul Cloak. You will need to craft 2 of each robe so again you will need to double your reagents.

The third and final quest from Balthazar is Iron Craft Dragonspyre. You will need the recipe Crimson Book Stand from Toshio in Mooshu. You will need to craft 2 of these to finally receive your Master Artisan Badge. 

Gathering the Reagents

Now, the fun part begins! For me, it took some time to gather all of the reagents needed. For the first recipe, Ring of Apotheosis, you will need:

Ghost Fire

Ghost fire is best bought from a reagents vendor. In fact, Zoltan Nightstone, who is standing nearing Balthazar, sells them for 100 gold a piece. The Bazaar also has them available and can cost anywhere from 50 to 500 gold. If you happen to have any Burning Snap Dragon, they drop Ghost Fire. If you are in a hurry to rank up, I would recommend buying them from a vendor or the Bazaar whichever works best for you. 

Diamond

I found Diamond to be the most difficult reagent to gather. You can find them in Ore as a rare harvest, or transmute Ore to create them. Ore spawns all over the spiral. It’s all about finding the hot spots. The Atheneum usually has 2 that you can harvest and the Cave of Solitude, in Mooshu, has around 3-4. Jumping from realm to realm makes it easier and quicker to gather the reagents you need in an area like these. They are available at the Bazaar, but they are quick to go, so if you see any – buy them as fast as you can! They usually cost anywhere from 100 – 1,000 gold. There are also several plants that could drop Diamond when you harvest them: Burning Snap Dragon, Deadly Helephant Ears, Fickle Pickle, Frozen Fly Trap, King Parsley, and the list goes on.

Black Lotus

Black Lotus can also be a difficult reagent to find. Mostly found in Mooshu, once you find a few, I would switch through different realms to find as many as you can in that spot. If you still can’t get enough, it is available at the Bazaar when you’re lucky usually selling anywhere from 43 to 425 gold, depending on how many are available. 

So in total for this recipe, you will need:

  • Ghost Fire – 18
  • Diamond – 30
  • Black Lotus – 40

Now, the second recipe varies depending on your wizards’ school. As we covered earlier, there are 7 different quest variations. We will cover the other variations next week. Since I am a Life Wizard, I will cover the reagents needed for the quest Needle and the Vine. For this quest you must craft the Flamesoul Cloak.

Nature's Wrath TC

Nature’s Wrath is a popular treasure card available at the Bazaar. These TC’s usually sell for around 300-400 gold each. You can also get it from harvesting Bamboo Shoots, Fickle Pickle, Fortune Cookie Tree, Purple Grapes of Wrath and Queen Crape Myrtle.
If you can’t find it at the Bazaar, Zan’ne in the Krokotopian Library has them available for 400 gold each.

Ruby

Ruby is an easy reagent to find. The vendors in Wizard City, Krokotopia, Marleybone, Wysteria, and Mooshu have it available for 15 gold each.
You can also buy it from the Bazaar from 8 to 75 gold. 
If you have any Ivy League, Snap Dragon or Ultra Dandelion there is a possibility you could get Ruby when you harvest them.

Crystal Vial

Crystal Vial is a pricey reagent when bought from a vendor and the Bazaar. The vendors in Wysteria, Mooshu and Dragonspyre sell them for 330 gold where as buying them from the Bazaar can cost between 165 to 1650 gold each, depending on how many are listed available. Harvesting Pink Dandelion can also get you some of these vials.

Ectoplasm

Ectoplasm is a tricky reagent. Battling different bosses in Mooshu and Dragonspyre can reward you with Ectoplasm but it is not guaranteed every battle. Buying it from the Bazaar is much quicker unless you enjoy farming. It retails for 25 – 250 gold each. Harvesting Baby Carrots, Orange Dandelion, Ultra Snap Dragon and Ultra Trumpet Vine will give you the chance of Ectoplasm at harvest.

Frost Flower

I would say Frost Flower is a fairly popular reagent that spawns all over the spiral in its cold and icy places. It is especially easy to find in Grizzleheim and Wintertusk and there is always a frost flower near the Ice Tree, Kelvin, in Ravenwood! rost flower can be found at the Bazaar, prices ranging anywhere from 33 to 325 gold each. Harvesting Evil Snow Peas, Fickle Pickle, Frozen Fly Trap, Orange Dandelion, Snow Apples, Honey Bee Plant and Boon Tree will increase your chances of harvesting a Frost Flower.

Black Pearl

I found Black Pearl to be a challenging reagent to find. It can be gathered as a rare harvest from black lotus or pearl. It can also be transmuted. You can also purchase Black Pearl from Diego 175 arena tickets. The Bazaar has them available but they are quick to go, so if they are available buy them quickly. They usually sell for anywhere from 188 – 1875 gold each. A few gardening options are Alligator Pear Tree, Deadly Fly Trap, King Parsley, Ultra Tiger Lily, and the list goes on.

Stone Block

Stone block is one of the easiest reagents in the game to find.Two of them spawn right in the Athaneum where you get the quest! The Bazaar has them selling from 18 to 175 gold a piece, you can even buy a bundle of 100 from the Crowns Shop for 499 Crowns. Burning Snap Dragon, Dandelion, Fickle Pickle, Snap Dragon and Tiger Lily all drop this reagent.

So in total for this recipe, you will need:

  • Nature’s Wrath TC – 12 
  • Ruby – 28
  • Crystal Vial – 6
  • Ectoplasm – 24
  • Frost Flower – 30
  • Black Pearl – 16
  • Stone Block – 20

Now for the last recipe. The Quest is called Iron Craft Dragonspyre and you have to craft 2 Crimson Book Stands.

Fire Elf TC

The Fire Elf TC is a very popular TC dropped by low ranked enemies. A popular boss to farm is the Kraken, located in Triton Avenue. It can be bought from the Bazaar from 113 gold each. If you can’t find any available at the Bazaar, Harold Argleston in the Wizard City Library has them for you at 250 gold a piece, Zan’ne the Krokotopian Librarian has them selling at the same price. They can be harvested from Bell Pepper and Helephant Ears.

Shadow Oil

Shadow Oil is best bought from a vendor. Vendors in Krokotopia, Marleybone, Wysteria, Mooshu and Dragonspyre sell Shadow Oil at 20 gold each. It can also be harvested from Orange Dandelion.

Glass Vial

Glass Vial is also best purchased from a vendor. Vendors in Krokotopia, Marleybone, Wysteria, Mooshu and Dragonspyre have them available for 125 gold each where the Bazaar could be anywhere from 63 to 625 gold each. There is a chance of receiving Glass Vial’s from harvesting Burning Snap Dragon too!

Cat Tail

Cat Tail is a very popular and easy reagent to find. They spawn just about anywhere in the Spiral where there is water. If you are having trouble finding them, they sell from 18 to 175 gold at the Bazaar! They can be harvested from Dandelion, Pink Dandelion, Tiger Lily and Honey Bee Plant!

Nightshade

Nightshade is actually a rare harvest from Deep Mushroom! Deep Mushroom is a reagent that can be found all over the spiral, however, Mooshu is the world where Deep Mushrooms likes to spawn most! If you aren’t having much luck finding Deep Mushroom by the road in Mooshu, the Bazaar is the best place to try next. Nightshade sells from 100 to 1000 gold each, but they are very rare. If you find them available be super quick to buy them! If you are still struggling to find Nightshade, harvesting Burning Snap Dragon, Ultra Ninja Fig, Honey Bee Plant and Fickle Pickle will increase the chances of you getting more Nightshade. You can also transmute 15 deep mushrooms into your needed Nightshade. 

Blood Moss

Blood Moss, another rare reagent. Actually a rare harvest from Red Mandrake. Red Mandrake spawns frequently in Wizard City’s Colossus Boulevard, Nightside, Sunken City, Firecat Alley, Haunted Cave and Cyclops Lane. If you have Azteca unlocked, it can be found there too! The Bazaar sells Blood Moss from 150 – 1500 gold each but it is one of those rare reagents that sell like hot cakes! Harvesting from Deadly Fly Trap, Ultra Ninja Fig, Honey Bee Plant, Pink Dandelion and Fickle Pickle will hopefully grant you some Blood Moss, or you can transmute 15 Red Mandrake at the crafting station to make 1 Blood Moss. 

Black Pearl is also needed for this recipe. So in total, you will need:

  • Fire Elf TC – 6
  • Shadow Oil – 6
  • Glass Vial – 2
  • Cat Tail – 72
  • Nightshade – 24
  • Blood Moss – 20
  • Black Pearl – 12

Transmute Recipes

Transmute Recipes are recipes you can buy from various Recipe Vendors around the spiral! They take a number of common reagents and craft them into a single desired rare reagent! You will need the Card Crafting Station which is available for purchase from the Furniture stores in Krokotopia, Marleybone, Mooshu and Dragonspyre for 1,500 gold. I found these recipes extremely helpful when trying to find Nightshade, Diamond and Blood Moss. I just crafted them and problem solved!


The Diamond Transmute Recipe is available from Felicia Worthington in Marleybone – Regent’s Square. Selling at 200 gold. You will need 15 Ore. 


The Black Lotus Transmute Recipe is available from Toshio in Mooshu – Jade Palace. Selling for 300 gold. You will need 10 Cat Tail and 10 Ore. 


The Ectoplasm Transmute Recipe is available from Balthazar Dragonthorn in Dragonspyre – The Athaneum. Selling for 150 gold. You will need 5 Leather Straps.


The Frost Flower Transmute Recipe is available from Torald Wayfinder in Grizzleheim – Northguard. Selling for 300 gold. You will need 10 Mist Wood and 10 Stone Block.


The Black Pearl Transmute Recipe is available from Toshio in Mooshu – Jade Palace. Selling for 400 gold. You will need 15 Black Lotus.


The Nightshade Transmute Recipe is available from Wul’yahm in Krokotopia – The Oasis. Selling for 200 gold. You will need 15 Deep Mushroom. 


The Blood Moss Transmute Recipe is available from Eudora Tangletree in Wizard City – Olde Town. Selling for 400 gold. You will need 15 Red Mandrake. 

That concludes our walk through of the Dragonspyre Crafting Quests! Next stop, Celestia! Where we will meet with Pierce Stanson, the Grandmaster Artisan! See you in the next article!

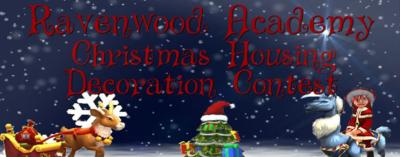
Christmas Decoration Contest!

Christmas is about sharing love and friendship and spending time with the ones you hold dear. This year we would like to do a Christmas Housing Decoration contest together with you, our community. Gather together all your Holly and your Mistletoe. Deck all your Halls and make everything merry and bright because we are coming to town! 

In order to qualify, submit a Winter Holiday themed screenshot of your Wizard in his or her decked out house. Submit your very best screenshot and your Wizards name to [email protected] Only one entry per person will be considered, entries will be verified for originality. Contest ends December 18th 2018. 

Prizes:
1st place: Aero plains Bundle
2nd place: 5,000 Crowns
3rd place: Christmas mount
4th place: 7 packs
5th place: 4 packs

Winners will be Announced on the @RavenwoodAcadmy Twitter December 21st 2018 at 7pm Eastern. Emails will be sent to the winners, Good luck to everyone, we can’t wait to see what you come up with!

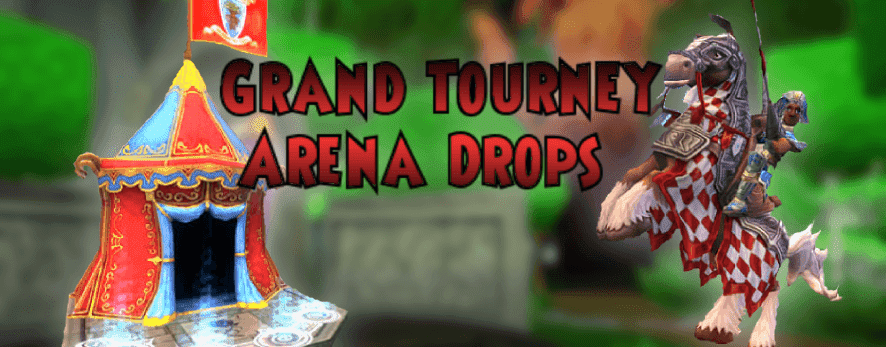
Grand Tourney Arena Drops

The Grand Tourney Arena is a housing dungeon that comes with the Grand Tourney Bundle. The dungeon can be accessed through castle tours using a glitch. The drops mentioned in this guide will be for the highest tier.
 
There are 12 pieces of gear (3 sets; each with a hat, robe, boots, and wand) from the Hoard of the Hydra card pack that drop from this housing dungeon. There is an Energy Set, a Healing Set, and a (terrible) Offensive/Utility Set.

Offensive/Utility Set (World's Fool Set)

As I stated before, this set doesn’t really have much to offer. Aside from the wand (that will be mentioned later), each of the 3 pieces provide a decent amount of health and power pips, as well as universal accuracy, damage, and resist. They also each give a nice utility item card: Cooldown (1 Pip), Enfeeble (2 Pips), and Mana Burn (target loses 4 pips).

Regardless of what school you are or what role you play, I can only see this combination of stats being useful for a spammer or support at best.

Energy Set (Pixie's Encanta Set)

The level 100+ version of the Energy Set gives a total of +59 energy. (Hat, Robe, and Boots give 18/23/18. The wand in this set doesn’t actually give any energy bonus.)

Healing Set (Faerie Court Set)

The level 100+ Healing Set a great option if you don’t want to spend crowns to get healing gear from packs, especially for non-life wizards. The 4 pieces give a total of 56 incoming and 60 outgoing healing bonuses! With a decent ring and athame, that could easily total to 100/100 or more. In addition, it provides item card versions of Rebirth, Healing Current (2 pips), and two Guardian Spirits (Restores 20% hp).
*Note: Although the Mandolin of Evermore visually looks like it matches with the energy set, I listed it with the healing set because it has the best healing stats of all 3 wands.
 

The Wands from the other sets also give decent healing boosts, with similar critical block ratings and a different item card.

This dungeon also drops many snacks (including mega snacks) at a high rate. Here are some of the good snacks:

Rank 7

Rank 8 (Mega Snacks)

The gear’s drop rates are decent, and the dungeon is very easy with a full team. Good luck!

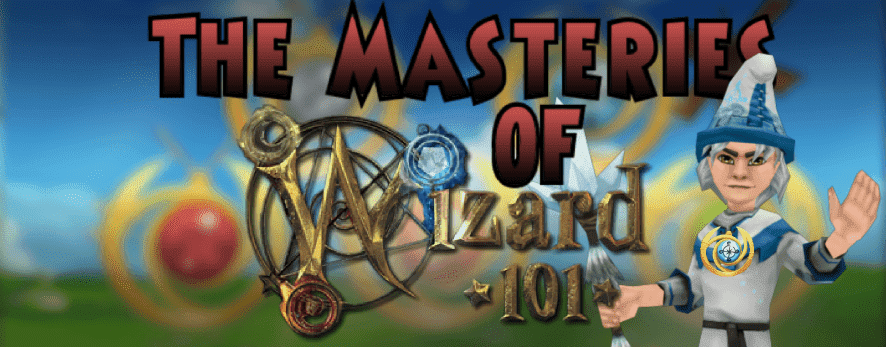
The Masteries of Wizard101

Greetings fellow wizards! In this article I will discuss the different type of masteries, where they are dropped and their usage in PvP/PvE.

What are Masteries?

Masteries are a subgroup of amulets that allow a wizard to use Power Pips with spells that are not of their own school.

This is what a mastery looks like.
This one is the Life School Amulet.

Where to Find Them

Any Level

Dropped from either Waterworks, located in Crab Alley, Wizard City, or from The Tower of The Helephant, located in Pegasus Place, Wysteria.  Both are avaliable to wizards at level 60 or higher.
It can also be bought from the Crowns shop for 9995 crowns

Level 90


Dropped by all 3 secret bosses in Aquila.
Mount Olympus – Gladiator Dimachaerus
Atlantea – Sand Squid Tentacle
Tartarus – Cronus

Level 100


Dropped by the hidden chest in the first part of Darkmoor. A gold key is required to gain access to the boss. Castle Darkmoor becomes available to wizards who reach level 100

Level 110


Dropped by Omen Stribog in the River of Frozen Tears in Polaris. A gold key is required.

Level 130


Can either be crafted from a recipe bought in Nimbus Recipe vendor Romar sells the recipe for 50,000 gold

Usage in PVE and PVP

Life: Mainly used because of the amount of healing spells it offers. Regenerate and Satyr are the most popular to save you which in battle either in PvP or PvE. 

Death: Mainly used with damage, life steal and healing spells. But its more commonly used to spam the enemies with plagues.

Myth: Mainly used to stun, using earthquake to remove all the enemies blades and shields or the use of shatter. 

Balance: Mainly used to spam Loremaster and Mana Burn in PvP, but also used when the wizard wants to be a support focused player.

Fire: Mainly used for damage over time hits (DOTs) which include Fire Elf and Burning Rampage. Also good for the Eirikur Axebreaker spell that comes from the ColdFire Dragon pet.

Ice: Mainly used for the shields that ice has to keep their damage low and you can use it to stun your enemies.

Storm: Use if you want to land high damage hits on your enemy or cast dispels.

What else are Masteries good for?


Masteries are not just used for PvP and PvE, they can also be used as part of a stitch. For example,  if you’re trying to make yourself look like a life wizard it looks cool to have the orbs flying around your wizard’s head.

To the right is an example of the Mastery Amulet stitched to a matching look.

You can use a mastery from another school to take care of some of the weaknesses that your main school has. For example, Storm wizards have low health so some Storm wizards might use a Life Mastery to get themselves out of any sticky situations. 

If you buy or farm for a Mastery Amulet, I hope this guide helps you to use it to your best advantage in game!

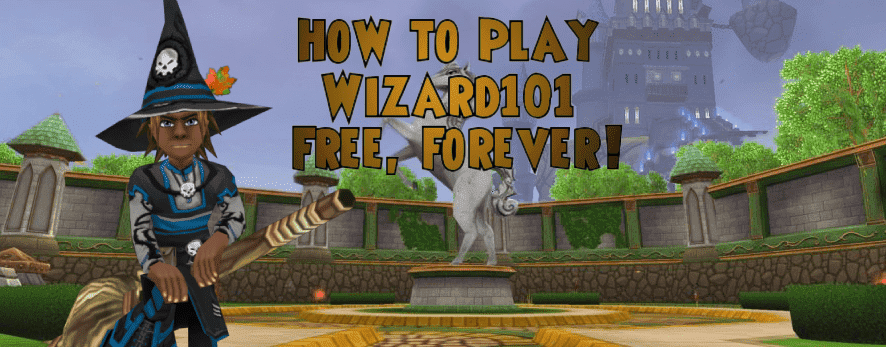
Play Wizard101 for Free!

Let me start by saying, we’ve all been there. There’s always been a time in the game when you’re considered a free player, whether you’re out of crowns or your membership has just run out. Especially when you’re playing for the first time, crowns and membership can be difficult to get if your parents don’t agree to it.

This guide assumes you want to level up to receive more spells from your professor and receive lots of gold, without ever paying crowns or membership.

Phase I: The Early Days

Farming

There are plenty of different places to farm, but where do we start? Farming is the repetitive act of defeating an enemy’s instance or gauntlet.

Let’s begin with the simplest places to farm that you can access yourself.

1. The Kraken

Kraken, the mighty monster of the depths is famously farmed, right in Triton Avenue. This is the best option until you are about level 12. The Kraken drops clothing and furniture you can sell in the bazaar (or keep for your future house!)

I recommend that you join a busy realm, such as Ambrose or Balestrom to get as many people to join the fight as possible so it will go quicker. After defeating the boss if you return to the Storm Mill through the teleport pad and come right back, the Kraken respawns.

2. The Harvest Lord

Farming The Harvest Lord has all the same benefits as the Kraken, except now you have a Team-Up button. Once you click that button, higher levels will join to help you farm him from the Team Up station right outside the bazaar.

3.  Housing Gauntlets

Winterbane Hall and the Midnight Sun Pagoda are some of the best gauntlets there are for this purpose. When you farm them you will get weapons, clothing, furniture, seeds, and pets. The only downside to gauntlets is that there is no Team-Up button to find higher levels to help you. Therefore, you must invite your own friends, or find a way to gather help. Find this place in a shared home on the housing tours menu.

Below are the tiers of difficulty and experience for all gauntlets. The numbers represent your level. I suggest you should farm the gauntlets around level 12 to level up quickly. The closer you are to the latter end of the levels, the more experience you will receive. Upon second entry, you will receive half of the experience you received the first time.

  • 01-19:  Tier 1
  • 20-39:  Tier 2
  • 40-59:  Tier 3
  • 60-79:  Tier 4
  • 80-100: Tier 5

Remember to try to mix it up between the various gauntlets offered. They can yield large rewards and XP. Here is a list of all housing gauntlets there are, as of November 2018

  • Winterbane Hall
  • Midnight Sun Pagoda
  • Spiral Cup Gauntlet
  • Grand Tourney
  • The Great Clock
  • Fantastic Voyage Expedition
  • Accursed Playhouse

Please note: Tanglewood Terror, Baddle of The Bands, Zeus, KrokopatraMeowiarty, and Rattlebones housing instances from the crowns shop are non-repeatable, but yield great rewards. Use with caution. They are  extremely challenging and do not adhere to the same tier of difficulty rule as the gauntlets listed above.

Gardening

Upon the completion of level 11, you will be given a quest. You must speak to Moolinda Wu, informing you that your status as a level 12 player now gives you the ability to garden. Farming the Kraken and Harvest Lord all this time, have been saving your money?

The two best seeds you can buy are Stinkweed and Prickly Bear Cactus. Prickly Bear Cactus is useful for pet snacks, because there is a chance it will give a mega-snack at the elder stage, but don’t be surprised if it doesn’t give you one too often.

Stinkweed

This is unironically one of the best plants you can buy at a lower level, purely for the sake of how much gold you get per harvest. Remember to save your gold to buy items, like the mounts for gold. Please click here for Amber Ravynsong‘s guide on the various permanent mounts that you can purchase for gold.

“Smoke Screen” and “Poison” will give you 200 and 215 gold each, respectively, by selling them at the bazaar. It is also worth mentioning that each stinkweed will give you about a hundred gold per harvest.

All you need to do is buy one stinkweed. It should roughly cost 480 gold. The gardening spells, pest control and water are all you need for this plant. Don’t waste money on much else, besides a gardening gnome. The stinkweed will give you more seeds over time- after all, it grows like a weed.

Buy a castle block floor from the bazaar. Although, there may be a chance there won’t be one there right away. You can grow small plots on these like a grid. I suggest plotting it as a 3×3 to a 6×6 grid. If you do ever plan to get a membership to continue questing, the large range Mooshu gardening spells will be your friend.

Phase 1 Review

  • At levels 1-9 (roughly), you will quest until you are completely done with the free-to-play zone offered.
  • When you are levels 9-12, you will farm the Kraken and The Harvest Lord.
  • Reaching level 12, you will garden Stinkweed.
  • By planting a 6×6 plot of stinkweed, you will earn thousands upon each harvest, selling poison and smoke screen treasure cards.
  • Also when reaching level 12. you will farm the Winterbane and Midnight Sun Pagoda gauntlets.
  • By level 15, you should have 100,000 gold to buy yourself a nice house from the Crowns shop.
  • Try all the gauntlets at least twice by level 19, then repeat.

Phase II: The Higher Levels

Over time, you will feel this is going to be monotonous and grinding. What variation can we add to this sequence, to make it more fun? You can begin by helping those who have the same goal as you. You can go to the Team-Up center outside the bazaar and aid lower levels with their quests. Remember, you earn 3 xp per pip used in battle, so attempt to use bigger spells when you have the chance.

Fishing

Try to get involved in fishing. By catching fish, you can earn even more money. As you progress, you will get more energy every 2 levels. You can earn hundreds to thousands of gold for every fish you sell, especially if you catch the fish of the day, or the fish of the week. Please click here for our fishing guides for more information.

In-game Events

Within the game, you should take advantage of an event whenever it comes around. Events such as The Lost Pages and The Five BOXES come around once every few months. Seize the moment and go for it. With The Lost Pages, farming is built right into it. Try helping other young wizards with the event even when you are done.

Free Crowns

Overall, you cannot deny that crowns are king in this game. They buy so many of the nice items in the crown shop, such as pack items, unique housing items, and much more.

On the KI free games website that opens every time you log out of the game when you aren’t a member, there’s a trivia tab where you can earn 10 crowns for each quiz you take.

In-game, check out the “Free Crowns” button to watch videos and earn crowns. Recently, they’ve stopped working, so be hasty with using these when you see one available.

Every Christmas, free crowns are offered as a part of “The 12 Days of The Spiral” event where you can receive gifts. Be warned! Keep up with the event every day, even on the thirteenth day, or else you may just miss the day they offer that gift.

Thank you, Starlights, I hope you have a wonderful evening, and good luck playing the game.

We Are Now An Official Fansite!

Greetings and salutations, Community!

As some of you have seen on Twitter, Ravenwood Academy is now an official fansite of KingsIsle Entertainment. It is an honor and a privilege to be an official fansite. Thank you for being patient and staying with us over the last 9 months as we first started as a wobbly and awkward new website, as we changed and evolved and tried new things. Ravenwood Academy has finally come into its own and we all have cause to celebrate.

The Future and Goals for Ravenwood Academy

We are here for you, Community. We are not here for us, we are here for you; we want to support your events, we want to support your streams. As an example, here’s a community streamers story. We want to spotlight you, we want you to reach out to us and ask things. Don’t hesitate. Once again, we are here for you, not us.

We are going keep providing guides for players, new and experienced. We have so much content waiting for you! We want to help the newer wizards that are coming to the spiral, and we want to showcase you and provide the content that The Community is looking for.
 

I, myself, as the Owner of Ravenwood Academy, will be replying to all messages. The best way to reach me is by emailing: [email protected]!

If you have any questions or concerns, please feel free to email me.

Thank you all,

Nathan Darkhorn

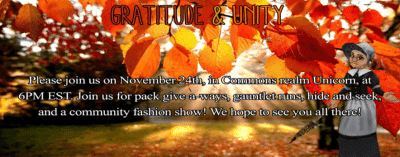
Community Thanksgiving Event

Saturday November 24th,  meet us in Commons realm Unicorn at 6pm Eastern for an all level Gauntlet Runs event!

Our Staff, Events and Runners teams will take community members through Accursed Play, Winterbane, Pagoda, or Spiral Cup while we all hang out, chat and do some PvP just for for fun in true Community style.

A few lucky wizards will even win packs and wand codes!

There is something for everyone to be Thankful for in the month of November and we are thankful for the gift of friendship and love that we all share in this community!

Be sure to tune in on our official Twitch channel so you can watch all the fun! We can’t wait to get together, hope to see you there!