Visionary Storm 100% Critical and Max Damage Guide

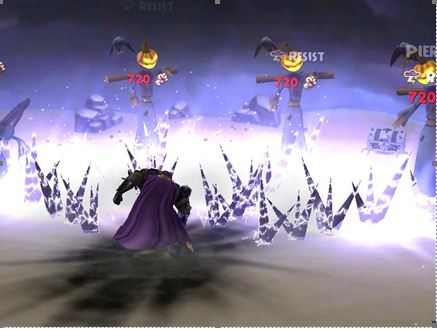
Ah the Storm school! The hardest hitting school and the easiest school to hit 100% critical. It is also the easiest school to balance super high damage with super high critical. Storm eclipses the other schools in that department but that’s not surprising since that’s what storm is all about, hitting high while trying not to die very quickly (intended shade). Currently, there are many methods to gain high damage and max critical with this school. We’ll explore the one that gives the highest damage while maintaining 100% critical. The current highest damage storm can achieve with 100% critical is 165% damage. The critical amount goes to 842 which is 100%.


Benefits

The Storm school is the hardest hitting school in the game. This means that they can end battles really fast. They have the highest critical in the game as well as the highest pierce. Their attacks are pretty deadly if they hit you directly. They also have quite a few spells that remove blades which is pretty cool, unless you’re fighting against one of course.

Problems

With this gear build, there are just a few problems you will run into. I would say not much is sacrificed compared to the other schools since this area is Storm’s specialty. If you run this gear you will have to sacrifice pierce, and a little bit of resist but you should be fine. Some schools will have to give up these factors along with accuracy but with this build, Storm usually maintains high accuracy. The other problem that you will encounter, which is not just native to this build, is health. Storm is notorious for their low health so this gear setup just reflects that.

What you’ll need

Robe: Malistaire’s Cloak of Flux

Hat: Stormy Paradox Conical

Boots: Stormy Paradox Boots

Wand: Sky Captain’s Boarding Hook

Pet: Triple damage Double critical pet with a Cautious Jewel

Athame: Aphrodite’s Storm of Thorns (with two (2) +18 critical Amethyst jewels)

Ring: Stormy Paradox Ring (With one (1) +18 critical Amethyst jewel)

Amulet: Flygob’s Medallion

Mount: Storm Ghulture

Deck: Stormy Paradox Deck

Total Damage: 165%
Total Critical: 842 (100%)

Storm Gear Setup

Calculations


Alternative Gear/Recommendations

So with the following gear on, Storm usually maintains 165% damage with 100% critical. The alternative gear will be shown at the end. You can also use the Lady of Spider’s Lure Amulet from Morganthe instead of the Flygob’s Medallion which will give you two extra blades.


What you’ll need

Robe: Malistaire’s Cloak of Flux

Hat: Stormy Paradox Conical

Boots: Stormy Paradox Boots

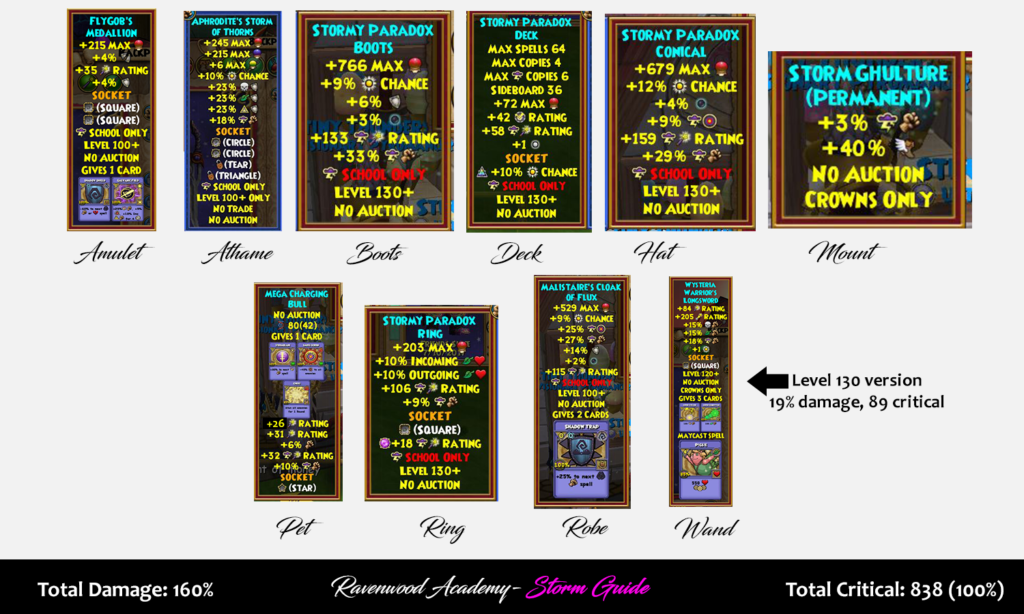
Wand: Wysteria Warrior’s Longsword (level 130+)

Pet: Triple damage Triple Critical pet

Athame: Aphrodite’s Storm of Thorns (with two (2) +18 critical Amethyst jewels)

Ring: Stormy Paradox Ring (With one (1) +18 critical Amethyst jewel)

Amulet: Flygob’s Medallion

Mount: Storm Ghulture

Deck: Stormy Paradox Deck

Total Damage: 160%
Total Critical: 838 (100%)
Storm Gear Setup

Calculations
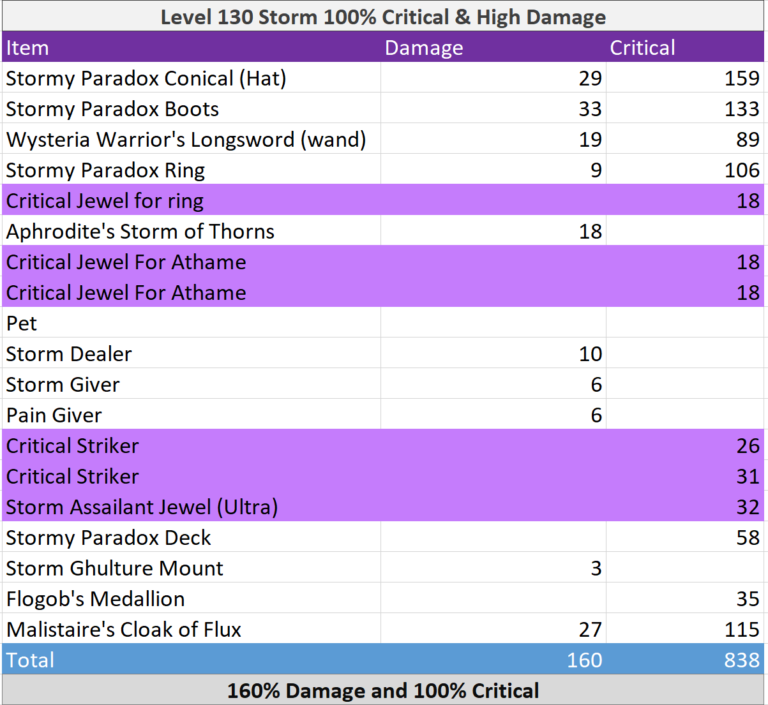
Gear Calculations

Thanks for reading my guide on achieving 100% Storm critical in Wizard101. I hope it will help your Storm Wizard hit like a Hurricane as you explore the Spiral with your friends from Ravenwood Academy.

Check out the rest of our Gear Guides, we have a guide for every school at Ravenwood Academy!

PS. Credit to AtmoPlex on twitter for the wand screenshot!

Balance 100% Critical Guide

Ah the school of Balance! Arguably one of the hardest schools to beat in PVP. In addition, they can also achieve max critical and high damage. With this setup you can get around 130% damage and 839 critical.

Benefits of the Balance School

The Balance school is really amazing. They’re one of the most feared schools in PVP. Loremaster, Mana Burn and Supernova can all be deadly spells when used correctly. I usually always lose to Balance in PVP, so I hate going up against them.
 
Their wide variety of spells can prove to be very useful in certain situations. Yet, one disadvantage they have that isn’t shared with the other schools is a prism card. This forces them to fight Balance bosses without the option of a hit conversion spell. This can be very annoying in PVE. You’re forced to ask for help, which is not always possible since some dungeons are solo.

disadvantages of this build

 
 Of course when you boost certain stats, you run the risk of decreasing the others. In this case, pierce and power pip chance and resist might be reduced. You don’t really see many Balances running around with 100% critical these days. This is solely because they don’t really like sacrificing other valuable stats. However, it’s always nice to critical every hit you use.
 
For this build I would use the Morganthe’s Shadow of Amber amulet because of the extra blades. You can swap it out for the Darkmoor alternative if you’d like. It would increase your critical by 5 and increase your pierce a little.
 
Personally, I would adjust the pet slightly to allow for more damage. This would decrease your critical, but it would still be high enough to achieve regular critical hits. That’s the beauty about customizing your load out to your own specifications. You can adjust the damage and critical to suit you, as long as you don’t decrease one of them too much.
 
Another disadvantage is that the Balance school doesn’t have the 3% damage Ghulture mount. Unlike the other Ghulture mounts, it caps it at 2% which is unfortunate. This is because the Balance Ghulture gives universal damage, not school specific damage.


What You’ll Need

Robe: Virtuous Light Brigade Armor

Hat: Balanced Paradox Conical

Boots: Balanced Paradox Boots

Wand: Jack Hallows Guitar

Pet: Quad damage, double critical pet.

Athame: Athame of the Chosen one (with two (2) +18 critical Citrine jewels)

Ring: Balanced Paradox Ring (With one (1) +18 critical Citrine jewel)

Amulet: Travelling Dead’s Charm

Mount: Balance Ghulture

Deck: Balanced Paradox Deck

Total Damage: 129% (Rounded to 130%)

Total Critical: 839 (100%)

Gear Setup

Calculations

We hope you find this guide helpful in your journey as a Balance Wizard. What is your favorite way to use your Balance 100% critical set? Let us know in the comments below!

Check out the rest of our Gear Guides, we have a guide for every school at Ravenwood Academy!

Vendors101: Krokotopia and Marleybone

Welcome to the 2nd “Quit Stalking the Bazaar”. Today we will be shopping in the worlds of Krokotopia and Marleybone!  From the sandy dunes of the desert to the elegance of Victorian life, I’ve scoured the shops for you!

Krokotopia Housing Vendors

Ea’rik

Ea’rik is the Furniture Shop keeper in Krokotopia. He is in the Krokosphinx. You’ll see him to the left when you get off the boat. He has a fabulous collection of housing items for sale. Even scaffolding which housing experts use for glitching can be found here.
 
Here’s a sample of what you will find


Scaffolding
Crafting Stations
Checkers and Gameboard
Hopscotch Mat
Many Fabulous Wallpapers and Flooring

Digby Hammershell

Good ole Digby is the Real Estate Agent for Krokotopia. You’ll find him inside the building next to Ea’rik. He’s a wonderful feller with 2 great castles for sale.

Castles available:

Oasis Camp-10,000 gold
Desert Villa-20,000 gold

Charley

Charley is the gardening expert in Krokotopia. You’ll find him on the left side of the Pyramid of the Sun. He sells spells and seeds and pots with Krokotopia designs!

Krokotopia Recipe Vendors

Wul’yahm

Wul’yahm is the Crafting Trainer in Krokotopia. You’ll find him on the 2nd island to the left of the Pyramid of the Sun. The Reagent Vendor is right behind him, so you can get your recipe and reagents at the same place!
 
Here’s a sample of the recipes he has for sale:


Tapestry to School of Balance
Tapestry to The Oasis
Glowing Fancy Lampost
Solar Decoration
Many Tablets and Obelisks

Kamal Sarhan

Around level 60 you will come back to Krokotopia for the House of Scales. The quest will lead you to Aleema who grants access to Zigazag. Kamal Sarhan the recipe vendor is in the central area of Upper Zigazag.
 

Recipes: Tapestry to House of Scales
Price: 5,000 gold

Pembaa

At level 25 a side quest for a lost beagle will lead you to Kembaalung Village. Pembaa is the recipe vendor in Kembaalung Village Krokotopia. He becomes available after completing The Attaché Case quest.

Recipes: Tapestry to Kembaalung
Price: 5,000 gold

Marleybone Housing Vendors

Neville Cobblestone

Neville Cobblestone is the Furniture Shop keeper in Marleybone. He is located in Regent’s Square inside the Real Estate & Fine Furnishings shop. Look to the right side of Market Square. He’s quite a pleasant person with some wonderful items!

Here’s a sample of what you can find:

Small Starry Tent
Amazing selection of Wallpapers and Floors
Grand Piano
Campfire with Kettle
Chess Pieces (to go with the game-board bought in Krokotopia)
Board-game

Tortimer T. Shellington

Tortimer is the “Go-to” guy for the best housing in Marleybone! Always ready to take you on a tour of his available castles. You can find him sharing a shop with Neville. They are best friends, you know!

Castles Available:

Metropolitan Manor-12,000 gold
Royal Estate-30,000 gold

Babbage Basset

Babbage Basset is a Castle Magic vendor. You can find him in Regent’s Square near the entrance to the Royal Museum. Babbage sells Castle Magic items and spells. He is renowned for introducing Wizards to the basics of Castle Magic.

Marleybone Recipe Vendors

Felicia Worthington

Felicia Worthington is the crafting trainer in Marleybone. She is outside Digmoore Station. This sweet, crafty lady sells recipes for the most delightful housing items. She might even offer you a spot of tea!
 
Here’s a sample of the recipes she sells:


Blue Wall Tapestry
Pavilion
Carved Bookshelf
Male and Female Mannequins
Weapon Rack

Captain Dartmouth

Captain Dartmouth is a recipe vendor inside Barkingham Palace on the left side. He becomes available after completing the Rooftop instance.

Recipe: Barkingham Palace Tapestry
Price: 5,000 gold

This completes our shopping trip through Krokotopia and Marleybone. So many vendors! So much to see! What was your favorite find? Tell us in the comments below. Join us next time for our excursion through the vendors of Mooshu and Dragonspyre!

Swing into summer friendship

Community Love

This May 2019 Ravenwood Academy is swinging into Summer with some great fun and friends. Nothing makes us happier than making new friends and sharing the Community Love. This month our friends from the Wizard101 Caffeine Team on Facebook will be joining us for a Community style House Party! It wouldn’t be a party without you! This is an all age community party, so come have some fun with us!

Previous slide
Next slide

We have everything a house party could need! Gauntlets, PVP, Hide and seek, and lots of friends to have fun with! 

See You There!

Join us Saturday May 25th at 4pm Eastern American Time. We will meet in the Myth Tower in Realm Troll. From there porting Wizards will bring everyone to the house party.If you can’t join us in Wizard101, the event will also be streamed on Ravenwood Academy’s Twitch channel.

Prizes

Codes and prizes will be dropped in the Twitch chat during the party. Be sure to tune into our Twitch live stream to learn how to win even more prizes! We listened to all of your suggestions. We will have Bundles, Crowns, Mounts & more! There will be fun for everyone!

We’re looking forward to this big house party and spending time with you! If you have any questions about this event, please email us at [email protected] or comment! 

FANSITE FESTIVAL FARMING 2019

Ravenwood Academy Fansite Festival farming event? Do you know what this is? No???? Well, it’s where all the Wizard101 and Pirate101 Fansites gather together to create something truly amazing for the community. 

This yearly event is organized by several members of the community who work hard together to coordinate with every fansite out there.

Ravenwood Academy is taking part in this year’s fansite Festival event.

Ravenwood Academy will be farming Lord Nightshade for Easter drops. Meet us in Realm Troll at 11 am Pacific Standard Time, Saturday, April 13th. 

Prizes!

Please tune in on our Twitch Channel https://www.twitch.tv/ravenwoodacademy at 11 am Pacific standard time for more information for prizes

If you have any questions regarding this event, please email us at [email protected]

We’re looking forward to having some fun with you, the community!

We had so much fun at the event with you all! Thanks to every Wizard we saw there. Congrats to everyone that won codes and prizes during the Twitch stream. The winners of the screenshot contest were:

1st: Steven Starbreaker prize Great Detective Bundle
2nd: Kane Moon prize Aeroplane Bundle
3rd: Erin Dragonheart prize Nimbari Hoard packs

Codes will be sent to your email!


Crafting101 – Fire Spells

The Basics

 
Have you ever wanted to get a spell, but did not want to spend hours farming for it? Well, then you came to the right place! Today I will be going through the basics on how to craft the Fire spells dropped by Loremaster.
 

Requirements

 
To craft your desired spell, you must have quested to Zafaria and finished the quest Drum a Little Drum. Once you have completed both you can buy the recipes for your desired fire spells!
 

Brimstone Revenant and Krampus Recipe Location

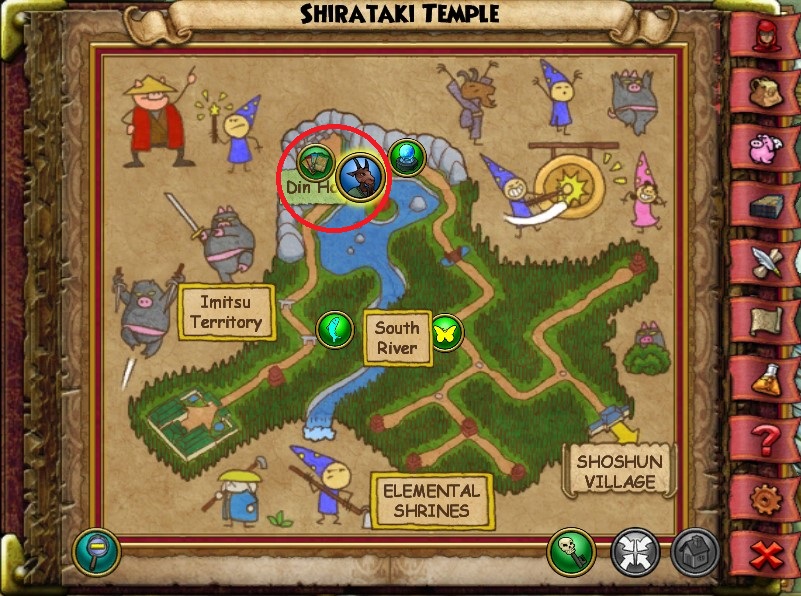
When you craft Brimstone Revenant or Krampus you will need to make your way over to Mooshu. Once you are in Mooshu you will have to beat the dungeon, Shirataki Temple. Once you complete the dungeon you gain access to Master Yan Kan Kook who sells the Brimstone Revenant and Krampus recipes.

Brimstone Revenant Recipe

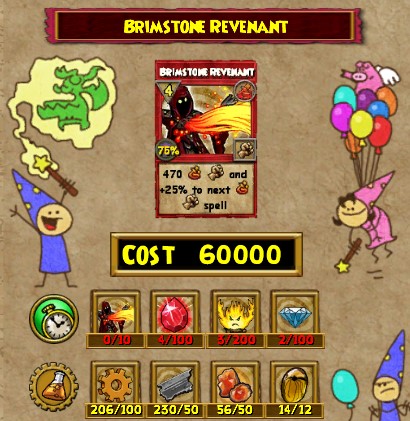
Brimstone Revenant is a must when it comes to fire attackers! This is a 4 Pip spell with a base damage of 470. It also adds a 25% fire trap for your next hit.
To craft Brimstone, buy the recipe for 60,000 Gold.
You will also need:
10 – Brimstone Revenant Treasure Cards
100 – Perfect Ruby
200 – Ghost Fire
100 – Diamonds
100 – Bronze Gear
50 – Scrap Iron
50 – Sunstone
12 – Amber

Krampus Recipe

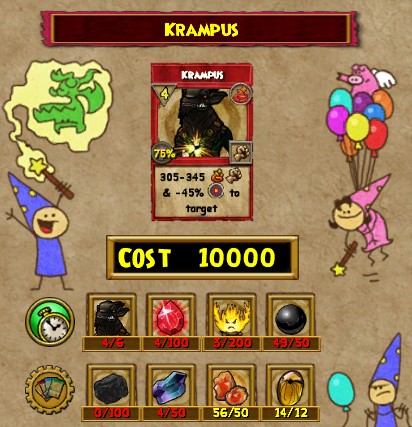
The spell Krampus is definitely the collector’s item out of all three spells. Krampus is a 4 Pip fire spell that does 305-345 fire damage. Krampus also leaves behind a -45% Mantle to make your opponents next hit fizzle!

To craft Krampus, you will have to buy the recipe for 10,000 Gold.

You will also need:
6 – Krampus Treasure Cards
100 – Perfect Ruby
200 – Ghost Fire
50 – Black Pearl
100 – Black Coal
50 – Astral Shard
50 – Sunstone
12 – Amber

Hephaestus Recipe Location

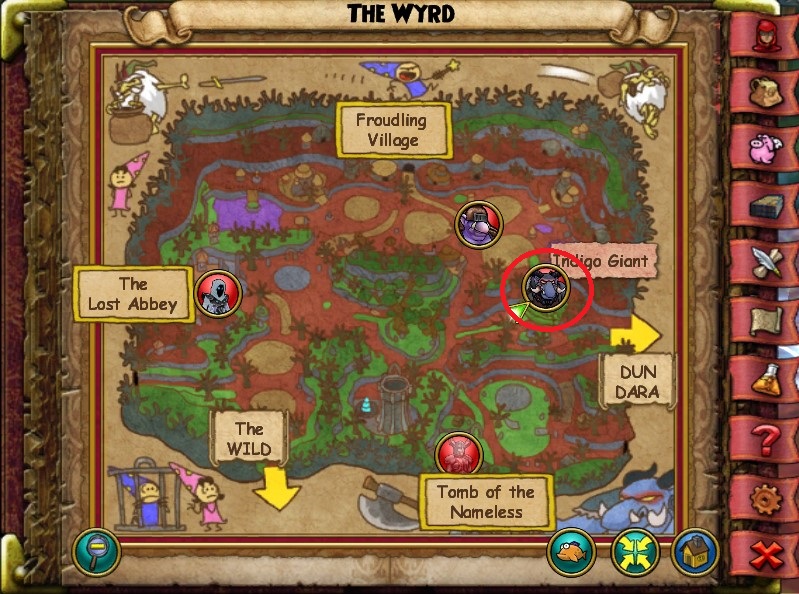
When you are ready to craft Hephaestus, you will have to make your way to Avalon. Once you are there head to the Wyrd and look for the Indigo Giant on your map. Once you defeat him you will have access to Grady who sells the Hephaestus Recipe.

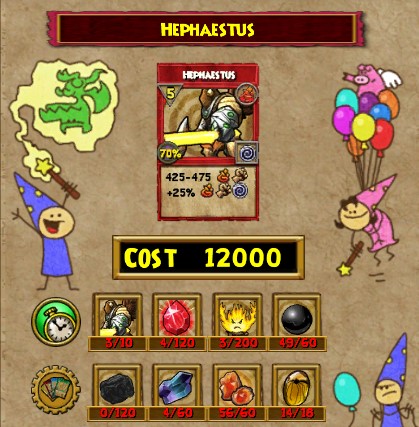
Hephaestus is the newest spell here, recently released in the Immortal’s Lore Pack. Hephaestus is a 5 Pip fire spell that does 425-475 damage and leaves an additional 25% fire trap for your next hit!

To craft Hephaestus, you will have to buy the recipe for 12,000 Gold.

You will also need:
10 – Hephaestus Treasure Cards
120 – Perfect Ruby
200 – Ghost Fire
60 – Black Pearl
120 – Black Coal
60 – Astral Shards
60 – Sunstone
18 – Amber

Where to get the Reagents!


Perfect Ruby: You can buy Perfect Ruby for 100 Gold a piece, In the Celestia base camp from the vendor Archytas. You can also buy Perfect Ruby from Noxolo Fasttrack in the Baobab Market in Zafaria.

Ghost Fire: You can buy Ghost Fire for 100 Gold a piece, in the Atheneum. From the vendor Zolton Nightstone.

Black Pearl: There are no vendors currently that sell Black Pearl for gold. If you are into PVP you can buy Black Pearls from Diego The DuelMaster in Unicorn Way for 175 Arena Tickets. You can also buy the Black Pearl transmute recipe from Avery Templeton in the Celestia Base Camp.

Black Coal: You can buy Black Coal right in Wizard City! from Elmer MeadowGrass in Olde Town for 5 Gold a piece!

Astral Shard: Astral Shard is one of the most difficult parts of the recipe as there is no vendor that sells them. You may be able to snag a couple from the Bazaar. You also can farm fishing chests in Castle Darkmoor for Astral Shards

Sunstone: You can buy Sunstone from Diego The DuelMaster in Unicorn Way for 200 Arena Tickets. You can also buy the transmute Sunstone recipe. You can get this from Avery Templeton in the Celestia Base Camp.

Diamond: You can buy Diamonds from Diego The DuelMaster in Unicorn Way for 100 Arena Tickets. You can buy the transmute Diamond recipe from Avery Templeton in the Celestia Base Camp.

Amber: Amber is by far the most difficult item to get on this list. One of the best places to get Amber is by farming Gladiator Dimachaerus in Mount Olympus in Aquila.

Hephaestus, Krampus, Brimstone Revenant: The best place to get these treasure cards would be from the Bazaar. They are not all common, but they do show up quite a bit if you refresh the treasure card tab a few times.

Thanks for reading my crafting fire spells, article! Please let me know what you think in the comment section. 

Visionary Fire 100% Critical and Max Damage Guide

This is a guide on achieving high damage and 100% critical for Fire school at Visionary, currently max level 130. It is possible for all the schools in the Spiral to attain 100% critical. However, when you boost a particular stat, you decrease others. With this critical and damage build you will sacrifice resist, pierce and power-pip chance.

Note: All pets must be 2.0 (or max stats) for this guide to be successful.

Fire School

Ah the school of fire. This is my main school and I use this build questing anywhere outside of Empyrea. With my guide, Fire school can get 157% damage and 100% critical. This is one of the highest critical builds in the game, second only to Storm. 

Advantages of the Fire School

One of the main advantages of fire school is the d.o.t.s. or, damage over-time spells. With this build, fire dots or other spells can wipe out mobs in a single turn. You will also have over 6k health with this gear set. This high health is a huge advantage over the storm school, which boasts higher damage.

What You’ll Need:

The gear you need:

Robe: Radiant Light Brigade Armor

Hat: Fiery Paradox Hat

Boots: Fiery Paradox Boots

Wand: Kapudan’s Boarding Hook

Pet: Quad critical Double damage pet

Athame: Edge of the Shadow Web (with two (2) +18 critical ruby jewels)

Ring: Fiery Paradox Ring (With one (1) +18 critical ruby jewel)

Amulet: Talisman of the Daystar

Mount: Fire Ghulture

Deck: Fiery Paradox Deck

Total Damage: 157% 
Total Critical: 839 (100%)

Gear Build

 Calculations


Alternative Gear for high damage and 100% critical

 This setup is the previous Max damage and 100% crit that fire could have gotten before the new Sinbad and the Iron Sultan gear. This gives you 149% critical and 100% critical. 

What you’ll need

The gear you need:

Robe: Radiant Light Brigade Armor

Hat: Fiery Paradox Hat

Boots: Fiery Paradox Boots

Wand: Jack Hallows wand

Pet: Quint damage critical pet

Athame: Edge of the Shadow Web (with two (2) +18 critical ruby jewels)

Ring: Mithraya’s Blazing Loop (With one (1) +18 critical ruby jewel)

Amulet: Talisman of the Daystar

Mount: Fire Ghulture

Deck: Fiery Paradox Deck

Total Damage: 149% 
Total Critical: 844 (100%)


Gear Guide For Fire

Calculations

Check out the rest of our Gear Guides, we have a guide for every school at Ravenwood Academy!

Crafting101 – The Wyrd House

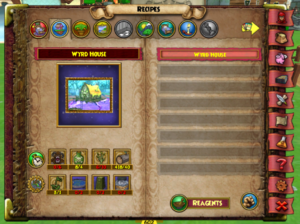
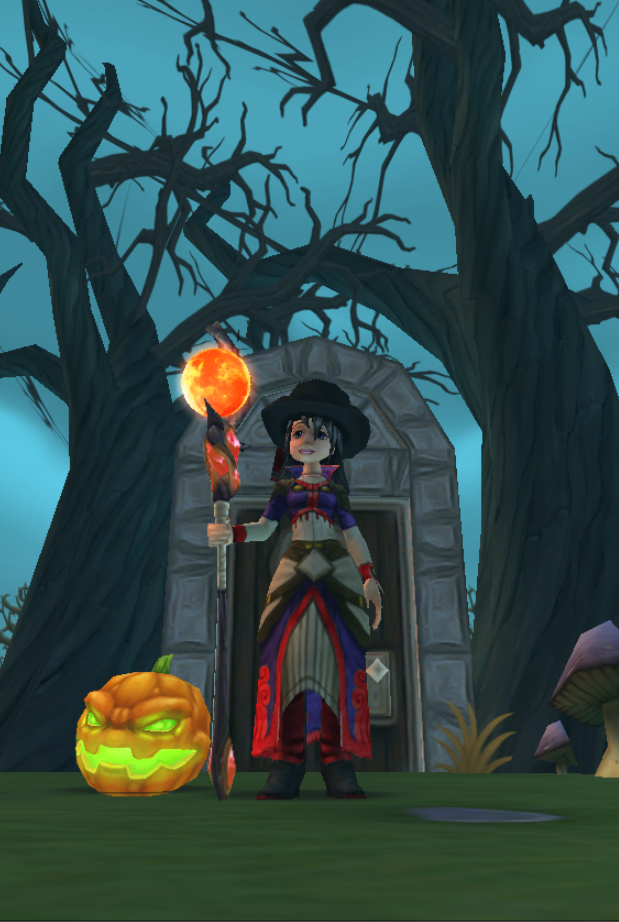
Welcome back to Crafting101! Dark and eerie, the Wyrd house is perfect for Hallowe’en, Death Wizards, and anyone else who wants their own nook for the arts of witchcraft. You can buy this recipe from Padraig in High Road, Avalon for 60,000 gold.

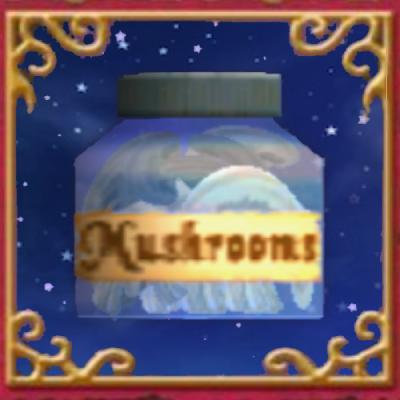
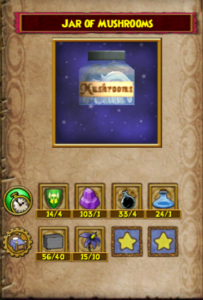
Jars of Mushrooms

We will need two Jars of Mushrooms for this project. You will have to craft these. You may purchase the recipe from Tarold Wayfinder in Grizzleheim for 2,400 gold. The recipe is listed below.

Forest Lord Treasure Cards

Six Forest Lord treasure cards are required to craft our house. This will be a rare find in the Bazaar as Life wizards often use this treasure card until they can learn the spell itself. Gardening Sour Fickle Pickles or Queen Crape Myrtle, you can receive this. You can also farm the Locres Knight in Caer Lyon, right in Avalon.

Poison

Four Poison Treasure Cards are required to craft this recipe. The easiest way to attain these treasure cards is to either buy them from the Bazaar, or to garden Stinkweed, as mentioned in Ravenwood Academy’s own play free forever guide

Vine

Only one vine is needed for the house. Gardening is one of the most efficient ways of getting this reagent. As it is possible to get it by interacting with the Winter Wind Tower’s Horn of Plenty, you can garden all of the Huckleberries, as well as Deadly Helephant Ears, and variants of Trumpet Vines. Additionally, you can buy this reagent for 400 Arena Tickets from Brandon Mistborn in Unicorn Way.

Mist Wood

One of the most notorious reagents in the game, you will need forty Mist Wood in order to craft this house. You can simply run around Wizard City or other worlds like Grizzleheim until you have collected enough.

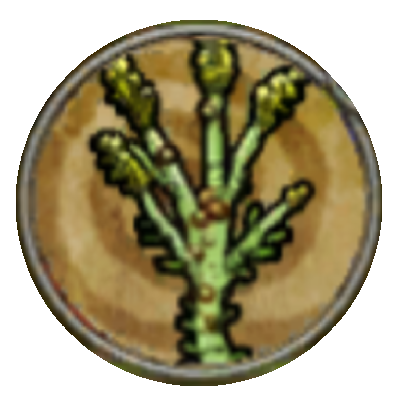
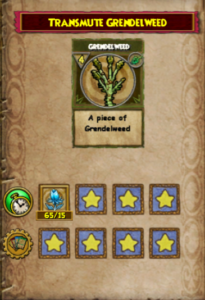
Grendleweed

The recipe calls for ten Grendleweed. You may obtain this through rare harvests of Frost Flowers as well as transmuting from Frost Flowers, found in worlds like Grizzleheim. The Transmute recipe is listed below.

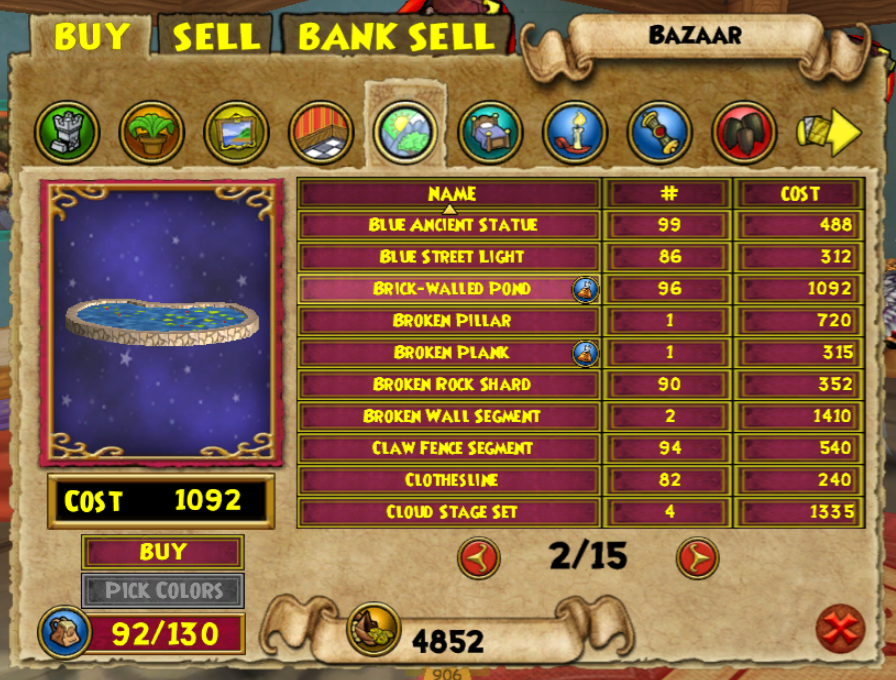
Brick-Walled Pond

Two of this item will be needed. You can find it easily in the Bazaar. The Bazaar should be stocked with the item at 1,092 gold in the outdoor section.

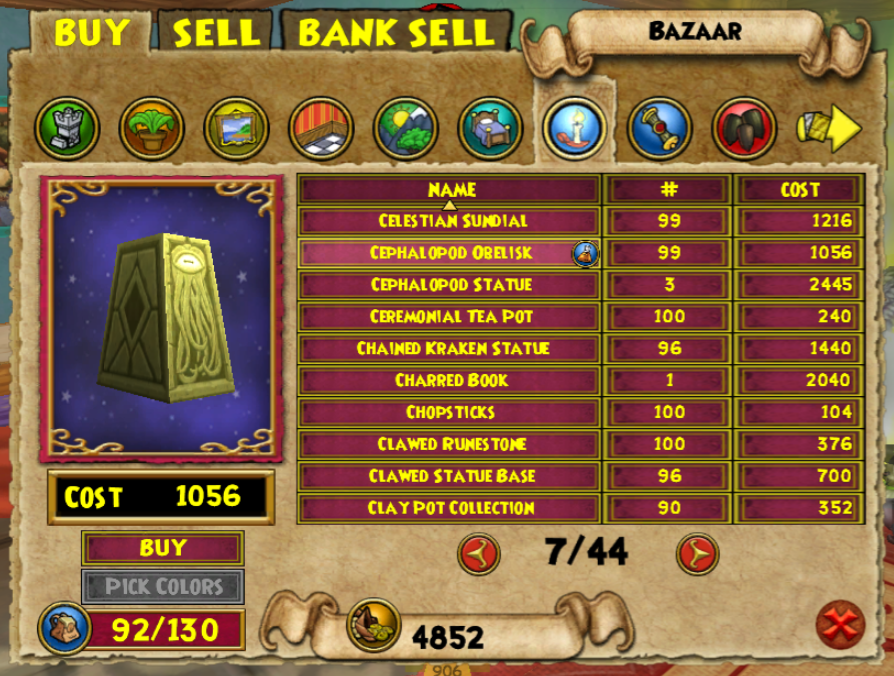
Cephalopod Obelisk

We will need two of this item, easily found in the Bazaar. There should be roughly a hundred of them available at any given time in the decor section, sold for 1,056 gold.

Transmute Recipes

Jars of Mushrooms

Sold for 2,400 gold, you can purchase this recipe from Tarold Wayfinder in the fort crossroads of Northguard, Grizzleheim. In order to craft this, you need four Spirit Shield treasure cards, one Amethyst, four Shadow Oils, one Glass Vial, forty Stone Blocks, and ten Nightshade.

Grendleweed

Sold for 400 gold, you can purchase this recipe from Avery Templeton in Base Camp, Celestia. Simply fifteen Frost Flowers can be plucked from the world of Grizzleheim to create Grendleweed.

Congratulations, young Wizard, on crafting your Wyrd House! Please look through more of our Crafting101 series to assist you with your crafting needs.

Thank you, Starlights, for collecting reagents and crafting with me. Have a wonderful night.

The Monquistan Choir

Despite its location in an isolated corner of the Spiral, Monquista, rich in gold and culture, is one of its most prominent powers. The Skull Island colonies enrich their people considerably. In line with Valencia and Marleybone, their society is posh and structured in which there is a noble class, a (daily changing) monarchy, and the Church. These powers fight vigorously with one another for control.
 
Please note I title tracks with their Wizard101 music scroll title and not the title of the You Tube video.

Skyway Theme

You can receive this music scroll from fishing chests in the Myth House, Sultan’s Palace, and Polarian Shipwreck

The Monquista soundtrack is most notable for its vocal counterpoint and harmony. This is complemented by stringed instruments like the guitar.
We begin with the full choir harmonizing together. The cello accompanies in a soulful motion, keeping the tempo and balance in the ensemble. Three pulses per measure is established, giving us a Mediterranean essence. 
We are greeted by the guitar at 00:18 seconds, the brass then joins in a perfect cadence. A classic resolution drives us into the next section. More strings join, creating counterpoint in the melodic contours between the pizzicato strings, the cello, and the voices
The tension rises though the chord progression. The cello hits a higher top note in each measure, leading us up to the entrance of the flute at 00:36 seconds. The contrasting chords in this section remind me of Tchaikovsky’s Swan Lake.
 
This continues until 0:52 seconds in when the high strings foreshadow other pieces to come. This connects the musical development and identity of Monquista. 

Royal Theme

You can receive this music scroll from fishing chests in the Myth House and Polarian Shipwreck

The piece begins with a regal texture, sharing likeness to Mozart’s Lacrimosa in melodic contour and structure. Beginning with the cello solo with the bass accompaniment, we feel the music in patterns of three, setting the tempo and mood for the entry of the choir.

At 0:26 seconds into the piece, the strings drop out, leaving the choir a capella. This leaves the music to sustain its somber, church-like tone until the string’s re-entry 0:38 seconds in, the cadential point, or moment the music’s tension seizes.

The flute begins 0:54 seconds into the piece, introducing the melody in a major modulation, or key change to a brighter key. We can hear the key change with the music’s relaxed tone instead of the somber and dramatic counterpart that came before.

Native Theme

You can receive this music scroll through fishing chests at the Death House, Nomad’s Camp, Polarian Shipwreck, Serpentine Escape, and the Winter Wind Tower.

The men of the choir sing in bass and baritone range, doubled by the guitar like the last track. This is the closest we’ve seen to monophony in the game’s soundtrack. In other words, each instrument plays in unison, without a simultaneous harmony. As the timpani strikes, the guitar drops out in favor of the strings section, thickening the orchestration
The horns crescendo into a new section. The strings take over, violins with the melody as the lower strings stabilize with long tones. The melody passes to the choir as the strings sustain beneath.
 
Like before, the orchestra crescendos into a new section. We receive a cadential point with a faint cry of the flute in the distance. The strings die down from sustaining chord progressions into lighter orchestration at timestamp 1:05
 
The guitar is accompanied by percussion in this new section. Every now and again we hear the flute’s cry once more. The melody passes from the choir to the strings, ending in a suspended chord, withholding a proper resolution.
 
We embark on the coda of the piece at timestamp 1:37. The beat is accented by the choir and tambourine. The strings interlude, leading us back to the beginning. 

Thank you, Starlights, for joining me on this musical adventure through the music of Monquista.

Disclaimer

Please note: I transcribed the music from the original/classic mode music scrolls. Not all of my transcriptions are 100% accurate, but they are close and the rhythm is properly notated

Protect your accounts

Greetings Fellow wizards!

It has come to my attention that a person has been going around impersonating trusted members of the community. Victims of the scam are asked if they entered a giveaway of 5k crowns. Then they ask for your email. An email is then sent from a fake KingsIsle email address. The email claims that they need your full credit card number, expiration date, and security NUMBER.

DO NOT GIVE YOUR EMAIL, CREDIT CARD NUMBER, EXPIRATION DATE OR THE SECURITY NUMBER!

This information is being used to hack your account and could lead to much worse. Please protect your accounts, wizards! If you notice anything like this or have questions please EMAIL the official email: [email protected] right away.

If you go to a website and the site is doing a giveaway, be careful… Here are all of the trusted fansites that are approved and supported by Kingsisle Entertainment.

Review this blog about Account Security Best Practices by Kingsisle!

Stay Safe, wizards!