Exclusive Pets

With the introduction of Deckathalon, we now have access to a variety of new pets. You will receive a class pet for placing above 25 on the leader-board. So if it’s an Ice event, you would get an “Ice Class Pet.” For positions 26-2500 you will receive the universal “Ravenwood Class Pet.” When you look at the pet, you’ll see a very large number of tags. You’ll notice the new “Exclusive Pet” tag.

The First Test

So, what does this tag mean? My first test was to try hatching by myself, with my own pets. Everything seemed normal. I sometimes received another class pet and other times I received the other parent. Then I tested hatching with another player, and I received this notification. Based on this notification, I assumed that you can’t receive an exclusive pet by hatching. However, when we hatched together, we both received a Ravenwood Class pet back. As a result, this alert’s meaning was still unclear.

The Second Test

For my final test, I found one of the few lucky people who got top 25 on the leaderboards and received an ice class pet. The person was kind enough to allow me to hatch with them. As expected we both received the same notification from before. However, this time neither of us received the other pet, after many hatches.
 
My conclusion is that exclusive pets can only be received from hatches if the pet is in that player’s pet tome. You’ll need to earn the pet first to hatch an exclusive pet.

MY THOUGHTS

In this section I’ll be covering my own personal thoughts on this feature. If you’re looking for how the feature works, you can find it above.
 
This feature has some pros and cons. Some good aspects include the pet remaining an accomplishment. Anyone walking around with a school class pet will have accomplished something great. However, one major drawback is that these pets will be ultra-rare. Only 25 players will receive the pet during any given event. On top of this, you can’t pick which school’s pet you want to receive.
 
During particular weeks I imagine the competition will be incredibly fierce, particularly Life. The cards given by the Life pet are very desirable. While this isn’t a bad thing, this type of competition is very unhealthy. The only measure that contributes to the leaderboards is how much time you’ve invested. Rewarding these pets based off the community progress bar might be better.
 
There should still be a reward for ranking high on the leader-board. It should be less impactful, like a cosmetic item. Other options include badges based on leaderboard placement. It could change based on your position, like the PvP badges. People can still be acknowledged for their achievements, but in a fairer way. This would avoid encouraging players to grind for a pet they need.
 
I’m interested to hear how everyone else feels about these new exclusive pets. Let me know what you think in the comments below!

Castle Magic Triggers III

Introduction

This will be the final part of the Castle Magic triggers guides. In this guide we will cover the remaining Castle Magic triggers. These triggers are the most difficult to understand. If you don’t know what Castle Magic triggers are, read through the first two guides first. Each section will name the trigger, what it does, how to use it, and why I assigned it to this difficulty. Then, I will finish by giving an example of how I like to use the trigger.

Advanced Triggers

These are the complicated Castle Magic triggers. Unlike immediate triggers, their purpose will generally be specific. They do not have a purpose for every creation. The few items in this category have many interactions within one trigger. Their interactions are are not the easiest to understand.

Magic Brazier

The Magic Brazier is like the magic lever from the beginner guide. The brazier has many states and casts a spell when it enters each one. But, unlike the lever, the magic brazier has 4 states: off, fire, storm and ice. To change the brazier’s state a player must use the item by interacting with it. This is an advanced trigger, as it requires managing many states that each cast their own spells. The best uses I have seen for this trigger involve creating puzzles. When used with another trigger, you can create a brazier combination to open a door.

Magic Item Detector

 The Magic Item Detector is likely the simplest of the advanced triggers. The player selects a size to detect in as well as a specific item for the trigger to detect. Then, the trigger will cast a spell whenever the selected item enters or leaves. This advanced trigger has both a settings menu and can move via castle magic. The only way this trigger works is if you are already using castle magic elsewhere. The best uses I have seen for this trigger involve setting a continuous path for an object to follow. One object can move towards a detector and create a chain effect. This is useful for wanting something to happen in a loop.

Magic Orb Catchers

Magic Orb Catchers need to be in the same house as a magic orb to function. They both come in three varieties: Fire, Ice and Storm. To use them, you need to both place the orb catcher and the corresponding magic orb somewhere in the same house. When a player walks over the orb, they will pick it up. As soon as that player walks near the same school’s orb catcher, the orb will disappear and the spell will trigger. One use for these triggers is requiring a player to have a key before accessing another area. If a magic orb catcher opens a door, the player would need the corresponding orb to open said door.

Magic Computer

The most infamous of the Castle Magic items. This item requires the deepest understanding to make use of. But, once you grasp the uses for this item, it opens up many new Castle Magic creations. The Magic Computer stores two signals, known as “Signal 1” and “Signal 2″. Then, based on what combination of these signals the magic computer is storing, will cast a spell. To add or remove either of these signals, you need to cast the “Add” or “Remove” signal spells on the Magic Computer. The Magic Computer has 6 different outputs, which I will explain in detail.
 
  • When Signal 1 AND 2 – This is the simplest of the magic computer expressions. When the Magic Computer has both signals, it will cast the AND spell. If it only has Signal 1 or Signal 2, it will not cast the spell, it must have both signals.
  • When Signal 1 OR 2 –  This expression requires only one of the signals to activate. It can be either Signal 1, Signal 2 or both. As long as the computer has at least one signal, the OR spell will activate.
  • When Signal 1 XOR 2 – Like the OR expression, except it only allows one signal or the other. If the computer has both signals, the XOR spell will not cast.
  • When NOT Signal 1 – This spell will cast as long as the Magic Computer does not have Signal 1. It can have no signals or Signal 2, but as soon as the Magic Computer gets Signal 1, it will not cast.
  • When NOT Signal 2 – This function will always be active as long as the Magic Computer does not have Signal 2. It can have no signals or Signal 1, but as soon as the Magic Computer gets Signal 2, it will not cast.
  • When NOT Signal 1 AND 2 – This spell will always cast as long as the Magic Computer does not have both signals. It is a complete opposite of “When Signal 1 AND 2”, if that spell is casting, this one is not.

As a concluding note on Magic Computers, they will only cast their spells when they update with a new signal. For instance, “When NOT Signal 1 AND 2” is active without touching the computer. But, it will not cast the spell until you alter either of the signals.

Conclusion

This concludes my guides on the Castle Magic triggers themselves. As always, feel free to ask if you have any questions on how to operate or use these triggers or about Castle Magic. I’d love to hear how you use your Castle Magic triggers! Otherwise stay tuned for more Castle Magic content and let me know what type of guides you would like to see in the comments below.

Balance 100% Critical Guide

Ah the school of Balance! Arguably one of the hardest schools to beat in PVP. In addition, they can also achieve max critical and high damage. With this setup you can get around 130% damage and 839 critical.

Benefits of the Balance School

The Balance school is really amazing. They’re one of the most feared schools in PVP. Loremaster, Mana Burn and Supernova can all be deadly spells when used correctly. I usually always lose to Balance in PVP, so I hate going up against them.
 
Their wide variety of spells can prove to be very useful in certain situations. Yet, one disadvantage they have that isn’t shared with the other schools is a prism card. This forces them to fight Balance bosses without the option of a hit conversion spell. This can be very annoying in PVE. You’re forced to ask for help, which is not always possible since some dungeons are solo.

disadvantages of this build

 
 Of course when you boost certain stats, you run the risk of decreasing the others. In this case, pierce and power pip chance and resist might be reduced. You don’t really see many Balances running around with 100% critical these days. This is solely because they don’t really like sacrificing other valuable stats. However, it’s always nice to critical every hit you use.
 
For this build I would use the Morganthe’s Shadow of Amber amulet because of the extra blades. You can swap it out for the Darkmoor alternative if you’d like. It would increase your critical by 5 and increase your pierce a little.
 
Personally, I would adjust the pet slightly to allow for more damage. This would decrease your critical, but it would still be high enough to achieve regular critical hits. That’s the beauty about customizing your load out to your own specifications. You can adjust the damage and critical to suit you, as long as you don’t decrease one of them too much.
 
Another disadvantage is that the Balance school doesn’t have the 3% damage Ghulture mount. Unlike the other Ghulture mounts, it caps it at 2% which is unfortunate. This is because the Balance Ghulture gives universal damage, not school specific damage.


What You’ll Need

Robe: Virtuous Light Brigade Armor

Hat: Balanced Paradox Conical

Boots: Balanced Paradox Boots

Wand: Jack Hallows Guitar

Pet: Quad damage, double critical pet.

Athame: Athame of the Chosen one (with two (2) +18 critical Citrine jewels)

Ring: Balanced Paradox Ring (With one (1) +18 critical Citrine jewel)

Amulet: Travelling Dead’s Charm

Mount: Balance Ghulture

Deck: Balanced Paradox Deck

Total Damage: 129% (Rounded to 130%)

Total Critical: 839 (100%)

Gear Setup

Calculations

We hope you find this guide helpful in your journey as a Balance Wizard. What is your favorite way to use your Balance 100% critical set? Let us know in the comments below!

Check out the rest of our Gear Guides, we have a guide for every school at Ravenwood Academy!

Vendors101: Krokotopia and Marleybone

Welcome to the 2nd “Quit Stalking the Bazaar”. Today we will be shopping in the worlds of Krokotopia and Marleybone!  From the sandy dunes of the desert to the elegance of Victorian life, I’ve scoured the shops for you!

Krokotopia Housing Vendors

Ea’rik

Ea’rik is the Furniture Shop keeper in Krokotopia. He is in the Krokosphinx. You’ll see him to the left when you get off the boat. He has a fabulous collection of housing items for sale. Even scaffolding which housing experts use for glitching can be found here.
 
Here’s a sample of what you will find


Scaffolding
Crafting Stations
Checkers and Gameboard
Hopscotch Mat
Many Fabulous Wallpapers and Flooring

Digby Hammershell

Good ole Digby is the Real Estate Agent for Krokotopia. You’ll find him inside the building next to Ea’rik. He’s a wonderful feller with 2 great castles for sale.

Castles available:

Oasis Camp-10,000 gold
Desert Villa-20,000 gold

Charley

Charley is the gardening expert in Krokotopia. You’ll find him on the left side of the Pyramid of the Sun. He sells spells and seeds and pots with Krokotopia designs!

Krokotopia Recipe Vendors

Wul’yahm

Wul’yahm is the Crafting Trainer in Krokotopia. You’ll find him on the 2nd island to the left of the Pyramid of the Sun. The Reagent Vendor is right behind him, so you can get your recipe and reagents at the same place!
 
Here’s a sample of the recipes he has for sale:


Tapestry to School of Balance
Tapestry to The Oasis
Glowing Fancy Lampost
Solar Decoration
Many Tablets and Obelisks

Kamal Sarhan

Around level 60 you will come back to Krokotopia for the House of Scales. The quest will lead you to Aleema who grants access to Zigazag. Kamal Sarhan the recipe vendor is in the central area of Upper Zigazag.
 

Recipes: Tapestry to House of Scales
Price: 5,000 gold

Pembaa

At level 25 a side quest for a lost beagle will lead you to Kembaalung Village. Pembaa is the recipe vendor in Kembaalung Village Krokotopia. He becomes available after completing The Attaché Case quest.

Recipes: Tapestry to Kembaalung
Price: 5,000 gold

Marleybone Housing Vendors

Neville Cobblestone

Neville Cobblestone is the Furniture Shop keeper in Marleybone. He is located in Regent’s Square inside the Real Estate & Fine Furnishings shop. Look to the right side of Market Square. He’s quite a pleasant person with some wonderful items!

Here’s a sample of what you can find:

Small Starry Tent
Amazing selection of Wallpapers and Floors
Grand Piano
Campfire with Kettle
Chess Pieces (to go with the game-board bought in Krokotopia)
Board-game

Tortimer T. Shellington

Tortimer is the “Go-to” guy for the best housing in Marleybone! Always ready to take you on a tour of his available castles. You can find him sharing a shop with Neville. They are best friends, you know!

Castles Available:

Metropolitan Manor-12,000 gold
Royal Estate-30,000 gold

Babbage Basset

Babbage Basset is a Castle Magic vendor. You can find him in Regent’s Square near the entrance to the Royal Museum. Babbage sells Castle Magic items and spells. He is renowned for introducing Wizards to the basics of Castle Magic.

Marleybone Recipe Vendors

Felicia Worthington

Felicia Worthington is the crafting trainer in Marleybone. She is outside Digmoore Station. This sweet, crafty lady sells recipes for the most delightful housing items. She might even offer you a spot of tea!
 
Here’s a sample of the recipes she sells:


Blue Wall Tapestry
Pavilion
Carved Bookshelf
Male and Female Mannequins
Weapon Rack

Captain Dartmouth

Captain Dartmouth is a recipe vendor inside Barkingham Palace on the left side. He becomes available after completing the Rooftop instance.

Recipe: Barkingham Palace Tapestry
Price: 5,000 gold

This completes our shopping trip through Krokotopia and Marleybone. So many vendors! So much to see! What was your favorite find? Tell us in the comments below. Join us next time for our excursion through the vendors of Mooshu and Dragonspyre!

Castle Magic Triggers II

Introduction

This guide is a continuation of the first castle magic triggers guide. I have gone through each castle magic trigger and assigned a difficulty of use to each one. This guide will cover intermediate triggers, another guide will cover advanced. Each section will name the trigger, what it does, and how to use it. I will explain the difficulty level and give an example of how I like to use these tools in my own designs.

Intermediate Triggers

These triggers are more complicated to use than the beginning triggers. Generally they serve very important purposes to Castle Magic. If an item requires unique input or separate data values it is Intermediate. If a trigger is not intuitive with other Castle Magic mechanics it is intermediate.

Magic Reflector

  • The Magic Reflector is one of the most essential castle magic triggers. The purpose of the magic reflector is to cast many spells at once. There can be a single target or different ones. You need to use another castle magic trigger to trigger this one. The only way to activate a Reflector is to target it with the “Activate Reflector” spell. The number of uses for reflectors are endless. I use one in almost every single build. For example, if you want to make an entire structure grow larger at once, use a reflector to target each piece. This way works without using a significant amount of triggers.

Magic Random Reflector

  •  As you can tell by the name, the magic random reflector is very similar to the magic reflector. It functions identically to the magic reflector except for one small difference. Instead of activating all eight spells at once, it picks one at random each time. Uses for this are more specific than the uses for the original magic reflector, due to it’s unusual nature. If you want to give a house a haunted vibe and have things happen randomly, this item would be the best tool for the job. 

Magic Timer

  • The magic timer is the next most versatile castle magic trigger. The magic timer has two main sections. An “On” timer counts down, then right afterwards an “Off” timer counts down. When each timer reaches zero, a spell is cast. You can set the timer to be activated by another trigger and to only count once or repeat. This is a more difficult trigger to master due to its additional options. You can access the additional options menu by pressing the “Magic Item Options” button. There are many uses for this, but the most common use is when you want a spell to be cast continuously. For example, if you want to make something stay large, you can set a magic timer to cast “Make Larger” and repeat.

Magic Player Detector

  • This item has some niche uses and is always worth keeping in mind. The magic player detector detects when a player walks on it or steps off. It’s a simple item to use except for an extra option. This option allows you to make the detector ignore the owner of the house. To use the player detector place it where you want players to walk. Then place the spells you want to cast. I like to use these when I want to surprise a friend. A spell will cast in front of the player when they walk on the spot you placed the detector on.

Magic Room Detector

  • The Magic Room Detector is the Player Detector’s older brother. The interface for this item is like the player detector’s, except the options include four sizes. The room detector senses when a player enters an area as opposed to a specific spot. I find this tool very useful, since the location players need to walk in is less precise. Use this tool like the player detector when you want to detect in a zone as opposed to a single spot. 

Magic Counter

  • The Magic Counter has an internal counter that keeps track of a number. The counter casts spells based on how that number relates to a value set by the player in the options. When the number is adjusted up or down the counter updates and casts another spell. This is useful when you want a spell to cast up until a certain point. If you wanted to use a timer to make an object larger only a few times, a magic counter would work well.

Magic Jump Detector

  • The Magic Jump Detector detects when nearby players jump and casts a spell. This item has the same option menu as the room detector. Pick a border size to detect within and whether you want to count the house owner. One fun example of a jump detector is to create an elevator. Use it to move a platform up when a player in the area jumps. This allows the player to determine how high they want to go before jumping off.

Magic Text Detector

  • The Magic Text Detector detects when nearby players send a menu chat message that you choose. To use it you pick a menu chat phrase and spell size in the additional options menu. Then, when a player in the area uses the menu chat phrase, the spell will cast. This is most useful in my experience for secret doors. Most players do not use menu chat so you could use it to password protect a special secret area.

Conclusion

That completes my intermediate Castle Magic Trigger guide. The advanced triggers will be covered soon, so practice these now. If you have any questions about these triggers or Castle Magic in general let me know in the comments below.

The Dark Side of Bunnies

Chocostein’s Monster

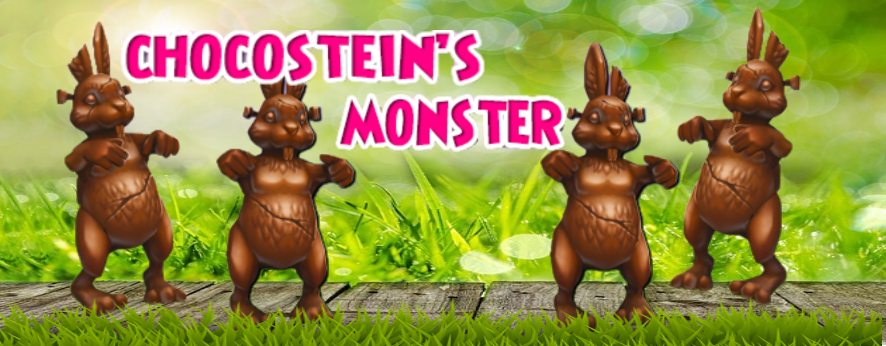
Chocostein’s Monster is one of the newest pets in the Spiral. This tasty looking Myth pet comes with a Berserk card at baby and receives a jewel slot at Ancient. Mine manifested some interesting talents, 4 out of the 5 were May Cast.
 
*May Cast Gardening Pixie
 
*May Cast Amplify
 
*May Cast Curse
 
*May Cast Spirit Shield on Ally
 
*Myth Sniper
 
These are not all the talents this pet can manifest, just the ones that mine got. It does give you an idea of what you might expect. Based on what I got, I suspect there are more May Cast talents in the pool.
 
At Ultra it received a Brilliant Opal, which is great for raising your pets intellect
A starting pedigree of 68 it isn’t the best I’ve ever seen, but it isn’t the worst. A little bit of hatching could get you to 70.  
 
This pets highest stat is Strength at 250, which isn’t too shabby at all.
 
Power comes in second at 230, which could use some improvement, but still not bad at all
 
I’m a little disappointed in the next 3 stats as they are on the lower side.  Agility at 225, Intellect at 210 and Will at 200.
 
I like my Agility, Intellect and Will to be higher, but with work it could get there.
With the awesome May Casts, the high Strength and decent Power, this could be a great pet.  Of course, it would also make an adorable addition to any castle. If you pick up this pet in the Crowns shop let us know what talents yours manifests in the comments below. Just make sure to keep it away from the kitchen and any Gobblers you might have running around!

Flat Stat Jewels101

The Misconception

Flat jewels are a misinterpreted stat for Wizard101. They have been since the beginning of the Spiral’s time. In fact, most players get rid of these jewels thinking they have no value. But it’s not true! I’ve used them since their introduction into the game. Many of my solo runs are successful because of these resist jewels.

How they work

Flat stat jewels come in two main categories: offensive and defensive. The offensive stats boost your damage while the defensive absorb incoming damage. These stats are static, meaning that pierce does not affect flat resistance. Likewise, flat damage is not hindered by resistance in its final value!
 

Being careful with calculations

Many online sources that mention flat stat jewels are incorrect. Here are the stats for my testing. Let’s use it as an example to see the calculations.
 

Example: (From my solo run of Grandfather Spider – lvl 120)

Mathematical functions for calculating stats

1.) For your attacks:
[(your spell X (1 + damage%) + flat damageX buffs (1+/-Blades)

2.) For resisting incoming attacks:
[(incoming damage – flat resist) X (1 – resist%)]X buffs (1+/-Traps)

The concept of flat jewels is the same for flat damage and flat resistance!

Simplifying the math

Let’s assume you’re about to take an attack dealing 1000 base damage. Flat resist works like an absorb. In this example it will remove 50 damage points from every school and 158 from Shadow School, before regular resist takes damage.
 
So, what if the situation changed where the attack does 4000 damage?
 
The jewels would still absorb 50 damage points from every school and 158 from Shadow School attacks. Then our percent resistance would reduce the rest of the remaining damage.
 
For X damage, we will absorb 50 from every school and 158 from Shadow School.
 
 
Adding the flat jewels to our percent resistance:

Resistance for X incoming damage:
Storm: 71% + 50
Ice: 72% + 50 
Fire: 51% + 50
Myth: 29% + 50
Life: 29% + 50 
Death: 29% + 50
Shadow: 29% + 158

Using Brace (-20% to incoming attacks) stacks to the player’s resistance:

Storm: 71+ 20 = 96%+50
Ice: 72 + 20 = 92%+50
Fire: 51 + 20 = 76%+50
Myth: 29 + 20 = 49%+50
Life: 29 + 20 = 49%+50
Death: 29 + 20 = 49%+50
Shadow: 29 + 20 = 49%+158

Grandfather Spider’s Stats

Grandfather Spider has a universal 120% damage boost, 7% universal pierce, and 20% fire resistance. His attacks are not only of the school of storm, but also of the Shadow School. He also has Balance Mastery and uses 3 Balance spells.
 
His natural attacks deal 330 X 14 = 4620 base shadow damage if he has max power pips!
 
[(spell’s max damage X (1 + damage%) + total flat damage] X buffs
 
If buffs = 0
total flat damage = 0
 
[(4620 X ( 1 + 120%)] X buffs = (4620 X 2.2) = 10,164!
 
So , we should prepare for Storm and Shadow hits.
 
An average 6 pip natural Shadow attack of his would deal:
 
6 X 330 = 1980 X 2.2 = 4356 damage, and that number will double if he lands a critical!
 
The spell “Rusalka’s Wrath (Shadow)” without any blades or traps deals:
 
[(spell base damage X (1 + damage%) + total flat damage] X buffs= [1445 X (1 + 120%)] = 3179 damage!
 
Let’s compare possible damage taken with or without some of these  stats:
 
If I hadn’t put brace on myself, it would be:
My Shadow resist: 29 – 7 (pierce) = 22 (incoming damage – total flat resist) X (1-resist%) =  3179 X (1 – 22%) = 3179 X 0.78= 2480!
 
My Shadow resist: 49 – 7% (due to pierce) = 42% base resistance. Now continue with the rest of the equation:
(incoming damage – total flat resist) X (1 – resist%) = (3179 – 158) X (1 – 42%) = 3021 X 0,58  = 1752
 
If I wasn’t wearing gear equipped with jewels, the resulting damage would be:
(incoming damage – total flat resist) X (1 – resist%) = (3179 – 0) X (1 – 42%) = 3179 X 0.58 = 1844
 
The difference between 1844 damage and 1752 is due to the flat stat jewels!
 
The differences might seem minor, but if you combine jewels in different pieces of gear, you will notice that they make a big difference.
 

Flat damage jewels work the same way

Here’s a hypothetical example in this specific fight
My damage is 104

When I cast the spell Fire From Above on Grandfather Spider, he receives damage according to our 1st mathematical function: With a nice Backdraft = 210% 
[[(your spell X (1 + damage%) + total flat jewels damage] X buffs(blades)] = [[1400 X ( 1 + 104%)]  = (1400 X 2.04) = 2856
 
*Attention! Not include all the decimals results in two formulas, rounds down after each calculation.
The exception for that rule, is only in the pets damage or resistance! We need exactly the percent of the pets to calculated correctly!
 
My spell with traps deals to Grandfather Spider:
Flat resist=0
Buffs=210
Grandfather resist on fire (due to pierce) = 20-22= 0 
 
[(incoming damage – flat resist) X (1 – resist%)]X buffs(traps)=
(2856 X 1) Χ (1+210%= 2856 Χ (1+210%) =  Χ 3,1 = 8853   
 
But if I had two flat damage jewels (fire), let’s say 50 points worth: [[(your spell X (1 + damage%) + total flat  damage] X buffs] =  [1400 X (1 + 104%)+ 50] = [(1400 X 2.04) + 50] = 2856 + 50 = 2906
 
[(incoming damage – flat resist) X (1 – resist%)]X buffs(traps)=
(2906 X 1) Χ (1+210%)= 2906 Χ 3,1 = 9008   
 
Don’t forget that since Grandfather Spider has shields, the actual number would be less. This was just a quick example with math!
 
As you can see, flat stat jewels can help our fights in their own way.
 
I hope this makes you think twice before tossing those flat stat jewels away! I have shown my stats below for convenience. Thank you as always, and best of luck questing!
 
*You can see the stats which I used for the above calculations as well as my gear, in the following pictures.
Also, you can see the battle that I describe above from my solo video at Europeans servers when I was 120 lvl, one year before.
Have fun!
 

Wizard City Housing Vendors

Tired of never finding the housing item you want at the Bazaar?  Well search no longer! There are many things available throughout all the worlds from a variety of vendors. Even items that are no auction and can never be found at the Bazaar! We will be visiting each world in this series and will show you who to go to for that perfect housing item. 

Wizard City Housing Vendors

There are four housing vendors in Wizard City, They have many housing items available. There are also six recipe vendors for craftable items. From Castles to Pet Bread Crumbs, we have them all listed here.

Aubert Quickhammer

Aubert is the furniture shop keeper in Wizard City. You’ll find him in the Shopping District by Eliks Edge, at the Wizard City Furniture & Castle Shop. He has everything from plants to wallpapers and floors. Tell him Sarai sent you!

Here’s a sample of what you will find.

Party Banner
Plaques for all schools
Fancy Lamppost
Small Yellow Tent
Small Blue Trim Rug
Tic-Tac-Toe pieces and Gameboard
Balloons
Music Player
Party Cake

Buxley Turleton

Buckley shares a shop with Aubert Quickhammer. He’s the best real esate agent in Wizard City!

Castles available:
Wooded Cottage 8,000 gold
Royal Playhouse 15,000 gold

Farley

Farley is the head gardener for Wizard City. You can find him in Golem Court.

Here’s a sample of what you can find:

Wizard City styled pots
Seeds
Tropical Garden Gnome

Roland Silverheart

You can find Roland on Unicorn Way outside of the PVP Arena. All of his items are non-auction and are purchased with Arena tickets. If you don’t PVP you can get tickets from doing your daily quests.

 
Here’s a sample of what you can find:
 
Wood Housing Blocks 
Bobbleheads 
Statues 
Ninja Sword Rack 
Market Tent Pavilion

Derrick Blaze

You can find Derrick next to the Bazaar. He sells the recipe for the Team Up Kiosk. In order to purchase this recipe you have to earn your Team Player badge.

Team Up Kiosk Price: 100 gold

Wizard City Recipe Vendors

Eudora Tangletree

You can find Eudora by the pond near the Bazaar in Olde Town. A lovely lady with great recipes! She has recipes for many different aquariums and seventeen different tapestries.

Here’s a sample of her other recipes:
Garden Lot
Directional Arrows
Moon Banner
Red Foodcart
Stack of Paper
Water Bucket

Lloyd Fallingwater


You can find Lloyd in the Shopping District near Eliks Edge. He has all the Stone Housing Block recipes. Who needs the Bazaar, just make them yourself!

Dr. Purreau

You can find Dr. Purreau in the Hatchery. He has recipes for a Pet Hatching Kiosk and a tapestry to the Hatchery. These recipes need Hatch Peppers. You can get this reagent by placing pets in the kiosk or in the chest from daily quest rewards.
 
Hatching Kiosk Recipe Price: 2,500 gold Tapestry Recipe Price: 2,500 gold

Harker

You can find Harker in Darkmoor to the left, near the small building. He has the recipe for the Castle Darkmoor tapestry. 

Recipe Price: 5,000 gold

Jackie Whisperflame

You’ll find Jackie in the snack shop at the Pet Pavilion. She sells the recipe for Pet Bread Crumbs. Bread Crumbs are an awesome way of controlling the movements of pets and mounts when they are placed in your Castle!

Recipe Price: 5,000 gold

This concludes the list of Housing Vendors for Wizard City. Whew, that was an all day shopping spree! Hope it helps you find that perfect item for your castle. Let us know in the comments below about your most surprising find shopping in Wizard City. Stay tuned for Krokotopia and many more worlds to come!

Visionary Life Guide to 100% Critical and Max Damage

Note: This guide is created for level 130 life wizards and requires a pet with 2.0 (max stats) to be successful.

Life School

The Life school is a beautiful school. It’s one of the few schools that can do everything whether it’s tanking, healing, or hitting. Because of this there are many strategies that a max-level Life Wizard can choose for both PvP and PvE.

 
This article will focus on the 100% critical gear strategy! I will help you achieve the max amount of damage while still keeping 100% critical. This strategy is popular with Life wizards since it guarantees strong heals without giving up damage.

What You’ll Need

For the best setup, here is the gear you’ll need:

Hat: Lively Paradox Conical – 134

Boots: Lively Paradox Boots – 112

Wand: Tormentor’s Skullsplitter – 181

Ring: Lively Paradox Ring – 89 (+18 Jewel)

Athame: Dark Woman’s Dagger – (+18 and +18 Jewel)

Deck: Paradox Deck – 49

Amulet: Spirit of Darkmoor’s Jewel – 35

Robe: Ornate Light Brigade Armor – 91

Pet: A quint-critical pet – 112.32 (with life-giver and life-bringer damage talents)

Total: Damage 120% – Critical 857 (100%)
That’s a good amount of damage for running 100% critical as a Life. Here’s a breakdown of all the gear and its stats:

Calculations

Possible Alternative Gear

Note that the gear listed above totals 857 critical, and you only need to reach 838 critical to get 100%. If you can’t get the perfect max critical and damage, it’s okay! There is room for other gear to replace some of the pieces above. Here are a few I recommend.
 
Hat: Krokopatra’s Vigor Fez
 
Boots: Cabalist Stompers of the First
 
Amulet: Jewel of the Shadow Web (Gives +45% blade)
 
Athame: Spirit of Darkmoor’s Thorn
 
Robe: Undying Malistaire’s Tunic
 
Deck: Rasputin’s Deck of Fortitude
 
Ring: Mithraya Vivid Seal
 
Remember, choosing one of these over the “best” gear means you lose other stats, like damage, health, power pip chance, resist, etc…

Things You Can’t Go Without

Quint-critical pet

– Tormentor’s Skullsplitter

You can’t get around these essentials. You can replace a few pieces of gear and still get 100% critical, but not these two. They’re vital to the guide (hah, puns!). Unfortunately, the only thing that will be difficult to get is these two pieces. One is from a seasonal pack while the other requires patience and hatching skill.
 
I hope this guide helps some fellow life wizards create the perfect gear set! Let us know what pieces you choose in the comments below!

Check out the rest of our Gear Guides, we have a guide for every school at Ravenwood Academy!

Crafting101 – Fire Spells

The Basics

 
Have you ever wanted to get a spell, but did not want to spend hours farming for it? Well, then you came to the right place! Today I will be going through the basics on how to craft the Fire spells dropped by Loremaster.
 

Requirements

 
To craft your desired spell, you must have quested to Zafaria and finished the quest Drum a Little Drum. Once you have completed both you can buy the recipes for your desired fire spells!
 

Brimstone Revenant and Krampus Recipe Location

When you craft Brimstone Revenant or Krampus you will need to make your way over to Mooshu. Once you are in Mooshu you will have to beat the dungeon, Shirataki Temple. Once you complete the dungeon you gain access to Master Yan Kan Kook who sells the Brimstone Revenant and Krampus recipes.

Brimstone Revenant Recipe

Brimstone Revenant is a must when it comes to fire attackers! This is a 4 Pip spell with a base damage of 470. It also adds a 25% fire trap for your next hit.
To craft Brimstone, buy the recipe for 60,000 Gold.
You will also need:
10 – Brimstone Revenant Treasure Cards
100 – Perfect Ruby
200 – Ghost Fire
100 – Diamonds
100 – Bronze Gear
50 – Scrap Iron
50 – Sunstone
12 – Amber

Krampus Recipe

The spell Krampus is definitely the collector’s item out of all three spells. Krampus is a 4 Pip fire spell that does 305-345 fire damage. Krampus also leaves behind a -45% Mantle to make your opponents next hit fizzle!

To craft Krampus, you will have to buy the recipe for 10,000 Gold.

You will also need:
6 – Krampus Treasure Cards
100 – Perfect Ruby
200 – Ghost Fire
50 – Black Pearl
100 – Black Coal
50 – Astral Shard
50 – Sunstone
12 – Amber

Hephaestus Recipe Location

When you are ready to craft Hephaestus, you will have to make your way to Avalon. Once you are there head to the Wyrd and look for the Indigo Giant on your map. Once you defeat him you will have access to Grady who sells the Hephaestus Recipe.

Hephaestus is the newest spell here, recently released in the Immortal’s Lore Pack. Hephaestus is a 5 Pip fire spell that does 425-475 damage and leaves an additional 25% fire trap for your next hit!

To craft Hephaestus, you will have to buy the recipe for 12,000 Gold.

You will also need:
10 – Hephaestus Treasure Cards
120 – Perfect Ruby
200 – Ghost Fire
60 – Black Pearl
120 – Black Coal
60 – Astral Shards
60 – Sunstone
18 – Amber

Where to get the Reagents!


Perfect Ruby: You can buy Perfect Ruby for 100 Gold a piece, In the Celestia base camp from the vendor Archytas. You can also buy Perfect Ruby from Noxolo Fasttrack in the Baobab Market in Zafaria.

Ghost Fire: You can buy Ghost Fire for 100 Gold a piece, in the Atheneum. From the vendor Zolton Nightstone.

Black Pearl: There are no vendors currently that sell Black Pearl for gold. If you are into PVP you can buy Black Pearls from Diego The DuelMaster in Unicorn Way for 175 Arena Tickets. You can also buy the Black Pearl transmute recipe from Avery Templeton in the Celestia Base Camp.

Black Coal: You can buy Black Coal right in Wizard City! from Elmer MeadowGrass in Olde Town for 5 Gold a piece!

Astral Shard: Astral Shard is one of the most difficult parts of the recipe as there is no vendor that sells them. You may be able to snag a couple from the Bazaar. You also can farm fishing chests in Castle Darkmoor for Astral Shards

Sunstone: You can buy Sunstone from Diego The DuelMaster in Unicorn Way for 200 Arena Tickets. You can also buy the transmute Sunstone recipe. You can get this from Avery Templeton in the Celestia Base Camp.

Diamond: You can buy Diamonds from Diego The DuelMaster in Unicorn Way for 100 Arena Tickets. You can buy the transmute Diamond recipe from Avery Templeton in the Celestia Base Camp.

Amber: Amber is by far the most difficult item to get on this list. One of the best places to get Amber is by farming Gladiator Dimachaerus in Mount Olympus in Aquila.

Hephaestus, Krampus, Brimstone Revenant: The best place to get these treasure cards would be from the Bazaar. They are not all common, but they do show up quite a bit if you refresh the treasure card tab a few times.

Thanks for reading my crafting fire spells, article! Please let me know what you think in the comment section.