Castle Magic Triggers III

Introduction

This will be the final part of the Castle Magic triggers guides. In this guide we will cover the remaining Castle Magic triggers. These triggers are the most difficult to understand. If you don’t know what Castle Magic triggers are, read through the first two guides first. Each section will name the trigger, what it does, how to use it, and why I assigned it to this difficulty. Then, I will finish by giving an example of how I like to use the trigger.
Advanced Triggers

These are the complicated Castle Magic triggers. Unlike immediate triggers, their purpose will generally be specific. They do not have a purpose for every creation. The few items in this category have many interactions within one trigger. Their interactions are are not the easiest to understand.

Magic Brazier

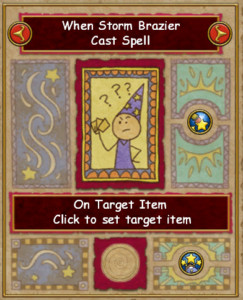
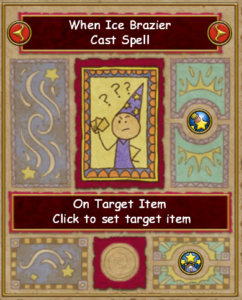
The Magic Brazier is like the magic lever from the beginner guide. The brazier has many states and casts a spell when it enters each one. But, unlike the lever, the magic brazier has 4 states: off, fire, storm and ice. To change the brazier’s state a player must use the item by interacting with it. This is an advanced trigger, as it requires managing many states that each cast their own spells. The best uses I have seen for this trigger involve creating puzzles. When used with another trigger, you can create a brazier combination to open a door.
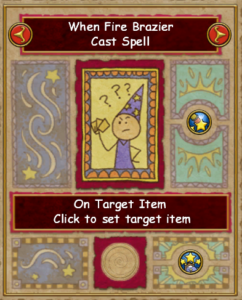
Magic Item Detector
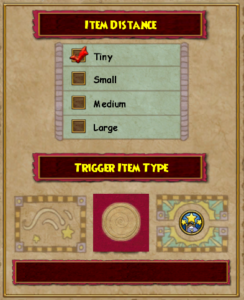
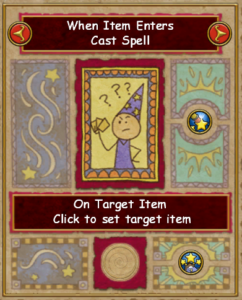
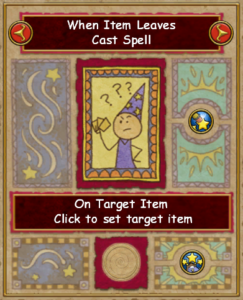
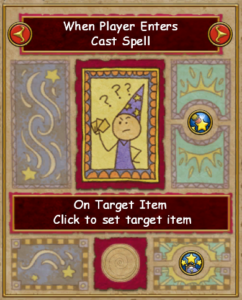
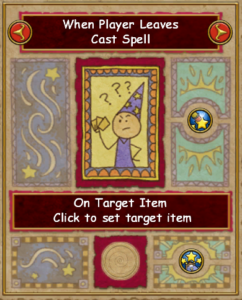
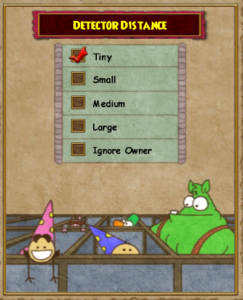
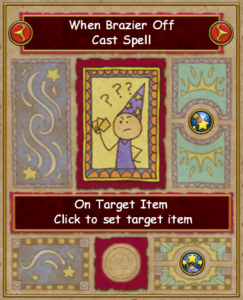
 The Magic Item Detector is likely the simplest of the advanced triggers. The player selects a size to detect in as well as a specific item for the trigger to detect. Then, the trigger will cast a spell whenever the selected item enters or leaves. This advanced trigger has both a settings menu and can move via castle magic. The only way this trigger works is if you are already using castle magic elsewhere. The best uses I have seen for this trigger involve setting a continuous path for an object to follow. One object can move towards a detector and create a chain effect. This is useful for wanting something to happen in a loop.

Magic Orb Catchers

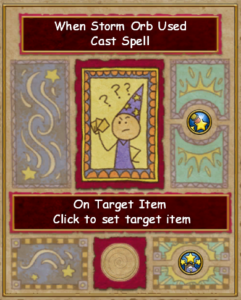
Magic Orb Catchers need to be in the same house as a magic orb to function. They both come in three varieties: Fire, Ice and Storm. To use them, you need to both place the orb catcher and the corresponding magic orb somewhere in the same house. When a player walks over the orb, they will pick it up. As soon as that player walks near the same school’s orb catcher, the orb will disappear and the spell will trigger. One use for these triggers is requiring a player to have a key before accessing another area. If a magic orb catcher opens a door, the player would need the corresponding orb to open said door.
Magic Computer

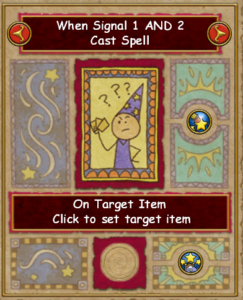
The most infamous of the Castle Magic items. This item requires the deepest understanding to make use of. But, once you grasp the uses for this item, it opens up many new Castle Magic creations. The Magic Computer stores two signals, known as “Signal 1” and “Signal 2″. Then, based on what combination of these signals the magic computer is storing, will cast a spell. To add or remove either of these signals, you need to cast the “Add” or “Remove” signal spells on the Magic Computer. The Magic Computer has 6 different outputs, which I will explain in detail.
 
  • When Signal 1 AND 2 – This is the simplest of the magic computer expressions. When the Magic Computer has both signals, it will cast the AND spell. If it only has Signal 1 or Signal 2, it will not cast the spell, it must have both signals.
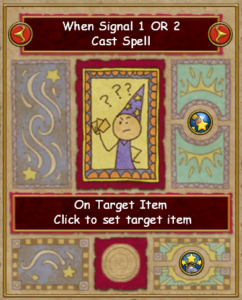
  • When Signal 1 OR 2 –  This expression requires only one of the signals to activate. It can be either Signal 1, Signal 2 or both. As long as the computer has at least one signal, the OR spell will activate.
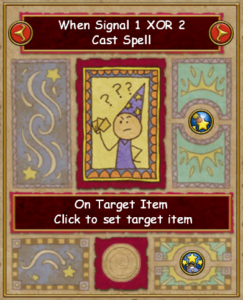
  • When Signal 1 XOR 2 – Like the OR expression, except it only allows one signal or the other. If the computer has both signals, the XOR spell will not cast.
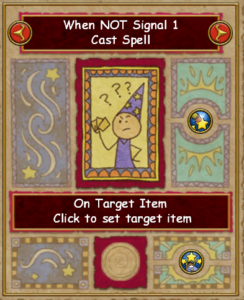
  • When NOT Signal 1 – This spell will cast as long as the Magic Computer does not have Signal 1. It can have no signals or Signal 2, but as soon as the Magic Computer gets Signal 1, it will not cast.
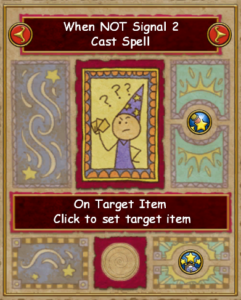
  • When NOT Signal 2 – This function will always be active as long as the Magic Computer does not have Signal 2. It can have no signals or Signal 1, but as soon as the Magic Computer gets Signal 2, it will not cast.
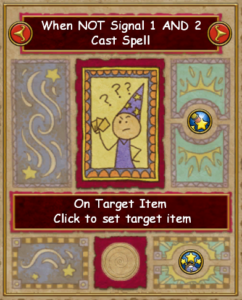
  • When NOT Signal 1 AND 2 – This spell will always cast as long as the Magic Computer does not have both signals. It is a complete opposite of “When Signal 1 AND 2”, if that spell is casting, this one is not.

As a concluding note on Magic Computers, they will only cast their spells when they update with a new signal. For instance, “When NOT Signal 1 AND 2” is active without touching the computer. But, it will not cast the spell until you alter either of the signals.
Conclusion

This concludes my guides on the Castle Magic triggers themselves. As always, feel free to ask if you have any questions on how to operate or use these triggers or about Castle Magic. I’d love to hear how you use your Castle Magic triggers! Otherwise stay tuned for more Castle Magic content and let me know what type of guides you would like to see in the comments below.

Vendors101: Krokotopia and Marleybone

Welcome to the 2nd “Quit Stalking the Bazaar”. Today we will be shopping in the worlds of Krokotopia and Marleybone!  From the sandy dunes of the desert to the elegance of Victorian life, I’ve scoured the shops for you!

Krokotopia Housing Vendors

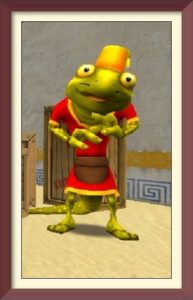
Ea’rik

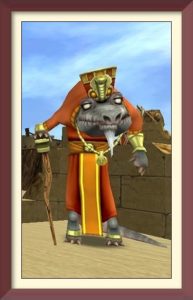
Ea’rik is the Furniture Shop keeper in Krokotopia. He is in the Krokosphinx. You’ll see him to the left when you get off the boat. He has a fabulous collection of housing items for sale. Even scaffolding which housing experts use for glitching can be found here.
 
Here’s a sample of what you will find


Scaffolding
Crafting Stations
Checkers and Gameboard
Hopscotch Mat
Many Fabulous Wallpapers and Flooring

Digby Hammershell

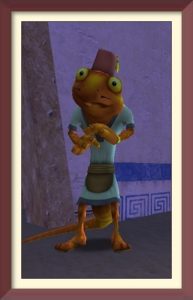
Good ole Digby is the Real Estate Agent for Krokotopia. You’ll find him inside the building next to Ea’rik. He’s a wonderful feller with 2 great castles for sale.

Castles available:

Oasis Camp-10,000 gold
Desert Villa-20,000 gold

Charley

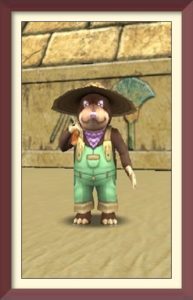
Charley is the gardening expert in Krokotopia. You’ll find him on the left side of the Pyramid of the Sun. He sells spells and seeds and pots with Krokotopia designs!

Krokotopia Recipe Vendors

Wul’yahm

Wul’yahm is the Crafting Trainer in Krokotopia. You’ll find him on the 2nd island to the left of the Pyramid of the Sun. The Reagent Vendor is right behind him, so you can get your recipe and reagents at the same place!
 
Here’s a sample of the recipes he has for sale:


Tapestry to School of Balance
Tapestry to The Oasis
Glowing Fancy Lampost
Solar Decoration
Many Tablets and Obelisks

Kamal Sarhan

Around level 60 you will come back to Krokotopia for the House of Scales. The quest will lead you to Aleema who grants access to Zigazag. Kamal Sarhan the recipe vendor is in the central area of Upper Zigazag.
 

Recipes: Tapestry to House of Scales
Price: 5,000 gold

Pembaa

At level 25 a side quest for a lost beagle will lead you to Kembaalung Village. Pembaa is the recipe vendor in Kembaalung Village Krokotopia. He becomes available after completing The Attaché Case quest.

Recipes: Tapestry to Kembaalung
Price: 5,000 gold

Marleybone Housing Vendors

Neville Cobblestone

Neville Cobblestone is the Furniture Shop keeper in Marleybone. He is located in Regent’s Square inside the Real Estate & Fine Furnishings shop. Look to the right side of Market Square. He’s quite a pleasant person with some wonderful items!

Here’s a sample of what you can find:

Small Starry Tent
Amazing selection of Wallpapers and Floors
Grand Piano
Campfire with Kettle
Chess Pieces (to go with the game-board bought in Krokotopia)
Board-game

Tortimer T. Shellington

Tortimer is the “Go-to” guy for the best housing in Marleybone! Always ready to take you on a tour of his available castles. You can find him sharing a shop with Neville. They are best friends, you know!

Castles Available:

Metropolitan Manor-12,000 gold
Royal Estate-30,000 gold

Babbage Basset

Babbage Basset is a Castle Magic vendor. You can find him in Regent’s Square near the entrance to the Royal Museum. Babbage sells Castle Magic items and spells. He is renowned for introducing Wizards to the basics of Castle Magic.

Marleybone Recipe Vendors

Felicia Worthington

Felicia Worthington is the crafting trainer in Marleybone. She is outside Digmoore Station. This sweet, crafty lady sells recipes for the most delightful housing items. She might even offer you a spot of tea!
 
Here’s a sample of the recipes she sells:


Blue Wall Tapestry
Pavilion
Carved Bookshelf
Male and Female Mannequins
Weapon Rack

Captain Dartmouth

Captain Dartmouth is a recipe vendor inside Barkingham Palace on the left side. He becomes available after completing the Rooftop instance.

Recipe: Barkingham Palace Tapestry
Price: 5,000 gold

This completes our shopping trip through Krokotopia and Marleybone. So many vendors! So much to see! What was your favorite find? Tell us in the comments below. Join us next time for our excursion through the vendors of Mooshu and Dragonspyre!
Castle Magic Triggers II

Introduction

This guide is a continuation of the first castle magic triggers guide. I have gone through each castle magic trigger and assigned a difficulty of use to each one. This guide will cover intermediate triggers, another guide will cover advanced. Each section will name the trigger, what it does, and how to use it. I will explain the difficulty level and give an example of how I like to use these tools in my own designs.

Intermediate Triggers

These triggers are more complicated to use than the beginning triggers. Generally they serve very important purposes to Castle Magic. If an item requires unique input or separate data values it is Intermediate. If a trigger is not intuitive with other Castle Magic mechanics it is intermediate.

Magic Reflector

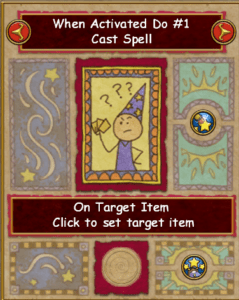
  • The Magic Reflector is one of the most essential castle magic triggers. The purpose of the magic reflector is to cast many spells at once. There can be a single target or different ones. You need to use another castle magic trigger to trigger this one. The only way to activate a Reflector is to target it with the “Activate Reflector” spell. The number of uses for reflectors are endless. I use one in almost every single build. For example, if you want to make an entire structure grow larger at once, use a reflector to target each piece. This way works without using a significant amount of triggers.

Magic Random Reflector

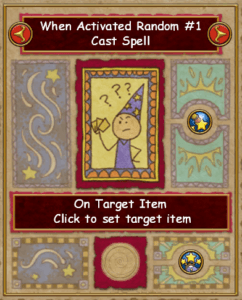
  •  As you can tell by the name, the magic random reflector is very similar to the magic reflector. It functions identically to the magic reflector except for one small difference. Instead of activating all eight spells at once, it picks one at random each time. Uses for this are more specific than the uses for the original magic reflector, due to it’s unusual nature. If you want to give a house a haunted vibe and have things happen randomly, this item would be the best tool for the job. 

Magic Timer

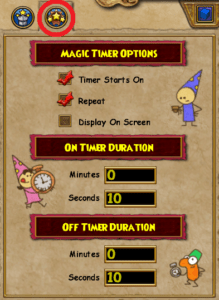
  • The magic timer is the next most versatile castle magic trigger. The magic timer has two main sections. An “On” timer counts down, then right afterwards an “Off” timer counts down. When each timer reaches zero, a spell is cast. You can set the timer to be activated by another trigger and to only count once or repeat. This is a more difficult trigger to master due to its additional options. You can access the additional options menu by pressing the “Magic Item Options” button. There are many uses for this, but the most common use is when you want a spell to be cast continuously. For example, if you want to make something stay large, you can set a magic timer to cast “Make Larger” and repeat.

Magic Player Detector

  • This item has some niche uses and is always worth keeping in mind. The magic player detector detects when a player walks on it or steps off. It’s a simple item to use except for an extra option. This option allows you to make the detector ignore the owner of the house. To use the player detector place it where you want players to walk. Then place the spells you want to cast. I like to use these when I want to surprise a friend. A spell will cast in front of the player when they walk on the spot you placed the detector on.

Magic Room Detector

  • The Magic Room Detector is the Player Detector’s older brother. The interface for this item is like the player detector’s, except the options include four sizes. The room detector senses when a player enters an area as opposed to a specific spot. I find this tool very useful, since the location players need to walk in is less precise. Use this tool like the player detector when you want to detect in a zone as opposed to a single spot. 

Magic Counter

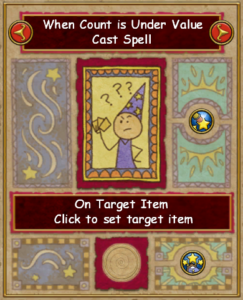
  • The Magic Counter has an internal counter that keeps track of a number. The counter casts spells based on how that number relates to a value set by the player in the options. When the number is adjusted up or down the counter updates and casts another spell. This is useful when you want a spell to cast up until a certain point. If you wanted to use a timer to make an object larger only a few times, a magic counter would work well.

Magic Jump Detector

  • The Magic Jump Detector detects when nearby players jump and casts a spell. This item has the same option menu as the room detector. Pick a border size to detect within and whether you want to count the house owner. One fun example of a jump detector is to create an elevator. Use it to move a platform up when a player in the area jumps. This allows the player to determine how high they want to go before jumping off.

Magic Text Detector

  • The Magic Text Detector detects when nearby players send a menu chat message that you choose. To use it you pick a menu chat phrase and spell size in the additional options menu. Then, when a player in the area uses the menu chat phrase, the spell will cast. This is most useful in my experience for secret doors. Most players do not use menu chat so you could use it to password protect a special secret area.

Conclusion

That completes my intermediate Castle Magic Trigger guide. The advanced triggers will be covered soon, so practice these now. If you have any questions about these triggers or Castle Magic in general let me know in the comments below.
Wizard City Housing Vendors

Tired of never finding the housing item you want at the Bazaar?  Well search no longer! There are many things available throughout all the worlds from a variety of vendors. Even items that are no auction and can never be found at the Bazaar! We will be visiting each world in this series and will show you who to go to for that perfect housing item. 

Wizard City Housing Vendors

There are four housing vendors in Wizard City, They have many housing items available. There are also six recipe vendors for craftable items. From Castles to Pet Bread Crumbs, we have them all listed here.

Aubert Quickhammer

Aubert is the furniture shop keeper in Wizard City. You’ll find him in the Shopping District by Eliks Edge, at the Wizard City Furniture & Castle Shop. He has everything from plants to wallpapers and floors. Tell him Sarai sent you!

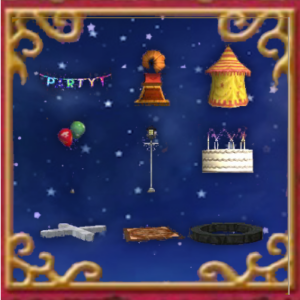
Here’s a sample of what you will find.

Party Banner
Plaques for all schools
Fancy Lamppost
Small Yellow Tent
Small Blue Trim Rug
Tic-Tac-Toe pieces and Gameboard
Balloons
Music Player
Party Cake

Buxley Turleton

Buckley shares a shop with Aubert Quickhammer. He’s the best real esate agent in Wizard City!

Castles available:
Wooded Cottage 8,000 gold
Royal Playhouse 15,000 gold

Farley

Farley is the head gardener for Wizard City. You can find him in Golem Court.

Here’s a sample of what you can find:

Wizard City styled pots
Seeds
Tropical Garden Gnome

Roland Silverheart

You can find Roland on Unicorn Way outside of the PVP Arena. All of his items are non-auction and are purchased with Arena tickets. If you don’t PVP you can get tickets from doing your daily quests.

 
Here’s a sample of what you can find:
 
Wood Housing Blocks 
Bobbleheads 
Statues 
Ninja Sword Rack 
Market Tent Pavilion

Derrick Blaze

You can find Derrick next to the Bazaar. He sells the recipe for the Team Up Kiosk. In order to purchase this recipe you have to earn your Team Player badge.

Team Up Kiosk Price: 100 gold

Wizard City Recipe Vendors

Eudora Tangletree

You can find Eudora by the pond near the Bazaar in Olde Town. A lovely lady with great recipes! She has recipes for many different aquariums and seventeen different tapestries.

Here’s a sample of her other recipes:
Garden Lot
Directional Arrows
Moon Banner
Red Foodcart
Stack of Paper
Water Bucket

Lloyd Fallingwater


You can find Lloyd in the Shopping District near Eliks Edge. He has all the Stone Housing Block recipes. Who needs the Bazaar, just make them yourself!

Dr. Purreau

You can find Dr. Purreau in the Hatchery. He has recipes for a Pet Hatching Kiosk and a tapestry to the Hatchery. These recipes need Hatch Peppers. You can get this reagent by placing pets in the kiosk or in the chest from daily quest rewards.
 
Hatching Kiosk Recipe Price: 2,500 gold Tapestry Recipe Price: 2,500 gold

Harker

You can find Harker in Darkmoor to the left, near the small building. He has the recipe for the Castle Darkmoor tapestry. 

Recipe Price: 5,000 gold

Jackie Whisperflame

You’ll find Jackie in the snack shop at the Pet Pavilion. She sells the recipe for Pet Bread Crumbs. Bread Crumbs are an awesome way of controlling the movements of pets and mounts when they are placed in your Castle!

Recipe Price: 5,000 gold

This concludes the list of Housing Vendors for Wizard City. Whew, that was an all day shopping spree! Hope it helps you find that perfect item for your castle. Let us know in the comments below about your most surprising find shopping in Wizard City. Stay tuned for Krokotopia and many more worlds to come!

Castle Magic Triggers

Introduction

To start, I would like to explain what a castle magic trigger is for those who do not know. Castle magic at the base operates by having one item perform an action when certain conditions are met. I like to refer to this as the item “triggering.” This guide will be covering all the items that can be used to trigger things to happen.

Buttons or levers are some of the most common triggers. I will be covering both how to use them, and some interesting ways to include them in your designs. Remember, you can buy all castle magic items from Babbage Basset. This guide will be split up into beginner, intermediate, and advanced triggers because they vary in complexity.

Beginner Triggers

These will be the simplest items, generally only consisting of a single condition and a single output. If you are just testing the waters of castle magic. I would suggest you play around using these items first. After you are familiar with the basics then explore the more advanced sections.

  • Magic Buttons

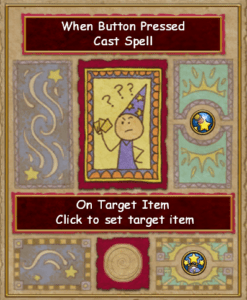
    There are two types of magic buttons. The magic button which gets placed on the wall, or the magic floor button, which gets placed on the floor
    . They operate the same way and only differ in where they can be placed. These are the simplest castle magic triggers and only contain the condition “When Button Pressed Cast Spell.” So, to use a button you need to place the spell you want to cast in the main section then select a target that you want the spell to cast on. Now when the button is pressed, that spell will cast.
  • Magic Start Detector 

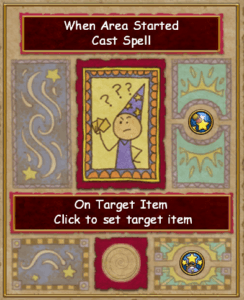
    Similar to the magic button, but with a much easier condition to meet. This item has the condition “When Area Started Cast Spell”. This means that when someone enters the area the detector is placed in, they will see the spell get cast one time. This can be useful if you want to adjust the size or location of an object. Just like with the magic button, place the spell you want cast in the main section. Then pick a target and the spell will be cast automatically
  • Magic Lever

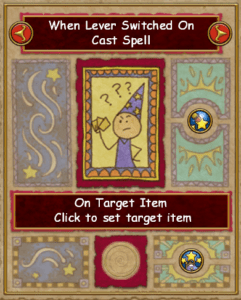
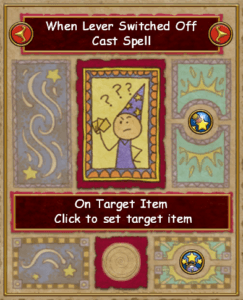
    The magic lever is slightly more complicated than the previous triggers. Unlike the buttons and start detector, the lever has two possible states. Therefore, there will be two outputs. The lever has one condition for “When Lever Switched On”, and another condition for “When Lever Switched Off.” This means it could cast two different spells, depending on which way it is pulled. Even though it is slightly more complicated, I put this in the basic section because both parts of this trigger function the same way.

    Place the spell you want to cast in the main section, then pick a target. The lever will cast the spell when it is moved into the matching position. I like to use levers when I want something that can be undone. For example, levers are great for making magic doors. You can make an object move one direction when switched on, and then make it move back the opposite direction when switched off.
  • Magic Pressure Plate 

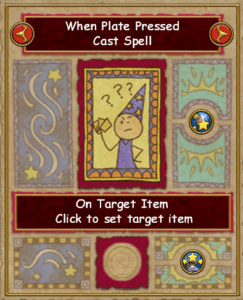
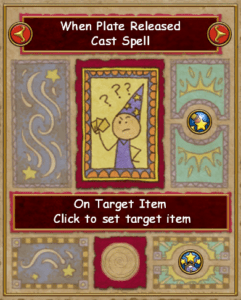
    The magic pressure plate is almost a carbon copy of the magic lever. It has two states as well, “When Plate Pressed Cast Spell” and “When Plate Released Cast Spell.” I use this less often than I use the magic lever because it’s a lot easier to accidentally step on a pressure plate and trigger accidentally. Yet, this can be used in the same way the magic lever can and could fit into your design in a better way than the magic lever in some cases. I always keep this trigger in the back of my mind when starting a new project.

Conclusion

This concludes the beginning castle magic triggers. There are many more triggers as well as additional uses for these beginner triggers that will be covered in our next installment. If you have any questions on how to operate or use these triggers or about castle magic in general, feel free to ask in the comments below. Otherwise, stay tuned for the intermediate and advanced castle magic guides.
How to Create a Portal Hub

Dedicating one of your castles to store the portals to your other houses can be a laborious task, especially deciding you want to begin a project like this. If you’re not sure what I mean by a “portal hub,” I am referring to a castle that is the central hub to teleport to your other homes. Successfully completing a project like this is a big accomplishment for any decorator, for your friends to tour your amazingly decorated houses and simply teleport to the next once they’re done.

The Math

Before we begin, there is a lot of math to be done. For this guide, I will be doing the most complex option of how we can interpret this project (and very much so the most impressive!).

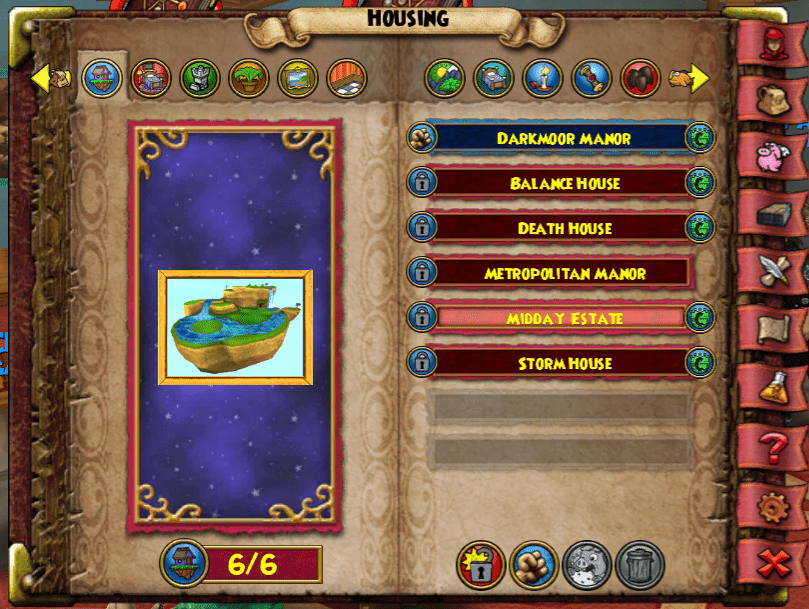
Open your list of houses and count all of the houses you want included in this project. I want my Balance House, my Storm House, my Death house, and my Midday Estate included in this project, plus my dorm. My Storm House will be the Hub, and my Dorm will teleport the visitor to the hub. Once the person gets to the hub, there will be several portals they can enter. This is described in the main flow chart. The Marleybone and Darkmoor houses will not be a part of this tutorial.

This means we will need one teleporter for the Dorm, three for the hub, and three more to put in the houses. Therefore, all together, we will need seven portals. We need two for every house we have, plus one for the dorm.

The Portal Plan

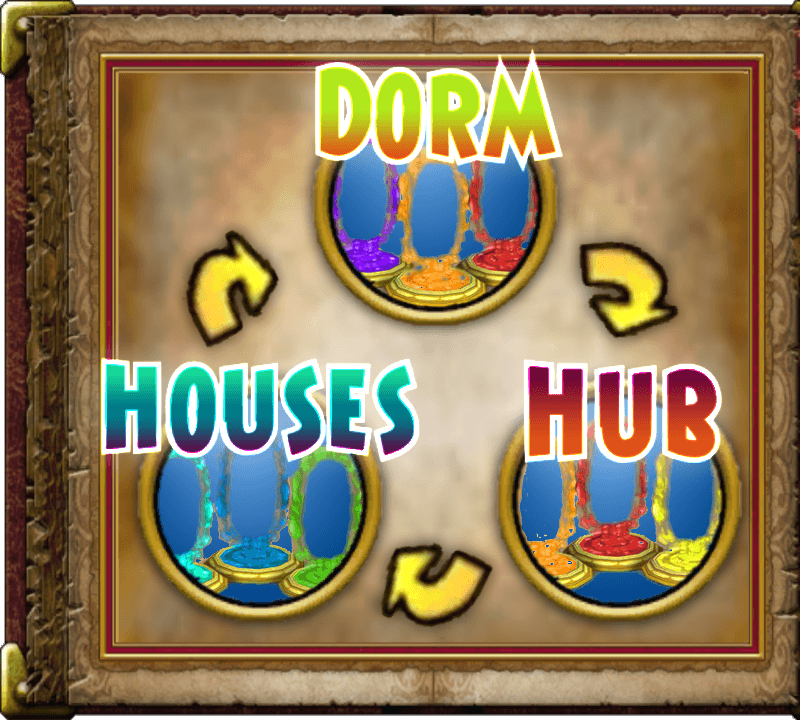
Next, we need to figure out the route these portals are going to take. The flow chart to the left makes it look easier than it feels when actually doing it.

We must set up three portals to go back to the dorm, the dorm portal to go to the hub, and the three hub portals to go to the houses. Remember, when you click on a portal without the mark in the corner of its box in the decorating menu, it means you need to select the location it will teleport to first. If it does indicate a point has been selected, you may proceed to place it. 

An Example

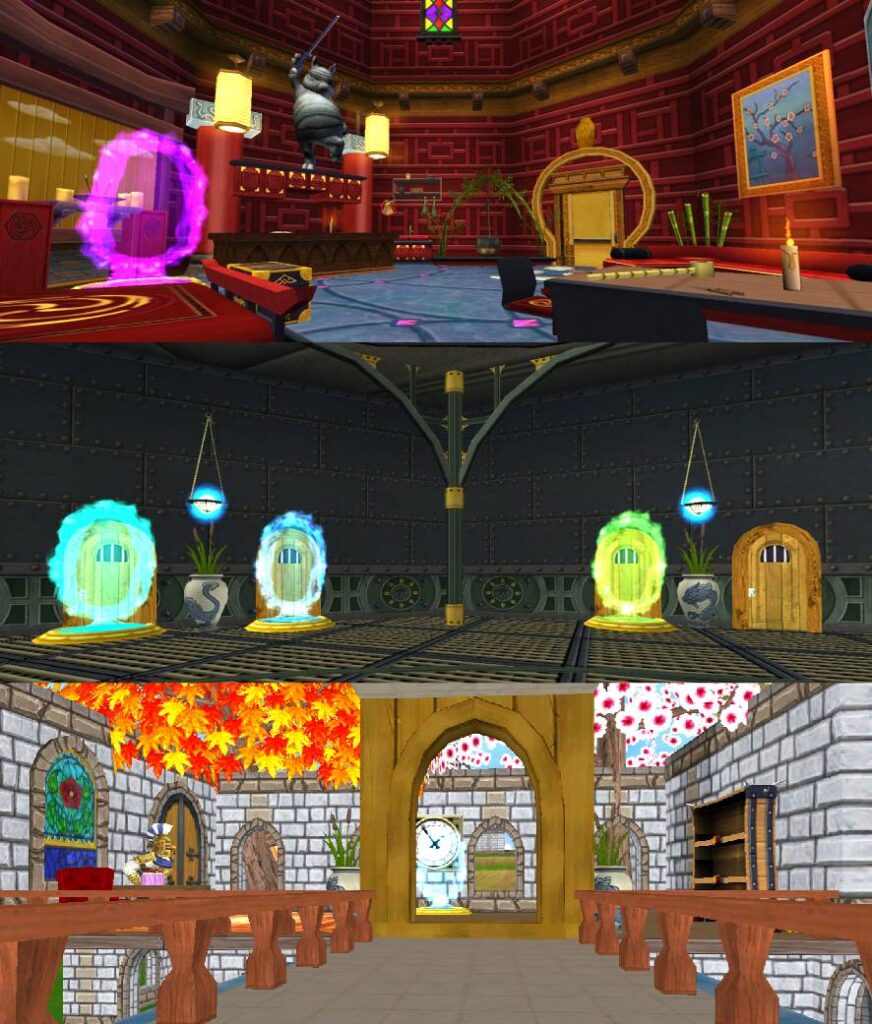
To the right is one possible combination a visitor may take. After teleporting to you in your dorm room, they go through the portal in the Storm House hub, and then the Midday Estate. When they decide to leave the Midday Estate, they will go back to the Dorm Room and begin again to see the other houses.

This visual shows where the portals are going to. The violet portal heads to the Storm House. This is color association. By using violet, it is a hint without needing to use a sign where they are about to go.

This works rarely. Most of the time, we need to put a sign nearby, or in the portal to show where people are going.

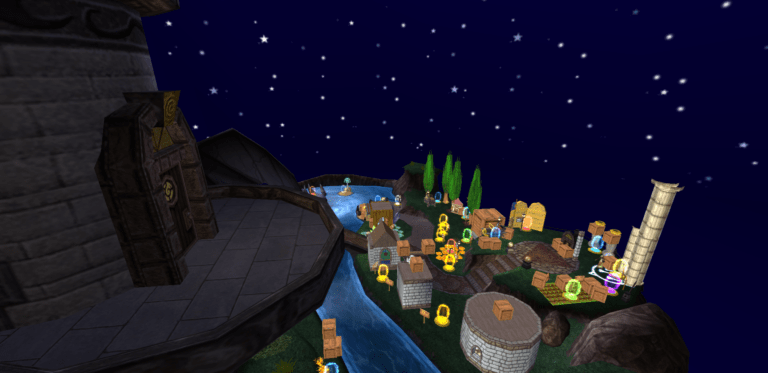
An extraordinary example of Paige Moonshade’s Portal Hub. Find her Wizard’s Watchtower on the castle tours!

It is always amazing to see houses on the tours that are connected together. Seeing portals linked together like this makes the house feels that its a part of something much larger, and is a product of greater quality. In projects like these, the more houses you have, the more work it will take to maintain it, but there’s a bigger pay off. In the image to the left, it looks amazing to see the portals of every single house in the game linked up together.

Thank you, Starlights, I wish you the best in your Portal Hub creations! Please remember to email your lovely interpretations of this guide to us at [email protected] because we would love to see them. If you have any issues following along with this guide, please get in touch with me in the comments below or on the Ravenwood Academy Discord!

Dorm Decorating: Death School

I ’m sure everyone remembers struggling to figure out what to do with their first dorm room. I had no idea what to do with the original furniture. Honestly, it just wasn’t for me, but after a week or so of fishing, questing, and collecting treasure cards, I had figured out how to make the most of my dorm.


First, I started by removing all of the furniture and by selling it in order to buy some furniture I could work with for the style I had in mind. I had to think “What’s a good color scheme?” and “What items are an absolute necessity for a dorm?” and most importantly, “How could I fit everything together to work the best for my dorm?”

Well, after a few hundred trips to the Bazaar (on the fine edge of an exaggeration), I had gathered enough decor to achieve my goal. Some of the first few items I chose were the Wyrm Crowned Bed, the Long Narrow Table, and the Portrait of the Bone Dragon. After I had picked out the larger items, I started searching for others that would work well with them.

I decided on some Aero Dwarf Chairs for the center of the room; this would be the first thing your Wizard would see each and every time you entered. I wanted to make my focus simplistic and fill the outer edges with more decor.

One of the most important things to go by when decorating is to ask yourself “Does this look cluttered?” I don’t know about you, but I definitely like to keep things tidy, especially in my Wizard’s home.

One of my favorite parts of setting up my dorm was glitching. If you’ve never tried it before, it might surprise you how easy it is! This was my first time glitching while decorating and it turned out flawless, in my opinion. All you need to get started is one Maple Bookcase and a Black Checker, the best part is how they always have both of these items in the Bazaar!


To achieve the decorating glitch, first set down whatever object you want to float on the floor, then place the bookcase next to it. Then, you place the Black Checker on whichever shelf you want your item to be when it is in the air. Then, grab your Black Checker on the shelf and move it so your bookcase sinks into the floor. Once it’s there, you can move the item into the bookcase and then move the maple bookcase again, and your object is in the air! After this, to remove your bookcase, you grab the checker again and move it so your item stays in place.

My favorite glitch in this dorm room is definitely my Small Fry Keeper Tank. For this glitch, I used my Maple Bookcase to glitch some Purple Dewberries into the tank. Then I used it again to set it up in the window and out of the way! By using the glitch, I saved walking space in my dorm. Plus, it looks amazing, even if I do say so myself. To finish the tank off, I placed a Blue Angel plant on top of the tank to add a splash of blue to the area.

Every Wizard needs a study area, and for this, I completed three separate glitches. I decided to put the Telescope in the window sill with the Castle Magic Help tome beside it. It only made sense to look at all those beautiful Wizard City sunsets up close from the comfort of my dorm! Looking toward the desk area, I glitched the Arcane Rebooter (from Wizard101’s 10th-year-anniversary code) onto the table because it was almost too big to fit otherwise. That glitch definitely freed up more space on the desk too! I added a few specimens in jars, a Bottle Burner, Test Tubes, and a Venus Flytrap plant to complete the look. I found the flytrap in the Bazaar, but you can also get it from Fishing Chests!

I decided to not put too much of an emphasis on the doorway and to keep it fairly simple, I added the Nimbari Sword Rack, one of my favorite decorations in the game. The Dragon Skull, the Black Rock Fragment, and a couple of Glowing Mushrooms to keep things interesting.

Last but not least, I glitched the Wyrm Crowned bed into the wall and placed more glowing mushrooms underneath it! This is a really small bed in the game, so adding the mushrooms turned it into its own focal point! Next to the bed, I have the Elegant Hat Stand, and the Special Hat stand each covered in Darkmoor Cobwebs. You can thank my pet Moose for that one.

I hope you guys enjoyed the read because I loved writing it for you! I hope you all have a blast glitching and creating your very own personalized dorm!

This article was submitted by Guest Author, Jen Skullbreaker

Dorm Decorating: Xmas Edition

It’s Christmastime in the Spiral once again! I’m sure all of you are just about as excited as I am (as if that’s even possible!). It’s the most wonderful time of the year and you can show your Christmas cheer with an exciting and original Christmas themed dorm room!

I am completely new at glitching and Castle Magic, but I’ve picked up a bunch of fun tricks this season to share with you all! For my dorm, I didn’t want to use any of the Christmas themed trees we all love so much. Instead, I decided to make my own original Christmas tree.

For my Christmas tree, I chose to use six of the Blue Holiday Ornaments and glitched them into the air using my trusty Maple Bookcase and Black Checker. For this glitch, all you have to do is set down whatever object you want to float and then place the bookcase next to it. Then you place the Black Checker on whichever shelf that you want your item to be in the air. You grab your Black Checker on the shelf and move it so your bookcase sinks into the floor. Once it’s there, you can move the item into the bookcase and then move the maple bookcase and your object is in the air! After this, to remove your bookcase, you grab the checker again and move it so your item stays in place.

I found all of the ornaments used for this in the Bazaar (and for quite a cheap price). All around my tree I have floating presents using the aforementioned ornament glitch. I thought this would be a really magical focal point and it turned out better than I had imagined. Speaking of the actual Christmas tree, it’s the Snowy Polarian Tree shrunk down twice along with the ornaments using Castle Magic. As you’ve probably noticed by now, my not-so-Christmas tree topper isn’t actually on the top of my tree. I did this because outside of Photomancy, the tree is too tall for it to show. For this, I just grabbed a handy Star Staff and enlarged it five times with Castle Magic as well.  
To the left of my tree, I made a cozy sitting space featuring one of the goodest of boys. Right next to him, I glitched a Regular Keeper Tank with a Red Cap Carpe (the perfect Santa fish!) into the floor using a rug and the Maple Bookcase. For this glitch, you start by placing your tank in your dorm and then set out your Maple Bookcase with the Black Checker on the lowest shelf. Once that is done, you grab the checker and move the opposite end on the bookcase into the tank. Grab the Maple Bookcase and set it down so that your tank is up in the air. After this you grab the checker once more and move it so that the bookcase is no longer touching the tank, which is now floating. Then you pick up your bookcase and then place it once more. This time you will put your checker on the second shelf and place a medium rug (either the Medium Magenta or Medium Purple). You then move the checker so your bookcase sinks once more and place the opposite end on the long side of your rug. Next, you move the bookcase and make sure that the rug is placed evenly inside of the tank. As you’ll see now, the rug fits perfectly where the wooden bottom stops and the blue base starts. Once this is done, remove the bookcase by grabbing the checker and place it somewhere else in the room. Pick up the bookcase. Grab the rug and move it anywhere in your room where you want your tank and you’ll see that the tank is sunk into the floor without the bottom wooden piece showing!

Inside the tank, I have a shrunk down Snowman and a Snow Pile. Remember that when glitching items inside of the tank, you need to place them where the tank will be first, which can get tricky if you need to float each item. That’s why sinking the tank is a perfect option if you want some extra flair! For the Snowman and Snow Pile, I shrunk them both using Castle Magic Reflectors and Start Detectors with the shrink cards in place (this is all trial and error, depending on how small you want an item. Using a Magic Reflector, you can use castle magic on up to eight items and you can shrink or grow a single item at least eight times!).  On top of the tank, we have another Snow Pile shrunk down. I also included some Yuletide Candy Canes and peppermints for all of the guests to enjoy.

One of my favorite glitches of all time would have to be putting the Silver Chest over the plain wooden one for your bank. It was revolutionary for me when I first tried it and it worked so well! I simply used two medium rugs and the chest. All you must do is place one rug on top of the other at different angles and rotate the first one until it is under the wooden chest. Once that’s done, you set down your Silver Chest (which is the one found under the furniture tab in the Bazaar) directly on top of your wooden bank chest.  You’ll never have a plain chest for your bank again!

Next to the chest, we have a matching table with the Cookies and Milk glitched on top using the Maple Bookcase once again since they wouldn’t fit normally, you always have to give a little something back to Santa! (even if he is trapped in your fish tank at the moment).

Next to my glitched chest, I used up my spare Blue Holiday Ornaments and glitched them into the air and placed the Azteca Basket underneath. For that, I used the Maple Bookcase and Black Checker glitch with the bottom shelf, one with the second shelf from the bottom. All ornaments were shrunk two sizes down and I enlarged the basket by a size. All the String Lights were enlarged twice with Castle Magic as well. Last but not least, in the window, I placed the Gingerbread House to finish off my dorm.

I hope you all enjoyed my article on How to Make the Most of your Dorm: Christmas Edition! Decorate those dorms and have a very magical Merry Christmas!

This article is by Community Contributor, Jen Skullbreaker

The Elements of Decorating

Intended For the Novice Decorator

I have no doubt you’ve been to homes with phenomenal mazes that extend to places in the sky you didn’t think they could reach, or beautiful portal displays of every house in the game. Each portal with an angel plant at elder, dancing elegantly nearby, or player-made homes of building blocks that are realistic in exterior and interior design. They all grab something within us. A kind of magic different than anything else in the game. When we enter those phenomenal homes, we are pulled into their absolute splendor.

Whether it’s to find a housing gauntlet or be inspired by other decorators, we’ve all entered another player’s in-game castle and felt a sense of awe in its aesthetic. As an avid housing decorator, I have won contests and have earned positions on the Top Rated houses leader board. Today, we will delve into the elements of decorating and see how you can apply these skills of craftsmanship to your own interior and exterior decor.

The Elements

Scale

Evaluate the overall size of your decoration in comparison to your character as well as your screen. From creating three-story high towers that can’t fit in your screen, to the smallest flower pot, the element of scale is probably one of the most important considerations.

Depth

Similar to “Space,” we need to think about angles and balance between the items. We cannot be decorating too flat, but we also need to decide what should get the most attention with depth. Debatably, this element can also be considered the most important.

Space

Next, we must determine how much space there should be between your items. Where can people walk through? Where should people walk through? At times, I find the best use of space in my home is when I block off areas I simply don’t want to decorate in order to focus on the bigger picture.

Realism

The truthfulness and believability that your decoration style can be accepted as possible in the game. For example, this does not mean you cannot have floating candles, because that can be explained with magic. Therefore, that would be truthful and believable. What this rule suggests, is to justify your room or exterior, and try to think of it from a new perspective. We must justify how believable the design is by looking at it with our visitor’s eyes in mind. 

Originality

 Does that stunning, beautiful, masterful home you just decorated feel like it’s yours? Of course, incorporating other’s ideas doesn’t hurt, but what does taking that idea add? How do you develop upon the different styles and themes within your castle? Remember, context screams louder than the idea itself.

Texture

 Make sure nothing feels too repetitive in your decor. Try to find items that break up your texture and gather attention, or create textures that repeat well together. With repetition, the simpler an idea is, the better. With complexity, it is better for it to stand-alone.

Color

Color is quite powerful. I suggest knowing or learning some color theory. Learn about the emotional impact of colors, what colors represent, what different colored roses represent, which are the primary, secondary, and tertiary colors- the list goes on. Think about how different colors make you feel.

Palette

A palette is a collection of colors that are consistent throughout your design. As this is a video game where we cannot always pick specific colors, we should be lenient with where our shades and tones happen to fall within the overall color family.

Example: Garden of The Albion Enchantress  


My entry for Paige Moonshade’s annual Summer contest.
Honorable mention 2018.

Here is one of the dorm rooms I’ve decorated, entered in Paige Moonshade’s Ninth annual best little Wizard City dorm contest. Let’s go through each of the various elements to see how we employ them in this example.

The scale might be one of the first things you notice. Several well-placed items make the room feel more grandiose because of their stature. The objects barely fit into the frame. Next, let’s see the depth. We create depth through the garden between the archways. Very diorama-like, it sits with us having to peer in, with each one of us taking a different perspective. This technique is used in Mooshu, with there being a fence next to the sidewalk and bamboo plants spread out between the wall of bamboo.

By examining this space, we see it is very tight, crammed, and in-your-face, especially when viewing it from an in-game perspective. Standing there, You are filled with a view 360 degrees around you of items. You can barely find your way out, and it’s not the door you think it may be. It is overgrown and wild, the feeling, like an enchanted garden that belongs to an evil queen.

We may find ourselves questioning the truthfulness of this design. Would an overgrown, enchanted garden of a witch looks like this? I  believe it would be. It was very W.I.T.C.H. inspired, after I had binge-watched the short running television series for the second time, and I wanted to incorporate its dark and contrasting magical vibe into my own decor (notice how that also covered the color section too? These elements can correlate to each other in intriguing ways!).


Selfie!

Some of the ways I break up the texture of items in my design is by using wall lamps to pretend to hang them on pillars and wall-like items. In a similar fashion, the bright mushroom breaks apart the dark violet texture, while still being within the color scheme established. In our palette, we see bright greens, dark violets, vibrant and dark reds, and light blues. These are consistent and rarely fall out of line.


As decorators, we strive to create new worlds within our own homes or give homage to the ones we have quested in, and bring it to life. Each Wizard is given one dorm in Ravenwood and I hope this helps you make the best of it and the other castles that you own. Thank you, Starlights

Couch Potato Farming for all Levels

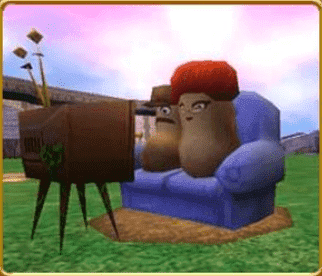
Anyone who has ever tried to hatch the perfect pet knows how important Mega-Snacks are. Mega Snack Packs are expensive and only help a little bit. The best and easiest solution is to grow Couch Potatoes, but how can we get them without spending all of our Crowns? Depending on your level, you have some great options old and new.
In my opinion, the absolute best place is the 5 Boxes quest box in Wizard City. This special event quest isn’t always in the Spiral, but when it is you will find it in a free to play area near the Bazaar. Meaning, even the newest Wizard with no membership has a pretty decent chance of getting this valuable Crowns seed. Super generous of KI! Be sure to take advantage of this opportunity the next time it comes to the Spiral!
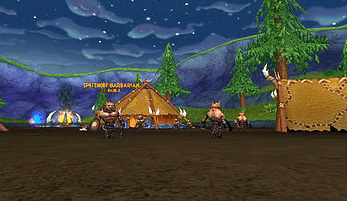
Once you have reached level 20 you can access Grizzleheim. The classic mob to fight for Couch Potatoes here is the Splithoof Barbarians in Boars Camp, Savarstaad Pass. This is one of the first areas you open when you get to Grizzleheim. It can be a grind farming this area, but it is accessible at a pretty early level in the game. For better drop chances, I find that switching realms every 10 fights or so helps.

Hands down, the best and easiest place to get this drop if you have a higher level Wizard is from the Death Ghultures in Mirage. This is one of the very first quests you get when you open Mirage. If you head towards Caterwaul Canyons, starting from the World Door, they are the first mob you see. They are a pretty easy kill at the required level to reach them with only 2,450 health. The drop rate is far more generous than it is in Grizzleheim or Wizard City. As a bonus, Evil Magma Pea drops here too.

There are many more places to farm for this drop, especially in the two worlds I talked about. These are my favorites mainly because of ease of access and reliability of drops. With luck and perseverance before you know it, you will have a garden that looks like this!

Good luck Wizards, see you out there!
             ~ Amber Ravynsong