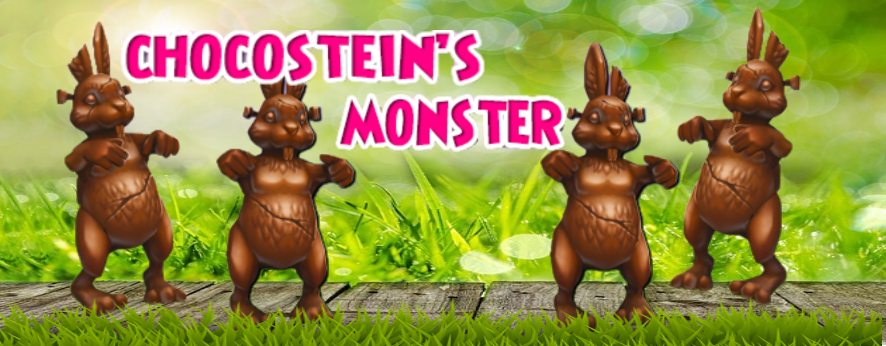
Chocostein’s Monster is one of the newest pets in the Spiral. This tasty looking Myth pet comes with a Berserk card at baby and receives a jewel slot at Ancient. Mine manifested some interesting talents, 4 out of the 5 were May Cast.
*May Cast Gardening Pixie
*May Cast Amplify
*May Cast Curse
*May Cast Spirit Shield on Ally
*Myth Sniper
These are not all the talents this pet can manifest, just the ones that mine got. It does give you an idea of what you might expect. Based on what I got, I suspect there are more May Cast talents in the pool.
At Ultra it received a Brilliant Opal, which is great for raising your pets intellect
A starting pedigree of 68 it isn’t the best I’ve ever seen, but it isn’t the worst. A little bit of hatching could get you to 70.
This pets highest stat is Strength at 250, which isn’t too shabby at all.
Power comes in second at 230, which could use some improvement, but still not bad at all
I’m a little disappointed in the next 3 stats as they are on the lower side. Agility at 225, Intellect at 210 and Will at 200.
I like my Agility, Intellect and Will to be higher, but with work it could get there.
With the awesome May Casts, the high Strength and decent Power, this could be a great pet. Of course, it would also make an adorable addition to any castle. If you pick up this pet in the Crowns shop let us know what talents yours manifests in the comments below. Just make sure to keep it away from the kitchen and any Gobblers you might have running around!
Flat jewels are a misinterpreted stat for Wizard101. They have been since the beginning of the Spiral’s time. In fact, most players get rid of these jewels thinking they have no value. But it’s not true! I’ve used them since their introduction into the game. Many of my solo runs are successful because of these resist jewels.
How they work
Flat stat jewels come in two main categories: offensive and defensive. The offensive stats boost your damage while the defensive absorb incoming damage. These stats are static, meaning that pierce does not affect flat resistance. Likewise, flat damage is not hindered by resistance in its final value!
Being careful with calculations
Many online sources that mention flat stat jewels are incorrect. Here are the stats for my testing. Let’s use it as an example to see the calculations.
Example: (From my solo run of Grandfather Spider – lvl 120)
Mathematical functions for calculating stats
1.) For your attacks: [(your spell X (1 + damage%) + flat damage] X buffs (1+/-Blades)
2.) For resisting incoming attacks: [(incoming damage – flat resist) X (1 – resist%)]X buffs (1+/-Traps)
The concept of flat jewels is the same for flat damage and flat resistance!
Simplifying the math
Let’s assume you’re about to take an attack dealing 1000 base damage. Flat resist works like an absorb. In this example it will remove 50 damage points from every school and 158 from Shadow School, before regular resist takes damage.
So, what if the situation changed where the attack does 4000 damage?
The jewels would still absorb 50 damage points from every school and 158 from Shadow School attacks. Then our percent resistance would reduce the rest of the remaining damage.
For X damage, we will absorb 50 from every school and 158 from Shadow School.
Grandfather Spider has a universal 120% damage boost, 7% universal pierce, and 20% fire resistance. His attacks are not only of the school of storm, but also of the Shadow School.He also has Balance Mastery and uses 3 Balance spells.
His natural attacks deal 330 X 14 = 4620 base shadow damage if he has max power pips!
[(spell’s max damage X (1 + damage%) + total flat damage] X buffs
If buffs = 0
total flat damage = 0
[(4620 X ( 1 + 120%)] X buffs = (4620 X 2.2) = 10,164!
So , we should prepare for Storm and Shadow hits.
An average 6 pip natural Shadow attack of his would deal:
6 X 330 = 1980 X 2.2 = 4356 damage, and that number will double if he lands a critical!
The spell “Rusalka’s Wrath (Shadow)” without any blades or traps deals:
[(spell base damage X (1 + damage%) + total flat damage] X buffs= [1445 X (1 + 120%)] = 3179 damage!
Let’s compare possible damage taken with or without some of these stats:
If I hadn’t put brace on myself, it would be:
My Shadow resist: 29 – 7 (pierce) = 22 (incoming damage – total flat resist) X (1-resist%) = 3179 X (1 – 22%) = 3179 X 0.78= 2480!
My Shadow resist: 49 – 7% (due to pierce) = 42% base resistance. Now continue with the rest of the equation:
(incoming damage – total flat resist) X (1 – resist%) = (3179 – 158) X (1 – 42%) = 3021 X 0,58 = 1752
If I wasn’t wearing gear equipped with jewels, the resulting damage would be:
(incoming damage – total flat resist) X (1 – resist%) = (3179 – 0) X (1 – 42%) = 3179 X 0.58 = 1844
The difference between 1844 damage and 1752 is due to the flat stat jewels!
The differences might seem minor, but if you combine jewels in different pieces of gear, you will notice that they make a big difference.
Flat damage jewels work the same way
Here’s a hypothetical example in this specific fight My damage is 104
When I cast the spell Fire From Above on Grandfather Spider, he receives damage according to our 1st mathematical function: With a nice Backdraft = 210%
[[(your spell X (1 + damage%) + total flat jewels damage] X buffs(blades)] = [[1400 X ( 1 + 104%)] = (1400 X 2.04) = 2856
*Attention! Not include all the decimals results in two formulas, rounds down after each calculation.
The exception for that rule, is only in the pets damage or resistance! We need exactly the percent of the pets to calculated correctly!
My spell with traps deals to Grandfather Spider:
Flat resist=0
Buffs=210
Grandfather resist on fire (due to pierce) = 20-22= 0
[(incoming damage – flat resist) X (1 – resist%)]X buffs(traps)=
But if I had two flat damage jewels (fire), let’s say 50 points worth: [[(your spell X (1 + damage%) + total flat damage] X buffs] = [1400 X (1 + 104%)+ 50] = [(1400 X 2.04) + 50] = 2856 + 50 = 2906
[(incoming damage – flat resist) X (1 – resist%)]X buffs(traps)=
(2906 X 1) Χ (1+210%)= 2906 Χ 3,1 = 9008
Don’t forget that since Grandfather Spider has shields, the actual number would be less. This was just a quick example with math!
As you can see, flat stat jewels can help our fights in their own way.
I hope this makes you think twice before tossing those flat stat jewels away! I have shown my stats below for convenience. Thank you as always, and best of luck questing!
*You can see the stats which I used for the above calculations as well as my gear, in the following pictures.
Also, you can see the battle that I describe above from my solo video at Europeans servers when I was 120 lvl, one year before.
Ravenwood Academy Fansite Festival farming event? Do you know what this is? No???? Well, it’s where all the Wizard101 and Pirate101 Fansites gather together to create something truly amazing for the community.
This yearly event is organized by several members of the community who work hard together to coordinate with every fansite out there.
Ravenwood Academy is taking part in this year’s fansite Festival event.
Ravenwood Academy will be farming Lord Nightshade for Easter drops. Meet us in Realm Troll at 11 am Pacific Standard Time, Saturday, April 13th.
If you have any questions regarding this event, please email us at [email protected]
We’re looking forward to having some fun with you, the community!
We had so much fun at the event with you all! Thanks to every Wizard we saw there. Congrats to everyone that won codes and prizes during the Twitch stream. The winners of the screenshot contest were:
1st: Steven Starbreaker prize Great Detective Bundle 2nd: Kane Moon prize Aeroplane Bundle 3rd: Erin Dragonheart prize Nimbari Hoard packs
Have you ever wanted to get a spell, but did not want to spend hours farming for it? Well, then you came to the right place! Today I will be going through the basics on how to craft the Fire spells dropped by Loremaster.
Requirements
To craft your desired spell, you must have quested to Zafaria and finished the quest Drum a Little Drum. Once you have completed both you can buy the recipes for your desired fire spells!
Brimstone Revenant and Krampus Recipe Location
When you craft Brimstone Revenant or Krampus you will need to make your way over to Mooshu. Once you are in Mooshu you will have to beat the dungeon, Shirataki Temple. Once you complete the dungeon you gain access to Master Yan Kan Kook who sells the Brimstone Revenant and Krampus recipes.
Brimstone Revenant Recipe
Brimstone Revenant is a must when it comes to fire attackers! This is a 4 Pip spell with a base damage of 470. It also adds a 25% fire trap for your next hit. To craft Brimstone, buy the recipe for 60,000 Gold. You will also need: 10 – Brimstone Revenant Treasure Cards 100 – Perfect Ruby 200 – Ghost Fire 100 – Diamonds 100 – Bronze Gear 50 – Scrap Iron 50 – Sunstone 12 – Amber
Krampus Recipe
The spell Krampus is definitely the collector’s item out of all three spells. Krampus is a 4 Pip fire spell that does 305-345 fire damage. Krampus also leaves behind a -45% Mantle to make your opponents next hit fizzle!
To craft Krampus, you will have to buy the recipe for 10,000 Gold.
You will also need: 6 – Krampus Treasure Cards 100 – Perfect Ruby 200 – Ghost Fire 50 – Black Pearl 100 – Black Coal 50 – Astral Shard 50 – Sunstone 12 – Amber
Hephaestus Recipe Location
When you are ready to craft Hephaestus, you will have to make your way to Avalon. Once you are there head to the Wyrd and look for the Indigo Giant on your map. Once you defeat him you will have access to Grady who sells the Hephaestus Recipe.
Hephaestus is the newest spell here, recently released in the Immortal’s Lore Pack. Hephaestus is a 5 Pip fire spell that does 425-475 damage and leaves an additional 25% fire trap for your next hit!
To craft Hephaestus, you will have to buy the recipe for 12,000 Gold.
You will also need: 10 – Hephaestus Treasure Cards 120 – Perfect Ruby 200 – Ghost Fire 60 – Black Pearl 120 – Black Coal 60 – Astral Shards 60 – Sunstone 18 – Amber
Where to get the Reagents!
Perfect Ruby: You can buy Perfect Ruby for 100 Gold a piece, In the Celestia base camp from the vendor Archytas. You can also buy Perfect Ruby from Noxolo Fasttrack in the Baobab Market in Zafaria.
Ghost Fire: You can buy Ghost Fire for 100 Gold a piece, in the Atheneum. From the vendor Zolton Nightstone.
Black Pearl: There are no vendors currently that sell Black Pearl for gold. If you are into PVP you can buy Black Pearls from Diego The DuelMaster in Unicorn Way for 175 Arena Tickets. You can also buy the Black Pearl transmute recipe from Avery Templeton in the Celestia Base Camp.
Black Coal: You can buy Black Coal right in Wizard City! from Elmer MeadowGrass in Olde Town for 5 Gold a piece!
Astral Shard: Astral Shard is one of the most difficult parts of the recipe as there is no vendor that sells them. You may be able to snag a couple from the Bazaar. You also can farm fishing chests in Castle Darkmoor for Astral Shards
Sunstone: You can buy Sunstone from Diego The DuelMaster in Unicorn Way for 200 Arena Tickets. You can also buy the transmute Sunstone recipe. You can get this from Avery Templeton in the Celestia Base Camp.
Diamond: You can buy Diamonds from Diego The DuelMaster in Unicorn Way for 100 Arena Tickets. You can buy the transmute Diamond recipe from Avery Templeton in the Celestia Base Camp.
Amber: Amber is by far the most difficult item to get on this list. One of the best places to get Amber is by farming Gladiator Dimachaerus in Mount Olympus in Aquila.
Hephaestus, Krampus, Brimstone Revenant: The best place to get these treasure cards would be from the Bazaar. They are not all common, but they do show up quite a bit if you refresh the treasure card tab a few times.
Thanks for reading my crafting fire spells, article! Please let me know what you think in the comment section.
You may be wondering how to achieve the Elixir Vitae badge for healing One Million. It sounds difficult! While it’s not easy, it’s possible for any wizard. So, read through my tips and tricks for getting this badge.
The Heal
The spell you use is very important. You need to maximize your potential healing output. To do this you will use the strongest healing spell you can.
Flowering Dryad is the best possible option for this. Not even a doubled Scion of Life can live up to this bad girl, healing 3360 base with full power pips.
The average Dryad can substitute, but you will lose 15 healing per pip, a total of 210 base.
The Buffs
The buffs make all the difference. You’re going to want to use every healing buff available. Use the following spells:
Let’s go through each of these cards. You can have a total of four different copies of Brilliant and Guiding Light. The trained, treasure card, item card and pet card versions. You could also use an extra 45% Guiding Light TC from the Eye of Bartelby pack, for extra insurance.
The Vengeful Elixir is critical to this strategy. You need to Critical Strike this heal to reach one million. Mend and Shadow Seraph spells will act as extra healing buffs to help you reach your goal.
The Stats
Stats are the key to success. You need to have at least 135% outgoing, and a friend with over 85% incoming to make this work.
Some items, such as the Stone of the Other Side or the Wolf’s Emerald Talon are drops. You can get these in Avalon and Wintertusk by farming bosses, or by checking the Bazaar. Combined, they give 58% outgoing! Throw in the Sword of Kings and any decent outgoing gear and you should be able to reach your target of 135%!
Remember!
You cannot use your heal without maximum power pips. Make sure you have those before you even try it!
This battle should be done against a lost soul in a peaceful realm. They don’t have a chance of defeating you and you shouldn’t have Unicorn Way bound wizards questing in your area.
If you’re not a Life wizard, be sure to equip a Life Mastery Amulet and an extra friend or more for the trained spells!
With all that said and done, go out there and get yourself an awesome badge!
Hello, and welcome to Legendary Storm PvP. I know, shocking. Why Legendary Storm PvP you may ask? When I was playing Wizard101, back when PvP was popular among my friends, we all liked Legendary PvP. The not so high stats, the no use of shadow pips, the little grind we did to get House of Scales or Waterworks gear was all fun. As a Legendary Storm, it was definitely a journey. Why Storm and why not Balance though? Good question. I liked that nobody ever really chose this school to solo, nor do I need to be just like everyone else and make one. I liked Storm for its high damage and pierce and the way it handles itself.
PvP as a Legendary nowadays is easy, fun, and sometimes unpredictable. I can guarantee I don’t win every one of my matches, but most. To those reading, you have to either farm Loremaster for some spells, craft or buy packs, depending on your preference. As some spells are wanted in PvP. For example, my storm has Queen Calypso, a card I use to bring out the utility of my spells, and the Damage Per Second it provides. I suggest crafting to those who don’t want to farm or buy packs, as it is one of the fastest ways to get the spells, believe it or not.
Gear and Stats
My Storm specializes in quick attacks, ending the rounds easily, and has high damage and pierce at 65. For a Storm, I would suggest going for high damage and pierce over critical, because of the critical nerf.
The gear that would be a good set up for Damage and Pierce would be:
Triange Jewel: Plain Accurate Amethyst +7 storm accuracy
With all the gear and jewels equipped your storm should have 125 Damage, 32 resist, 27% accuracy, 54% critical chance, 20% pierce and 79% power pip chance. We will also be using Infallible before we hit which gives an additional 15% accuracy and pierce over 4 rounds.
Spells Trained through Training Points
Ice School – Tower Shield
Sun School – Gargantuan
(Prepare for the weird one) Fire School – Phoenix, Infection, and Stun Block.
Main Deck Set Up
6 Queen Calypso’s
Max Damage enchants, thus being Gargantuan
3 Lightning Bats
5 Wild Bolts
4 Tower Shields
3 Volcanic Shields
3 Glacial Shields
3 Pixies
3 Darkwinds
2 Storm Dispells
3 Storm Shark
2 Insane Bolts
3 Storm Lord
2 Storm Snakes
4 Storm Blades
Side Deck Set Up
Now, for that phoenix spell I mentioned earlier – you are going to want to enchant a lot of them from the Mutate Phoenix spell.
The Spell Thunderbird has such high utility, as it gives you x3 +30% traps universally, pack 3 of them.
2 Storm Lord
4 Tower Shields
5 Infallible
3 Kraken
5 side Queen Calypso
3 Triton
2 Storm Shark
3 Triage
2 Gargantuan
Strategy
The goal is to hit as fast as possible, preferably trying to pull an infallible first round to get that maximum amount of Pierce through the first couple of hits. If you can get infallible up, you can then hit with multiple Queen Calypsos and small hits, dealing good damage, and keeping them on the defensive.
If your opponent hasn’t stun shielded, that’s where Storm Lord comes in play. Switch back from playing offensively and defensively as you will need to make sure you can be able to out damage per second them and survive. Don’t just hit randomly, as we’re built on strategy. Make combined hits that make sense.
For example, you have the pips needed for the 5 pipped Thunderbird. You cast that into a Queen Calypso, giving you a +30% and a +20% traps on your opponent, making use of that utility you have.
Avoid spamming cards like a wild bolt or insane bolt as you are wasting pips. Use a Wild bolt to get off a shield, or start off with a hit, or need to get rid of a card. Infection is for your heal spammers, and with all the pierce you have, it’s fine to hit through shields. All your other hits, use in situations where you know your opponent is open, and you can do mass damage. All spells and all battles aren’t all the same. Different situations occur, just have to be patient and committed to learn and understand what to do in different situations.
I hope you’ve enjoyed the guide. If you got any questions, my Discord is 𝕴𝖓𝖋𝖊𝖗𝖓𝖆𝕲𝖆𝖒𝖎𝖓𝖌 #1999, and I will gladly answer all questions related to storm Legendary PvP.
he home of the ruthless clockwork empire and our own Diego the Duelmaster. Valencia was once a land of pristine culture and beauty until the clockworks came onto the scene.
This is best shown through the music of Valencia. Elegant classical instruments such as the piano and strings identify the culture. Played in a tense style, they represent the threat of The Armada to our pirate.
Tense Theme
You may receive this music scroll from fishing in the Amber Estate, the Fire House, the Polarian Shipwreck, or The Acropolis
The intrada is unique and notable for its thin texture. Only the piano and high strings begin before the lower instruments join in, creating rhythmic contrast. We are next greeted with an arpeggio that has the same melodic contour as Skull Island’s Main Theme at 0:07 seconds.
Changing instrumentation and mood, the music develops alongside the story. This maintains the spirit of adventure. The music leads us to the idea of the strings and piano repeating one another in a game-like fashion.
In the next section at 0:25 seconds the beat is emphasised with bass and snare, like a military march. This is intentional and reminds us of Valencia’s dominant military power.
The next section at 0:50 seconds brings us back to Skull Island. The music paints the adventure of being a pirate in the lion’s den, with a choir sustaining chords behind it. The brass joins in as the piano continues, a feature of Valencian music we will continue to see later. The brass that welcomed us bursts forth accents where the melody does not play. This counterpoint presents throughout the music in classical Valencian style.
Combining the previous ideas, the piano joins the percussion in emphasizing the beat. The contrasting ideas of the Armada and the cultured Valencians are now one and the same. Valencia has been conquered.
Espionage Theme
The strings slyly play their chord progression leading us to a melody in the piano we hear in other tracks. This leads us back to the strings, and they keep trading off in this manner. Every time the pattern occurs, there is a slight variation in what they play. This keeps the music interesting in its development.
At timestamp 0:40, the piano and strings finally come together in harmony. They start a new chord progression together, leading into a new section. In a mournful style, the piano plays a new solo line as the strings quietly sustain in the background.
The piano repeats this line in an ostinato. More texture is added by other instruments of the ensemble. The pizzicato strings, clarinets, and string bass are most prevalent in the texture. They either contrast or harmonize with the melodic line.
The brass and strings unify together at timestamp 1:06. Bold and bright, this section contrasts with the moody sections before, like a beacon of hope.
The section at timestamp 1:16 is the realization of devastation. The atonal piano line seems to stop time itself before the clarinets come in. The line these reeds play is a common “Easter Egg” in many video games and movies. It is a reference to the Dies Irae, the clarinets are warning about tragedy and horror.
The line ends on a major chord, bitter-sweet. The next section is a morbid and joyous waltz, before leading back to the beginning.
Skyway Theme
You may receive this music scrolls from fishing in the Botanical Gardens, Fire House, Life House, Serpentine Escape
Throughout this piece the orchestra is light and exposed, like a mournful ballad.
Like a cog at work, the piano begins by hammering away at its lower end. This trades off to the higher register of the piano with an added delay effect. The English horn enters next with a sixteenth note run, playing twice before resolving to the next section.
Now the piano with its delay effect, takes over the melody of the piece, louder than before. After this hallucination-like solo at timestamp 0:42, the bass of the piano pairs up with the contrabass. The cellos play arpeggios and violins sustain chords over this more driving section. The bassoon and metal strikes enter, resolving the tension.
Contrasting with the previous vigorous section, this section brings a breath of relief. This piece emotes anxiety, yet we see a melancholy side. The swelling strings and quiet murmuring of the machine that backs up the clarinet solo posses a relaxing ambiance.
Almost playful, the bassoon at 1:40 plays the theme we heard from the previous track. The mood changes here to balance the sad and mournful with hope as the adventure progresses.
Danger Theme
Silent but driving, the strings begin with an underlying ostinato. The other orchestration is layered throughout the first 0:38 seconds of the piece. We see this texture from the previous piece, but orchestrated to fit a new mood. The theme plays through the ensemble beginning with the bassoon, and carries to the horns.
This leads to a climax in the music as the strings, horns, and piano join in homophony. Playing similar melodies that harmonize into one.
The next section at 0:53 seconds leads back to a driving ostinato with strings and percussion. The horns have the melody in a short-short-short-long pattern that develops by changing chords. At 1:10, there is a chromatic mediant, a change to the chord not within the key we are in.
Timestamp 1:18 brings us a piano solo, ending the horns’ melody on a short note. A new motif emerges of even shorter notes that get passed to-and-fro from the piano and oboe. As the piece gets more wild, the low bassoon carries the motif, keeping stability. We hear the theme from previous pieces hinted at, reminding us of our pirate’s heroic nature.
Thank you, Starlights, for venturing through the music of Valencia with me. Have a wonderful night.
Please note: I transcribed the music from the original/classic mode music scrolls. Not all of my transcriptions are 100% accurate, but they are close and the rhythm is properly notated
Somewhere in the Spiral, there’s a refuge for young pirates, orphaned when young who have turned to a life of crime. Marked by skull-shaped mountain, there is danger and treasure lurking all throughout the island region. Whether it’s hoodoo, dueling, brawling, treason, or smuggling, pirates ally with Captain Avery for their own safety and a large cut in the treasure of Captain Gold.
Main Theme
The pace is set immediately with a waltz-like rhythm with the percussion and quacking trumpets. The mood gives us the feeling that something is off, there is a mystery at hand and we’re just the pirate to look into it. This vibe continues as it moves into a 12/8 section 00:12 seconds into the piece, which means there’s three notes per beat. We are given one of the main arpeggios used throughout the soundtrack of Skull Island.
The arpeggio sets up our next section 00:20 seconds in, as the brass features the melody. We also carry over crescendoing chords sustained in the horns from the previous section. The harp twinkles down as the melody passes onto the low reeds, giving a dark and damp feeling, reminiscent of the sewer-like passages within the Skull Mountain.
The climax of the piece comes in at 00:52 seconds. We are no longer in a mysterious minor key, but now an adventurous major key. The violins stir the excitement on their high strings as the oboe plays the melody. The low voices crescendo as the piano strikes along on the downbeat. The resolution drives us forward with a feeling of hope in our adventures as a pirate.
We move on to a clambering call and response from the ensemble before a joyous celebration, alluding to Celestia’s crab march with the castanets and xylophone.
City Theme
The mood of this piece is serious. Unlike the spookiness, joy, and film-like nature of the other pieces, we begin with a fife- like military march with flutes and drums. After the strings play the main melody, we move into a major key at 00:39 seconds. The strings play rolling hills of arpeggios as other strings instruments accent the first note of each bar.
As the violins descend their quick sixteenth notes, the dynamic of the piece raises and adds in with more instruments. Percussion notably accents the first beat of each bar along with the strings section. After a cymbal roll, we begin a waltz with the brass. The low brass and plucked strings keep the time as the horns play the melody, eventually passing to the accordion.
We enter a new, flourishing section at 1:17 as the brass sustains the chords as the quick violins play speedy figures. The fife adds in to the violins to accent their melody. We end the phrase in a dissonant cluster that seems to be magically cleared by the flute’s ascending glissando.
Skyway Theme
The Skull Island Skyway Theme is a stark contrast to the other pieces. It is bright and joyous and begins with a fanfare, compared to the damp textures the other pieces convey. There is a certain kind of silliness to the piece, like a young child earning their sea legs.
The melody gets passed around from instrument to instrument, taking turns with the texture. Along with that, there is notable hemiola. A hemiola is a complex rhythmic figure where two groupings of three notes can be played as three groupings of two notes, which gives the piece syncopation. A famous hemiola is “America” from West Side Story.
Haunted Theme
The mood of the piece is established right away with the bass end of the piano, swaying back and forth between the notes. Notice how on the harp part, it develops the main arpeggio I pointed out earlier. Also take note of the how the horn pitch bends downward, also like the Main Theme.
This change of mood and instrumentation is what enhances a story. By developing the music along with the story, the music becomes more complex by giving itself a narrative to follow.
Vaguely like Stravinsky’s The Firebird, we hear the piano and horns play an aggressive melody before the tension breaks with a hauntingly beautiful waltz. The music fits well with the original story of Lasko, Manny, Mo, and Jack who were Ratbeard’s poisoned crew mates, murdered by Ratbeard himself. Lasko wanted his crewmates to have their final wishes before being released to the afterlife and one of them wanted to return a locket to their lost love.
Jungle Theme
The very first bit we hear in the music is the brass pitch bending upward rather than downward, developing a motive we’ve heard in previous pieces. As the brass starts the chord progression, the harp comes in with the arpeggio motif at 00:09 seconds in. This pattern continues as the bassoon comes in with a new idea 00:36 seconds into the piece.
The musical content is layered into the texture while the harp plays a new idea as an ostinato or repetitive figure. The percussion bangs away on the drums, representing the idea of danger in the jungle. This leads to the eventual arrival of the horn taking away the melody. The low strings heavily approach a new ostinato, replacing the melody. The harp and voices add-in, trading off the strings for the brass to lead the orchestra back to the beginning.
Thank you, Starlights, for venturing through the music of Skull Island with me. Have a wonderful night.
Please note: I transcribed the music from the original/classic mode music scrolls. Not all of my transcriptions are 100% accurate, but they are close and the rhythm is properly notated
“One in a Million” is one of the most popular badges in Wizard101. Unfortunately, without the proper setup and strategy, you may fail at your attempt to earn it, wasting time and gold. So, here are my tips and tricks on how to achieve “One in a Million.”
Prisms
If you use a prism in your setup, you can double the number of traps used for your big hit. By using your counter school traps first (for example, a Fire wizard applying Ice school traps) and then casting a prism before placing fire traps, the fire traps will be triggered followed by the ice traps. This will double the damage your school traps can provide!
You can easily get treasure card traps for your opposing school at the Bazaar. With the help of a friend from that school, you will also have access to the regular trap and regular potent trap.
Universal Traps and Blades
Bringing a Balance wizard along will make your life a lot easier. They can layer you with many blades, you could even end up doing 50 Million if that was possible! You also can get a few balance blades by using treasure cards.
Feints are super important to this strategy. If you use regular feint, potent, treasure card, potent treasure card, item card, pet feint, and mass feint, you’ll have a huge advantage in getting your damage up to one million!
All The buffs!
It’s really easy to forget a couple of blades or traps when you’re assembling over twenty, so try to write a list and quintuple check that you have packed everything. You may forget that one last sharpen or an elemental trap which could result in you not reaching your goal.
Some schools get especially useful spells like Supercharge and Backdraft that will make hitting a million much easier. Be sure that you include these in your setup if you can!
Some extra tips
You need to remember to bubble and aura. Combined, these provide a significant damage bonus.
Also, remember to pack a heal or two. Even max-levels may get too low on health. you don’t want to die and lose all of those carefully stacked blades.
Don’t forget to attempt this on an enemy that your school boosts on. It’s a free, easy damage bonus you wouldn’t get from a different creature. Also remember that if you’re using the prism as I previously suggested, you’ll want to face a creature of the same school that you are to get this boost.
Go to an empty realm if you are attempting this in an open area! I cannot stress this enough. Otherwise, unknowing or inexperienced players may run in and wipe out all your progress. Take preventative measures in advance.
That said, go out there and earn your “One in a Million” badge!
Dedicating one of your castles to store the portals to your other houses can be a laborious task, especially deciding you want to begin a project like this. If you’re not sure what I mean by a “portal hub,” I am referring to a castle that is the central hub to teleport to your other homes. Successfully completing a project like this is a big accomplishment for any decorator, for your friends to tour your amazingly decorated houses and simply teleport to the next once they’re done.
The Math
Before we begin, there is a lot of math to be done. For this guide, I will be doing the most complex option of how we can interpret this project (and very much so the most impressive!).
Open your list of houses and count all of the houses you want included in this project. I want my Balance House, my Storm House, my Death house, and my Midday Estate included in this project, plus my dorm. My Storm House will be the Hub, and my Dorm will teleport the visitor to the hub. Once the person gets to the hub, there will be several portals they can enter. This is described in the main flow chart. The Marleybone and Darkmoor houses will not be a part of this tutorial.
This means we will need one teleporter for the Dorm, three for the hub, and three more to put in the houses. Therefore, all together, we will need seven portals. We need two for every house we have, plus one for the dorm.
The Portal Plan
Next, we need to figure out the route these portals are going to take. The flow chart to the left makes it look easier than it feels when actually doing it.
We must set up three portals to go back to the dorm, the dorm portal to go to the hub, and the three hub portals to go to the houses. Remember, when you click on a portal without the mark in the corner of its box in the decorating menu, it means you need to select the location it will teleport to first. If it does indicate a point has been selected, you may proceed to place it.
An Example
To the right is one possible combination a visitor may take. After teleporting to you in your dorm room, they go through the portal in the Storm House hub, and then the Midday Estate. When they decide to leave the Midday Estate, they will go back to the Dorm Room and begin again to see the other houses.
This visual shows where the portals are going to. The violet portal heads to the Storm House. This is color association. By using violet, it is a hint without needing to use a sign where they are about to go.
This works rarely. Most of the time, we need to put a sign nearby, or in the portal to show where people are going.
An extraordinary example of Paige Moonshade’s Portal Hub. Find her Wizard’s Watchtower on the castle tours!
It is always amazing to see houses on the tours that are connected together. Seeing portals linked together like this makes the house feels that its a part of something much larger, and is a product of greater quality. In projects like these, the more houses you have, the more work it will take to maintain it, but there’s a bigger pay off. In the image to the left, it looks amazing to see the portals of every single house in the game linked up together.
Thank you, Starlights, I wish you the best in your Portal Hub creations! Please remember to email your lovely interpretations of this guide to us at [email protected] because we would love to see them. If you have any issues following along with this guide, please get in touch with me in the comments below or on the Ravenwood Academy Discord!