The Dragon Titan Army Band

Intended for Musician and Non-Musician Alike

"Things started turning darker. Kingsisle were talking about dark and epic Mordor Wagner 'Flight of The Valkyries' in The Ring Cycle. I am looking at concept art and the NPC characters had Russian military influence; All the architecture was darker - more foreboding."

“Main Theme”

Just as mentioned in Everhart’s video linked above, we begin our adventure in Dragonspyre with a world-stopping minor-Major seventh chord, which flourishes throughout the ensemble as the harp and woodwinds flutter downward, providing emotional dissonance. We typically associate the word “dissonant” with something that sounds bad, but in this piece, it provides an unsettling air. 

The ninth of the chord is added to the melody bringing even more color and lending an elegant dissonance to the third tone. The third tone of the chord gives the emotion, so this dissonance that rubs against it creates a feeling of tension and suspension.

The intrada stops 00:10 seconds into the piece, bringing us a chord progression that starts in a minor key, then becomes uplifting and progresses back to the same chord with a picardy third. A picardy third is when a minor chord changes the third tone to become a Major chord. This progression carries along, developing the arpeggiating figures and changing the chords before it reaches a climax into a new section at 00:30 seconds. The strings play the main melody as the brass plays a counterline beneath, eventually joining together into a dismal setting at 00:40 seconds. The trumpet enters, bringing a sliver of hope before it fades away into the darker minor chords and ends.

The next section frolics dastardly within the woodwinds and harp, quickly arpeggiating, presenting the feeling of sneaking and slyness. The strings caress the melody beneath this texture, giving support to the voices above and conveying a kind of dark magic brewing within.

Picking up into timestamp 1:26, we transition into the brass as the bridge takes us into the next section, with heavy Lydian chord dissonances in the bass. The music is ascending into this one epic moment. At timestamp 1:45 we are given the antithesis to the main Wizard101 theme, an operatic technique. The same descending arpeggios and textures are used as the brass plays the ascending melody in a minor key. This reflects the darkness of the world and the danger the Wizard is in.

“Theme 1”

Calling back to the previous piece, we begin with the hard percussion, horns, and masculine choir. Through borrowed chords (chords that are similar to the key, but not the same) and chromatic mediants (chords that have slight or no relation to the key), we get a dark and enchanting texture. Also calling back to the previous piece, we have these four-note motifs played in the horns that bring us through the chord progression. The texture thickens with the addition of the woodwinds, but it 

Concept art of the fire wizard from the original Wizard101 loading screen

harkens forth, like a great army coming from the distance, closer and closer.

This brings us into the next section at 00:50 seconds which uses a repetitive eighth note figure in the horns as the rest of the orchestra brings forward tutti stabs, transitioning us into action. The same texture is still present, but now the melody in the brass and the high strings add-in, playing the chord progression while the trumpets sing in the higher register.

Next, the strings section glissandos in unbreaking unison as the flutes play descending Danny Elfman triplets. In film-scoring or in this case, game-scoring, notes in pairs of threes that have the same note on the first and third beat are considered “Danny Elfman triplets”  because it is characteristic of his work in pieces such as his Batman Theme or Alice’s Theme. The triplets develop, changing notes along the chord progression, giving the piece sass.

As the texture from before returns, the arpeggio transforms from being a Danny Elfman triplet, to playing the entire arpeggio. The notes rock up and down, leading us to a flourish that counterpoints between the sections. The piece calms down and recapitulates the music before returning to the beginning. 

“Theme 2”

A military march kicks the piece off, setting the texture and pace with some aggressive snare and bass drums. The dark minor tonality in the low brass gives us the feeling that something powerful is coming, and it is nearby. The choir joins in as the pauses in this motif get closer and closer until an ostinato in the strings takes off with the chimes adding further texture.

The solo trumpet comes in like before, continuing the style of the piece. The low brass and choir responds to the trumpet’s call. This idea repeats, leading to the addition of the strings. At 00:50 seconds, we introduce new musical content. The higher voices of the ensemble play ascending arpeggios, developing the arpeggiating ideas from the other pieces and giving the impression the single idea has split into two. While this is happening, the arpeggio splits among the other instruments, trading between them when they play, creating a more complex texture. Then, we return to the original arpeggio in the woodwinds as the rest of the ensemble sustains onto the chords. This idea trades off between the other instruments in the ensembles, growing in volume. 

At timestamp 1:15, the woodwinds move onto a new idea. Great swooping arpeggios that feel like dragon wings fly over the melody that is being played by the strong brass. This texture is prominent in the next track as it comes to its climax as well. This presents the idea as something we can ground our emotions onto, so we will remember this section when it is recontextualized.

Then the ostinato kicks in as a power drive to the end. The brass plays familiar motifs from the previous melodies to latch on to our memories of the ever-dangerous Dragonspyre.

“Theme 3”

 In the beginning, the drums set the tone of the piece with a stately march, keeping tempo for the horn’s repetitive melody. The lower brass joins the bass drum, thickening and supporting the texture as the woodwinds play the eighth note motif that the horns played in the melody.

The motion stops as the bass instruments play introducing the   

orchestra which joins in with a similar motif. The idea develops through a different articulation by stabbing at the notes rather than playing them legato, or smoothly. Next, we are greeted by a familiar idea in the woodwinds, rocking back and forth between two notes before completing the rest of the arpeggio. This idea can be found in the other tracks and provides texture as the brass harmonizes. Finally, the choir joins in bringing the rest of the brass section, the strings, and additional percussive flourishes, such as crash cymbals.

The excitement halts as the orchestra becomes homophonic, playing in a similar fashion, but harmonizing together. Afterward, the trumpets lead us into a climactic section that develops the two-note repetition idea by playing the first two notes in the woodwinds only, while the strings and brass take the melody. A familiar idea, but now re-imagined in a flourishing major key before becoming tense and heroic to reflect our now deathly situation.

In the end, we come full circle to a military feeling before engaging in an anthem. Very patriotic in style, it presents the strength of Dragonspyre as a force to be reckoned with. This dissipates into the bras and chimes, leading us back to the beginning.

“Theme 4”

Once again, we are greeted by a familiar symphonic texture, giving Dragonspyre continuity in its musical identity. After establishing the mood, the piece drifts to become sad and wistful in the next section. The strings lull us as the harp gently caresses the arpeggios. The flutes join in, embellishing the texture.
The brass crescendos quickly as the rest of the orchestra comes in

referencing the homophonic texture from before. This leads us to a climactic point in which the repetitive arpeggio from before creates tension as the brass sustains the chords. The next section contrasts this texture with stabs. Ideas from the previous tracks peep throughout this piece, greeting us like an old friend for this finale.

At 00:51 seconds in, we hear a theme being carried from instrument to instrument. The theme goes deeper and deeper, much like our wizard coming closer and closer to Malistaire in the story. This theme is played in The Crown of Fire, during the time that our wizard is carried by the young Battle Drake to our final confrontation with Malistaire.  

In the final section, the orchestra splits beats with the ensemble, creating syncopation before joining together. This thrilling moment dies down as the choir begins to solemnly sing. The flute and strings join in, introducing a new melody at timestamp 01:24. We enter a new key. It’s a major key, bright and happy. The future is looking bright and we are uplifted. Although the story is not over yet! Magic and mystery shroud us, and we can never be too sure whether those enemies we have conquered in the past may come back to haunt us.

Thank you, Starlights, for venturing through the music of Dragonspyre with me. Have a wonderful night.

Disclaimer

Please note: I transcribed the music from the original/classic mode music scrolls. Not all of my transcriptions are 100% accurate, but they are close and the rhythm is properly notated. The example in “Theme 1” comes from Nelson Everhart’s video, as linked.

Crafting101 – Zafaria

Today we will craft two Conga Drums and two Spirit Caller Drums for the quest "Drum a Little Drum"

Welcome back to Crafting101, young Wizard! Congratulations on achieving your Grandmaster Artisan Badge. You are now well on your way to becoming a Legendary Crafter. The Zafaria crafting quest is unlike any other crafting quest. You cannot complete this quest by teleporting to a friend to access the trainer early as you could with the others. You must complete the quest “To Market, To Market,” before being able to collect his quest.

Koyate Ghostmane

After completing ‘To Market, To Market,” Koyate Ghostmane will have the quest for you. You can find him near the large hollow log in Baobab Market. He is the first lion you see when you enter the area. Once you talk to him, you get the quest “Drum a Little Drum.” This quest requires you to craft two Spirit Caller Drums. The recipe for the Spirit Caller Drums will automatically go into your recipe book.

You will notice that you need Conga Drums for the Spirit Caller Drums recipe. These will also need to be crafted. Gearwise sells the Conga Drum recipe for 4,755 gold. You can find him in Survey Camp, Celestia.

The Recipes

There are many reagents required to craft both of these drums. Below is a list of all the reagents you will need in order to craft them.

Conga Drum

You need two Conga Drums to make the two Spirit Caller Drums. In previous worlds, we crafted two items twice. Now we will learn how to craft items that are an ingredient in other recipes. This is an essential tool if you plan to craft a house, such as The Wyrd or The Treetop Getaway.

Legion Shield

The Spirit Caller Drums need 8 Legion Shield treasure cards between them. These have a chance of being harvested from White Tiger Lillies or Missile Toe plants. If you’re lucky, you may find this Treasure Card in the Bazaar. It’s price ranges from 540 gold to 1013 gold.

You can farm Winter Skulls in Nordrilund and Nastrond for a chance at this treasure card. These places are in Wintertusk, Grizzleheim.

Giant

Our Conga Drum recipe requires four Giant treasure cards. The easiest place to find this treasure card is from the Archivist in Celestia. You can also harvest Giant from Sunion plants.
 
Dromel Merchant, Lost & Found, and the Treasure Chest all have this item as one of their daily rewards. Avery Templeton’s treasure card recipe is listed below under ‘Transmute Recipes.’
 

Amethyst

The bright violet accent in the Conga Drums requires 2 Amethysts. Amethysts aren’t found in the Spiral. Buy them from vendors like Al Saf’wan or Campbell Hodgson for 15 gold per gem. Harvesting plants such as the Fortune Cookie Tree, Ivy League, and Snap Dragon can also give you this card.

Perfect Onyx

The Spirit Caller Drum recipe requires 4 Perfect Onyx. Noxolo Fasttrack and other reagent vendors sell them for 100 gold each. Noxolo lives within the large hollow log in Baobob Market, Zafaria. Additionally, Perfect Onyx may harvest from Ivy League and Maelstrom Snap Dragons.

Crystal Vial

The Conga Drums recipe needs 2 Crystal Vials. It is a pricey reagent when bought from a vendor or the Bazaar. The vendors in Wysteria, Mooshu, and Dragonspyre sell them for 330 gold.

Buying them from the Bazaar can cost between 165 to 1650 gold each. Their cost depends on how many are available. Harvesting Pink Dandelion can also get you some of these vials.

Pristine Vial

Four Pristine Vials are in the Spirit Caller Drum recipe. Pristine Vials are either bought or harvested. Archytas sells these for 500 gold each. Also, if you grow the Maelstrom Snap Dragon, you will have a chance at harvesting this item.

Black Pearl

There are 28 Black Pearls in our Spirit Caller Drum recipe. Black Pearls are a challenging reagent to find. It can be a rare harvest from Black Lotus or regular Pearl. You can also buy Black Pearl from Diego for 175 arena tickets. The Bazaar has them available for 188 – 1875 gold each.

A few gardening options are: Alligator Pear Tree, Deadly Fly Trap, King Parsley, and Ultra Tiger Lily. The transmute Recipe is listed below.

Golden Pearl

The gold accent in the Spirit Caller Drums calls for 16 Golden Pearls. These are a rare harvest from pearls found in many underwater places in the Spiral. This includes Stormriven Hall, The Grotto, The Portico and Waterworks in Crab Alley.
 
This reagent can be harvested from Maelstrom Snap Dragon, Evil Magma Peas, Deadly Helephant Ears, and Fickle Pickles. The Gorilla, Minotaur, Magic Eggs, and Dragonfly all have this item as one of their daily rewards. The transmute recipe is listed below.

Sunstone

18 Sunstones are required for our Spirit Caller Drum recipe. These are a rare harvest from sandstone.

Sunstone is harvestable from Maelstrom Snap Dragon, Evil Magma Peas, Fickle Pickle, and Deadly Helephant Ears. The transmute recipe is listed below.

Aether

12 Aether will be required in order to complete both sets of drums. This is a rare harvest from Kelp and Shells. You may harvest this reagent from Deadly Helephant Ears, Evil Magma Peas, Fickle Pickle, King Parsley, and Maelstrom Snap Dragon.

You also might get this reagent from housing rewards. This includes The Dragonfly Ride, Dromel Merchant, Giant Gorilla and the Horn of Plenty. If you have arena tickets, Diego sells Aether for 200 tickets each. The transmute recipe is listed below.

Shell

16 Shells are in our Conga Drum recipe. This reagent is common in Celestia. Shells can be found in places such as Base Camp, Stormriven, District of the Stars and The Grotto. They’re also in Wizard City’s own sunken Triton Avenue, Crab Alley.

You may be lucky enough to harvest this reagent from Fickle Pickles and Maelstorm Snap Dragons. The transmute recipe is below.

Fossil

24 Fossils are required to craft our Conga Drums. This is a rare harvest from Stone Blocks. They can be found in places like Stone Town and Waterfront, Zafaria. Buying this reagent from the Bazaar can range from 100-1000 gold each. The transmute recipe is listed below.

Scales

The Conga Drum recipe requires 8 scales. You might harvest this reagent from Maelstrom Snap Dragons. Additionally, there is a chance to receive this item from The Magic Eggs housing reward instance. This reagent goes for 400-4000 gold in the Bazaar. You can find the transmute recipe below.

Transmute recipes

Giant

Giant is available from Avery Templeton in Base Camp, Celestia. You can buy it for 150 gold. The recipe requires 1 Peridot, 5 Pearl, and 3 Black Lotus for each Giant treasure card.

Black Pearl

The Black Pearl transmute recipe is available from Toshio in the Jade Palace, Mooshu. It sells for 400 gold. You will need 15 Black Lotus per pearl.

Golden Pearl

15 white pearls make up a golden pearl. Avery Templeton sells this recipe for 600 gold.

Sunstone

Sandstone can create sunstone. Sandstone is a rare drop from Stone Blocks. Sandstone is common in the Savannah and Stone Town. You can also find it in the Khonda Desert. This recipe is available from Avery Templeton for 150 gold.

Aether

You can make Aether with 15 kelp. Kelp is located in Celestia and Crab Alley. The recipe is available from Avery Templeton for 600 gold.

Shell

Shells can be created with 10 Scrap Iron. This recipe is sold by Avery Templeton for 600 gold. Scrap Iron can be collected in Marleybone.

Fossil

This recipe requires 15 Stone Blocks. It is available from Balthazar Dragonthorn in The Atheneum, Dragonspyre for 200 gold. Stone Blocks can be found in Celestia and many other places in the Spiral.

Scales

Scales can be created by using 5 Fish Fins. Transmute Fin uses 5 Scales. Both recipes are sold by Avery Templeton for 800 gold.

Completion

Now that you have all of your ingredients go back to your Housing Crafting Station. Craft the Conga Drums, then the Spirit Caller Drums. Once you have turned in the quest you will be awarded 7,981 gold and your Legendary Artisan badge. Congratulations, young Wizard! 

Thank you Starlights, for joining me in crafting and collecting reagents! Catch our next edition of Crafting101 in Azteca, where we will craft an Eagle War Shield.

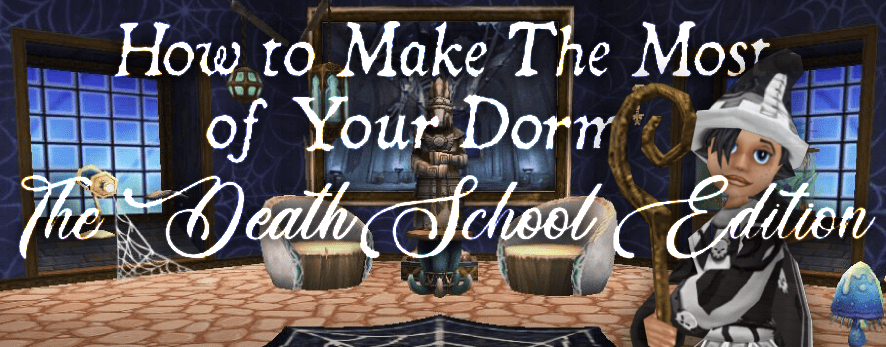
Dorm Decorating: Death School

I ’m sure everyone remembers struggling to figure out what to do with their first dorm room. I had no idea what to do with the original furniture. Honestly, it just wasn’t for me, but after a week or so of fishing, questing, and collecting treasure cards, I had figured out how to make the most of my dorm.


First, I started by removing all of the furniture and by selling it in order to buy some furniture I could work with for the style I had in mind. I had to think “What’s a good color scheme?” and “What items are an absolute necessity for a dorm?” and most importantly, “How could I fit everything together to work the best for my dorm?”

Well, after a few hundred trips to the Bazaar (on the fine edge of an exaggeration), I had gathered enough decor to achieve my goal. Some of the first few items I chose were the Wyrm Crowned Bed, the Long Narrow Table, and the Portrait of the Bone Dragon. After I had picked out the larger items, I started searching for others that would work well with them.

I decided on some Aero Dwarf Chairs for the center of the room; this would be the first thing your Wizard would see each and every time you entered. I wanted to make my focus simplistic and fill the outer edges with more decor.

One of the most important things to go by when decorating is to ask yourself “Does this look cluttered?” I don’t know about you, but I definitely like to keep things tidy, especially in my Wizard’s home.

One of my favorite parts of setting up my dorm was glitching. If you’ve never tried it before, it might surprise you how easy it is! This was my first time glitching while decorating and it turned out flawless, in my opinion. All you need to get started is one Maple Bookcase and a Black Checker, the best part is how they always have both of these items in the Bazaar!


To achieve the decorating glitch, first set down whatever object you want to float on the floor, then place the bookcase next to it. Then, you place the Black Checker on whichever shelf you want your item to be when it is in the air. Then, grab your Black Checker on the shelf and move it so your bookcase sinks into the floor. Once it’s there, you can move the item into the bookcase and then move the maple bookcase again, and your object is in the air! After this, to remove your bookcase, you grab the checker again and move it so your item stays in place.

My favorite glitch in this dorm room is definitely my Small Fry Keeper Tank. For this glitch, I used my Maple Bookcase to glitch some Purple Dewberries into the tank. Then I used it again to set it up in the window and out of the way! By using the glitch, I saved walking space in my dorm. Plus, it looks amazing, even if I do say so myself. To finish the tank off, I placed a Blue Angel plant on top of the tank to add a splash of blue to the area.

Every Wizard needs a study area, and for this, I completed three separate glitches. I decided to put the Telescope in the window sill with the Castle Magic Help tome beside it. It only made sense to look at all those beautiful Wizard City sunsets up close from the comfort of my dorm! Looking toward the desk area, I glitched the Arcane Rebooter (from Wizard101’s 10th-year-anniversary code) onto the table because it was almost too big to fit otherwise. That glitch definitely freed up more space on the desk too! I added a few specimens in jars, a Bottle Burner, Test Tubes, and a Venus Flytrap plant to complete the look. I found the flytrap in the Bazaar, but you can also get it from Fishing Chests!

I decided to not put too much of an emphasis on the doorway and to keep it fairly simple, I added the Nimbari Sword Rack, one of my favorite decorations in the game. The Dragon Skull, the Black Rock Fragment, and a couple of Glowing Mushrooms to keep things interesting.

Last but not least, I glitched the Wyrm Crowned bed into the wall and placed more glowing mushrooms underneath it! This is a really small bed in the game, so adding the mushrooms turned it into its own focal point! Next to the bed, I have the Elegant Hat Stand, and the Special Hat stand each covered in Darkmoor Cobwebs. You can thank my pet Moose for that one.

I hope you guys enjoyed the read because I loved writing it for you! I hope you all have a blast glitching and creating your very own personalized dorm!

This article was submitted by Guest Author, Jen Skullbreaker

Crafting101 – Celestia | Pt 2

Today we will craft a Tea Set for the quest "Time for Tea."

Welcome back to Crafting101. In our second edition of Celestia crafting, we will go over Odgen Peake’s Tea Set request. You will find him in Survey Camp, Celestia, down the left path when arriving from the Spiral Door. In his quest, “Time for Tea,” Odgen Peake is homesick, and asks for a tea set, to give him a touch of home while he’s away in Celestia

The recipe is available from Tarold Wayfinder in Northguard, Grizzleheim for 2,430 gold. You will find him in the crossroads of the courtyard of Northguard’s fort.

The Recipe

This is the recipe for the Tea Set you need to craft for Odgen Peake. The reagents are listed below.

Reshuffle

You will need 5 Reshuffle Treasure Cards. Harold Argleston, Zan’ne, and The Archivist sell this treasure card for 1,100 gold each. If you are a Balance Wizard, Niles in Krokosphinx, Krokotopia has the recipe to craft this card.

Amethyst

You will need 1 Amethyst. You will have to harvest or buy this gem from vendors like Al Saf’wan or Campbell Hodgson for 15 gold each. They may be harvested from plants such as Ivy League, Snap Dragon, and Fortune Cookie Tree

Shadow Oil

You will need 3 Shadow Oil. Archytas, Campbell Hodgson, and Al Saf’wan sell this reagent for 20 gold and it ranges from 10-100 gold in the bazaar. This reagent may also be harvested from Orange Dandelions.

Glass Vial

You will need 1 Glass Vial. Crystal Vial is a pricey reagent when bought from a vendor or the Bazaar. The vendors in Wysteria, Mooshu, and Dragonspyre sell them for 330 gold whereas buying them from the Bazaar may cost between 165 to 1650 gold each, depending on availability. This reagent can also be harvested from Pink Dandelions.

Fossil

You will need 8 Fossils. Fossils are a rare harvest from Stone Blocks, which can be found in Survey Camp, Base Camp, and Stormriven in Celestia, along with many other places in the Spiral. This reagent may be harvested from Burning Snap Dragons and Fickle Pickles. The transmute recipe is listed below.

Red Mandrake

You will need 35 Red Mandrake. Mandrake may be collected from The Floating Land in Celestia, the Haunted Cave, Sunken City, Nightside, and Colossus Boulevard in Wizard City. The Transmute recipe is listed below.

Transmute Recipes

Fossil

This recipe requires 15 stone blocks. It is available from Balthazar Dragonthorn in The Atheneum, Dragonspyre for 200 gold. As mentioned, stone blocks can be found right in Celestia.

Red Mandrake

This recipe requires 10 Mist Wood and 10 Mushroom. It is available from Eudora Tangletree in Olde Town, Wizard City for 300 gold. Mist Wood may be found, most notably, in Marleybone and Wizard City, as well as The Floating Lands, Celestia. Deep Mushroom may be found in Wizard City, Mooshu, inside the structures of Krokotopia, and Stormriven, Celestia.

Conclusion

Once you have collected all of the reagents, you will need to craft the tea set in the furniture crafting station. Now let’s go enjoy a spot of tea with Odgen Peake! Congratulations on your extra training point, use it wisely. Please note that this is a side quest and you will not receive a new crafting badge or time slot.

Thank you, Starlights, for the fun crafting and collecting reagents! Catch the next edition of Crafting101 in Zafaria, where we will craft two Conga Drums, two Spirit Caller Drums, and become a Legendary Crafter.

Crafting101 – Celestia | Pt 1

Tonight we will be learning how to craft The Seal of The Seven Seas for the quest "That Seven Seas Show"

Welcome to Crafting101 young wizard, or welcome back if you’ve been following along on our journey. Now that you have achieved your Master Artisan Badge, you are well on your way to the next tier, the Grandmaster Artisan Badge. Before you can begin this quest, you need to get to The Floating Lands, Celestia. In order to unlock Celestia, you will need to defeat Dragonspyre, and the infamous Malistaire but you can complete this crafting quest at any level by teleporting to a friend.

Step 1 – Pierce Stanson

Now that you have stepped out into The Floating Lands, you are ready to track down Pierce Stanson to start the quest. Upon exiting the Survey Camp onto the beach, he will be to the left, up against the path. Once you find him, you will be assigned the quest “That Seven Seas Show.” #puns

Step 2 – “That Seven Seas Show”

The recipe is available from Pierce Stanson, himself. The amulet will cost 1,787 gold. Let’s check out the resources we can gather together! The amulet will require 8 Fish Fins, 11 Golden Pearls, 7 Perfect Jades, 5 Polymorph Treant Treasure Cards,  5 Pristine Vials, 10 Sandstones, and 6 Sunstones. 

Step 3 – Gathering the Reagents

Fish Fin

8 Fish Fins will be needed in total. Aside from hunting them down in the bazaar, you can garden Maelstrom Snap Dragons, receive them from the Magic Eggs housing reward item, or transmute from fish scales.

Golden Pearl

11 Golden Pearls will be needed in total. These are a rare harvest that you can find from pearls in Stormriven hall, The Grotto, The Portico, and Waterworks, Crab Alley. However, you can transmute regular pearls into golden pearls too. They may be harvested from Maelstrom Snap Dragon, and Evil Magma Peas, Deadly Helephant Ears, and Fickle Pickles. The Gorilla, Minotaur, Magic Eggs, and Dragonfly all have this item as one of their daily rewards.

Perfect Jade

7 Perfect Jades will be needed in total. You will have to buy or harvest these gems. It is most easy to buy them from Archytas in the Survey Camp for 100 gold each. The Bountiful Cart can also give Perfect Jade as a reward. Gardening the Maelstrom Snap Dragon or Ivy League gives a chance at this item.

Polymorph Treant Treasure Card

5 Polymorph Treant Treasure Cards will be needed in total. You are able to buy them from the Archivist in District of the Stars, Celestia. They may also be harvested from plants such as Moon Flowers, Red Grapes of Wrath, and Sour Fickle Pickles.

Pristine Vial

5 Pristine Vials will be needed in total. Pristine Vials are an item you will need to buy or harvest. Archytas sells these for 500 gold each, but if you grow the Maelstrom Snap Dragon, you will have a chance at harvesting this item.

Sandstone

10 Sandstones will be needed in total. They may be transmuted with stone blocks or gathered from sandy places in the Spiral. Sandstone can be harvested in the Science center, The House of Scales, Upper Zigazag, Krokotopia, as well as Azteca and Mirage. They can be gathered as a rare harvest from Stone Blocks in Celestia, Dragonspyre, Mooshu, Grizzleheim, Marleybone, Krokotopia, and Wizard City. Growing Maelstrom Snap Dragon, Evil Magma Peas, Fickle Pickle, and Deadly Helephant Ears can give you a chance at Sandstone.

Sunstone 

6 Sunstones will be needed in total. You may transmute these from sandstones. These are a rare harvest from sandstone. Sunstone is harvestable from Maelstrom Snap Dragon, Evil Magma Peas, Fickle Pickle, and Deadly Helephant Ears.

Step 4 -Completion

Now that you have all your ingredients, go back to your Equipment Crafting Station and begin making the Seal of the Seven Seas. Once you have turned in the quest, you will be awarded 7,278 gold and your Grandmaster Artisan badge. Congratulations Wizard! 

Thank you, Starlight, for your time here crafting and collecting reagents.

Member Benefit Tier List!

Everyone loves a good old-fashioned tier list!  Everyone loves Wizard101 member benefits! Why not combine the two and create our very own Member Benefit Tier List!

I will list all the member benefits under a category, starting at being the worst and finishing in the S tier being the best. Please note that these tiers are based on opinion only and are not fact. You may find that you love Double Animus and don’t care for Double pet XP. Let us know your thoughts in the comments below!

The D Tier

Double Monstrology Exp and Animus
Daily Assignment and Daily PvP Assignment Boost

I know Monstrology has its fans, including myself. But most of the players I have spoken with just aren’t that into it.  

As for the daily assignment boosts,  to me this is be the least useful of the bunch. I was only able to complete a few assignments within the time given, limiting the benefit from it significantly.

The C Tier

Free Chest Re-Roll
Training Point Buy Back

These are both nice benefits but they have some problems restricting their potential! First off, although this benefit can be useful for newer players it’s rare that you would want or need to buy back your training points once you have gained a better understanding of the game. This makes this benefit far more useful for new players than more seasoned wizards who have little need of it.  

The chest re-roll is limited to one re-roll per boss each day. Making farming a little nicer for one run but still not providing an amazing benefit.

The B Tier

Zero Energy Fishing
Double Reagents and Unlimited Crafting

This member benefit definitely has its perks. Whether you’re trying to level up, catch new fish, find a rare wand or even a new permanent mount to add to your collection, this benefit lets you go wild with lures!  

While fishing can seem boring for some, others find it to be a relaxing change from the usual game play. The hunt and grind for what you want is always worth it when you finally get it, and fishing is no exception since it offers some great rewards. If you haven’t tried fishing yet you may not find this benefit to be very exciting, but anyone who’s fished before will understand just how good unlimited fishing is!

Double reagents are just amazing. Every reagent you collect by gardening, gathering or fighting is doubled. Always paired with unlimited crafting, there is no cool down time when you craft items. With no timers, you can craft to your heart’s content whilst doubling your chances of getting some of those pesky, harder to get reagents!

The A Tier

Double Pet xp

Everyone loves double pet experience. It’s fortunately a common benefit, and everyone rushes to the Pet Pavilion to train up their pets which we all know will inevitably fail and leave us crying ourselves to sleep… no? Just me? With double pet XP every game you play or snack you feed to your pet gives twice the benefit that it would have normally. So, a Fancy Yogurt that would give your pet 50 XP will give you 100 XP during this benefit. Almost enough to level to teen in one snack! Even gold bought snacks like Shanta Pudding give significant boosts to your pets XP during this reward.

Either way, we all know and love Double Pet XP and we’re all praying it doesn’t go anywhere, anytime soon! 

The S Tier

Double Gardening Rewards

Welcome to the crème de la crème! This is undoubtedly the best and tragically the rarest of all the member benefits. We get this gem a few times a year and boy do we capitalize!

Whether it’s Couch Potatoes, Evil Magma Peas, King Parsley or Pink Dandelions, you will double every single seed, snack, reagent or housing item that your garden drops during this reward. 

_____________________________________________________________________________________________

So that was my tier list of all the eight current member benefits available in Wizard101! Let us know in the comments if you agree!

Crafting101 – Dragonspyre | Pt 2

You didn’t think we were only going to cover the Life recipe and not the other schools did you? Well, if you did, don’t worry, we’ve got you covered! 

As we mentioned in Part 1, for your second crafting quest, Balthazar Dragonthorn gives you a quest that corresponds with your school. In the first Dragonspyre crafting guide we showed you what the Life School quest would be like, we will be explaining more about the other schools quests in this edition. For Life, the Quest is Needle and the Vine. If you are a Life wizard and have found this article looking for a Dragonspyre Crafting Guide, CLICK HERE.

Please note: If a particular reagent has already been covered in an earlier recipe, I won’t repeat the reagent but will let you know which recipe we already covered it in! – Now, let’s begin, shall we?

Reagents in Common

Crystal Vial

in total are required. Crystal Vial is a pricey reagent when bought from a vendor and the Bazaar. The vendors in Wysteria, Mooshu and Dragonspyre sell them for 330 gold where as buying them from the Bazaar can cost between 165 to 1650 gold each, depending on how many are listed available. Harvesting Pink Dandelion can also get you some of these vials.

Frost Flower

15 in total are required. Frost Flower is a fairly popular reagent that spawns all over the coldest places spiral. It is especially easy to find in Grizzleheim and Wintertusk and there is always a frost flower near the Ice Tree, Kelvin, in Ravenwood! Frost Flowers can be found at the Bazaar, pricing anywhere from 33 to 325 gold each. Harvesting Evil Snow Peas, Fickle Pickle, Frozen Fly Trap, Orange Dandelion, Snow Apples, Honey Bee Plant and Boon Tree will increase your chances of collecting Frost Flower.

Black Pearl

in total are required. Black Pearl is a challenging reagent to find. It can be gathered as a rare harvest from black lotus or pearl. It can also be transmuted. You can also purchase Black Pearl from Diego 175 arena tickets. The Bazaar has them available but they are quick to go, so if they are available buy them quickly. They usually sell for anywhere from 188 – 1875 gold each. A few gardening options are Alligator Pear Tree, Deadly Fly Trap, King Parsley, and Ultra Tiger Lily.

Stone Block

20 in total are required. Stone block is one of the easiest reagents in the game to find.Two of them spawn right in The Atheneum, where you get the quest. The Bazaar sells them from 18 to 175 gold per piece. You can even buy a bundle of 100 from the Crowns Shop for 499 Crowns. Burning Snap Dragon, Dandelion, Fickle Pickle, Snap Dragon and Tiger Lily all drop this reagent.

Storm - Needle and Rain

This is the Storm specific robe you need to craft for Balthazar Dragonhorn. The reagents are listed below.

Leather Straps

12 in total are required. They may be harvested from Orange Dandelion and Trumpet Vine. The Transmute Recipe is listed below.

Storm shark

in total are required. You can craft this from your school tree in Ravenwood. These are sold in the bazaar for roughly 160 gold and Harold Argleston/Zan’ne for 250 gold. They may be harvested from Fish on a Vine, Fickle Pickle, and Bamboo Shoots.

Jade

14 in total are required. Jades cannot be found in the Spiral, but you can also buy these from vendors like Al Saf’wan or Campbell Hodgson for 15 gold per gem. The Gardening sources for Jade are Burning Snap Dragons, Snap Dragons, Ivy Leagues, and Ultra Dandelions.

Ice - Needle and Frost

This is the Ice specific robe you need to craft for Balthazar Dragonhorn. The reagents are listed below.

spider silk

12 in total are required. This may be harvested from Orange Dandelion or Boom Shroom. The Transmute Recipe is listed below.

Evil Snowman

in total are required. You can craft this from your school tree in Ravenwood. These are sold in the bazaar for roughly 160 gold and Harold Argleston/Zan’ne for 400 gold. They may be harvested from Bamboo Shoots, Evil Snow Peas, and Fickle Pickle.

Amethyst

14 in total are required. Amethysts cannot be found in the Spiral, but you can also buy these from vendors like Al Saf’wan or Campbell Hodgson for 15 gold per gem.

Fire - Needle and Flame

This is the Fire specific robe you need to craft for Balthazar Dragonhorn. The reagents are listed below.

Leather Straps

12 in total are required. They may be harvested from Orange Dandelion and Trumpet Vine. The Transmute Recipe is listed below.

Sun bird

in total are required. You can craft this from your school tree in Ravenwood. These are sold in the bazaar for roughly 160 gold and Harold Argleston/Zan’ne for 400 gold. They may be harvested from Bamboo Shoots, Burning Snap Dragon, Pink Dandelion, and Helephant Ears.

Onyx

14 in total are required. Onyx cannot be found in the Spiral, but you can also buy these from vendors like Al Saf’wan or Campbell Hodgson for 15 gold per gem.

Death - Needle and Bone

This is the Death specific robe you need to craft for Balthazar Dragonhorn. The reagents are listed below.

Bronze Gear

12 in total are required. These may be harvested from Orange Dandelions. There is a chance The Minotaur in The Acropolis will drop this item. The transmute recipe is listed below.

Banshee

in total are required. You can craft this from your school tree in Ravenwood. These are sold in the bazaar for roughly 160 gold and Harold Argleston/Zan’ne for 400 gold. They may be harvested from Bamboo Shoots.

Amethyst

14 in total are required. Amethysts cannot be found in the Spiral, but you can also buy these from vendors like Al Saf’wan or Campbell Hodgson for 15 gold per gem. 

Myth - Needle and Fate

This is the Myth specific robe you need to craft for Balthazar Dragonhorn. The reagents are listed below.

Ectoplasm

12 in total are required. You can harvest ectoplasm from Orange Dandelions, Ultra Snap Dragons, and Ultra Trumpet Vines. If there are any in the Bazaar, you can buy them for roughly 250 gold per reagent. The transmute recipe is listed below.

Cyclops

in total are required. You can craft this from your school tree in Ravenwood. These are sold in the bazaar for roughly 160 gold and Harold Argleston/Zan’ne for 400 gold. They may be harvested from Bamboo Shoots and Fickle Pickle.

Ruby

14 in total are required. Rubies cannot be found in the Spiral, but you can also buy these from vendors like Al Saf’wan or Campbell Hodgson for 15 gold per gem. These can be harvested from Ivy Leagues, Snap Dragons, and Ultra Dandelions.

Balance - Needle and Luck

This is the Balance specific robe you need to craft for Balthazar Dragonhorn. The reagents are listed below.

Bone

12 in total are required. Bone may be harvested from Dandelion, Deadly Fly Trap, Pink Dandelion and Orange Dandelion. The Transmute Recipe is listed below.

Locust Swarm

in total are required. You can craft this from your school tree in Krokosphinx, Krokotopia. These are sold in the bazaar for roughly 160 gold and Harold Argleston/Zan’ne for 400 gold. They may be harvested from Bamboo Shoots and Fickle Pickle.

Onyx

14 in total are required. Onyx cannot be found in the Spiral, but you can also buy these from vendors like Al Saf’wan or Campbell Hodgson for 15 gold per gem. 

Transmute Recipes

Frost Flower

The Frost Flower Transmute Recipe is available from Torald Wayfinder in Grizzleheim – Northguard. It is sold for 300 gold. You will need 10 Mist Wood and 10 Stone Block. 

Black Lotus

The Black Lotus Transmute Recipe is available from Toshio in Mooshu – Jade Palace. It is sold for 300 gold. You will need 10 Cat Tail and 10 Ore.  

Black Pearl

The Black Pearl Transmute Recipe is available from Toshio in Mooshu – Jade Palace. It is sold for 400 gold. You will need 15 Black Lotus per pearl.

Ectoplasm

The Ectoplasm Transmute Recipe is available from Balthazar Dragonthorn in Dragonspyre – The Atheneum. It is sold for 150 gold. You will need 5 Leather Straps. 

Spider Silk

The Spider Silk Transmute Recipe is available from Toshio in Mooshu – Jade Palace. It is sold for 150 gold. You will need 5 Ectoplasm per Spider Silk.

Bronze Gear

The Bronze Gear Transmute Recipe is available from Felicia Worthington in Marleybone – Regent’s Square. It is sold for 150 gold. You will need 5 Spider Silk per gear.

Bone

The Bone Transmute Recipe is available from Wul’yahm in Krokotopia – Oasis. It is sold for 150 gold. You will need 5 Bronze Gear per Bone.

Leather Straps

The Leather Straps Transmute Recipe is available from Eudora Tangletree in Wizard City – Olde Towne. It is sold for 150 gold. You will need 5 Bones per Leather Strap.


Thank you, Starlights, for joining me crafting and collecting reagents! Catch our next edition of Crafting101 in Celestia, where we will craft an Amulet of the Seven Seas.

By Saffron ShadowWeaver and Peyton Lionheart

Contest Winners

What a wonderful time we had looking at all of the entries! It was fun for the whole team. 

Here are the winners of the Christmas Decoration contest, prizes will be sent to the email you provided: 


- 1st Place -
Austin Death: Aero plains Bundle

- 2nd Place -
Jeffery Shade: 5,000 crowns

- 3rd Place -
Laura Battleblood: Yuletide Parade Truck!

- 4th Place -
Jerry Tom: 7 packs of your choice

- 5th Place -
Nathan Darkblood: 4 packs!

Take a look at these other amazing screenshots

We tired to add many of your pictures as we could, sorry if we missed yours. There might be a special surprise coming from Santa for all of you who worked so hard decorating your homes for the season! Keep a close eye on your emails!!


Thanks to everyone who entered, we will be having more contests like this in the year ahead and would love to hear your feedback or suggestions. Please email us with any thoughts at [email protected] or comment on this post.

Dorm Decorating: Xmas Edition

It’s Christmastime in the Spiral once again! I’m sure all of you are just about as excited as I am (as if that’s even possible!). It’s the most wonderful time of the year and you can show your Christmas cheer with an exciting and original Christmas themed dorm room!

I am completely new at glitching and Castle Magic, but I’ve picked up a bunch of fun tricks this season to share with you all! For my dorm, I didn’t want to use any of the Christmas themed trees we all love so much. Instead, I decided to make my own original Christmas tree.

For my Christmas tree, I chose to use six of the Blue Holiday Ornaments and glitched them into the air using my trusty Maple Bookcase and Black Checker. For this glitch, all you have to do is set down whatever object you want to float and then place the bookcase next to it. Then you place the Black Checker on whichever shelf that you want your item to be in the air. You grab your Black Checker on the shelf and move it so your bookcase sinks into the floor. Once it’s there, you can move the item into the bookcase and then move the maple bookcase and your object is in the air! After this, to remove your bookcase, you grab the checker again and move it so your item stays in place.

I found all of the ornaments used for this in the Bazaar (and for quite a cheap price). All around my tree I have floating presents using the aforementioned ornament glitch. I thought this would be a really magical focal point and it turned out better than I had imagined. Speaking of the actual Christmas tree, it’s the Snowy Polarian Tree shrunk down twice along with the ornaments using Castle Magic. As you’ve probably noticed by now, my not-so-Christmas tree topper isn’t actually on the top of my tree. I did this because outside of Photomancy, the tree is too tall for it to show. For this, I just grabbed a handy Star Staff and enlarged it five times with Castle Magic as well.  

To the left of my tree, I made a cozy sitting space featuring one of the goodest of boys. Right next to him, I glitched a Regular Keeper Tank with a Red Cap Carpe (the perfect Santa fish!) into the floor using a rug and the Maple Bookcase. For this glitch, you start by placing your tank in your dorm and then set out your Maple Bookcase with the Black Checker on the lowest shelf. Once that is done, you grab the checker and move the opposite end on the bookcase into the tank. Grab the Maple Bookcase and set it down so that your tank is up in the air. After this you grab the checker once more and move it so that the bookcase is no longer touching the tank, which is now floating. Then you pick up your bookcase and then place it once more. This time you will put your checker on the second shelf and place a medium rug (either the Medium Magenta or Medium Purple). You then move the checker so your bookcase sinks once more and place the opposite end on the long side of your rug. Next, you move the bookcase and make sure that the rug is placed evenly inside of the tank. As you’ll see now, the rug fits perfectly where the wooden bottom stops and the blue base starts. Once this is done, remove the bookcase by grabbing the checker and place it somewhere else in the room. Pick up the bookcase. Grab the rug and move it anywhere in your room where you want your tank and you’ll see that the tank is sunk into the floor without the bottom wooden piece showing!

Inside the tank, I have a shrunk down Snowman and a Snow Pile. Remember that when glitching items inside of the tank, you need to place them where the tank will be first, which can get tricky if you need to float each item. That’s why sinking the tank is a perfect option if you want some extra flair! For the Snowman and Snow Pile, I shrunk them both using Castle Magic Reflectors and Start Detectors with the shrink cards in place (this is all trial and error, depending on how small you want an item. Using a Magic Reflector, you can use castle magic on up to eight items and you can shrink or grow a single item at least eight times!).  On top of the tank, we have another Snow Pile shrunk down. I also included some Yuletide Candy Canes and peppermints for all of the guests to enjoy.

One of my favorite glitches of all time would have to be putting the Silver Chest over the plain wooden one for your bank. It was revolutionary for me when I first tried it and it worked so well! I simply used two medium rugs and the chest. All you must do is place one rug on top of the other at different angles and rotate the first one until it is under the wooden chest. Once that’s done, you set down your Silver Chest (which is the one found under the furniture tab in the Bazaar) directly on top of your wooden bank chest.  You’ll never have a plain chest for your bank again!

Next to the chest, we have a matching table with the Cookies and Milk glitched on top using the Maple Bookcase once again since they wouldn’t fit normally, you always have to give a little something back to Santa! (even if he is trapped in your fish tank at the moment).

Next to my glitched chest, I used up my spare Blue Holiday Ornaments and glitched them into the air and placed the Azteca Basket underneath. For that, I used the Maple Bookcase and Black Checker glitch with the bottom shelf, one with the second shelf from the bottom. All ornaments were shrunk two sizes down and I enlarged the basket by a size. All the String Lights were enlarged twice with Castle Magic as well. Last but not least, in the window, I placed the Gingerbread House to finish off my dorm.

I hope you all enjoyed my article on How to Make the Most of your Dorm: Christmas Edition! Decorate those dorms and have a very magical Merry Christmas!

This article is by Community Contributor, Jen Skullbreaker

The Elements of Decorating

Intended For the Novice Decorator

I have no doubt you’ve been to homes with phenomenal mazes that extend to places in the sky you didn’t think they could reach, or beautiful portal displays of every house in the game. Each portal with an angel plant at elder, dancing elegantly nearby, or player-made homes of building blocks that are realistic in exterior and interior design. They all grab something within us. A kind of magic different than anything else in the game. When we enter those phenomenal homes, we are pulled into their absolute splendor.

Whether it’s to find a housing gauntlet or be inspired by other decorators, we’ve all entered another player’s in-game castle and felt a sense of awe in its aesthetic. As an avid housing decorator, I have won contests and have earned positions on the Top Rated houses leader board. Today, we will delve into the elements of decorating and see how you can apply these skills of craftsmanship to your own interior and exterior decor.

The Elements

Scale

Evaluate the overall size of your decoration in comparison to your character as well as your screen. From creating three-story high towers that can’t fit in your screen, to the smallest flower pot, the element of scale is probably one of the most important considerations.

Depth

Similar to “Space,” we need to think about angles and balance between the items. We cannot be decorating too flat, but we also need to decide what should get the most attention with depth. Debatably, this element can also be considered the most important.

Space

Next, we must determine how much space there should be between your items. Where can people walk through? Where should people walk through? At times, I find the best use of space in my home is when I block off areas I simply don’t want to decorate in order to focus on the bigger picture.

Realism

The truthfulness and believability that your decoration style can be accepted as possible in the game. For example, this does not mean you cannot have floating candles, because that can be explained with magic. Therefore, that would be truthful and believable. What this rule suggests, is to justify your room or exterior, and try to think of it from a new perspective. We must justify how believable the design is by looking at it with our visitor’s eyes in mind. 

Originality

 Does that stunning, beautiful, masterful home you just decorated feel like it’s yours? Of course, incorporating other’s ideas doesn’t hurt, but what does taking that idea add? How do you develop upon the different styles and themes within your castle? Remember, context screams louder than the idea itself.

Texture

 Make sure nothing feels too repetitive in your decor. Try to find items that break up your texture and gather attention, or create textures that repeat well together. With repetition, the simpler an idea is, the better. With complexity, it is better for it to stand-alone.

Color

Color is quite powerful. I suggest knowing or learning some color theory. Learn about the emotional impact of colors, what colors represent, what different colored roses represent, which are the primary, secondary, and tertiary colors- the list goes on. Think about how different colors make you feel.

Palette

A palette is a collection of colors that are consistent throughout your design. As this is a video game where we cannot always pick specific colors, we should be lenient with where our shades and tones happen to fall within the overall color family.

Example: Garden of The Albion Enchantress  


My entry for Paige Moonshade’s annual Summer contest.
Honorable mention 2018.

Here is one of the dorm rooms I’ve decorated, entered in Paige Moonshade’s Ninth annual best little Wizard City dorm contest. Let’s go through each of the various elements to see how we employ them in this example.

The scale might be one of the first things you notice. Several well-placed items make the room feel more grandiose because of their stature. The objects barely fit into the frame. Next, let’s see the depth. We create depth through the garden between the archways. Very diorama-like, it sits with us having to peer in, with each one of us taking a different perspective. This technique is used in Mooshu, with there being a fence next to the sidewalk and bamboo plants spread out between the wall of bamboo.

By examining this space, we see it is very tight, crammed, and in-your-face, especially when viewing it from an in-game perspective. Standing there, You are filled with a view 360 degrees around you of items. You can barely find your way out, and it’s not the door you think it may be. It is overgrown and wild, the feeling, like an enchanted garden that belongs to an evil queen.

We may find ourselves questioning the truthfulness of this design. Would an overgrown, enchanted garden of a witch looks like this? I  believe it would be. It was very W.I.T.C.H. inspired, after I had binge-watched the short running television series for the second time, and I wanted to incorporate its dark and contrasting magical vibe into my own decor (notice how that also covered the color section too? These elements can correlate to each other in intriguing ways!).


Selfie!

Some of the ways I break up the texture of items in my design is by using wall lamps to pretend to hang them on pillars and wall-like items. In a similar fashion, the bright mushroom breaks apart the dark violet texture, while still being within the color scheme established. In our palette, we see bright greens, dark violets, vibrant and dark reds, and light blues. These are consistent and rarely fall out of line.


As decorators, we strive to create new worlds within our own homes or give homage to the ones we have quested in, and bring it to life. Each Wizard is given one dorm in Ravenwood and I hope this helps you make the best of it and the other castles that you own. Thank you, Starlights