Forgotten Lore of Dragonspyre

Warning! Spoilers Lie Ahead!

Dragonspyre is an ancient, haunted world in which renegade professor Malistaire has recently been spotted!

Once an advanced militant society, Dragonspyre had an esteemed Academy rivaling that of the Ravenwood School of Magical Arts in Wizard City. The inhabitants once held a special interest in Fire Magic.

Legend has it that in the summoning of a great Dragon, the world was destroyed and changed forever. Its great buildings and stone columns crumbled before the coming of the Dragon Titan.

Now, it has become a land of fire, lava, and ghosts.

-KingsIsle Entertainment

Welcome!

Greetings and Salutations Wizards and Pirates of the Spiral! I am Shade, allow me to welcome you to the first installment of “Forgotten Lore.” In this new series, we will explore the lore of the Spiral, and uncover secrets you might have missed. Let’s begin! 
 
Dragonspyre was the first new world added to Wizard101. Unveiled in early 2009, it came only four months after the game’s initial release. Looking at Dragonspyre through a real-world lens, its inspiration seems to come from ancient Rome. Its architecture has distinct Roman elements, such as columns and archways. Many of Dragonspyres areas use Roman words like Basilica, Forum, Athenaeum, and Necropolis. Meanwhile, its NPC’s take influence from the Russian Military.

It seems clear that the developers meant for Dragonspyre to be very different from the worlds that came before it. So, they opted for a fiery and foreboding dark fantasy theme. The destroyed state of the world might make one think of Pompeii. Which, as we know, was buried beneath volcanic ash when Mount Vesuvius erupted in 79 C.E.

Dragonspyre’s civilization is ancient, predating both Wizard City and Merle Ambrose. It was also home to Dragonspyre Academy. A rival of the Ravenwood School of Magical Arts during its time. This world is also the home-world of some key players. Cyrus, Malistaire, and Sylvia Drake (born Sylvia Spitfire) are all from Dragonspyre. It is also the home of the infamous Loremaster and houses the grand finale of Wizard101’s first story arc.

But how did Dragonspyre become what it is today? Why did these things happen? 

Given Dragonspyre’s current state of disarray, its lore has required some effort to reassemble. After investigating countless sources, I have re-constructed the most probable sequence of events

So, without further ado, sit back, relax, and let me tell you the story….

Dragonspyre and Century War

In the beginning, Dragons and Humans lived side by side, but humanity lived in constant fear. One-night, King Mene met in secret with the Queen of the Drakes, Gavarena. They allied Man and Drake. Together they would overcome the Dragons and drive them out. A new kingdom would be born. In light of their victory, they named this Kingdom Dragonspyre.

The Kingdom continued to grow after Mene’s passing. Later, King Jurgen expanded Dragonspyre’s borders. Man and Drake worked together to protect the realm. It was an age of peace but it was not to last. King Jurgen passed away suddenly, with no children. Without an heir to the throne, Dragonspyre fell into a civil war that lasted 100 years. This would be forever known as the Century War.

Kylgore and the Golden Age

The war came to an end by the efforts of Kylgore the Magnificent and a Drake, named Leneth the Great. They worked together to defeat a mighty black dragon in Dragonspyre’s outer ring. Exactly how Kylgore achieved this victory remains a mystery. After his triumph, Kylgore claimed the throne and put an end to the war. An age of peace finally descended on Dragonspyre.

Kylgore’s rule brought many changes to Dragonspyre. Significant advancements in culture were made, and explorations of the sciences began. New magical advancements, including the creation of Knowledge Crystals, began in Kylgores reign.

Kylgore and His Descendants

King Kylgore forged a friendship with Aurelius Ambrosius, leader of the Druidic Treeminders. As a gift, Aurelius gave Kylgore seven saplings from Ravenwood. The King planted the magical trees throughout Dragonspyre. They would later become the trees of Dragonspyre Academy. To commemorate their friendship, Kylgore ordered the construction of a statue of Aurelius.

The Beginning of the Academy

Generations passed, and the Kingdoms’ knowledge remained locked away, seen only by royalty. King Kylgore descendants, King Betrin and Prince Viggor, clung to that tradition. They hoped to keep their secrets from falling into unworthy hands. But then, Rydall the Conqueror infected his people with an alchemical plague. Mobs of the afflicted revolted in the city streets. Something had to change if Dragonspyre was to survive.
 
Duke Sebastian came forward and fought with the monarchy for the right to search the knowledge crystals for a cure. He sent a champion, Iona Pyrelance, to do battle against King Betrin. Iona won the battle! Duke Sebastian’s bravery caused the laws to be overturned. Knowledge would become accessible to the masses, and Dragonspyre Academy was born. All who qualified were welcome within its walls. The people, armed with this new knowledge, overcame Rydall’s Plague, and the rebellion finally ceased.

The Tragedy of Viggor's Legion

Some embrace change, while others fear it. While Rydall’s Plague ravaged his homeland, Prince Viggor set out in the hopes of building Dragonspyre’s Empire anew. With his Drake and General Greyflame at his side, they would lead an army of soldiers on a perilous journey. Their plan? To conquer the magical realms of the Ravenwood and the Treeminders who lived there. Viggor’s mission would start a war with the Treeminders. Turning a once peaceful people into a society as evil as the invaders they sought to drive out.

There were massive casualties in the conflict between the Dragonspyrians and the Treeminders. Destroyed were the Ravenwood, its magical trees (except for Bartelby), and Viggor’s army. A man named Gregor would be the final soldier to fall. The remains of the deceased forces would never return to Dragonspyre.

The Aftermath

The few surviving Treeminders remained to plant new magic trees. They buried their dead in catacombs deep beneath Wizard City. When it was over, the survivors fled to the worlds of Albion and Avalon. The lost Knowledge Crystals buried within the catacombs contain a record of those events.

Soon after, Dragonspyre Academy became the center for knowledge in the Kingdom. Much of their curriculum devoted to the study of war, combat, and pyromancy. Dragonspyre’s dislike of Wizard City could have come from the anger over Viggor’s tragic failure.

Aldared the Usurper

Like fire, knowledge can be dangerous when placed in the wrong hands. A graduate of Dragonspyre Academy by the name of Aldared proved this. He used his advanced knowledge to unseat the King of Dragonspyre and became known as Aldared the Usurper. His rule was as cruel as it was brutal, and the people despised him.

Founding of the Great Council

The people of Dragonspyre suffered under Aldared’s tyranny until a group of Wizards and Warriors laid siege to the Usurper’s palace. Katia Firewinter, Eliena (the legendary Drake), and Drannik the Shrouded Wizard were among them. Aldared was, at long last, cast down and his soul safely trapped within a Knowledge Crystal. Drannik attempted to seize control of the throne but was cut down by Katia. With the threat gone, she began working with her fellow mages and warriors to create a new government. The Great Council, also known as the Council of Wizards, Warriors, and King, would come from her efforts.

The Council of Wizards and Warriors

While Aldared may have died, his influence remained. Kildare, a Wizard of the Great Council, became corrupted by Aldared’s crystal. Valerik Brightsword discovered this treachery and defeated Kildare swiftly. While Kildare’s defeat came before he could do much harm, the damage was done. Fear and paranoia began to settle in among the members of the Great Council.

As time passed, the power of the King diminished, and members of the Council began to bicker for control. People were fearful of the Wizards, their magic, and their crystals. They spurred a great Warrior named Lyon to action. He led a group of fellow Warriors to demand control of all the spells in Dragonspyre.

Whether the reasons for Lyon’s actions were justifiable or out of a desire for power, no one knows. Regardless, the matter came to the attention of the Council. When the Council denied Lyon, he betrayed them in broad daylight.

Lyon challenged the leader of the Wizards, Rurik Flamesoul, to a fight. After a vicious battle, Rurik proved victorious. He would become the only Wizard to best a Warrior in open combat. His victory would secure the Wizard’s control over the magic of Dragonspyre.

The Fall of Dragonspyre

Time went on, and the Wizards began to fear those who challenged their power. Vladimir Darkflame, Dean of Admissions at Dragonspyre Academy, decided to take matters into his own hands. He gathered a group of conspirators, Andor Bristleback, Devora Shadowcrown, and Zora Steelwielder. Together, they orchestrated the coup of the century. They kidnapped the Academy’s Professors, and summoned the Dragon Titan. The traitors were apprehended and detained within the Labyrinth. But, the summoning of the ancient Fire Titan could not be undone.

The Titan rose from its slumber, and the razing of Dragonspyre began. The Dragon Titan summoned its army within the city walls, taking the defenders by surprise. Boris Blackrock, the Obsidian Golem, did battle against the Dragon Titan. Using the knowledge his mage creators left him, Boris faced the Titan in single combat. But, the Obsidian Golem fell, as would many others in the wake of the Titan’s chaos. To commemorate his sacrifice, Boris became the last great hero to be buried within the Necropolis.

The Final Assault 

Dragonspyre’s defenders retreated to the Academy as the Titan’s army advanced. When the Fire Titan led its final assault upon the Academy, everything was laid to waste. All that survived was the Fire Tree, Ashley, and the Fire School, whether this was out of mercy or respect no one knows.

 When and how the Titan’s onslaught came to an end is a mystery. What is certain is that the Dragon Titan has become a colossal stone statue coiled around the volcano. Its armies remain, waiting in vain for someone or something worthy of leading them. Dragonspyre is forever changed, and whether it will ever recover from its fate remains to be seen.


Endgame Arc One

Spoiler Warning!

It would be many years before Malistaire Drake returned to Dragonspyre. When he did he held in his hands the stolen Krokonomicon, and in his heart the vain hope of waking the Titan and restoring his beloved wife, Sylvia to life. Pulled toward the Crown of Fire, at the volcano’s summit, Malistaire began his ritual.

His twin brother Cyrus traveled alongside the Savior of Wizard City, to Dragonspyre. Cyrus attempted to reason with his brother, summoning the spirit of Sylvia to assist him. Unfortunately, this only angered Malistaire further and the necromancer banished his brother. The Savior of Wizard City would be forced to duel him for the fate of the Spiral.

After a perilous battle, the young Wizard triumphed (as predicted). Malistaire ultimately perished and was finally reunited with his lost love! Hand in hand, Malistaire, and Sylvia departed together for the Other Side. At least until Morganthe woke him up, and the whole Darkmoor incident, but that’s a story for another time.

Thanks for reading!

Well, that’s all on the world of Dragonspyre. For now, at least.

I’d like to give a special thanks to the team here at Ravenwood Academy who helped make this possible (as ghosts can be tricky things to photomance)!

Since this is the first article in this series, I’d like to know: would you like to hear more about the lore of the Spiral? If so, what would you like to see next? I would love to hear your thoughts and opinions in the comments below.

In the meantime, please feel free to explore the wealth of information Ravenwood Academy has to offer! If you want to stay up to date on our latest content, follow us on Facebook and Twitter. You can also join our Ravenwood Community Discord to meet fellow Wizard101 fans and enthusiasts! 

See you in the Spiral!

-Morgan Shade

Wizard101 Theory: The Coven Conspiracy

Hello, I’m Fable Finder! Join me as we ponder the depths of a conspiracy.  We’ll gaze into the shadows, exposing the hidden secrets. The secrets that ripple throughout the Spiral, leaving only questions in their wake.  I present to you, Wizard101 Theory: The Coven Conspiracy.

Our wizard is first sent to Grizzleheim at Level 20. Merle Ambrose wishes to establish an alliance with their King. When we arrive, we must prove our worth by helping Bjorn Ironclaws. He sends us to his friend, Hagen Shieldbreaker, who gives us many quests towards this end. We learn about a mysterious group, the Coven, who seek to unleash the Everwinter. Later on in Wintertusk, the Coven works to unleash the Everwinter by awakening Ymir. When you think about it, this effort doesn’t make sense. Why would the Coven want to unleash the Everwinter?

In the quest “A Wolf Among Bears”, Osric Grimbold tells us about Wulfric Foesbane. Wulfric is a wolf who has allied themselves with the bears. When we go to speak with Wulfric, this is what he tells us:

Notice how Wulfric remarked that it is foolish to trust a raven. This remark is important in revealing cultural distrust to the Ravens. This also suggests that Ravens have a history of trickery in this world. Why else would a lack of trust exist? Wulfric’s skepticism proves to be correct in the quest “All is Revealed”. Munin, a member of the Ravens, confesses the following when the Dust of Discovery is cast upon him:

Yet, in Wintertusk, it is none other than a raven, Grandmother Raven, who is helping us put a stop to the Coven. Could Grandmother Raven be the one who is behind the Coven? In the quest, “Fishes & Loaves”, Grandmother Raven directs us to Henrek Graincutter. Henrek’s role in the story is to help our wizard find Vestri’s Golden Seal. When we go to speak with Henrek, this is what he tells us:

This may not seem like much, but remember that all lines of dialogue in the game are important to the story. KingsIsle added that dialog for a reason: it is a hint. Why would Grandmother Raven be behind the Coven though? Even if she was, how would this explain why the Coven wanted to unleash the Everwinter? To answer these questions, we must examine the nature of Grandmother Raven’s powers. In the quest “A Potion for Bartleby”, Merle Ambrose explains the following:

Boar

This tells us that Grandmother Raven has the power to create objects that can show the past and future. If she has this power, why would she only give Bartleby this ability? We can assume that she gave herself this ability as well. Grandfather Spider, equal in power to Grandmother Raven, most likely did the same. But, how exactly do the past-viewing and future-revealing powers work?

The power to see into the past does not appear to have any constraints in the game. This is not the case for the power to reveal the future; it has its vagueness. Let’s assume for a moment that the power to reveal the future has no constraints whatsoever. Bartleby would foresee the fight between Raven and Spider that takes place in the Third Arc. Why didn’t he try to stop it? In the First Arc, Bartleby could stop Malistare Drake from awakening the Dragon Titan. Why didn’t he try to stop that, either?

Treant

If we assume the power to reveal the future has no constraints, there would be no story. Thus, logic dictates that the power to reveal the future has a constraint. First, the future is indeterminate. This power does not reveal one defined future, but only possible futures. Second, this power cannot see endlessly into the future. It must have some sort of time-frame. Thus, the farther into the future, the vaguer the outcome becomes. This would also explain why prophecies are as vague as they are.

So how is this relevant to Grandmother Raven and the Coven? Well, the first time we meet Grandmother Raven in person, in the quest “That’s So Raven”, we find her trapped in a cage.

When Grandmother Raven is finally freed in the quest “Root of the Loom”, she remarks about her time spent in the cage.

In the quest “Norn Time”, the Norns explain that only an outsider can free Grandmother Raven.

Grandmother Raven would not sit dormant through free will. Most people, when imprisoned, would search for ways to escape. So, what escape attempt did Grandmother Raven make?

Grandmother Raven used her future-revealing power to assess all her possible futures. Her best chance relied on an outsider to free her from imprisonment. She pondered about how to actualize this possible future. In the quest “That’s So Raven”, Grandmother Raven tells us this:

So, Grandmother Raven knew about us and our heroism. By creating a world crisis in Grizzleheim, she could attract an outsider to come and free her. With this in mind, Grandmother Raven created the Ravens of the Coven to act in her stead. She made the Ravens seek to unleash the Everwinter, as well as made them hate her to throw the trail off. I doubt the Coven is aware that they are being used by Grandmother Raven. When we defeated the Coven the first time, we did not end up freeing Grandmother Raven. So later on, she let loose the Coven on Wintertusk, so we would end up freeing her. Then, with her main goal achieved, she helped us put a stop to the threat she created.

There is one hole in this theory, and you may have noticed it. As I showed earlier in this post, when we meet Grandmother Raven in person for the first time, she is in a cage. Yet, she claims that the Coven trapped her in the cage. If this is true, it would contradict the theory. But this story is implausible. How could the Coven, a group of ordinary sorcerers, trap Grandmother Raven, who is a divine being, in a cage? It’s likely that Grandfather Spider, the Rat, or the Scorpion trapped Grandmother Raven. It’s more likely that she lied about who trapped her to make us doubt the possibility that she created the Coven. The Rat and the Scorpion are candidates because they are the offspring of deity. We’ve also learned, through the story, that lower-divine beings can challenge greater ones.

In conclusion, the Coven is a false flag operation perpetrated by Grandmother Raven. Her motivation for it was to free her from imprisonment. Now that is a scheme within a scheme, as Henrek Graincutter put it.

More Theories

Wizard101 Theory

Have you ever wondered if Sylvia Drake actually died of a cold? Why did the Coven want to unleash the Everwinter on Grizzleheim? Does being the Scion of Bartleby actually mean anything, or is it just a replay of the Chosen One trope?…

A Tale of Three Scions

In the middle of Empyrea, the game reveals that the main hero of our story is the Scion of Bartleby. What does this mean? On the surface, it appears that this is simply a replay of the Chosen One trope. This is true, but it’s not the entire story. When you critically examine all the facts that we have been given, we are left with more questions than answers….

The Absence of Being

The Third Arc is about a conflict between Grandmother Raven and Grandfather Spider. Both of them posed a threat to the Spiral during this time. They are finally reconciled at the end of Empyrea, and lock themselves in the Primordial Forest. After this, our Wizard returns to the Arcanum to bring everyone up to speed. When we arrive, we receive a cryptic prophecy from Sybil, the Tree of Knowledge in the Arcanum….

So there are my thoughts on the Conspiracy of the Cabal, and links to my other theories.  I hope you enjoyed our walk into the shadows.  Let me know in the comments what your thoughts are!

Sailing with Sinbad

Join me as we set sail in Wizard101’s newest gauntlet, Sinbad and the Iron Sultan.  And guess what…..It’s Craftable!  

Visit Lloyd Fallingwater in the shopping district to purchase the recipe under the furniture tab. He also has 2 new recipes for the reagents needed to craft this magnificent Gauntlet.

Recipe price for Gauntlet: 10,000 gold

Recipe price for Transmute Magnificent Clay: 2,000 gold

Recipe price for Transmute Marvelous Clay: 2,000 gold

Crafting the gauntlet requires Red Magical Clay, another new reagent that I have yet to locate as a drop within the Spiral.  

You will find the Marvelous and Magical Clay reagents that are required for crafting, in the new Sinbad Hoard Pack!

The new gauntlet is also available for purchase on the Wizard 101 website.  A $39.00 bundle with the Gauntlet and 7500 Crowns!

Sinbad Hoard Pack

The gear that’s available in the new Hoard pack is the “Fleet Kapudan’s Attire”, the “Sky Captains Attire”, and the “Grand Admirals Attire”  The wand is the “Boarding Hook”. The new mount is a very cool and unusual looking 2-headed bird. Last, but definitely not least, is the Gryphon pet, which is a simply adorable puppy like creature.

Credit for the screenshot of the Kapudans Boarding Hook goes to Destiny Thunderstaff

In addition to the new gear, you will find a lot of great new housing items in the packs. These items are also dropped in the gauntlet.

There is also a new summon treasure card that comes in this pack. It’s Sinbad himself!  I cannot wait to use this and see what kind of spells he has available.

The Gauntlet

Together, we’ll travel to the Isle of Metallos upon the ship Chimera. Sinbad and his 1st mate Lemmi accompany us as we forge our way through through the depths of the dungeon.

Upon entering you find yourself at the Port of Ferros, speaking with Sinbad and his 1st mate, Lemmi.  They ask your assistance in finding and getting rid of an Evil Magician who goes by the name Hari Houssen. He has possession of a magical jewel that grants amazing transmutation powers, called the Iommi stone.  The Sultan has offered a handsome reward to anyone who can free the citizens of the Isle of Metallos from him and his minions.

The Isle of Metallos is a lava filled cave full of destruction. Craggy ledges, broken bridges, and many tunnels lend an overwhelming sense of doom throughout the entire dungeon.  Keep your eyes open, as there is a secret hidden boss within the gauntlet.

Your first mob battle will  be against a metal version of the Minotaur, a Metaltaur! They are Ice School mobs, with 4,835 health. Watch out, they are truly a “beast” to beat!

The second battle finds you up against a mob of metallic versions of Cyclops, named Chromeclops. They are Myth School with 5,565 health, and you battle 3 of them. They hit hard at over 4,500 damage, so be well protected. Made of chrome, they have a single focus, so attack on their blind side!

After defeating the cyclops, you travel on to a room where you find a metallic version of the Skeletal Pirate, aptly named Steeleton. They are Death School and have a health of 4,780.  Personally, I found them easier than the Chromeclops. I really “rattled their bones”.

After that battle, following the path that the Steeletons sent you on, you finally reach the summit. It’s there that you come face to face with Hari. When you enter, you will find him in the middle of a transmutation spell to turn his dragon into gold. As he changes into the Iron Sultan, you must stop him and retrieve the Ione Stone! *Note to KI, LOVE the guitar shred!”

For the final battle of this gauntlet you will be up against the Iron Sultan, his Golden Dragon and a Skeeleton. The Iron Sultan is Storm School, with 13,875 health. The Golden Dragon is Sun School with a health of 5,875.  The Steeleton is Death, as before with the same health of 4,780.

Make sure you have a good strong team here, the Sulton is strong with attack spells hitting well over 6,000!

Now that you have defeated the Iron Sultan and retrieved the Iommi Stone, you will be rewarded with this awesome statue to commemorate your grand adventure. Make sure you pick it up.  Well done!  As an added surprise this statue will give you a daily reward, so check it every day.

I hope this article helps you on your way to crafting the new Gauntlet, and will also help you get through it. If you find items that I have not listed, comment below and I’ll add it in and give you credit for your discovery!

Thanks for  reading!

The Absence of Being

Hello, I’m Fable Finder.

The Third Arc is about a conflict between Grandmother Raven and Grandfather Spider. Both of them posed a threat to the Spiral during this time. They are finally reconciled at the end of Empyrea, and lock themselves in the Primordial Forest. After this, our Wizard returns to the Arcanum to bring everyone up to speed. When we arrive, we receive a cryptic prophecy from Sybil, the Tree of Knowledge in the Arcanum.

[…]

This is an essential scene that must be understood when trying to predict what the Fourth Arc will be about. Since all lines of dialogue in the game have been choreographed, they were all put there for a reason. Thus, interpretations of this scene will be assessed based on how well they abide by the following rules:

Rule One
The threat we will face in the Fourth Arc relates to the “Nothing” Sybil spoke of, so understanding what that means is paramount.
 
Rule Two
Observe what Ione said in response to Sybil. This is a hint that the threat of the Fourth Arc will arise as a result of thwarting Raven and Spider.
 
Rule Three
Ione’s response was also a hint saying that the threat of the Fourth Arc will be much, much worse than the threat of the Third Arc.
 
Rule Four

Sam Johnson, KingsIsle’s Lead Creative Designer,  stated in an interview that he wanted the Fourth Arc to be “fundamentally different” from the other arcs in structure.

Apocalyptic Interpretation

This interpretation is the simplest and takes what Sybil said at face value. If the Spiral got destroyed, it would be replaced by “Nothing”. Thus, the “Nothing” Sybil warned us about is the aftermath of the Spiral’s destruction.
 

How well does this interpretation abide by the rules? While this interpretation could potentially fulfill Rule Two, it violates Rule Three. The threat of the Third Arc was the destruction of the Spiral, so facing the threat again would be nothing new. For the same reason, it also violates Rule Four.

False Security Interpretation

I came up with this interpretation. What if the “Nothing” Sybil warned us about is the appearance of nothing?  When the Fourth Arc begins, it will seem like there is nothing to be afraid of. We will have a false sense of security. However, there will be a traitor in the midst plotting something sinister, and we won’t find out until later.

How well does this interpretation abide by the rules? Well, this interpretation is yet to be complete.

First, how will the threat of the Fourth Arc arise as a result of thwarting Raven and Spider?  Raven and Spider were thwarted when they reconciled and locked themselves in the Primordial Forest. Therefore, the threat of the Fourth Arc will arise either as a result of Raven and Spider reconciling, as a result of Raven and Spider locking themselves in the Primordial Forest, or both.

We must remember that the Cabal is still in play. We have yet to enter the “Cabal Room” in the Arcanum. KingsIsle would not have put that there unless we were going to explore it. 

Second, while some members of the Cabal may have given up after the reconciliation of Raven and Spider, it’s entirely plausible that some of them would stay loyal to the cause. In fact, wouldn’t you think that the reconciliation of Raven and Spider would anger the Cabal, and make them even more determined to achieve their goal?

The first possibility is that as a result of Raven and Spider reconciling, the Cabal is angered and becomes more determined.  Whoever the traitor is, most likely an important character from Ravenwood or the Arcanum, they will be in league with the Cabal. Either they were in league all along, or the Cabal turns them to their side. The Cabal will use the traitor to try and achieve their ends. How well does this possibility abide by the rules? Well, it violates Rule Three and Rule Four.

The second possibility is that Bartleby is the traitor. Bartleby being the traitor doesn’t violate Rule Three since Bartleby wouldn’t be challenged by anyone of equal divinity like was the case with Raven and Spider, however, it does violate Rule Four. Plus, Bartleby has no motive to betray us.

Nihilism Interpretation

I’ve been thinking about philosophy a lot recently. One day I thought of an interpretation of Sybil’s prophecy that makes the most sense. Nihilism comes from the Latin word “nihil”, meaning “nothing”.

So what if the “Nothing” Sybil warned us about is referring to nihilism? Well, what even is nihilism?

“That there is no truth, that there is no absolute state of affairs—no thing-in-itself. This alone is nihilism, and of the most extreme kind.”

–Friedrich Nietzsche

Nihilism asserts that there is nothing beyond our direct experience: no truth, no God, no meaning, no morality, no consciousness, and so on. However, this interpretation is incomplete, and it needs something to build on top of it.

Neverending Story Interpretation

Sarai Willowbreeze proposed this interpretation.  The Neverending Story is both a book and a film, and it follows a mystical world which is under a threat from a dark force called the “Nothing” that is threatening to engulf it.  KingsIsle obviously likes to make references, so the Fourth Arc taking inspiration from The Neverending Story makes sense.

AwesomeTheSauce pointed out in a video that the Third Arc takes inspiration from the Earthsea Cycle book series. One comment on that video pointed out that Mirage takes inspiration from the book Dune. Lastly, it is evident that Empyrea takes inspiration from Star Trek.

This interpretation successfully builds onto the Nihilism Interpretation. In fact, the Nothing in The Neverending Story is a metaphor for nihilism. Here is a quote from the Wikipedia page of The Neverending Story:

We’re making progress, but this interpretation is also incomplete. We have yet to know how it fulfills Rule Two and Rule Three.

The Theory

Meaning is incredibly important. Meaning is what gives us a reason to live. Meaning is how we derive our happiness. This is why nihilism is so destructive. The nihilist has no reason to live, and no way to derive happiness. Doesn’t that sound like torture? If you were experiencing nihilism, would you not prefer destruction? Clearly, the threat of nihilism is worse than the threat of the Spiral being destroyed.

How can The Neverending Story Interpretation fulfill Rule Two?

To answer this, we must recall the events of Briskbreeze Tower.  The story began when Sergeant Muldoon asked for our help in finding Lieutenant Culpepper, who had gone missing.  Our search lead us to Kirby Longspear, who said that Culpepper was investigating the presence of Undead in Colossus Boulevard.  Kirby then told us that Culpepper went into Briskbreeze Tower after hearing there was Undead in there.  AwesomeTheSauce can take it from here.

All the threats we have faced so far have come from inside the Spiral. However, the Nothing, by necessity, must come from outside the Spiral. We don’t see any traces of it inside the Spiral anyway. AwesomeTheSauce mentioned in another video that he thinks Sybil’s prophecy and Orrick’s prophecy are connected, and I agree.

Furthermore, in the Briskbreeze Tower video, AwesomeTheSauce points out that the Arcanum is outside the Spiral and brings to our attention the black hole that we see from the Arcanum.

What else could this black hole be besides the Nothing from the Neverending Story?

So again, how can the Neverending Story Interpretation fulfill Rule Two?

Well, as I said earlier, the Cabal will undoubtedly be involved in the Fourth Arc. I suspect that as a result of Raven and Spider reconciling, the Cabal will be angered and become more determined to achieve their ends. Because of this, the Cabal will somehow be responsible for unleashing the Nothing onto the Spiral.

If this is the case, it would suggest that Orrick Nightglider is a member of the Cabal.  If Sybil’s prophecy and Orrick’s prophecy are connected, then Orrick has been planning to unleash the Nothing onto the Spiral for ages, either because he wants vengeance for something, or he is experiencing nihilism and wants the whole Spiral to suffer as he does. 

This means he probably would have infiltrated the Cabal in hopes of eventually influencing them to help him unleash the Nothing.  If this is the case, it’s possible that the bone key he drops in Briskbreeze Tower will be the key we use to unlock the Cabal Room in the Arcanum.

Additionally, there is a book called the Lathe of Heaven.  A side quest in Empyrea suggests that the Fourth Arc will also draw inspiration from this book.  The plot of the book is about someone who can dream things into reality, so it’s easy to see how this could be integrated with The Neverending Story.   

AwesomeTheSauce was the one who brought this to my attention in the following video:

In conclusion, my prediction is that the threat we will face in the Fourth Arc is the Nothing from The Neverending Story.  Orrick Nightglider will manipulate the Cabal into helping him unleash the Nothing upon the Spiral.  As a result of the Nothing being unleashed, the residents of the Spiral will slowly lose their sense of meaning, and this will torture them.

What do you think? Does my theory make sense to you? Why or why not? Let us know in the comments below.

Fable Finder

The Celestian Orchestra

Celestia, world of the shining stars, the reflecting moon, the powerful sun -and crabs- we invite you to the recently discovered in-tact ruins of the Celestian Opera House. Archaeologists have inspected the theatre to be in safe enough condition for public entry. Our finest Marleybonian musicians have decided to hold a special performance of a collection of works held by the Archivist for hundreds of years to play for you tonight.

Main Theme

Celestia’s main theme is divided into two primary sections. These two sections highly contrast with one another, changing tonalities when going into the second section. This divide between an A and B section is called binary form. One common attribute binary form has is that the A and B section are equal in length (read: duration), as they are here.

We begin the piece off with two contrasting timbres of the low brass and flute. Instruments add in building the piece’s momentum, such as the harp, glockenspiel, and horns.

The texture becomes stable as the horns completely take over the melody and a back-beat ostinato, or repeating figure, in the strings and percussion is added.

At 00:51 seconds into the piece, the key changes into the minor mode, giving us a mysterious mood change in stark contrast to the adventurous mood in the primary section. The repetitive ascending lines in the strings give us tension, leading us upward into the mysteries. The descending eighth note line propels us forward into the next ascending row. At timestamp 1:12, the horns come in with a melody.

Each time the horns sustain a note before rhythmic trumpeting, the woodwinds play a quick descending line as counterpoint. At 1:20, the harp takes that idea and develops upon it. The harp is the main focus and the section lacks any punctuating rhythms, unlike the previous moment. Timestamp 1:25 brings back the punctuation as well as syncopates the rhythm for the thrilling tensity. Above this is the violin, borrowing from the themes of Marleybone. Using a theme to represent the people of Marleybone is a leitmotifThis makes the music coherent with the world, showing how the Marleybonians have brought their musical voice and how it effects the world of Celestia.

Mysterious Theme I

Like sea life swimming in and out of the corals in a reef, the orchestral texture solemnly and constantly shifts, phasing in and out. The high piano keys and harp accompany the echoing solo, like a sea creature seeing another silhouette off  in the distance.

The texture shifts at 00:26 seconds, coming in with the timpani strike. The texture solidifies to be more traditionally orchestral. The cellos play the melody with the celesta doubling. The horns play an ascending line in the space of the melody. When it repeats, the strings and trumpets take over this counterpoint. At 00:42 seconds, the horns come back in lower, playing the melody as the trumpets play the counterpoint. The trumpets then lead us into the next section with their soli.

The next section at 00:52 seconds brings in a colder texture with the piccolo, harp, and celesta. The piccolo, as the highest voice, is the most noticeable to our ears. This develops a motif in different harmonic contexts that form a melody. The harp and celesta play arpeggios along with the bassoons. The horns play to lead into the different chord changes.

The unstable harmony builds tension, leading to the climax at timestamp 1:08. The horns and choir sustain their tones, giving the orchestra a full, supported sound. The celesta doubles the melody of the horns, adding a mysterious timbre. The timpani pluck of the harp marks the end of the adventurous section and leads us back into the cloudy mystery of the harp and celesta. The celesta plays the piccolo’s melody from before, giving an eerie tone.

Mysterious Theme II

Check out Maleficent’s transcription of this piece on Musescore! 
We begin with a very light and airy texture, utilizing the smooth and cold sounds of the flutes, harp, and celesta. The flute and violin harmonize with each other as the murmuring harp supports the overlaying texture.

The flute section plays two variations on a harmonized five-note melody. At 0:12 seconds, the cello enters as the celesta continues its overlying waltz figure and the harp continues its arpeggio pattern. The slight texture change effects the mood, becoming more peaceful and melancholy than mysterious.

At 00:24 seconds, the cello’s descending figure in the melody leads to a brief stop in the harmony of the music as the suspended cymbal leads us into the next section. This technique is common in dance music, where a brief break after building tension makes us desire a resolution.

The celesta and piccolo double the melody as the violin takes over the harp’s function from before. The horns and strings sustain chords, implying the dorian mode (a specific kind of minor mode). We sway back and forth between two chords, the tonic and the major IV chord. Typically a minor iv chord, the raised scale degree in dorian gives us the unique and regal harmonic colour presented in this section.

In stark contrast, our next section has modulated to the major mode, giving it a brighter mood. The upbeat waltz pattern in the horns and strings mellows the tone. The light melody on the flute is uplifting and delicate. The music paints a picture of the fragile crumbling ruins of Celestia and the delicate breeze in the leaves of the Floating Lands.

The glissando in the celesta at 00:50 seconds leads us into the contrast of orchestration in the section. The melody is carried to the violin, still being supported by the underlying waltz figure in the horns and pizzicato strings. Timestamp 0:58 gives us a cadential point, or rest within the music. The low strings and brass come together to play a descending figure, which as the tonic gets lower in the orchestra, the more at rest we are with it and the closer to the end we seem to become. Like Tchaikovsky’s The Nutcracker, the piece ends with a quick sixteenth note run in the celesta.

Calling back to the themes of Marleybone again, we are given a Mary Poppins-like texture with quick descending arpeggios in the celesta. The low strings and brass begin the melody as both sections high ends add in gradually, building the tension. Mysteriously, we end quietly with the celesta and violin in a cute and peaceful duet, calling back to the cello solo at the beginning. The flute ends the piece on the leading tone, which when harmonized with the pizzicato strings, implies the lydian mode, a mysterious and airy major mode.

Tribal Theme

The Tribal theme begins aggressively with a swift tam-tam (gong) strike and men’s choir. Hand drums accompany the singers primitive-sounding vocals in the intrada leading into the next section. Percussion of many colors adds vibrance to the flute’s main melodic line 00:11 seconds into the piece.

Timbres such as the marimba and xylophone are essential to the tropical sound of the piece. The bassoon takes over the flute’s melody in its mid-high register 00:21 seconds in. The xylo adds in, like a bandage to patch the transition.

At 00:34 seconds, the texture becomes more mysterious with a strong modal shift occurring at the same time. The flute takes over the melody, bringing a colder texture upfront in the ensemble. The harp has a glissando over a sustained chord in the vibraphone.

We come back into our happy texture at 00:38 seconds with harmonizing high strings and xylophone doubling a melodic line. As they fade out, the bass drum strikes, empowering the marimba’s ascending arpeggiated line.

Timestamp 00:43 brings us a hefty cadence point into the next climactic section. We see the return of the tribal voices in counterpoint of the strings and mallet percussion. In other words, the voices sing where the other melody’s voice is sustained on a note.

This thick orchestral texture relaxes into a flute solo at 00:56 seconds. This time, the melodic line is played in a lower register, bringing a sense of familiarity, but closure to the piece. Most pieces feel resolved in lower registers and more tense in the higher ones and this piece exemplifies that.

Finale Theme

The crash in the percussion initiates the orchestra. The woodwinds scramble together from motifs, or recognizable fragments in development. This continues as an ostinato as the low brass comes in with a simple melody. The high brass comes in at 00:19 seconds, continuing where the low brass left off. This melody introduces the main thematic material used in the piece, categorized by its short-long-short-long rhythm. This section ends with a bass drum hit as the ensemble plays a dramatic chord.

The suspended cymbal leads us into the next section at 00:32 as the rhythm changes into a triple meter. The woodwinds’ downbeat is emphasized more than the other two beats in each measure, giving the feeling of a waltz. The melody stated beforehand in the brass develops with this meter change. The short-long-short-long pattern shortens the longer note by a single beat so that the long note plays on each downbeat. As this occurs, the horns and trumpets have a call-and-response pattern with each other. As one group sustains a note in their melody, the other repeats it in the meantime. The melody is given to the flute, continuing the same rhythmic pattern

The melody climaxes at 00:52 seconds, as the timpani strikes. The high strings emphasize the downbeat of the melody the as the brass plays. All the while, the harp plays quick, descending arpeggiated runs while the flute rocks back and forth between notes.

In the transition section at 1:15, the flute and the harp duo together to create a mysterious ambiance before jumping right into the grand finale of the piece at timestamp 1:29. In the meantime, the mysterious mood distracts us from the fact that the rhythm is changing to duple meter, giving us four beats per measure. In this section, we see the full development from the short-long-short-long motif become short-long-short-up-down-up-down.

Thank you, Starlights, for joining me on this musical adventure through the music of Celestia.

Disclaimer:

All transcriptions of the music are from the original/classic mode music scrolls. Not all of my transcriptions are 100% accurate, but they are close and the rhythm is properly notated.

A Tale of Three Scions

Hello, I’m Fable Finder. In the middle of Empyrea, the game reveals that the main hero of our story is the Scion of Bartleby. What does this mean? On the surface, it appears that this is simply a replay of the Chosen One trope. This is true, but it’s not the entire story. When you critically examine all the facts that we have been given, we are left with more questions than answers. Let’s start with what we know.

Main Hero’s Backstory

In the video “Making of Wizard101 ~ Part 4” published on KingsIsle’s channel in 2010, the person who was the Creative Director at the time, Jeffrey Todd Coleman said: “When I was a kid, all I wanted to do was climb under my bed or in the back of my closet and find a portal to a magical world. I think that’s pretty much what every kid wants, and it’s effectively what we’ve created.”


It’s clear that Coleman’s idea was implemented into the game. For example, during character creation, Merle Ambrose says the main hero is from a different realm. More recently, during the quest “Only Mostly Dead”, Zander says the main hero is from Earth.

We can infer from this, that the main hero started off as a normal kid on Earth. Merle Ambrose was obviously casting some sort of realm-searching spell to find someone of great potential. For some reason, Merle’s spell chose the main hero, and created a portal somewhere in their house. Then the events of the game began.

This leaves us with some questions. Why did Merle’s spell choose the main hero? Why didn’t the spell choose someone who was already a Wizard, and even better a powerful one? Why did Merle Ambrose even need to find a Wizard? There’s tons of experienced Wizards all around the Spiral, couldn’t Merle Ambrose have gathered some together and chased down Malistaire?

Scion of Bartleby Lore

Let’s see what Merle Ambrose has to say about the Scion of Bartleby.

If a test is required, that means nobody knows who the Scion of Bartleby is, not even Bartleby himself. So what determines who is the Scion of Bartleby? Bartleby couldn’t have chosen his Scion, because then he wouldn’t have needed a test. But, why would the Scion be some random kid from Earth? There is undoubtedly more to this story that we don’t know.

The Answer

What does Scion even mean, anyway? Let’s take a look at Merriam Webster.

We can tell from this definition that this word was chosen by KingsIsle with careful thought. After all, it’s plant terminology, and Bartleby is a tree, so this definition certainly applies here. And that sounds a lot like what Mellori is, doesn’t it? Mellori was born when Raven broke off her love for Spider. This would make Mellori a detached, living portion of Raven, or in other words, the Scion of Raven.

If you are a child of an entity, you were simply born of them. Scions, being a detached, living portion of an entity, are also born of that entity. So not only is the main hero the Scion of Bartleby, they are also the child of Bartleby. Mellori is the same way, but for Raven. This answers all the questions we had asked previously, but there is one more. Mellori is the Scion of Raven because she is Raven’s love for Spider. So what makes the main hero the Scion of Bartleby? This is where we enter the territory of speculation, but I would speculate that the main hero is Bartleby’s hope. When the titans broke up the First World, he probably lost hope. And Bartleby was pretty melancholy during the first and second arcs. He only started being more positive when he found out that the main hero is his Scion.

What about Zander saying the main hero is from Earth? About that, it seems odd to me that Spiral beings would be unable to enter the Astral plane, but for some reason Earthly beings, who are non-magical, would be able to. Zander clearly has special knowledge somehow, so he probably knows the main hero’s true origin story. I suspect the real reason that the main hero was able to enter the Astral plane is because they are the Scion of Bartleby, and Zander made up a fake reason because he wanted to keep the knowledge of the main hero’s true origin story from the rest of the scholars. However, we can tell from the tutorial that the main hero did start off in another realm. The main hero’s being could have simply manifested on Earth when they detached from Bartleby.

What about Spider, does he have a Scion? Let’s ask him.

Pay attention to the wording. Spider said Bat was his only dream. A dream is a happy thing, and Spider’s only dream ever created Bat. Based on this, it’s reasonable to assume that Bat is the Scion of Spider, specifically Spider’s happiness.

It is unlikely that Rat and Scorpion are Scions. When a Scion is created, the entity loses something. Raven lost her love for Spider when Mellori was created. Nothing about the personalities of Rat and Scorpion suggest that Spider lost anything from their creation. Rat and Scorpion are bitter and hateful, and so was Spider. Second, Rat and Scorpion were created in Spider’s nightmares, and Spider having nightmares was not a unique occurrence. Again I stress that Bat is unique because he was born of Spider’s only dream.

In conclusion, there are three Scions. The main hero is the child and Scion of Bartleby, Mellori is the child and Scion of Raven, and Bat is the child and Scion of Spider. This also explains how they were able to combine all their essences to create that overpowered Divine Paradox transformation that the main hero transformed into to defeat the Aethyr Titan. The Divine Paradox transformation is the unification of all three Scions.

What do you think? Is Bat really the Scion of Spider? What does determine who becomes the Scion of Bartleby? We want to hear your theories in the comments below!

Shoutout to Saffron Life for helping me synthesize this theory.

Fable Finder

Superstacking Medium Plants

Gardening is such an amazing way of  getting Mega Snacks, TC’s, reagents and of course GOLD!  Making the most of your gardens space is very important. Here is an  easy way to have a 64 medium plant  garden, and it’s basically error free.  When completed, it will be 4 plants high, 4 plants wide, and 4 plants deep.

Start with the Basics

The best way to get started is to  have a castle that is considered a plant like. Currently, the castles that all plants like are:

Botanical Gardens – The Botanical Gardens are available with the Evergreen Bundle Gift Card (Sometimes available during special events, in the Crowns shop for 12,500 Crowns)

Red Barn Farm – This castle is available from the crowns shop for 12,500 Crowns or 125,000 Gold

Everafter Village – This castle is available in the Fantastic Fairytale Bundle.  It can be found at Gamestop online and in stores for $39.00

You’ve bought your castle, so now it’s time to get the supplies you’ll need to get your stacked garden, “off the ground”…..pun intended! These are the items I use, most of  which can be found at the Bazaar.

Items for Stacking

12 Crates:
The preferred ones are:
*Crate of jellybeans
*Crate of hot dogs
*Crate of pudding
*Crate of pies
*Crate of ice cream
You can find crates at the Bazaar, usually costing between 300 gold and 1100 gold.  They are also available in the crown shop for 500 crowns or 2500 gold.

Dragonspyre Standard:
This can be bought from the Bazaar for 1600 gold.

Flat Wooden Platform:
You will find this item in the Crowns Shop for 350 Crowns, or 1750 gold

Stairs Castle Block:
Occasionally, stairs can be found at Bazaar for 75-125 gold
They are also available to craft from Lloyd FallingWater in the Shopping District. The recipe costs 2000 Gold for a narrow one or 10,000 gold for a wide one.

Tatami Mat:
The Tatami Mat is sold by Zhi Lan, Mooshu Housing Shop. The vendor price is 350 gold. 

Helpful Extras

Last, but not least, a little bit of research has to be done so you will know what your plants will like. In this example, I’ll be planting Trumpet Vines. Try to get as many of the likes as you  can.  The following items are the likes for Trumpet Vines. 

Your plants likes may differ from this list.

Deadly Helephant Ears
Decorative Gong
Helephant Ears
Gong of the Oni
King Parsley
Pixie
Tropical Garden Gnome
Ultra Helephant Ears,

After collecting all your needed items, it’s time to get started!  This video will take you through every step to creating your own 64 medium plant garden. I hope this helps you maximize your rewards from gardening!

These steps should get you on your way to maximizing your gardening space.  I’d love to hear what medium size plants you decided to use and the likes you added to speed up your harvest! Let me know in the comments.

Keep your eyes open for the next article where I will show you how to easily get 50+ large plants in one compact area.

Happy Gardening!

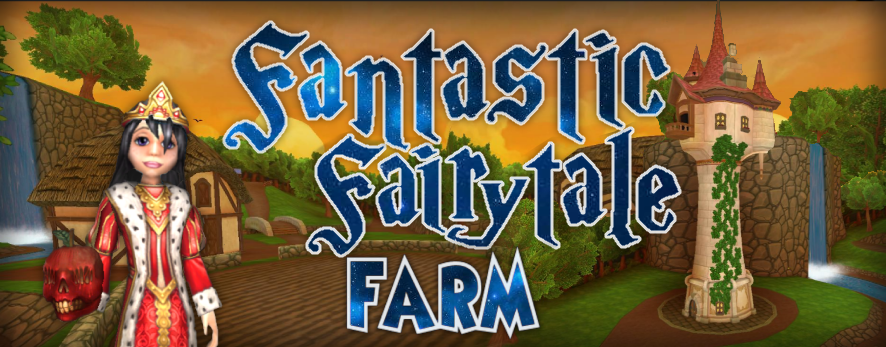
Happily Everafter

This incredible new castle is by far one of my favorites! The entire estate is full of fairytales and fables, from Mother Goose to The Brothers Grimm. What truly caught my attention was the morals behind the fairytales represented. I don’t know if KingIsle had an ulterior motive behind their selection of fables, but if they did…..BRAVO! Each area of this home has positive morals hidden within the fable itself.

The Land of Fairytales and Fables

As we arrive through the Spiral Door, we see many pathways leading from a central farmhouse.  The central farmhouse also has a small barn with a secret tunnel that leads to the main house. There are multiple gardening areas all around the central farmhouse. As a bonus, this house is a like for your plants! There is also a lovely lake with a stream for fishing. I haven’t quite figured out what fairytale the main farmhouse represents. Maybe Jack and the Beanstalk? What do you think it could be? I would love to hear your ideas in the comments below!

The first house we’ll visit represents Mother Goose and The Old Woman who lived in a Shoe. It’s a multi-level house, 4 stories inside, with quaint details. The last 2 stories are reached by climbing a ladder, how fun! The rooms inside are smallish, but have plenty of space for decorating in your style.

In the Old Woman and the Shoe, there is a woman who has so many children she doesn’t know what to do! The moral of this story is, listen to your parents and have good behavior.

From there we go to visit the 3 Little Pigs, a fable originally published in 1886. You’ll find a straw house, a house of twigs, and a brick house. These are cute little 1 room shacks.  To the left of them is a path that when followed takes you through a cave to the next house.

Just as the 3 Little Pigs worked hard to accomplish their dreams, so can you!  The moral of this story is you can accomplish anything with hard work and dedication.

The next house we come to is the witches’ house from the Brothers Grimm tale, Hansel and Gretel. This is a fabulous rendition of the enticing candy house. The entire structure is covered in sweet treats that sparkle in the sunlight. The interior has 2 rooms that are vibrantly colored, matching the outside. If you go through the side of the large tree stump, it takes you underground, coming out int the main area of the castle.

Hansel and Gretel got into loads of trouble because they didn’t listen to their parents and trusted someone they didn’t know. The moral of this story is to always listen to your parents and don’t trust strangers.

After climbing a hill, we find ourselves at a wishing well. This well has a daily gift for your Wizard! On this occasion I recieved gold and a pet snack. Climbing a hill to a well is from an old 18th century nursery rhyme, Jack and Jill.

Jack was in such a hurry that he forgot to stay safe and be careful.  The moral in this story is to avoid being hasty and do things carefully.

Rising to the sky we have the Brothers Grimm again, this time with Rapunzels Tower. This whimsical structure has 3 stories with a winding walkway that circles around the main floors.

Rapunzel dreamed of getting out of her tower and patiently waited for that wonderful day to arrive. The moral of this story is to never give up on your hopes and dreams!

There is a hidden door behind the waterfall that takes you to the lower level of Rapunzels Tower!

The mount that comes with the bundle is none other than the Pumpkin Carriage from Cinderella! This is another great multi-person mount from KingsIsle, this one with stunning details.

Cinderella had a hard life but kept a happy heart no matter what. The moral in this story is to be kind, forgive others, and don’t let bad things ruin a good heart.

The pet that comes with this bundle is the adorable, or should I say “toadorable” Noble Toad!  As his crown shows, he comes from a long line of Noble Toads!

Gear fit for a King or Queen

If you’ve ever wanted to have a regal look, this is the gear for you. The stats won’t replace your dungeon farmed gear, but it will make an amazing stitch!

This wand is utterly amazing, so very eerie!  It’s called Poison Apple.  Once again, the stats are not the greatest but it would be another awesome stitch. Does anyone remember where a poison apple comes from? That’s right, Snow White!  

Snow White was envied for her inner beauty as much as for her outer beauty.  Her good-hearted trust in everyone caused problems for her.  The moral to this story is that real beauty comes from within, and once again don’t trust strangers.

KingsIsle has outdone themselves with this bundle!  Not only is it an adorable castle with many features, but it also has wonderful morals for the children of the game. I hope you enjoyed this walkthrough of the Fantastic Fairytale Farm! If you see any other fairytales or fables represented that I missed, let us know in the comments below! Until next time, may all your dreams come true!

Facebook
Twitter
Tumblr

Visionary Storm 100% Critical and Max Damage Guide

Ah the Storm school! The hardest hitting school and the easiest school to hit 100% critical. It is also the easiest school to balance super high damage with super high critical. Storm eclipses the other schools in that department but that’s not surprising since that’s what storm is all about, hitting high while trying not to die very quickly (intended shade). Currently, there are many methods to gain high damage and max critical with this school. We’ll explore the one that gives the highest damage while maintaining 100% critical. The current highest damage storm can achieve with 100% critical is 165% damage. The critical amount goes to 842 which is 100%.


Benefits

The Storm school is the hardest hitting school in the game. This means that they can end battles really fast. They have the highest critical in the game as well as the highest pierce. Their attacks are pretty deadly if they hit you directly. They also have quite a few spells that remove blades which is pretty cool, unless you’re fighting against one of course.

Problems

With this gear build, there are just a few problems you will run into. I would say not much is sacrificed compared to the other schools since this area is Storm’s specialty. If you run this gear you will have to sacrifice pierce, and a little bit of resist but you should be fine. Some schools will have to give up these factors along with accuracy but with this build, Storm usually maintains high accuracy. The other problem that you will encounter, which is not just native to this build, is health. Storm is notorious for their low health so this gear setup just reflects that.

What you’ll need

Robe: Malistaire’s Cloak of Flux

Hat: Stormy Paradox Conical

Boots: Stormy Paradox Boots

Wand: Sky Captain’s Boarding Hook

Pet: Triple damage Double critical pet with a Cautious Jewel

Athame: Aphrodite’s Storm of Thorns (with two (2) +18 critical Amethyst jewels)

Ring: Stormy Paradox Ring (With one (1) +18 critical Amethyst jewel)

Amulet: Flygob’s Medallion

Mount: Storm Ghulture

Deck: Stormy Paradox Deck

Total Damage: 165%
Total Critical: 842 (100%)

Storm Gear Setup

Calculations


Alternative Gear/Recommendations

So with the following gear on, Storm usually maintains 165% damage with 100% critical. The alternative gear will be shown at the end. You can also use the Lady of Spider’s Lure Amulet from Morganthe instead of the Flygob’s Medallion which will give you two extra blades.


What you’ll need

Robe: Malistaire’s Cloak of Flux

Hat: Stormy Paradox Conical

Boots: Stormy Paradox Boots

Wand: Wysteria Warrior’s Longsword (level 130+)

Pet: Triple damage Triple Critical pet

Athame: Aphrodite’s Storm of Thorns (with two (2) +18 critical Amethyst jewels)

Ring: Stormy Paradox Ring (With one (1) +18 critical Amethyst jewel)

Amulet: Flygob’s Medallion

Mount: Storm Ghulture

Deck: Stormy Paradox Deck

Total Damage: 160%
Total Critical: 838 (100%)

Storm Gear Setup

Calculations

Gear Calculations

Thanks for reading my guide on achieving 100% Storm critical in Wizard101. I hope it will help your Storm Wizard hit like a Hurricane as you explore the Spiral with your friends from Ravenwood Academy.

Check out the rest of our Gear Guides, we have a guide for every school at Ravenwood Academy!

PS. Credit to AtmoPlex on twitter for the wand screenshot!

Crafting101 – Death Spells

Welcome to the Death edition of my crafting series. I’ll walk you through the basics of crafting the Death spells in Wizard101. These are the spells dropped by Loremaster! Unfortunately, Headless Horseman will be omitted from this list. Maybe someday it’ll be a spell we can craft!

Deer Knight and Lord of Night’s Recipe Location

Deer Knight Recipe

Deer Knight is a hit-all Death spell that requires 5 pips. It has a base damage of 300 + another 270 over three rounds! This spell is a must for any Death Wizard. It has uses for both PvE and PvP players. The Deer Knight recipe can be bought for 60,000 gold from Grady in Avalon.

You will need the following Treasure Cards and Reagents to craft Deer Knight.
6 – Deer Knight Treasure Cards
100 – Perfect Onyx
200 – Ghost Fire
100 – Blood Moss
100 – Bone
50 – Spring
50 – Sunstone
12 – Amber

Lord of Night Recipe

Lord Of Night is another 5-pip Death damage spell. This spell gives 50% of the damage back to the caster in health! It also gives the enemy a 25% Infection as a trap. You can buy the Lord of Night recipe from Grady for 60,000 gold.

You will need the following Treasure Cards and Reagents to craft Lord of Night.
6 – Lord Of Night Treasure Cards
100 – Perfect Onyx
200 – Ghost Fire
50 – Nightshade
25 – Turquoise 
50 – Scrap Iron
25 – Sunstone 
12 – Amber

Where to Get the Reagents

Perfect Onyx: You can buy Perfect Onyx for 100 gold a piece in the Celestia Base Camp from the vendor Archytas.

Ghost Fire: You can buy Ghost Fire for 100 gold a piece in the Atheneum. Zolton Nightstone in Dragonspyre is the reagent vendor I prefer.

Blood Moss: I find that the easiest way to get Blood Moss is by transmuting the reagent. You can buy the transmute Blood Moss recipe from Avery Templeton in the Celestia Base Camp for 400 gold. It requires 15 Red Mandrake to transmute one Blood Moss. 

Bone: You can get Bone from Elik Silverfist in the Bazaar.

Spring: I find that the best place to get Spring is in Marleybone. It can be harvested with Scrap Iron as a rare drop.

Sunstone: You can buy Sunstone from Diego The Duelmaster in Unicorn Way for 200 Arena Tickets. You can also buy the transmute Sunstone recipe from Avery Templeton in the Celestia Base Camp. If you are lucky, you might even find Sunstone in the Bazaar. 

Amber: Amber is by far the most difficult item to get on this list. One of the most popular places to get Amber is by farming Gladiator Dimachaerus in Mount Olympus in Aquila.  

Nightshade: In my opinion, the easiest way to get Nightshade is to buy it from Diego The Duelmaster for 175 Arena Tickets. You can find Diego in Unicorn Way. You can also buy the transmute recipe from Avery Templeton in the Celestia Base Camp for 200 gold.

Turquoise: You can buy Turquoise from Elik Silverfist in the Bazaar in Olde Town.

Deer Knight and Lord Of Night Treasure Cards: The best place to get both of these treasure cards is from Elik Silverfist from the Bazaar in Olde Town.

Thanks for crafting your Death spells with Ravenwood Academy! What was the hardest reagent for you to find? Which was the easiest? Let us know in the comments below.