Member Benefit Tier List!

Everyone loves a good old-fashioned tier list!  Everyone loves Wizard101 member benefits! Why not combine the two and create our very own Member Benefit Tier List!

I will list all the member benefits under a category, starting at being the worst and finishing in the S tier being the best. Please note that these tiers are based on opinion only and are not fact. You may find that you love Double Animus and don’t care for Double pet XP. Let us know your thoughts in the comments below!

The D Tier

Double Monstrology Exp and Animus
Daily Assignment and Daily PvP Assignment Boost

I know Monstrology has its fans, including myself. But most of the players I have spoken with just aren’t that into it.  

As for the daily assignment boosts,  to me this is be the least useful of the bunch. I was only able to complete a few assignments within the time given, limiting the benefit from it significantly.

The C Tier

Free Chest Re-Roll
Training Point Buy Back

These are both nice benefits but they have some problems restricting their potential! First off, although this benefit can be useful for newer players it’s rare that you would want or need to buy back your training points once you have gained a better understanding of the game. This makes this benefit far more useful for new players than more seasoned wizards who have little need of it.  

The chest re-roll is limited to one re-roll per boss each day. Making farming a little nicer for one run but still not providing an amazing benefit.

The B Tier

Zero Energy Fishing
Double Reagents and Unlimited Crafting

This member benefit definitely has its perks. Whether you’re trying to level up, catch new fish, find a rare wand or even a new permanent mount to add to your collection, this benefit lets you go wild with lures!  

While fishing can seem boring for some, others find it to be a relaxing change from the usual game play. The hunt and grind for what you want is always worth it when you finally get it, and fishing is no exception since it offers some great rewards. If you haven’t tried fishing yet you may not find this benefit to be very exciting, but anyone who’s fished before will understand just how good unlimited fishing is!

Double reagents are just amazing. Every reagent you collect by gardening, gathering or fighting is doubled. Always paired with unlimited crafting, there is no cool down time when you craft items. With no timers, you can craft to your heart’s content whilst doubling your chances of getting some of those pesky, harder to get reagents!

The A Tier

Double Pet xp

Everyone loves double pet experience. It’s fortunately a common benefit, and everyone rushes to the Pet Pavilion to train up their pets which we all know will inevitably fail and leave us crying ourselves to sleep… no? Just me? With double pet XP every game you play or snack you feed to your pet gives twice the benefit that it would have normally. So, a Fancy Yogurt that would give your pet 50 XP will give you 100 XP during this benefit. Almost enough to level to teen in one snack! Even gold bought snacks like Shanta Pudding give significant boosts to your pets XP during this reward.

Either way, we all know and love Double Pet XP and we’re all praying it doesn’t go anywhere, anytime soon! 

The S Tier

Double Gardening Rewards

Welcome to the crème de la crème! This is undoubtedly the best and tragically the rarest of all the member benefits. We get this gem a few times a year and boy do we capitalize!

Whether it’s Couch Potatoes, Evil Magma Peas, King Parsley or Pink Dandelions, you will double every single seed, snack, reagent or housing item that your garden drops during this reward. 

_____________________________________________________________________________________________

So that was my tier list of all the eight current member benefits available in Wizard101! Let us know in the comments if you agree!

Catching the Kiliman Copperleaf Doodlefish

Every Monday morning the weekly tournament fish changes. In this article, I will share my experiences with the fantastic hobby of tournament fishing!

Kiliman Copperleaf Doodlefish

Life School | Rank 2 | Common /Regular |1500 XP

Αverage sale price in gold: 700 each

Used in recipe:Pet Bread Crumb

Ingredients:

1 Merle Doodlefish
1 Satyr Doodlefish
1 Zeus Doodlefish
1 Pacal Doodlefish
1 Goliath Doodlefish
1 Kiliman Copperleaf Doodlefish
1 Nalia DuneStrider Doodlefish
1 Flytrap Doodlefish

Vendor:
Jackie Whisperflame/Wizard City – Pet Pavilion – West Ende Girls Snack Shop  (5,000 Gold)

Limits:

Small Fry: <10

Whopper: >40

Fish Location:

Housing Items:
The Sun Palace

How to catch a Whopper:

In the same area, the Sumo Koi fish is available to be caught. It is the same rank, same school but different size in whopper. The Kiliman Copperleaf Doodlefish‘s shadow in the water is 40 in length for a whopper and the Sumo Koi’s shadow is 35 in length. Also, the Doodlefishes always swim faster than other fishes.

How to find this fish:

  1. Common Vitality Lure/ Winnow Rank 3 Fish/ Reveal Large Fish
  2.  If no fish are affected: Summon Fish and repeat
  3.  If a fish is revealed: Charm Fish / Minor Vitality Lure and catch it.

Advice:

The Sun Place has two ponds that link together for the fishing spells. So, it is unnecessary to repeat the spells when you go inside in the second pond.


The first 3 winners will get tournament tickets:

First place: 120 tickets
Second place: 50 tickets
Third place: 20 tickets

The Tournament end on the 17/12/18

Good Luck!

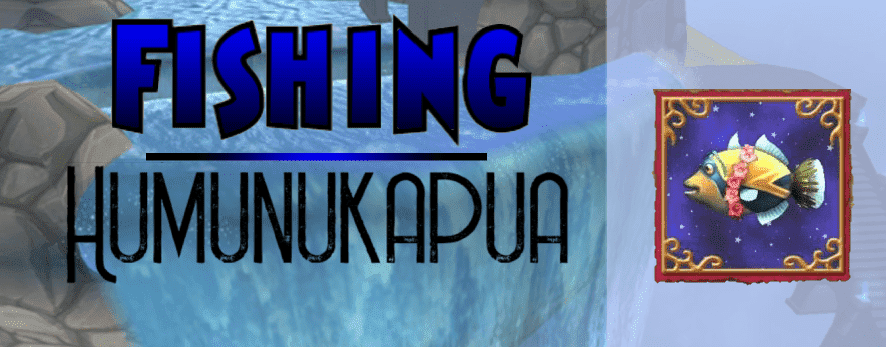
Catching the Humunukapua

Every Monday morning, the weekly tournament fish changes. In this article, I’m going to share my experience with the fantastic hobby of tournament fishing!

Humunukapua

School Life | Rank 3 | Common/Regular |1500 XP
No used in any recipes
Αverage sale price in gold: 1300 each

Limits:

Small Fry: <15
Whopper: >45
 

Fish Location In order:

Celestia/Celestia Base Camp/The Floating Land
 
Housing Items:
Fantastic Voyage Expedition
 

How to catch a Whopper:

The best place is the Fantastic Voyage Expedition if you have access to it. The Humunukapua is one of 2 life fish. The other being the Mistletoe Angler, although this is a seasonal fish which only appears during the Yuletide season and is a Rank 1 fish.
 

How to find this fish:

1. Reveal Large Fish / Reveal Fish School
2. If no fish are affected: Summon Fish and repeat
3. If a fish is revealed: Reveal Rank 1 fish
4. If no fish are affected: Common Vitality Lure and catch it
 
The first 3 winners will get tournament tickets:
First place: 120 tickets
Second place: 50 tickets
Third place: 20 tickets
 
The Tournament end on the 10/11/18
 
Good luck!

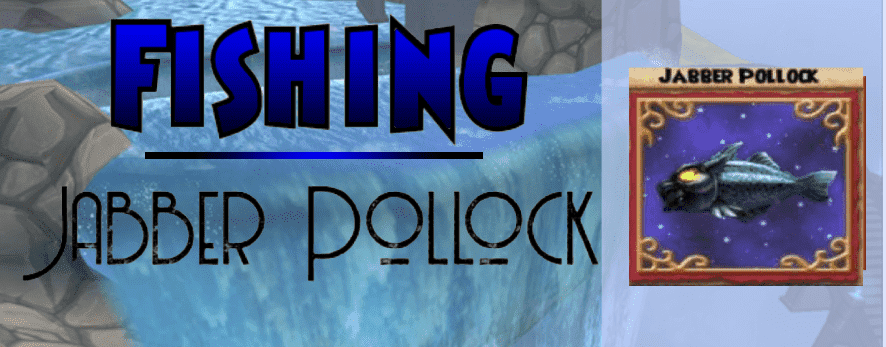
Catching the Jabber Pollock

Every Monday morning the weekly tournament fish changes. There are fishing secrets I can tell you. I want to share with you my experience in the fantastic world of wizard101 tournament fishing!

This week we have the Jabber Pollock:

School Myth | Rank 2 | Common/Regular | 1400 XP
 
Limits:
Small Fry < 15
Whopper > 25
 
Fish Location in order:
Avalon/High Road/ Poisoned Well
 
No used in any recipes
 
Αverage sale price in gold:
500 each
 

How to catch a Whopper

The only place we can find it is the dungeon: Poisoned Well. Be careful, because you must finish the battle first. So prepare your gear or your deck for a fight before you go in. Once you get to it, Jabber Pollok is the only myth school fish in the pond.


How to find this fish in order

1. Reveal Fish School/Reveal Large Fish

2. If no fish are affected Summon Fish and repeat
3. If a fish is revealed – Minor Fable Lure or / Common Fable Lure and catch it.

The first 3 winners will get tournament tickets:
First place: 120 tickets
Second place: 50 tickets
Third place: 20 tickets
 
The tournament end in 19/11/18
Good luck!

Polarian Shipwreck

Are you ready to take on the next challenge? Is all the equipment there?
We need your valuable help, time, patience and screenshots!
 

I will continue with the Polarian Shipwreck

This is what’s been confirmed or not yet by Wiki and the Housing Item Identifier or other sources.
 

Battle Narwhal

 
Wiki: Verified
Housing Item Identifier: Verified


Proper Penguin

Wiki: Verified
Housing Item Identifier: Verified


Polarian Explorer’s Pickaxe

Wiki: Not Verified yet
Housing Item Identifier:
Currently, it hasn’t been found.


Polarian Explorer’s

Wiki : Not Verified
Housing Item Identifier: Gear not Verified, shows only the recipe for the mannequin.
Others sources: Not verified as of now.
 

Advice

The Castle contains 4 ponds that are linked together.
The spells will apply to both ponds, so there’s no need to repeat them.
The fishes of this Castle are mostly from the ice school, so use Winnow Ice Fish or an ice lure!
Winnow ice fish can help too if you use the Buoy Chests 1 spell.
The Napoleguin Doodlefish, Ice school, rank 2 is the doodle of this Castle.
 

Secret Pond

At a lower point on the ice wall of the Polarian Shipwreck, there is a different color to the ice. If you walk through, you will find a hidden pond.
 
 
If you get some of the crowns gifts that have not been confirmed in the Wiki, please take a photo with the chest drop and send it to us at [email protected]
 
Thanks for visiting Ravenwood Academy
I can’t wait to see your photos and comments!
 
Thank you and Good luck!

Energy Saving Tips

Hey everyone!

Just sharing something I found out recently that might increase your energy efficiency while training pets. Let me know what you think!

First things first.....

Before I start, consider getting some energy gear if you don’t already have some! I made a guide you can check out here for some ways to get energy gear without emptying your crowns wallet.
 
Also, you should never use snacks that give less than 8-10 XP unless you are completely broke. It’s just so inefficient. Sell them if you have them, and buy the rank 7 snacks from the bazaar. (If the snack is the same school as your pet, that’s a plus too.) You may already have some rank 7+ snacks from bosses you have fought while questing or farming, so you shouldn’t always have to buy when you run out of mega snacks.

Back to the point.....

This mainly applies to people that have a limited number of mega snacks. If you have like 400+ in that tiny little backpack of yours, keep doing what you’re doing.
 
You wanna make the most out of your precious, limited supply of mega snacks?
DON’T USE THEM.
(Well, not yet at least.)
 
This may not make sense at first, but trust me here. Consider this: regardless of what level your pet is, the same snack will always give the same amount of xp.
 On the other hand, the level of your pet DOES decide how much energy you spend per game during training.
 
But why does that matter?
 
Theoretically, you’d want to spend more time at the lower levels to take advantage of the cheaper energy cost. The better snacks will level you up faster (which is the goal), but that gives you less time at the lower levels. And there’s no way using worse snacks can be more effective……right?
 
Not necessarily.
 
Still kinda confusing right? Well check out this example!
 
Imagine you begin training a pet, and have these two snacks in your backpack:
 
Fancy Yogurt (x5)
Shanta Pudding (x13)
Pet: Baby (0/125 xp)
Naturally, you want to rush straight to Teen using those Fancy Yogurts right? Well, 3 snacks will level you up. Here are the results:
 
Pet: Teen (25/250)
Games Played: 3
Energy Cost per Game: 2
***Energy Used: 6***
Remaining Snacks:
Fancy Yogurt (x2)
Shanta Pudding (x13)
Now, assuming you play 15 more pet games and used the remaining Fancy Yogurts and all the Shanta Puddings, you would just barely make it to Adult. Here are the results:
 
Pet: Adult (5/500)
Games Played: 15
Energy Cost per Game: 4
***Energy Used: 60***
Remaining Snacks: None
 
Overall to get from Baby to Adult, it took 66 energy and all 18 snacks. We used the mega snacks first, which is typically how people train their pets.
 
Now, lets see if what happens when we take the same situation, but start by feeding the Shanta Pudding instead of the Fancy Yogurt.
 
Since it only gives 10 xp, you will need all 13 snacks just to get to Teen. Results:
 
Pet: Teen (5/250)
Games Played: 13
Energy Cost per Game: 2
***Energy Used: 26***
Remaining Snacks:
Fancy Yogurt (x5)
Shanta Pudding (x0)
 
Then, you continue to Adult by using the mega snacks. Results:
 
Pet: Adult (5/500)
Games Played: 5
Energy Cost per Game: 4
***Energy Used: 20***
Remaining Snacks: None
Notice the difference yet? In both cases, you played 18 games, used 18 snacks, and ended up right at Adult.
 
The difference? Energy. In the first scenario, 66 energy total was used. But in the second scenario, only 46 energy was used.
 
You literally saved 20 energy from baby to adult just by feeding snacks in a different order.
 
The concept is pretty simple: by spending more time at lower levels, you decrease your energy usage overall. This was just an example, so I used specific snacks and only did 2 levels of training, but the same idea applies for any other situation.
 
The longer you wait to use your mega snacks, the more energy you will save in the long run.
 
Yes, it will seem like it’s taking longer at first. Even in the example, it took 10 games longer just to get to Teen. But if you’re in it for the long haul, you will appreciate the extra energy and less time spent at the higher levels.
 
Personally, I like to wait until my pet is Ancient (mainly because I have an absurd amount of the +15 xp snacks) before I start using my rank 8 and 9 snacks. If your pet fails early, you can rest easy knowing that no mega snacks were wasted. This also allows you to speed through those expensive 8-10 energy games as quickly as possible, which saves a ton of energy.
This concept does also apply during double xp, but the biggest priority in that case would be to use all of your mega snacks before the event is over. The sheer volume of double xp is worth more than saving some energy, but it is entirely possible to do both.
 
Like I mentioned at the beginning, if you just have limitless mega snacks (and I know at least a few of you gardening monsters do), then ignore this completely, as it won’t help you. The goal is to speed through the higher levels to avoid high energy costs per game; but if you can speed through the entire thing with only mega snacks, then you do you.
 
For those of you that made it this far, I appreciate you taking the time to read this post! Do you think this is effective? Leave a comment below!
 

By Community Guest Author: NinjaDudeb12

Alternatives For Energy Gear


The level 120+ Snowdrifter’s Set have the best energy bonus, but what are some other options for those that don’t enjoy spending 3 million crowns on packs?

Farm Waterworks

(Crown Shop Price: 7995 Crowns)

Luska Charmspeak & Sylster Glowworm can drop this full set of level 55+ energy gear, as well as mastery amulets and Rank 9 mega snacks.

Farm Mirror Lake

(Crown Shop Price: 8995 Crowns)

This full set of level 70+ gear drops from various parts of the dungeon. The first battle (Tse-Tse Snaketail) drops the hat, the second battle (Elephant Spectral Guardian) drops the robe, and the fourth battle (Starburst Spiders) drop the boots. Additionally, this dungeon is guaranteed to drop two Rank 8 mega snacks every run.

Farm Grand Tourney Arena

(Hoard of the Hydra Pack Price: 399 each)
The Grand Tourney Arena is a housing dungeon, which can be done without a membership. The last two battles of this dungeon can drop all 3 pieces of the Pixie’s Encanta Set, originally from the Hoard of the Hydra pack.
 
While the level of the gear drops ranges from “Any Level” to “Level 100+” based on your level and the tier of the dungeon, it’s one of the best sets of energy gear available for all levels. The Level 50+ Set is better than the one from Waterworks, and the Level 70+ Set is better than the one from Mirror Lake.

This dungeon also drops other gear and and some nice snacks. For a complete list of drops, click here.

Farm Spiral Cup Gauntlet

The Spiral Cup Gauntlet is a housing dungeon that drops the Greenwarden’s Energetic Set, which can be acquired from the Wyvern’s Hoard Pack, but unlike the previous dungeon it only drops up to “Level 90+” gear.
 
If you compare the highest level energy gear from each of these dungeons, the Level 90+ Greenwarden’s Energetic Set is slightly more favorable with 1 more energy in the robe and the boots. Despite this, more people prefer to farm Grand Tourney Arena for the additional snacks and other drops.
The picture for the Level 90+ Version is currently missing.
(Wyvern’s Hoard Pack Price: 399 each)

Farm the Telegraph Boxes

(Wyvern's Hoard Pack Price: 399 each)

The 5 B.O.X.E.S Event, each of these dungeons drop the Greenwarden’s Energetic Set at a level corresponding to its world. The highest level available as a drop is the Level 80+ version of the set, which comes from the Avalon Telegraph Box

While the Spiral Cup Gauntlet does go up to Level 90+, the Telegraph Boxes allow you to use the “team up” feature which makes it easier to farm. It is known to have much higher drop rates, but it is a seasonal event that only comes a few times a year.

PvP Tournaments for Arena Tickets

(Total Cost: 900 Arena Tickets)
PvP tournaments are not the most practical option for everyone, but if you love PvP and fishing, they will be an excellent option for you. The Seafarer’s Set is the best energy gear for low-level wizards, and it gives a nice fishing luck bonus as well.

If you are a member, you can pay using gold to enter PvP Tournaments. Once you earn enough tickets, you can buy this gear from Brandon Mistborn, a vendor in Unicorn Way right outside of the Arena. Each Tournament can get you a minimum of 250 tickets, so it shouldn’t take too long.

Get a Ring & Athame that give Energy


At level 56+, Wintertusk has craftable rings and athames that give a little energy.

Recipe Vendor: Ingulf the Grower (Vestrilund)


At level 72+, you can buy rings with a similar energy bonus at the bazaar.
 
Bazaar Price: 10,500 gold
At level 76+, various Avalon bosses drop a ring that gives more energy and high damage.
 
The pictures of the other school rings are currently missing, but here are the names:
– Sir Corwin’s Ring (Myth)
– Sir Malroy’s Seal (Death)
– Nameless Ring (Balance)
– Brisk Circle of Nodor (Ice)
– Lady of the Lake’s Signet (Life)
– Deep Water Rising Ring (Storm)


At level 100+, the Gold Skeleton Key boss in Darkmoor (Aphrodite II) drops a ring, athame, and wand that give a high energy boost, Additionally, she rewards a +1 energy jewels for tear slots.

Get a Dapper Corgi Pet with Energy Talents

The pet itself gives +8 energy, and can give a maximum total of +53 energy with both energy talents and jewel.

 
Energy talents available:
 
• Energy: (Star Jewel only) +5
• Big Energy: (Star Jewel only) +10
• Huge Energy: (Star Jewel OR Pet Talent) +15
• Ultra Energy:(Star Jewel OR Pet Talent) +20
 
The pet talents will not stack with the same jewel. The ideal combination would be to have the “Ultra Energy” and “Huge Energy” talents with a “Big Energy” jewel, as the picture shows.

The Dapper Corgi pet is not available on the Hatchmaking Kiosk; however, the talents are easily obtained from there. For example, the Pixie Queen pet (there are 2 with the same name in the kiosk, I’m referring to the one that doesn’t give a Fairy item card) has many options on the Kiosk with both energy talents, as well as some other useful utility talents. The Unicorn pet is another great option. Once you get both of the energy talents from there, find a friend to hatch a Dapper Corgi with if you want the extra +8 energy.

As for the jewels, many bosses drop them. I got mine from farming Halfang Bristlecrown while farming for gold. He drops all 4 of the energy jewels, in addition to a vast selection of other jewels, so unless you already farm him often there are probably better options.

The Handsome Formori mobs in Dun Dara, Avalon are one of the best options because they are relatively easy to defeat, you can fight more than one at a time, and they do not drop many different types of jewels.

Know any other good ways to get some energy gear? Let me know down in the comments below, or send an email to us!

Catching the Ice School of Fish

Every Monday morning the weekly tournament fish changes. There are secrets that many Wizard101 fishing lovers don’t know. I want to share my experiences with you and travel together exploring the fantastic world of wizard101 tournament fishing!

 Ice School of Fish


School Ice | Rank2 | Common/ Regular | 1,200 XP

No used in any recipes

Αverage sale price in gold:  600 each

Limits:

Small Fry <10 

Whopper >40

Locations In order:

Azteca/The Zocalo/Zultun Dock/ Cloudburst Forest

Celestia/Celestia Base Camp/ District of the Stars

Dragonspyre:

The Basilica/The Atheneum/Plaza of Conquests,

The Basilica/The Atheneum,

The Basilica/The Atheneum/The Grand Chasm 

The Basilica/The Atheneum/The Tower Archives

The best place to catch it:

Cloudburst Forest because there is no other fish of the ice school there!

How to catch a Whopper

Use the spells in order: Winnow ice fish and then Reveal Large Fish. If no Fish are affected, summon fish and repeating the 2 first step. If you see any ice fish, put ice lure 2 or 3 and try to catch it! If you can’t see anything, go to the highest point and repeat the spell. Try glancing to all destinations quickly to see if anything shows up.

The first 3 winners will get tournament tickets:
First place: 120 tickets
Second place: 50 tickets
Third place: 20 tickets
 
The tournament ends at 30/07/18

Good luck

Catching the Guard Doodlefish

Every Monday morning the weekly tournament fish changes. There are secrets that many Wizard101 fishing lovers don’t know. I want to share my experiences with you and travel together exploring the fantastic world of wizard101 tournament fishing!

 the Guard Doodlefish


School Balance | Rank 1 | Common/Regular | 1,500 XP

Limits:

Small Fry < 13 

Whopper > 40

No used in any recipes

Αverage sale price in gold: 700 each

Fish Location:

Housing Items:

Battlemage Keep
*Houses purchased through Bundles, have a unique doodlefish.

How to catch a small fry

Go to the Commons and then navigate yourself to the Castle Tours headquarters where you can find the following in Visit Castle/ top rated list. It the only Balance school fish this season in that Castle. The fish that we are looking for, the shadow in the water are 13 and less for small fry. That means we are looking for fishes that have a smaller shadow. If a lure is always 10, that fish in small fry are 1,3 less that lure. But for doodlefish those limits are relative, they are about double the size of the lure.

See an example with a guard doodlefish at 13,60 relative with the lure:

The first 3 winners will get tournament tickets:
First place: 120 tickets
Second place: 50 tickets
Third place: 20 tickets
 
The tournament ends at 06/08/18
 

Good luck!

Catching the Fish Sandwich

Every Monday morning the weekly tournament fish changes. There are secrets that many Wizard101 fishing lovers don’t know. I want to share my experiences with you and travel together exploring the fantastic world of wizard101 tournament fishing!

This week we have the Fish Sandwich:

School Myth 1 | Rank | Common/ Regular | 1,300 XP
 
Limits:
Small Fry < 10
Whopper > 29,90
 

Fish Location In order:

 
Wizard City/ The Commons/ Shopping District/ Olde Town/Cyclops Lane
 
Zafaria/Baobab Crossroads/ Baobab Market
 
Housing Items: 
Castaway’s Bungalow
Myth House
Aero Village
 
NOTE: Houses purchased through Bundles have a unique doodlefish.
 

No used in any recipes

Αverage sale price in gold: 300 each


How to catch a Whopper

The best place to try is the Castaway’s Bungalow because there aren’t any other myth fish there. If you don’t find any castle to visit, the next best location is Cyclops Lane. Check the big pond in the park, Myth rank 1.
>25 for Whopper.
 

Spells in order

  1. Winnow Myth Fish/ Reveal Large Fish
  2. If no fish are affected – Summon Fish and repeat
  3. If a fish is revealed – use Lesser Frost Lure, Minor Fable Lure or Common Fable Lure and catch it.
  4. If nothing shows or no message appears, search the pond and repeat Reveal Large Fish

Tips

The fish that we are looking for, the shadow in the water will be 30 and more for Large Fish. That means when we are looking for fish with our eye, If a lure is a 10, the Whopper Fish Sandwich is 3 times the size of the lure. To avoid catching Mythacudas, make sure the shadow is over 3 times the size of the lure and not 2.5.
 
The first 3 winners will get tournament tickets:
First place: 120 tickets
Second place: 50 tickets
Third place: 20 tickets
 
The tournament ends at 20/08/18
 

Good luck!