Storm Titan’s Trident Strategy!

Basics

The final dungeon of Part two, Storm Titan Maelstrom, is one of the hardest fights in the game.  And sadly it is also the only fight in-game that drops the new Paradox gear, the majority best offensive gear in-game!  But what if you could kill it in a few rounds without ever losing more than a few hundred hit points?  Would be nice to save yourself an hour or more wouldn’t it?

The premise of this strategy is to kill the titan by using overtime and before he kills you.  But never fear, he won’t even be able to kill you with the Bad Jujus you placed on him!  Just make sure you understand everything fully, it isn’t a super strict strategy either with a decent margin of error.

Character Roles

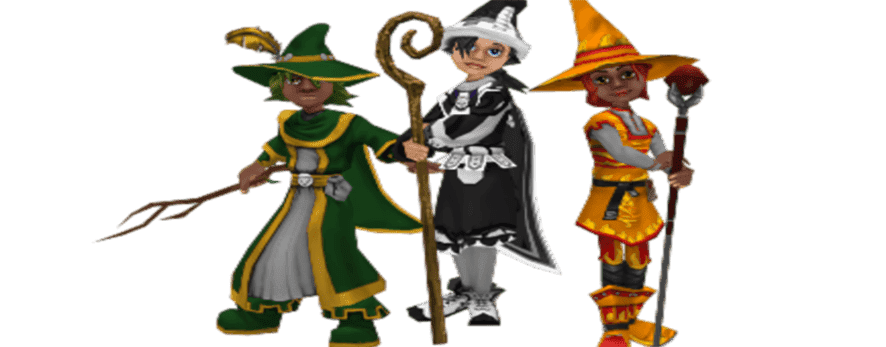
Hitter: Your hitter is going to need a very strong DOT spell.  You’re looking at Heckhound, Stormhound etc.  Perhaps even Spinysaur!

Balance: Sadly, it is very hard to pull this off without a balance.  Although it may be possible without, a Balance simply provides an unrivaled advantage.  They can set up the hitter more effectively than any other school can.

Jade Death: Again something you can’t do without.  Only a Death can cast the required Indemnity Bad Jujus required to pull it off, as Storm Titan will cleanse himself. Death is also useful for Dark Pact.

Jade (any):  This can be any school that can tank and go first.  They’ll be elemental/spiritual setting up your hitter as well as a couple other bits and bobs of support that make your life a lot easier.


The Strategy

I won’t go into the round by round specifics as you actually have a lot of flexibility with this strategy.  However, there are a couple of important points that cannot be missed.

Bubble Change:  It’s important to note that this is no longer possible.  You can’t balance dispel, meaning the bubble stays up, capping your damage before a million.

Cleanses:  Packing a minimum of 2 cleanses is a good idea.  The boss likes to use virulent plague as well as mass infection.

Juju Spam:  This is vital.  Your Death has to Indemnity Juju spam.  If you get unlucky with shadows, he will pull up his trident on 5 shadow pips.  If this is the case and he does not have 2 Jujus on him you will lose everyone but your jades, so you got to get those Jujus on!  They also stop the tempests, cheats and other hits from hurting a lot!

The DOT:  The damage over time has to do over 40K damage on every tick.  Alternatively, impact + DOT hits like Rain Of Fire can work well too.  Each hit will trigger a new phase.

Minions:  There will be one batch of minions summoned after the initial hit or first tick of the DOT.  It’s vital that they’re killed immediately, by bugs; bull etc, as they could prevent the tick from doing enough by their shield spam.

General Blading:  This isn’t too hard to understand.  You gotta blade blade blade!  All balance and hitter do is blade.  The Death should Dark Pact whenever they are able too, but prioritize the Jujus.  Your Jade is in charge of the Elemental Blades.

The Hitting Round:  The round you hit there are a couple things you HAVE to do.  It’s important that firstly your hitter actually hits.  Your balance should shatter, as it’s possible he will have either a storm or myth shield (Note:  With a fire, this isn’t necessary).  We recommend being in shrike if you’re a hitting storm, but a few well-timed prisms work well too.  Your Death is free to do whatever, but ideally uses their last or remaining Dark Pact.


Conclusions

This sounds too good to believe.  A strategy that works easily, is super fast and has a little room for error.  But we’ve got the proof.  I’ve done it over a dozen times and my friend Julie has pulled it off over 20 times already!  Big thanks to Dark Merit and James Storyshield on Discord for brainstorming and testing this strat!

So best of luck guys!  Get farming for your new Paradox Gear!

Editors Note:  The wizards over at Team ELITE also came up with this strategy. Check out their video guide to it here  https://goo.gl/kFnGU4

Empyrea P2: Test Realm

Introduction:

Welcome to Chapter Two of my Empyrea Part 2 Series!  This chapter focuses on the current state of the test realm as of 3/11/18.  As this is most likely near the end of Test Realm as a whole, and most of the big changes have been made already!

Once again this article will review information taken from the questionnaire we’ve shared out across a multitude of discord servers, so if you want to help out for the next one (Chapter 3, Live Realm) stay tuned for them!


So, we’ll cover the changes made in Test, what was good, what was bad.  And then overall conclude how we feel about the world in general, let’s get into it!


Questing

In our Expectations chapter, we covered that the overwhelming majority of the discord player base wanted a long storyline.  Nothing that only too a few hours. What we got seems to have split everyone, almost down the middle!

It’s clear to see the majority wanted a longer storyline, but nearly half are happy with the length we got.  It seems Kingsisle have succeeded here, reaching a nice middle ground.  I think the only way we could have got a better result is with a slightly longer story, maybe an hour or two more.  And even then, the story was compelling!  We weren’t bored, tirelessly spamming spacebar to clear through it ASAP (At least the second time).  It’s actually a storyline we can get invested in and enjoy, and I cannot wait to see what the final ending to the Third Arc contains for us!

When asked about the difficulty of the world, it was pretty cut and dry as to what we wanted to what we got.  Overall the questing side of Part Two seems too big a success, with little to no flaws, and without spoiling the story, has some fun bosses, challenges and more!

Not a single person wanted the world to be easier.  With a good portion wanting it to be a little bit harder, a potentially perfect compromise would be to keep the offensive ability of the world the same, but increasing the health overall a fair amount, say 10%-15%.


Unique Content

This was never going to be an easy task for Kingsisle.  They had a lot of work ahead of them if they wanted to match their own creativity and design of Part One.  Not only would there need to be a good amount of this new, unique content but it would also have to live up to expectations!

It’s clear when asked if they were happy with the number of new areas, most people were.  Again, no one wanted less, with a respectable portion wanting more areas than what we saw.  However overall this is another check in the list for Kingsisle!  

I think the only way this could’ve been improved was if the story itself was longer.  It never really felt like we did nothing in an area, or that it was a waste of time. Every area felt fairly fulfilled, and that’s without side quests too!

Here’s the true success story though.  It is almost impossible to deny the beauty, creativity and sheer scale of the new areas.  They’re all incredibly unique, well put together and are very fun to play through.

There’s not much more to say here.  Fantastic job to Kingsisle, and while we acknowledge the smaller portion who disliked the design of the area, it’s almost negligible compared to those who liked it!

But how do the mobs and NPCs fair in these new environments?!  I mean what is there really to say.  An overwhelming majority loved the new mobs, bosses, and NPCs.  

It’s safe to say that no real NPC was boring, felt unneeded or didn’t contribute much to our play through.  Not a single mob really felt useless or unrequired either, and Kingsisle even added multiple roaming mobs you don’t actually take on in the story simply to expand on the world!

As for bosses, well dang.  The regular bosses were all challenging in their own right, with heavy hits and some unique and fun cheats.  And certain bosses were overall super creative and fun to fight through.

But what about puzzles?

Well, this wasn’t too hard either, with a majority enjoying the puzzles and mini-games that were incorporated into the story!  They added a nice change of pace and character to the world, once again making it feel more and more immersive!

But now to tackle something that could potentially taint some players opinions on the world.

It’s safe to say Whirlyburly was being fairly hyped up by the Kingsisle team.  They spoke at length about it in a video on their Official Youtube channel, and we had a lot to expect going into it.

However, it somewhat failed to deliver based on how you responded when we asked what you thought of it.  Most of the player base just didn’t really care about it.  It was kind of just there for them, nothing to take note of, which is a major shame.  Overall not even 20% found it above just meh.  

Further a scary percentage actually just disliked it entirely, which for something that they apparently sunk a fair bit of effort into is upsetting.

Kingsisle have made a fair amount of changes to Whirlyburly in between Test realms, but I still don’t think it has lived up to our expectations, which is a major bummer.

It’s safe to say this is not the potential PvP substitute that many players were expecting, but hey?  At least there are some cool badges to earn.


Gear

Now we get to the juicy stuff.  This is almost what makes or breaks a new world in today’s game.  The grind for the perfect gear has never been easy and everyone wants to be the guy with almost unbelievable stats.  So how did it fair?

Well, we asked what you thought of the rarity, and we got some mixed results!  With a majority finding it to be just about right, just over two-fifths of the players wanted it different!

A near perfect split of that mount going either way, with nearly half wanting it to be a little more of a grind and harder.  Whilst the other half are under the belief that it’s too hard and should be made easier.

What’s unique here is that the craftable gear, like Part One, is an exact copy of the dropped gear, so you won’t have to cry yourself to sleep at night wondering if you’d have got it after just one more run!

However, there is an issue…

It was safe to say, based on just game knowledge and the results from Expectations that we desperately needed improved offensive robes, not useless ones with critical block, as well as Amulets and Athames.  Wands and Rings were also needed, though not as badly, and Hat and Boots were in a good position with Cabalist Gear.  So when asked what gear you believed wasn’t improved enough, we got pretty much what was expected.

An overwhelming majority wanted an improved robe, as for many schools Malistaire or Rattlebones at level 100 is still the best!  And while some have Tenni’syn gear, it’s not enough.

We also clearly see the desire for Wands and Athames, closely followed by amulets.  And whilst the new crafted mastery amulets are great and all, we need some good ‘ol stats on some Amulets!

It’s safe to say we aren’t too happy with most of the new gear, which is a tragic end to an otherwise near perfect world!


Conclusion

All in all, I’d be more than happy to call the world a success as of Test Realm.  It seems polished, minus some bugs, and vibrant.

Almost no issue whatsoever with the Questing side to the world, with the only possible critique being making it a little longer and challenging.  But all in all very nice.

The unique content in terms of design is near perfection!  I am more than happy to say I love this world visually, and how diverse and colorful it is.  The mobs, areas, cutscenes and more were all splendid! Sadly what was potentially the most unique and hopefully long lasting piece of content, Whilyburly, seemed to drop the ball.  Let’s hope Kingsisle change that for Live Release!

Now, gear.  Always a controversial and dividing factor, and yet somehow Kingsisle managed to leave everyone a little disappointed.  I think it is very, very clear that no one wants a robe with basically just block and incoming. It seems they’re a little behind on the “gear meta”.  Let’s hope we see some big changes.

Overall though I am looking forward to bringing all my characters through this world!  Let’s just hope Live Release only bolsters this world’s already impressive achievements and accolades!

Couch Potato Farming for all Levels

Anyone who has ever tried to hatch the perfect pet knows how important Mega-Snacks are. Mega Snack Packs are expensive and only help a little bit. The best and easiest solution is to grow Couch Potatoes, but how can we get them without spending all of our Crowns? Depending on your level, you have some great options old and new.

In my opinion, the absolute best place is the 5 Boxes quest box in Wizard City. This special event quest isn’t always in the Spiral, but when it is you will find it in a free to play area near the Bazaar. Meaning, even the newest Wizard with no membership has a pretty decent chance of getting this valuable Crowns seed. Super generous of KI! Be sure to take advantage of this opportunity the next time it comes to the Spiral!

Once you have reached level 20 you can access Grizzleheim. The classic mob to fight for Couch Potatoes here is the Splithoof Barbarians in Boars Camp, Savarstaad Pass. This is one of the first areas you open when you get to Grizzleheim. It can be a grind farming this area, but it is accessible at a pretty early level in the game. For better drop chances, I find that switching realms every 10 fights or so helps.

Hands down, the best and easiest place to get this drop if you have a higher level Wizard is from the Death Ghultures in Mirage. This is one of the very first quests you get when you open Mirage. If you head towards Caterwaul Canyons, starting from the World Door, they are the first mob you see. They are a pretty easy kill at the required level to reach them with only 2,450 health. The drop rate is far more generous than it is in Grizzleheim or Wizard City. As a bonus, Evil Magma Pea drops here too.

There are many more places to farm for this drop, especially in the two worlds I talked about. These are my favorites mainly because of ease of access and reliability of drops. With luck and perseverance before you know it, you will have a garden that looks like this!

Good luck Wizards, see you out there!
             ~ Amber Ravynsong

Empyrea P2: Expectations

Introduction

So this series of articles is an experiment I came up with at 2 am while debating with a friend of mine as to whether Empyrea Part Two would be a walk in the park or not.

So I figured instead of just ramming our heads into one another, I’d actually try to get some results.  So I went to Google Forms and whipped up a quick questionnaire that I circled among a variety of large Wizard101 Discord Servers.

The results were kind of interesting and has lead me to make this article.  I also intend on following it up with three more related articles about the Test realm release, Live release and lastly what could’ve been done differently

With all that said I hope you find all of this somewhat interesting, and a special thanks to all the discord partners who shared this and everyone who answered it.


Questing

So this is going to affect different players in different ways.  Some may not care about the actual quests themselves whilst others may.  I gathered some interesting data to take a look into what people seem to want.

First off it’s important to establish what people do not want.  I think the two world traits the community can universally agree are bad for the game are repetitiveness and easiness.

  • Pre-Nerf Zafaria is infamous among older players as some of the grindiest and most boring questing the game has ever seen, with endless infinite length defeat and collects taking hours of your day.
  • Cast your mind back to Polaris’ release.  Coming off Darkmoor and Khrysalis Part Two we were expecting a serious challenge.  What we got was a measly few hours of killing in a few turns without breaking a sweat.

The communities data reflects these idea’s quite vividly, with 43.6% of players wanting Empyrea Part Two to be the hardest in game PvE content we have ever seen!  And the remaining majority wanting it to at least be harder than Part One!

Part One’s Medulla nerf, while maybe needed, was a little too drastic.  And while not on the same level as the Mirage nerf, it still was too much of a nerf.  Players need PvE incentive, and 100 Kill badges for bosses won’t cut it. We want a challenge!!!

We can see this idea of a challenging second part echoed within other data too.  A big part of the memory of a world is how long it takes. Everyone remembers Khrysalis, most quite vividly, due to its sheer length.  

But that doesn’t mean it’s remembered badly.  Most people see finishing Khrysalis as an accomplishment purely based on its length.  But what it appears Kingsisle doesn’t understand is that that itself is not an inherently bad thing!  

A very clear majority want Empyrea Part two to have equal to or more quests than part one, with 79 quests.  And just under half wanting over 100 quests. Finishing 100 or more quests leaves you feeling like a hardened veteran walking away from battle!

We actually feel accomplished, and that feeling is something that a lot of game developers strive to make their players feel as it keeps them interested and coming back for more.  Sadly, the last time I personally felt accomplished in the game when related to PvE content, was finishing Mirage in test realm, about 2 years ago!  So let us hope that Part Two meets our standards!


Unique Content

Thankfully, this is something that KI succeeded in with the release of Part One!  What I mean by unique content can be broken down quite easily. Variations of mobs, New mob types, areas we visit, unique story mechanics and others.

Empyrea Part One released 5 Unique new creature types.  We got the Dwarves of Athanor as well as the Beastmen of Aeriel.  They were all awesome and conceptually incredible. And those 5 doesn’t even include those tagged by ‘unknown’.  Ranging from The Bat to The Quizzler.

When asked how many new creature types they’d like to see,
the resounding majority wanted more than Part One!  

And fortunately, it doesn’t look like KI are going to let us down here with the new mushroom-fungus like humanoid already teased! 

Could this awesome looking mushroom man tie into his own unique area?  Well, let’s see how the community feels! 

When it comes down to remembering a world, a very big factor that contributes to your memories are the area’s you quested in.  Think Floating Island of Celestia, and how unique it is compared to the rest of the world.

It’s very important for a world to create amazing areas both in design and mechanics.  Part one didn’t let us down too much here, with a sophisticated Alphoi city and a subterranean Lava settlement.  And it’s safe to say the community wants it all again and more!

A clear majority want at least 2 more areas compared to what we saw in Part One, with more than 85% wanting more than equal to what we were given.

A giant Mushroom forest with towering mushrooms as tall as trees to accompany our leaked mob could contribute a lot to making Part Two something truly memorable!

Take a look at some awesome airships that we’ve seen leaked, let’s hope these play a fairly large role, like piloting one into battle and boarding enemy ships.  Just some wild speculation but it’d be awesome.  

Empyrea Part One also brought in fun minigames that broke up the monotonous slaying and collecting we normally partake when slicing our way through a world.  The dance game and shock-a-lock variations made the world a lot more fun and certainly had a lasting impact on the community!

When asked whether they’d like to see more puzzles in Part Two, the very clear vast majority answered yes!

Clearly, this shows KI has considerable interest in keeping the game alive and going and is not out for the quick buck.  Why create these fun new mechanics if they don’t care about the games longevity.

And with talk of a fun new “board game” within the game, with tons of badges and fun stuff to accompany it, it’d be safe to say they intend on continuing this trend!

Now we tackle probably the most divisive and complicated issue.. Gear!


Gear

Where to begin.  Part One brought us the Cabalist Hood and Boots, which are without out a doubt unparalleled in the offensive gear section.  Certain schools find a lot of value out the Corporal Tenni’syn Robes and the Cabalist Decks from Beast Man’s Fight Club are also incredible if you can look past the number of copies.

However, there are a lot of out-dated gear pieces that we REALLY need to see upgraded.  A lot of schools still use Malistaire robes, Morganthe’s amulet or Level 99-100 athame’s.  For 25 levels these gear pieces have not been improved on.

And the communities opinions reflect that too.  

Thanks to the Cabal hat and boots, most don’t feel they need improvement, however, the numbers speak for themselves.  Almost everyone universally agrees that we need new robes, amulets, and wands.

Now the upgrading of the crafted wands could potentially take care of this issue, but that eliminates only one problem.  Could we see the same mechanic for other gear pieces? I believe it’d be unlikely to see it on all, or even just a few, but the possibility and potential is there.

But with all this talk of new gear, a very big thing to remember is the attainability of these pieces.  For crafting, we’re limited by the scarcity of reagents, but for regular dropped gear it’s all about the rarity.  

It’s safe to say that the player base got burnt out farming secret tunnel so much.  The fact that Medulla, a final boss, had its top-tier gear also dropped by some elite minions in the first area is honestly alarming.

And this is a flaw with my questionnaire.  I should’ve asked whether people enjoyed farming a random variety of mobs and bosses for gear as opposed to a single boss.  However, a general consensus I discovered amongst talking with the community was that it was detrimental to the game to have top tier gear dropped so early by such a simple and easy mob.

And while this is a trend we see KI repeating, thanks to the video’s on their official channel, we can hope it’s not as boring and repetitively easy as Secret Tunnel.


Conclusion

I think overall we have a lot to look forward too in Empyrea Part Two.  We’re hoping for this to be one of the biggest and most meaningful PvE expansions we’ve seen to date.  And based on the interviews we’ve heard, it may just be that.

However, there is always going to be cause for concern.  We really need KI to keep up without the creatures, areas and artistic success of Part One while not letting us down in the other factors like difficulty and length.

With regards to the other articles, you can expect to see another form after a week or two of test seeing how it compares to your expectations and more, with a subsequent article on it.  Empyrea Part Two: Chapter 2, Test Realm. Get hyped!

I’d again like to thank everyone who took part for helping me reach these conclusions.  Much appreciation to all.

Alternatives For Energy Gear


The level 120+ Snowdrifter’s Set have the best energy bonus, but what are some other options for those that don’t enjoy spending 3 million crowns on packs?

Farm Waterworks

(Crown Shop Price: 7995 Crowns)

Luska Charmspeak & Sylster Glowworm can drop this full set of level 55+ energy gear, as well as mastery amulets and Rank 9 mega snacks.

Farm Mirror Lake

(Crown Shop Price: 8995 Crowns)

This full set of level 70+ gear drops from various parts of the dungeon. The first battle (Tse-Tse Snaketail) drops the hat, the second battle (Elephant Spectral Guardian) drops the robe, and the fourth battle (Starburst Spiders) drop the boots. Additionally, this dungeon is guaranteed to drop two Rank 8 mega snacks every run.

Farm Grand Tourney Arena

(Hoard of the Hydra Pack Price: 399 each)
The Grand Tourney Arena is a housing dungeon, which can be done without a membership. The last two battles of this dungeon can drop all 3 pieces of the Pixie’s Encanta Set, originally from the Hoard of the Hydra pack.
 
While the level of the gear drops ranges from “Any Level” to “Level 100+” based on your level and the tier of the dungeon, it’s one of the best sets of energy gear available for all levels. The Level 50+ Set is better than the one from Waterworks, and the Level 70+ Set is better than the one from Mirror Lake.

This dungeon also drops other gear and and some nice snacks. For a complete list of drops, click here.

Farm Spiral Cup Gauntlet

The Spiral Cup Gauntlet is a housing dungeon that drops the Greenwarden’s Energetic Set, which can be acquired from the Wyvern’s Hoard Pack, but unlike the previous dungeon it only drops up to “Level 90+” gear.
 
If you compare the highest level energy gear from each of these dungeons, the Level 90+ Greenwarden’s Energetic Set is slightly more favorable with 1 more energy in the robe and the boots. Despite this, more people prefer to farm Grand Tourney Arena for the additional snacks and other drops.
The picture for the Level 90+ Version is currently missing.
(Wyvern’s Hoard Pack Price: 399 each)

Farm the Telegraph Boxes

(Wyvern's Hoard Pack Price: 399 each)

The 5 B.O.X.E.S Event, each of these dungeons drop the Greenwarden’s Energetic Set at a level corresponding to its world. The highest level available as a drop is the Level 80+ version of the set, which comes from the Avalon Telegraph Box

While the Spiral Cup Gauntlet does go up to Level 90+, the Telegraph Boxes allow you to use the “team up” feature which makes it easier to farm. It is known to have much higher drop rates, but it is a seasonal event that only comes a few times a year.

PvP Tournaments for Arena Tickets

(Total Cost: 900 Arena Tickets)
PvP tournaments are not the most practical option for everyone, but if you love PvP and fishing, they will be an excellent option for you. The Seafarer’s Set is the best energy gear for low-level wizards, and it gives a nice fishing luck bonus as well.

If you are a member, you can pay using gold to enter PvP Tournaments. Once you earn enough tickets, you can buy this gear from Brandon Mistborn, a vendor in Unicorn Way right outside of the Arena. Each Tournament can get you a minimum of 250 tickets, so it shouldn’t take too long.

Get a Ring & Athame that give Energy


At level 56+, Wintertusk has craftable rings and athames that give a little energy.

Recipe Vendor: Ingulf the Grower (Vestrilund)


At level 72+, you can buy rings with a similar energy bonus at the bazaar.
 
Bazaar Price: 10,500 gold
At level 76+, various Avalon bosses drop a ring that gives more energy and high damage.
 
The pictures of the other school rings are currently missing, but here are the names:
– Sir Corwin’s Ring (Myth)
– Sir Malroy’s Seal (Death)
– Nameless Ring (Balance)
– Brisk Circle of Nodor (Ice)
– Lady of the Lake’s Signet (Life)
– Deep Water Rising Ring (Storm)


At level 100+, the Gold Skeleton Key boss in Darkmoor (Aphrodite II) drops a ring, athame, and wand that give a high energy boost, Additionally, she rewards a +1 energy jewels for tear slots.

Get a Dapper Corgi Pet with Energy Talents

The pet itself gives +8 energy, and can give a maximum total of +53 energy with both energy talents and jewel.

 
Energy talents available:
 
• Energy: (Star Jewel only) +5
• Big Energy: (Star Jewel only) +10
• Huge Energy: (Star Jewel OR Pet Talent) +15
• Ultra Energy:(Star Jewel OR Pet Talent) +20
 
The pet talents will not stack with the same jewel. The ideal combination would be to have the “Ultra Energy” and “Huge Energy” talents with a “Big Energy” jewel, as the picture shows.

The Dapper Corgi pet is not available on the Hatchmaking Kiosk; however, the talents are easily obtained from there. For example, the Pixie Queen pet (there are 2 with the same name in the kiosk, I’m referring to the one that doesn’t give a Fairy item card) has many options on the Kiosk with both energy talents, as well as some other useful utility talents. The Unicorn pet is another great option. Once you get both of the energy talents from there, find a friend to hatch a Dapper Corgi with if you want the extra +8 energy.

As for the jewels, many bosses drop them. I got mine from farming Halfang Bristlecrown while farming for gold. He drops all 4 of the energy jewels, in addition to a vast selection of other jewels, so unless you already farm him often there are probably better options.

The Handsome Formori mobs in Dun Dara, Avalon are one of the best options because they are relatively easy to defeat, you can fight more than one at a time, and they do not drop many different types of jewels.

Know any other good ways to get some energy gear? Let me know down in the comments below, or send an email to us!

Pets, Pets, Pets! Basics

To begin with pets in the spiral there are a few things you need to do first. This article is meant to help you figure out where to begin being a pet owner in game.
 
1. Plant a garden! I know, you thought this article was about pets, well it is. You will be surprised to learn how much gardening will help you with your pet ventures. Not only do you gain cards and drops to sell for gold by gardening (which you will need for hatching pets), this is also where you can get some very good pet snacks, and lots of them if you do it right.
 
2. Acquire a pet! You can get pets from many different places. You can buy pets in the crown shop, buy them for gold in some places, get them from packs, and even from game drops. For a complete list of just about every pet in game and where to get it, visit http://www.wizard101central.com/index.php
 
3. Choose your favorite pet training game and start training. Some people just go straight to the dance game to quickly feed their pet snacks. If the pet you currently have isn’t the one you want, or not getting good talents then it’s time to start hatching to get a better one.

Training


Every pet has stats that are the following: Strength, Intellect, Agility, Will, and Power.
To increase your pet’s stats and experience shown within the experience bar you must train the pet. There are many different games in the pet pavilion to play that will train your pet. You can choose whichever one you are good at or enjoy, or just go for whatever is the easiest.

My personal favorite is the maze because it kind of reminds me of a Pac-Man sort of game, but the dancing one is quick, so I like that one too.


Stats and experience points are based on which game you play, how well you play that game, and what snacks you feed the pet for reward.


There are extensive reference guides at http://www.wizard101central.com/index.php that will tell you everything you’d ever want to know about pet snacks and such. The only way to bring up a pet’s level and power is through feeding them snacks, and the only way to feed them the snacks is to play the games.

Pet Levels

There are 7 levels to pet training beginning with baby. Each level after baby is as follows:
-Teen -Adult -Ancient -Epic -Mega -Ultra.
 
With each level the amount of energy it costs to train your pet will increase, as well as the experience needed to reach the next level. The energy cost goes up by 2 for each level until epic, where it stays at 10 energy per game. The experience needed will double every level until you reach epic, then it will stay at 2000 experience points.

Pet Talents

As you train your pet it will learn talents each time it levels. There are talents that can benefit your wizard in many, different ways, then there are what most call “selfish talents”. Selfish talents are talents that boost the pet’s max stats. For more detailed information on the different pet talents, and how to get them, etc. refer to http://www.wizard101central.com/index.php

By: Tiffany Rainhaven

Permanent Mounts for Gold


Never quest on foot again, get a permanent mount for gold.

There is no reason any wizard should have to run around The Spiral on foot with the great selection of mounts Kings Isle is offering for in game gold only. Enjoy a 40% speed boost and get every quest done faster, just follow the instructions below! The first thing you should do is open the Crowns Shop and navigate to the Permanent Mounts section.

Next, scroll down to the Bengal Tiger, the first mount on the list that is available for gold. You will notice a tab activate that says “gold” Click the Gold tab, and you will see the price in Gold!

Classic Mounts

Not every mount can be purchased for gold, but there is a great selection of classic mounts such as Dragons, Cats, and Broomsticks that can be. When you switch the tab to gold for the Bengal Tiger, you will be able to see which other mounts can be purchased for gold and their prices. Now you can quest in style!

~ Amber Ravynsong

Lambent Fire: 2 Turn Farming Strategy

Lambent Fire

Lambent Fire is a Stone Skeleton Key Boss that is found in Crystal Caves – Avalon. He drops the Burning Rampage spell, which is highly sought-after by many fire wizards. Unfortunately, his cheats work conveniently well to make the battle harder specifically for fire.

Main Cheats & Common Strategies

He cheat-casts steal charm on all fireblades, elemental blades, and universal blades. Aegis can be used to prevent this cheat, but many people don’t have that spell yet. If Bladestorm is used, only the caster will have their blade stolen. A common strategy is to have someone spam quench (fire dispel) on the boss so that someone else can blade. Hitters of other schools often don’t worry about this cheat (other than balance), but it’s mainly fire wizards that are farming this boss.

He also cheat-casts Immolate on any universal traps. That’s right – no feints, even if protected with Indemnity. You would need someone to spam quench for that, too. The only exceptions to this cheat are Mass Feint and Malediction (mass universal traps). Regular traps (like Fire Trap, Elemental Trap, Fuel, and Backdraft) all work fine. Fire Prism and Mass Fire Prism are both allowed.

A minion will also cheat-cast Bad Juju at the end of the 3rd turn to whoever has the most pips, which is usually the hitter. That always has to be cleared using a wand spell or Cleanse Charm before hitting. This cheat is part of a cheat-cycle and repeats every 3rd turn.

So if you’re fire, it’s hard to blade and hard to trap. Farming is all about efficiency; regardless of the drop rate, you have a higher chance of getting what you want if you get more runs in. But with all of the cheats against buffs, how could 4 average fire wizards ever hope to beat Lambent Fire in 2 turns?
 

Here’s The Strategy

 
Person 1: Minion Killer
 
You need one person to kill the minions. If you’re a fire wizard with a +1 pip deck, use Mass Fire Prism followed by an enchanted Scald.
 
Yeah, I said Scald. Trust me on this.
 
How high your damage is won’t matter, the minions will die regardless. If you don’t get a power pip on the 1st and 2nd turn, no worries; it will just take 3 turns to kill.
 
If the minion killer ends up not being a fire wizard, just find someone that can kill the minions by the 2nd turn. Having a spell that is both AoE and DoT (like Deer Knight or Reindeer Knight) would be ideal, but anyone else that can one-shot minions by the 2nd round is fine.
(Ex: Stormblade + Tempest/Storm Lord)
 
Person 2: Main Hitter

Here’s another surprise for you fire wizards: if you’re the hitter, use Fire Prism (single) on the boss, followed by an enchanted Heckhound. Even if you have a shadow hit ready.
 
Another “useless” spell, I know. Just go with it.
 
If your main hitter is not fire, then just have someone blade and hit with any DoT spell. Frostbite, Poison, or Thunderstorm (Rain Core pet spell) are all great options. Even if you have a stronger spell, please stick to DoT.
 
                                                                       Person 3: Secret Weapon
 
This is where the strategy comes together. Most of the people farming this boss are fire, right? Someone probably has Dalia’s Smoldering Hairdo, the fire hat from the Professor’s Hoard Pack. Congratulations, you have been selected to use Incindiate.
Does it make sense yet?
 
This will detonate all of the previously used DoT spells AND double their damage. To put this in perspective: Assuming a fire wizard was the main hitter and used what I said above, it would end up being a 5-7 pip Heckhound with a prism. If you include a Colossal enchantment and the double damage from Incindiate, you’re looking at a 1900-2440 base damage attack. That’s more base damage than any spell in the game. And that’s still without the 30% ice boost (from prism), stat damage, or even a possible critical.
 
The Scald works similarly; with Colossal and Incindiate, it would have 1540 base damage, which is still more damage than Raging Bull. That alone with the 30% ice boost is guaranteed to kill minions (and land a solid hit on the boss as well), not to mention your stat damage.
 

If you’re a non-fire wizard but you have the hat, you can still make it work. If you have a fire mastery amulet, great. If you have a +1 pip deck, using empower on the 1st turn will give you enough pips to cast Incindiate on the 2nd turn

f you are balance, you could go first and use bladestorms (cheat will only steal blade from you) to boost the other 2 hitters, or use Donate Power to boost the Heckhound, or both.
 
If you have Dworgyn’s Havoc Hood (the death hat from the Professor’s Hoard Pack), Mass Feint would also help.
 
If you are not fire but you are still a strong hitter, then you can blade and hit with whatever you got; just keep in mind DoT will do double damage.
 
If you have none of these, you could always buy Donate Power tc from the bazaar and use that on the main hitter before they use Heckhound, or buy Fire Trap/Elemental Trap/Fuel tc. Just find some way to be helpful.


Person 4: Backup

There is no specific role for this person, just help somehow. If you are fire/ice/death, I recommend doing the same thing as the main hitter. I’m specifically including ice and death because they both have solid, low-pip DoT spells they can use, and they each have a 30% damage boost against Lambent Fire.

If you’re fire but have really low accuracy/damage, use traps for the hitters. (Traps have to be after prisms, so enter battle after the hitters.)

If you are balance, you could go first and use bladestorms (cheat will only steal blade from you) to boost the other 2 hitters, or use Donate Power to boost the Heckhound or both.
 
If you have Dworgyn’s Havoc Hood (the death hat from the Professor’s Hoard Pack), Mass Feint would also help.
 
If you are not fire but you are still a strong hitter, then you can blade and hit with whatever you got; just keep in mind DoT will do double damage.
 
If you have none of these, you could always buy Donate Power TC from the bazaar and use that on the main hitter before they use Heckhound, or buy Fire Trap/Elemental Trap/Fuel tc. Just find some way to be helpful.


(If you’re a high level and wanna get fancy, a death wizard could use Empower then Wrath of Hades, or a myth wizard could use Empower tc then King Artorius (which both have a big 1000+ damage DoT). If you’re hitting minions, an ice wizard use Empower TC/Snow Angel, or a myth wizard could use Mythblade/Noble Humongofrog. Feel free to get creative!
 
Putting It All Together
 
If your backup person is not hitting or trapping, have them go first, followed by the 2 hitters (in any order). If the backup person is hitting, then all 3 hitters go in any order. Most importantly, have the person using Incindiate go last.
 
If anyone on the team doesn’t have enough pips to do their part by the 2nd turn (due to lack of power pips, entering late, etc.), everyone needs to wait until the 3rd turn to hit.
 
If your hitters aren’t very strong, or you don’t have a backup person, hitting on the 3rd turn can also give everyone an extra turn to trap, and increases Heckhound’s base damage (by gaining an extra pip). This would ensure a kill, although most full teams can manage it in 2 turns.
 
Preventing Fails
 
 
One of the unpredictable things in this battle that can cause a fail is Lambent Fire using Efreet. But with this strategy since the person using Incindiate is going last, the Efreet will always target them (since they will always be across from him) as long as you have a full team.


The Bad Juju cheat is another thing people worry about,
but hitting by the 3rd turn avoids this completely.
 
 
The minions CAN use Immolate, which can clear some of their prisms. If the minion killer is fire and has low damage, the Scald might not kill. Have a backup AoE hit in to clean up. Lambent Fire will not use Immolate.
 
Aside from that, watch your accuracy and power pips. Incindiate needs 15% accuracy to ensure no fizzles. Raise your power pip stat too, especially if you don’t have a +1 pip deck. Other than that, make sure your hitters all have 100% accuracy for their school. If your accuracy isn’t high enough, taking an extra turn to use Infallible is well worth your time. Accuracy and power pips are much more important than critical for this strategy.


Deck Setup

Minion Killer

If you are fire, this is the setup you wanna have. Keeping a maximum of 7 cards ensures that you will draw exactly what you need. the plan is to use Mass Fire Prism, then an enchanted Scald. If you get a pip fail can’t use Scald on the 2nd turn, use a trap while waiting for a pip. If your fire accuracy isn’t perfect, use Infallible tc regardless of pips.
 
If some minions clear their prism and end up surviving, then you have a backup enchanted Meteor Strike. In the rare case that it goes past the 3rd round, you may need a wand to for the Bad Juju cheat.
 
If you’re not fire, just replace the trap/prism with blades, and the attacks with your AoE spells.


Main Hitter/Backup Hitter
 
Same simple setup: Fire Prism then Enchanted Heckhound. Pip fails don’t really matter with Heckhound, but use a trap if someone else on your team needs to wait for pips. Just like before, you have an enchanted Meteor Strike and a wand hit for emergencies, but probably won’t end up using them.
 
If you aren’t fire, just replace the trap/prism with blades, and the Heckhound with your DoT spell. Backup hit is optional.
 
***All hitters NEED perfect accuracy, more than anything else. If you fizzle, you miss out on the Incindiate. If someone on your team needs to use Infallible tc, just hit on the 3rd turn.
 
Secret Weapon
 
It’s pretty simple for this person: enter the battle last and be ready to use Incindiate by the 2nd turn. if you have a +1 pip deck and at least 90% power pips, you’re solid. You can use a Fire Trap or anything else that would be helpful while you wait. If you don’t have a deck pip, increase your power pips as much as possible and use Empower tc on the 1st turn. Regardless, 15% fire accuracy is a must. Backup hit is optional.

Other Backup 
If the Backup is a fire wizard with low damage/accuracy and doesn’t want to hit, this is also a possible setup. Pack whatever traps you have, and go after the hitters so that your traps go after their prisms.
 
If the backup isn’t fire, then go first and support in any way possible. An easy way is by using Donate Power tc to boost Heckhound on the 2nd turn.
 
 
While I do agree that this strategy is a bit particular by requiring a spell like Incindiate, also consider that you’re more likely to run into fire wizards with this boss than anywhere else. The chance that someone on your team has it is pretty decent. All the current guides and strategies advise against having too many fire wizards (which is terrible since fire wizards farm it the most), but this one encourages it. This is also the only current strategy that can be done in 2-3 turns with a team of average Archmage fire wizards.
 
Good luck on your drops!
 

By: NinjaDudeB12 #4545

Level 5 Gear Guide

Gear choices can be a little bit confusing for a new Wizard sometimes. Here is a guide to help you understand your options and help your level 5 wizard be the best it can be.
 
For 585 gold your level 5 wizard can buy the helm, robe, and boots shown here from the Bazaar. You can see that the Helm gives 1% resist to all types of damage, and the robe and shoes combined will give a 2% boost to any type (or school) of damage. The athame and ring pictured here are the best commonly found choice available to finish off this set, providing your Wizard with a small health and mana boost. This set will improve your damage and resist a little bit. Enough to give you a small advantage as you quest through the first few areas of Wizard City.


In the crowns shop appearance tab, you can select and purchase individual crowns gear items. For 5,180 crowns you can purchase the set pictured below. This set is a popular choice for low level PvP as well as PvE. As you can see, you will gain a 3% accuracy boost, a 6% damage boost, and 12% resistance, all to any school. Additionally, you will start each battle or match with an extra pip and have a small chance of getting a power pip which counts for 2. This set will give you a significant, well-rounded advantage questing through all of Wizard City and into Krokotopia or set you up for victory in the Arena.


For 7500 crowns the Starter sets give any school a significant advantage that can easily carry you all the way to level 30 when you upgrade to Zeus gear. They each come with full clothing sets and a permanent mount.
 

For 7500 crowns the Starter sets give any school a significant damage and accuracy advantage that can easily carry you all the way to Mount Olympus when you upgrade to Zeus gear. It is not as well rounded as the previous set as it offers no universal resist, and you will have to part with that extra pip at the start of the round. In return, you get an extreme damage and accuracy boost that is likely to make you one of the most overpowered wizards in the next few worlds.  Each set includes a full clothing set and a permanent mount making it a pretty good value for wizards that want to not have to worry about gear while they quest through from here to level 30.

 
Opening a few packs is a fun option and can give you a small advantage gear wise if you get lucky. The Important thing when using pack gear is to use the gears that match your school for best advantage. The hat and robe seen here will give a good advantage to fire wizards, while the boots will provide support for death.
 
With any of these sets your Wizard will have an easier time in Wizard City and in some cases far beyond. Good gear makes every battle faster and easier, so it is worth investing the time to make your level 5 wizard the best it can be.
 

Mount Olympus Strategy Guide

When you reach level 30, Cyrus Drake will invite you to the Quest for Glory, your ticket to Mount Olympus. The quest will send you to Cyclops Lane, where you will discover something unique. Hiding in the back of the park is a golden chariot to Aquila. There, you will meet Silenus, who will send you to Mount Olympus to meet Zeus. This is a side quest you will definitely want to do, as the gear Zeus drops here will keep your stats where they need to be until you reach level 56 or 60.

When you step inside the sigil to Mount Olympus, you first meet Athena. She will be your guide and sends you to your first challenge, Apollo. Apollo is a Life boss with Myth minions, but he mainly deals Fire damage. This boss doesn’t cheat, but he uses a natural attack that leaves behind a smokescreen nearly every round. Stacking a Feint or two on the boss with a few blades on your attacker will work. After defeating Apollo, you will be awarded your first Legion Token, an Ophidian Archer.

After you turn in the first Legion Token, Athena will send you to the next challenge. The Moon Chamber. Inside you will find Moon school and Death school mobs. There isn’t a boss here, and there are no cheats. It’s worth noting that many at-level Wizards prefer to use a particular strategy to minimize the number of mobs in this fight.

For the mob-reducing strategy, only one Wizard enters the room to start the battle before the rest of the team joins. This trick works in all of Aquila, wherever rooms contain battles with minions. Your usual mob-killing strategy boosted by an extra blade or two should do the trick, and in no time, you will have your second legion token, a Minotaur Warrior.

Next, Athena will send you to the Sky Balcony to face the Praetorian Guards. This is another mob like the last one. Even though one of them is in a different school like a boss would be, the health is about the same for all of them. The “boss” is a Storm, and the mobs are Myth. The same strategy you used in the last fight will also work here; be sure to convert the boss if your attacker is Storm. Grab the free statue of Zeus, which you will find on the Sky Balcony, then swipe the third Legion Token, a Carthenian Elephant.

After turning in the final Legion Token, Athena will send you off to face a new kind of challenge. Down in the Arena, Eris Golden Apple has a puzzle you must solve. She will show you two teams, and you will have to figure out which of your warriors can take down the ones she selects. Lucky for us, she makes the same moves every time. First, move your Carthenian Elephant. Second, move the Minotaur Warrior. Then end the game with the Ophidian Archer.


If you complete the puzzle correctly, you won’t have to fight anything here, turn in the quest and move ahead to the next challenge.
 
Next, The Hall of the Watchful Eye contains an easily conquered Myth mob, the Elite Cyclops Guard. After you defeat them, you will gain access to Hephaestus.

Before moving ahead, you must gather Hephaestus’s statues that are hidden all around Mount Olympus. Start by heading straight out the door and down the hall. When you get to the end of the hall, head out the door and hang a left toward the Chamber of the Sun. Enter the Chamber of the Sun, but stop side the door and turn to your right. You will see the first statue in the corner (1).

Head back out the door and toward Athena; you will find the next statue in the corner by the entrance (2). Now, go toward the Moon Chamber, but when you get to the top of the stairs leading to the Moon Chamber door, turn to the left. The third statue is hidden in a corner (3). Finally, head down the nearest set of stairs to the Arena. When you get to the bottom of the stairs, stop and turn to your right. You will see the fourth eagle statue standing near the bench in the alcove there (4). Now that you have gathered all the eagles, you can bring them to Hephaestus and brace yourself for the next challenge.

Inside the Hall of Battle, you will meet Ares Savage Spear. Ares is a fire boss with Death minions and has a damage aura that is permanently renewed. If you hit him directly, he says, “You dare strike me directly!?” and smacks you with the business end of his spear for just under 500 damage, leaving behind a 40% trap.

The best strategy here is to stack up a few Feints on the boss, a few blades on your attacker and hit with an All One Enemy attack such as Tempest or Meteor. If Ares doesn’t die in the AOE attack, make sure the follow-up hit finishes him off or face his wrath.


Next is the big boss, Zeus. The same mob-reducing strategy is often employed here that I introduced you to in the Moon Chamber. It’s a good idea in this fight, especially because Zeus is a Myth boss with Ice minions that are not easy for an at-level team; they tend to cast a lot of shields that complicate things.

If you use any spell over six pips in this battle, Zeus will hit you out of turn with a free Minotaur and scold you that “You hesitate too much!” The best strategy here is to stack 2-3 feints on Zeus plus 3-4 blades on your attacker and go for a one-shot kill. Having a supporter carry Shatter is a good idea, just in case those Ice mobs stack up too many shields before your attacker is ready to kill.

When you complete this battle for the first time, you will be awarded the title Honorable Bronze Archon, and you will have conquered Mount Olympus!