Krampus Guide

It’s Christmas in the Spiral! You know what that means? You now have access to the skeleton key boss, Krampus. You can find the dungeon entrance in Wizard City Ravenwood behind the Ice Tree, Kelvin.


When you enter, everything will be decorated and pretty for Christmas.

Until you are caught running in the Halls. Everything turns dark. Now you’ve made Krampus angry and have 3 options to choose from.

  1. Wooden Key Krampus
  2. Stone Key Krampus
  3. Gold Key Krampus
Or, runaway and beg for forgiveness. But we all know that won’t work! So you’re better off confronting him. You might be scared, but no worries! I’ll teach you how to conquer him!

Wooden Key

Behind the Wooden Key option, you will find a Krampus, Rank 6, with health maxing at 4,900.

He Resists to:

  • Fire – 15%
  • Balance – 10%
  • Death – 10%
  • Storm – 10%
  • Myth – 10%

He Boosts to:

  • Ice – 15%
  • Life – 15%

You will not be able to Stun or Beguile him.

Stone Key

Behind the Stone Key option, you will find a Krampus, Rank 11, with health maxing at 15,072.

He Resists to:

  • All schools – 20%

He Boosts to:

  • Ice – 30%
  • Life – 30%

You will not be able to Stun or Beguile him.

Gold Key

Behind the Stone Key option, you will find a Krampus, Rank 15, with health maxing at 30,144.

He Resists to:

  • Fire – 50%
  • Death – 50%
  • Balance – 30%
  • Myth – 30%
  • Storm – 30%

He Boosts to:

  • Ice – 30%
  • Life – 30%

You will not be able to Stun or Beguile him.

Cheats

  1. Maycast shadow Steal Charm on any blades casted on yourself
    – You can use Aegis the first time to get around this cheat. Any other time could get your unprotected blades stolen.
    – You can also cast Blades on other Wizards. Be warned that he could take your blades if you have any.
  2. Removes Feints
    – Indemnity will not work. Cheat is triggered twice.
  3. At the beginning of every 3rd round, he will dimension shift any traps
  4. Every 5th round minions will be summoned.
  5. Late Rules:
    Wooden: Will cast an enhanced power link
    Stone: Will cast Scald and a -75% accuracy Smoke Mantle
    Gold: Will cast DoT for 1,596 Fire damage over 3 Rounds and a -75% version of Smoke Mantle on the Wizard.

Strategy

Hitter: Buff up using non-blades. For example, traps and Windstorm or Star school aura spells.

Supporters: Blade up the hitter and get them set up to hit before the 5th round to prevent having to deal with the minions. Supporters should also heal and shield to prevent defeat.

Make sure the person Hitting goes last

Round One: Supporters should begin to set up by casting Elemental or Spirit Blades/Traps and any other Blades/Traps that the hitter can use. The hitter should use any of their school traps.

Round Two: Enchant Blades and Traps using potent/sharpen to increase the damage.

Round Three: One support team member can use the hitters’ school global spell, ex. Time of Legend, or Darkwind, and the rest can continue blading up the hitter. The hitter can use their preferred Star School damage spell, e.g. Frenzy, Berserk etc.

Round Four: This is the round you will want to use any last buffs you have while the hitter attacks with their strongest spell. Preferably a shadow hit if they can and no DoT spells. If you do not have Shadow magic yet and you are the hitter, use your highest damage spell to hit.

Now you know how to beat Krampus, go save Christmas before It’s too late!


The Music of Mooshu

Intended for Musician and Non-Musician

As the emperor falls ill, the factions of Mooshu wage war against each other and there is no way of knowing how it will all play out. Mooshu’s people are hesitant to trust us wizards because of Malistaire who stole their spiral key  in an attempt to resurrect his beloved Sylvia. Let us delve into the atmosphere and take a closer look at how the music of Mooshu is used to aid the story.

“Main”

From the first moment, the texture is established through a high-pitched gong. The plucked strings set the serene tone and give the land of Mooshu a musical identity. We feel the authenticity in relation to our own world. The flute comes in, sustaining a single tone with an embellishment, queuing the plucked strings to play a phrase in a soli. A soli is the musical action of having a single section play together, similar to a solo, but with more people playing the same phrase.

After that, we dive into the first melody. Syncopated and fluttering with notes, this is our driving theme of action. The finger cymbals add percussive texture. The flute plays it first, before the plucked strings, giving us continuity in the established musical texture, as well as creating a call-and-response pattern between these instruments.

By 00:32 seconds, we have our second melody. This melody contrasts with the first by being calmer, less syncopated, and having fewer notes. After the flute plays, the bowed strings make their first appearance, adding grandeur and excitement to the texture. The flute climaxes in a beautiful solo, with the same melody as before, except the notes are more sustained. This leads to the calming down.

Our call-and-response pattern continues as the plucked strings and percussion lead us back into the hardy bowed strings. The strings play an ostinato as the flute develops the melody sustaining notes whilst adding a flutter, combining the two melodies we have heard previously. The next section calms us down, phasing in and out the different instruments and bringing us back to the beginning.


“Plague”

The Shoshun village is one of the most memorable parts of Mooshu, acting as a major crossroads of four paths. Guarded and maintained by monks, here is where we find the healing waters that will save the plagued waters of Mooshu. The plucked strings take the majority of the piece with a motif before the erhu plays the melody at 00:49 seconds. This is the same melody as the second theme in the piece before, but the piece recontextualizes this theme to the current events of the story. This theme represents Mooshu’s ongoing troubles.


Next, at timestamp 1:25, the brass plays. This is a new instrument that hasn’t been in the first theme, and the majority of this piece is over when the brass comes in. The entry of the brass, ascending in pitch, represents the wizard uplifting Mooshu from its troubles. The high strings come in as the harp plays descending lines. This minor tonality represents the struggle of saving Mooshu from the plague.

“War”

Starting with the dark brass, there is new context to this timbre. The factions of Mooshu are waging war against each other and our wizard is the one who must be swift as the coursing river, with all the force of a great typhoon, with all the strength of a raging fire, and mysterious as the dark side of the moon.

Spontaneous and erratic, the deep drums signal the driving emotion of the high stakes in this section. The bowed strings and flute play, queuing in the hardy, pulsing plucked strings and percussion. This music represents how the attack occurred at Hametsu village, pillaging it to ruin.

The war theme contrasts with the plague theme in style and orchestration, but the pulsing melodic ostinato emphasizes the first three out of three-and-a-half pulses in each measure, similar to the melody heard in the plague theme. I say “three-and-a-half pulses” because the entire piece is in an “unusual” time signature to our western ears. The piece is in 7/8, meaning we must divide the number seven into three pulses, making one of them unequal to the others.

The brass enters again, signaling the devastation to the village with their minor tonality and descending tones. Afterward, the pulsing ostinato in the plucked strings continues as new elements are added to the texture. The plucked strings mimic and develop the brass’ line as a motif to tie the end together.

“Haunted”

The Haunted Theme plays in the Yoshihito temple that serves as a crossroads to the final areas of Mooshu. Serving as the grey area between life and death, the tone is melancholy and almost sorrowful.

We begin with the high strings harmonizing in a minor tonality, with the plucked strings and percussion responding to the high string’s cry. The erhu plays the melody, heard from the Plague and Main themes. The major harmonies and wind chimes give the theme new light. This thematically represents peace and the finality of death.

We glissando into the climax at 00:39 seconds. This glissando places the strings to play the highest notes an octave above the erhu. The erhu then walks down the scale in eighth notes, giving us resolution into the next phrase.

The ostinato heard in the Main Theme comes back, then, we jump around notable themes from the other three pieces. This alludes to the haunted theme acting as a recapitulation of the theme we heard before which brings resolution to this chapter of the story.

“Mystical”

This selection from Pirate101 is heard in the Skyways and is one of the most simple in orchestration. We begin with the koto playing a simple line. From the placement of the pitches, it feels syncopated, despite it being completely even eighth notes. This is accompanied by finger cymbals, blocks, and unique drums, fitting into the timbre of the previous pieces.

The erhu comes in, slightly thickening the light texture, adding sustained notes that stabilize the orchestration before the flute comes in. At 00:42 seconds in, we are greeted with a familiar element heard in the previous pieces of descending arpeggios. The flute seems to dim away as the tam-tam crashes, giving drama to the texture.

The plucked strings and flute play the melody in unison, emphasizing its importance. The brass come in, adding counterpoint in the pause of the melody. This calms down into a flute solo with the plucked strings having a wonderful glissando, giving a magical effect. The plucked strings come back in as the flute plays the main melody of the piece before the percussion, strings, and flute changes the texture into a climactic tutti, or the entire orchestra, before we calm down to start again.

Thank you, Starlights, for venturing through the music of Mooshu with me. Have a wonderful night.

Disclaimer

Please note: I transcribed the music from the original/classic mode music scrolls. Not all of my transcriptions are 100% accurate, but they are close and the rhythm is properly notated.

Empyrea P2: Live Realm!

Introduction

We’ve finally reached our last chapter in this amazing series! The third and final chapter, Live Realm. We will look and see how the community feels about this world!

Let’s tackle this insane world once and for all and see just what we all think about it!


Questing

The story line and questing difficulty are locked. What we have is what we’re getting. Kingsisle noticed that the majority wanted it to be challenging, we’re lucky we don’t have to relive the Mirage release.

What’s great about this is that the story is engaging. If you take away the visuals, fight mechanics and mini-games, it’s a well-written and enjoyable story!

Did you enjoy questing?

Over two-thirds of the players I asked enjoyed questing throughout Empyrea Part Two. That’s an amazing figure, as only 19% didn’t enjoy it! There are many people in the game who don’t play it for the story or questing, so this makes sense and is a lot better than it seems! 

Personally, I believe this is one of, if not the most important factor, to a world’s memory in hindsight. Looking back on Khrysalis, while it’s a beautiful and story-driven world, it’s only remembered for being insanely long!

It wasn’t just the story that stood out for Empyrea. The difficulty was almost perfectly tuned with the quest line and made us feel immersed within the world!

Did you enjoy the bosses and mobs?

The majority enjoyed the fights within the world! It wasn’t just us battling our way brainlessly, we had fun killing things! Again, this will contribute a lot to our long-term perception of this world. We’ll look back and say yeah, I enjoyed it. Things like these keep our hopes up for the game and its story!

Did you enjoy the challenge?

The difficulty was perfect and I’m happy Kingsisle didn’t nerf Part 2! We needed a challenge and we got one! There are also some debatable topics flying around the community. The biggest being the Titan’s Trident fight. 

Do you think the Trident fight needs to be nerfed?

The community was split on this topic. We want a challengeIt’s too hard! There’s cause for both arguments.

The cheats are unfair and gaining shadows while raised in the air and untouchable means the boss is super hard to beat. If you’re coordinated and playing with a knowledgeable team, it doesn’t take too long.

The problem lies within the team requirements. The demand for Balance and Death wizards for blades and Bad Juju is insane! You need both if you don’t want the fight to take over an hour. This debate will keep raging on and there’s nothing we can do to resolve it!


Overall World

I asked for a lot of information from you guys to get the best overall feel for this world and how you felt about it. It’s safe to say, the chart reveals all!

Did you enjoy the World overall?

All the positive results combined take up more than half the data. Another fifth considers it cool, another considers it okay, and a small majority didn’t enjoy it.

This is a good thing. It shows us that Kingsisle isn’t messing around with world releases. We’ve got a lot to look forward to!

Did you enjoy the ‘Nothing’ teaser?

The community is split three ways on this. I think partially due to concern. It’s been a long time since we started a new story arc, let’s hope that Kingsisle will nail it like they did this one.

This had led to some wild speculation about what we will face, let’s hope it meets our expectations!

Was what we got enough?

An overwhelming majority think we got enough new content to keep us going for a while. However, there is a cause for concern we won’t get new content soon enough, and the game will die down.

Recently, I’ve noticed a lot more people in the game, with a few realms appearing full which used to be empty at peak play time. I think the number one priority for Kingsisle should be to keep this hype train going!

To those who said it wasn’t enough, I’d encourage you to keep going. It may just be the initial grind that burns you out. Give WhirlyBurly, the side quests, and farming a chance. Maybe your opinion will change!


Opinions

I did something different with this questionnaire and asked for individual opinions. I also asked about one of my favorite new games, Whirlyburly!

Have your opinions on WhirlyBurly changed?

Sadly, I seem to be in the minority. I think the main reason for the overall view and perception of Whirlyburly is that there isn’t enough to work for, cause, and there aren’t any shorter game modes. 

That’s a different topic and we can be reasonably sure this isn’t all we’ve seen from Whirlyburly.

I then asked for just your thoughts on anything Part Two related. I got a lot of calls for nerfs but not to over-nerf. There were other great ideas and opinions such as:

  • A request for PvP gear and PvE gear to be entirely separate.
  • It’s the best world ever.
  • A Life school AOE spell needs to be created.

Conclusion

We’ve tackled Empyrea Part Two while breaking down each part to see how we all feel and overall, I think this world has been great. A 8.5/10 at least. There’s little room to complain, a lot to enjoy and shows promise for what’s coming! I am happy and eager to see the game’s future.

A final shout out to the entire community for taking part and helping with these articles! You guys have been amazing and I think it’s participation and approaches like this that will keep this game going for years to come! Thank you all!

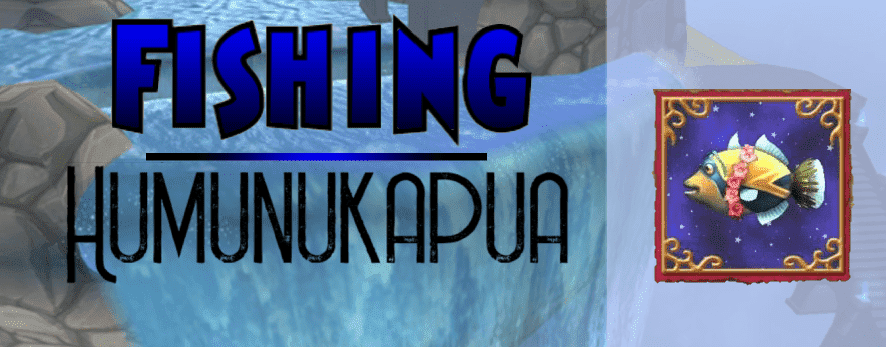
Catching the Humunukapua

Every Monday morning, the weekly tournament fish changes. In this article, I’m going to share my experience with the fantastic hobby of tournament fishing!

Humunukapua

School Life | Rank 3 | Common/Regular |1500 XP
No used in any recipes
Αverage sale price in gold: 1300 each

Limits:

Small Fry: <15
Whopper: >45
 

Fish Location In order:

Celestia/Celestia Base Camp/The Floating Land
 
Housing Items:
Fantastic Voyage Expedition
 

How to catch a Whopper:

The best place is the Fantastic Voyage Expedition if you have access to it. The Humunukapua is one of 2 life fish. The other being the Mistletoe Angler, although this is a seasonal fish which only appears during the Yuletide season and is a Rank 1 fish.
 

How to find this fish:

1. Reveal Large Fish / Reveal Fish School
2. If no fish are affected: Summon Fish and repeat
3. If a fish is revealed: Reveal Rank 1 fish
4. If no fish are affected: Common Vitality Lure and catch it
 
The first 3 winners will get tournament tickets:
First place: 120 tickets
Second place: 50 tickets
Third place: 20 tickets
 
The Tournament end on the 10/11/18
 
Good luck!

The Masteries of Wizard101

Greetings fellow wizards! In this article I will discuss the different type of masteries, where they are dropped and their usage in PvP/PvE.

What are Masteries?

Masteries are a subgroup of amulets that allow a wizard to use Power Pips with spells that are not of their own school.

This is what a mastery looks like.
This one is the Life School Amulet.

Where to Find Them

Any Level

Dropped from either Waterworks, located in Crab Alley, Wizard City, or from The Tower of The Helephant, located in Pegasus Place, Wysteria.  Both are avaliable to wizards at level 60 or higher.
It can also be bought from the Crowns shop for 9995 crowns

Level 90


Dropped by all 3 secret bosses in Aquila.
Mount Olympus – Gladiator Dimachaerus
Atlantea – Sand Squid Tentacle
Tartarus – Cronus

Level 100


Dropped by the hidden chest in the first part of Darkmoor. A gold key is required to gain access to the boss. Castle Darkmoor becomes available to wizards who reach level 100

Level 110


Dropped by Omen Stribog in the River of Frozen Tears in Polaris. A gold key is required.

Level 130


Can either be crafted from a recipe bought in Nimbus Recipe vendor Romar sells the recipe for 50,000 gold

Usage in PVE and PVP

Life: Mainly used because of the amount of healing spells it offers. Regenerate and Satyr are the most popular to save you which in battle either in PvP or PvE. 

Death: Mainly used with damage, life steal and healing spells. But its more commonly used to spam the enemies with plagues.

Myth: Mainly used to stun, using earthquake to remove all the enemies blades and shields or the use of shatter. 

Balance: Mainly used to spam Loremaster and Mana Burn in PvP, but also used when the wizard wants to be a support focused player.

Fire: Mainly used for damage over time hits (DOTs) which include Fire Elf and Burning Rampage. Also good for the Eirikur Axebreaker spell that comes from the ColdFire Dragon pet.

Ice: Mainly used for the shields that ice has to keep their damage low and you can use it to stun your enemies.

Storm: Use if you want to land high damage hits on your enemy or cast dispels.

What else are Masteries good for?


Masteries are not just used for PvP and PvE, they can also be used as part of a stitch. For example,  if you’re trying to make yourself look like a life wizard it looks cool to have the orbs flying around your wizard’s head.

To the right is an example of the Mastery Amulet stitched to a matching look.

You can use a mastery from another school to take care of some of the weaknesses that your main school has. For example, Storm wizards have low health so some Storm wizards might use a Life Mastery to get themselves out of any sticky situations. 

If you buy or farm for a Mastery Amulet, I hope this guide helps you to use it to your best advantage in game!

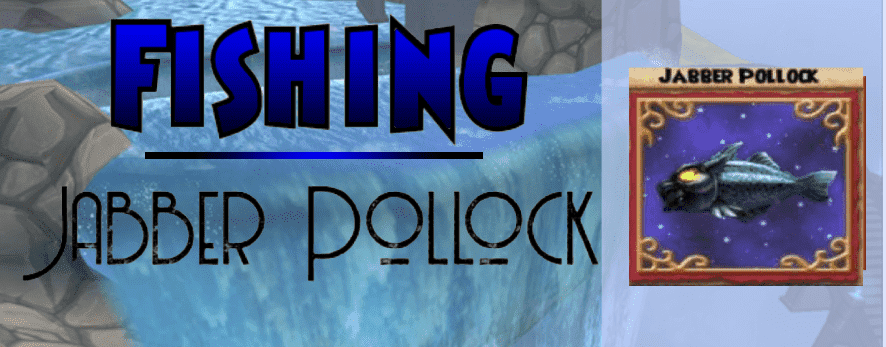
Catching the Jabber Pollock

Every Monday morning the weekly tournament fish changes. There are fishing secrets I can tell you. I want to share with you my experience in the fantastic world of wizard101 tournament fishing!

This week we have the Jabber Pollock:

School Myth | Rank 2 | Common/Regular | 1400 XP
 
Limits:
Small Fry < 15
Whopper > 25
 
Fish Location in order:
Avalon/High Road/ Poisoned Well
 
No used in any recipes
 
Αverage sale price in gold:
500 each
 

How to catch a Whopper

The only place we can find it is the dungeon: Poisoned Well. Be careful, because you must finish the battle first. So prepare your gear or your deck for a fight before you go in. Once you get to it, Jabber Pollok is the only myth school fish in the pond.


How to find this fish in order

1. Reveal Fish School/Reveal Large Fish

2. If no fish are affected Summon Fish and repeat
3. If a fish is revealed – Minor Fable Lure or / Common Fable Lure and catch it.

The first 3 winners will get tournament tickets:
First place: 120 tickets
Second place: 50 tickets
Third place: 20 tickets
 
The tournament end in 19/11/18
Good luck!

Jewels

What are Jewels?

Jewels are items in the game that can be added–affixed–to equipment. (Athames, rings, amulets, decks, and even pets!) There are five different types of jewels–circle, triangle, square, tear, and star. Each different shape gives different boosts to stats.

Square jewels boost resistance, stun block, critical block, and incoming healing percent.

   (The square, tear, and triangle shape jewels.)

Triangle jewels boost shadow pip percent, power pip percent, accuracy, and can grant cards.

Tear jewels increase mana, health, energy, and fishing luck.

Circle jewels boost damage percent, critical chance percent, and outgoing healing percent.

Star jewels are equipped to pets, and can offer a multitude of different things; accuracy, cards, damage, resistance, and can even increase your gold obtaining rate. Star jewels can also boost your pet’s attributes. (Suffice to say, star jewels can give your wizard a handy little boost.)

(Know that jewels can boost specifics as well. A square jewel that is red will give you a boost in a fire resist. Jewels that are rainbow colored are the jewels that are universal–universal resist, universal damage, universal accuracy, etc.)


When you affix–socket–a jewel to an item, you must shatter–break–it to reopen that slot. When you shatter a jewel, the jewel will usually disappear. There are exceptions to this rule, so before you affix a jewel to a piece of equipment, double check that it is, in fact, shatter-proof.

You can carry up to a hundred jewels in your bag. They can be trashed and sold, but they cannot be auctioned. You can put jewels in a bank and the shared bank.

Obtaining Jewels

Like mostly everything in the game, jewels can be obtained be farming, buying off of vendors, or crafting. (You can even find jewels in fishing chests.) Some jewels can’t be bought, some can’t be crafted, some can’t be farmed. It’s annoying, but it’s life.

To craft jewels, you need two things: the recipe and the jewel crafting station. (Which is obtained from a quest at level 15.) All jewel recipes require three fundamental things: a type of metal, a type of gem, and a type of treasure card. What type of metal, type of gem, and what type of treasure card depends on the recipe, but that’s the blanket rule.

For example, the recipe for a random ice school jewel for levels 45-65. In the bottom left, the ingredients needed are listed. 15 sapphires, 4 bronze, and 4 ice spear treasure cards.

Farming for jewels works just as farming for any other type of equipment. Do your research before setting off. Buying jewels from a vendor is just like buying gear from a vendor.


This is a novice’s wrench.

Opening Sockets

Some items have sockets that have a lock over them. This means you must open the locked socket before you can affix anything to it. This requires an item: a wrench. Different items require different wrenches. If you don’t have the correct wrench, you can pay crowns to unlock the socket. Wrenches are traditionally dropped by bosses, but a variety of bosses drop different wrenches.

Affixing Jewels

Courtney, you say, I have the jewel I want to affix, but what do I affix it to? 

Great question, young grasshopper.

You affix jewels to gear you know you will be using. The better the jewel, the more you want to ensure that it will get used.

Just recently, I got my gear from Darkmoor. My ring, Band of the Chilling Light (dropped from Aphrodite, the gold skeleton key boss in the Graveyard) gives three sockets: a circle, a tear, and a square. Since I plan on using this equipment piece of a long time, I would choose to affix a good jewel, perhaps a universal resistance jewel, a health-boosting jewel, and a really good damage jewel.

The ring I used before I got this one was one I got in Zafaria. At level 66. I never replaced the ring because I had my best jewels affixed to it, and the rings I found later on never matched up to it.

When you’re a lower level, you switch gear a lot. When you’re level fifteen, there’s a good chance you’ll be using a different athame at thirty. There’s nothing wrong with that, and I highly recommend you do not use a level fifteen athame at level thirty. Don’t equip a rare/good jewel you just found to an athame you’ll use, perhaps, for five more levels. (This is a suggestion, not a requirement. What I’m trying to get at is to plan out how long you’re going to use a piece of equipment. It does no good to waste jewels you spent hours farming for.) 

Shattering Jewels

This is the downside. I mentioned it above, but for almost all jewels, when you affix them, to get rid of them you must shatter them. This breaks the jewel, and you can never get that jewel back. There are jewels that are shatter-proof, but there are more jewels that aren’t. Be very careful what jewels you choose to affix.


I was very fond of the +17 ice damage as well as the +32 fire resist. I also never really found a better ring, but that could have been me forgetting to double check my gear.

The process of affixing/shattering a jewel to an item


 Community Contributor Courtney PixieBreeze

Energy Saving Tips

Hey everyone!

Just sharing something I found out recently that might increase your energy efficiency while training pets. Let me know what you think!

First things first.....

Before I start, consider getting some energy gear if you don’t already have some! I made a guide you can check out here for some ways to get energy gear without emptying your crowns wallet.
 
Also, you should never use snacks that give less than 8-10 XP unless you are completely broke. It’s just so inefficient. Sell them if you have them, and buy the rank 7 snacks from the bazaar. (If the snack is the same school as your pet, that’s a plus too.) You may already have some rank 7+ snacks from bosses you have fought while questing or farming, so you shouldn’t always have to buy when you run out of mega snacks.

Back to the point.....

This mainly applies to people that have a limited number of mega snacks. If you have like 400+ in that tiny little backpack of yours, keep doing what you’re doing.
 
You wanna make the most out of your precious, limited supply of mega snacks?
DON’T USE THEM.
(Well, not yet at least.)
 
This may not make sense at first, but trust me here. Consider this: regardless of what level your pet is, the same snack will always give the same amount of xp.
 On the other hand, the level of your pet DOES decide how much energy you spend per game during training.
 
But why does that matter?
 
Theoretically, you’d want to spend more time at the lower levels to take advantage of the cheaper energy cost. The better snacks will level you up faster (which is the goal), but that gives you less time at the lower levels. And there’s no way using worse snacks can be more effective……right?
 
Not necessarily.
 
Still kinda confusing right? Well check out this example!
 
Imagine you begin training a pet, and have these two snacks in your backpack:
 
Fancy Yogurt (x5)
Shanta Pudding (x13)
Pet: Baby (0/125 xp)
Naturally, you want to rush straight to Teen using those Fancy Yogurts right? Well, 3 snacks will level you up. Here are the results:
 
Pet: Teen (25/250)
Games Played: 3
Energy Cost per Game: 2
***Energy Used: 6***
Remaining Snacks:
Fancy Yogurt (x2)
Shanta Pudding (x13)
Now, assuming you play 15 more pet games and used the remaining Fancy Yogurts and all the Shanta Puddings, you would just barely make it to Adult. Here are the results:
 
Pet: Adult (5/500)
Games Played: 15
Energy Cost per Game: 4
***Energy Used: 60***
Remaining Snacks: None
 
Overall to get from Baby to Adult, it took 66 energy and all 18 snacks. We used the mega snacks first, which is typically how people train their pets.
 
Now, lets see if what happens when we take the same situation, but start by feeding the Shanta Pudding instead of the Fancy Yogurt.
 
Since it only gives 10 xp, you will need all 13 snacks just to get to Teen. Results:
 
Pet: Teen (5/250)
Games Played: 13
Energy Cost per Game: 2
***Energy Used: 26***
Remaining Snacks:
Fancy Yogurt (x5)
Shanta Pudding (x0)
 
Then, you continue to Adult by using the mega snacks. Results:
 
Pet: Adult (5/500)
Games Played: 5
Energy Cost per Game: 4
***Energy Used: 20***
Remaining Snacks: None
Notice the difference yet? In both cases, you played 18 games, used 18 snacks, and ended up right at Adult.
 
The difference? Energy. In the first scenario, 66 energy total was used. But in the second scenario, only 46 energy was used.
 
You literally saved 20 energy from baby to adult just by feeding snacks in a different order.
 
The concept is pretty simple: by spending more time at lower levels, you decrease your energy usage overall. This was just an example, so I used specific snacks and only did 2 levels of training, but the same idea applies for any other situation.
 
The longer you wait to use your mega snacks, the more energy you will save in the long run.
 
Yes, it will seem like it’s taking longer at first. Even in the example, it took 10 games longer just to get to Teen. But if you’re in it for the long haul, you will appreciate the extra energy and less time spent at the higher levels.
 
Personally, I like to wait until my pet is Ancient (mainly because I have an absurd amount of the +15 xp snacks) before I start using my rank 8 and 9 snacks. If your pet fails early, you can rest easy knowing that no mega snacks were wasted. This also allows you to speed through those expensive 8-10 energy games as quickly as possible, which saves a ton of energy.
This concept does also apply during double xp, but the biggest priority in that case would be to use all of your mega snacks before the event is over. The sheer volume of double xp is worth more than saving some energy, but it is entirely possible to do both.
 
Like I mentioned at the beginning, if you just have limitless mega snacks (and I know at least a few of you gardening monsters do), then ignore this completely, as it won’t help you. The goal is to speed through the higher levels to avoid high energy costs per game; but if you can speed through the entire thing with only mega snacks, then you do you.
 
For those of you that made it this far, I appreciate you taking the time to read this post! Do you think this is effective? Leave a comment below!
 

By Community Guest Author: NinjaDudeb12

A Game Changing Deck Strategy

Have you been spending your training points on a secondary school thinking it’s the best option to help on your questing journey?

Well, I have a little game changer for you! Personally, this helped me so much in my journey through the spiral. I am a life wizard and everyone knows us life wizards don’t hit hard in the beginning. It’s a struggle until we get Forest Lord. So, I thought learning the spells of the strongest school in the game would help me out a lot. I was wrong. I struggled through all the worlds until I got to Celestia, which is main world no.6! I spent all my training points on the wrong cards.

It wasn’t until I found a useful set up that saved me more times than I can remember that life in the Spiral got a bit easier.

Let’s elaborate shall we?

ICE - Tower Shield

Tower shield is a necessary spell in case you are facing an enemy you don’t have a shield for or didn’t pack a treasure card for. It reduces 50% damage from any school. I don’t take this spell out of my deck unless I have a shield to match the school of the enemy I’m facing in battle. You have to be level 16 to learn it. All spells require 1 training point but you will have to learn Frost Beetle, Snow Serpent, Volcanic Shield, and Evil Snowman before getting access to train the spell. You will need a total of 5 training points.

Tower Shield is also available as a Treasure Card which gives an additional 5% shield. It can be bought from the Bazaar in Wizard City Olde Town.

DEATH - Feint

Feint is one of my favorite spells from the death school. It’s a trap that adds 70% damage with a small catch of also casting a 30% trap on you. It is not linked to another school, so can be used on any enemy to add more damage. You will have to be level 26 to be able to get this spell. You will have to learn Dark Sprite, Ghoul, Dream Shield, Banshee, Vampire, and Skeletal Pirate before getting it. You will need a total of 7 training points.

Feint is also available as a Treasure Card too! Instead of a 30% trap on your self it reduces to 20%. Also can be bought from the Bazaar.

BALANCE - Reshuffle

Reshuffle, a spell I had no idea was actually trainable in Wizard City itself! This spell is another favorite of mine and never leaves my deck. It is a massive help when you’re fighting a boss, or even a mob battle and haven’t packed enough attack spells or heals. Reshuffle does exactly what it’s called, reshuffles all your cards back into your deck. This spell is located in Colossus Boulevard in Wizard City. Mildred Farseer has the spell for you to train along with a few others. You will have to be level 20 to be able to train it and will only be 1 training point. You do not need to learn all the spells that she offers in order to train one. 

Reshuffle can be bought from the Bazaar. If you haven’t trained the spell and see it in the Bazaar, buy it quick as it is fast to go. You can also buy Reshuffle from the Library in the commons of Wizard City.

Below is a picture of Mildred Farseer and a map of where she is located in Colossus Boulevard. 

BALANCE - Spirit and Elemental Blades/Traps

These 4 spells are great for setting up a boss or mob to increase your damage. The blades adding 35% and traps adding 25% damage. They are not only great for yourself but if you are working with a team of other wizards, you can also help out by trapping the enemy they are aiming to hit or casting the blades on them. So these are a multi-useful spell. I would only get the cards that match your school.

Niles, the Balance tree has these spells. He is at the entrance of the Krokosphinx in Krokotopia, which is the second main world in the Spiral.  You will have to be level 15-25 to get these spells and you also must complete all the Wizard City main quests to gain the Krokotopia Spiral Key. Each of these spells needs 1 training point. 

Below is a picture of Niles and where he is located.

Training Points

To learn all the spells above, you will need a total of 15 training points. Don’t panic! Every four levels, you gain 1 training point and your school spells don’t cost anything! Also, doing Prospector Zeke’s quests in every world, which involve you exploring the world you are in to find whatever item he has requested, will help you gain another training point in each world.

A picture of Prospector Zeke along with 2 of his quests are below.

saffron22

I hope this guide helps you the way it did for me! 

Whirlyburly! The Basics

Introduction

So, how about Whirlyburly? Whirlyburly is that oddly-placed mini-game within our Velo City storyline. It’s kind of like chess, but three player… and hexagonal… with only three pieces…  Okay, so it’s nothing like chess, but it is a tactical board game with a lot of inner complexities that make it surprisingly fun.

The game can be complicated and confusing for a new player, and only through experience does one learn the ropes, but that’s what this is here for! So, let’s see what we can teach you!


The Cards

The random selection of 5 cards you get at the start of each round are what allow you to make specific plays. Ideally, you want big movement pattern cards, but often small, strategic plays can win you a match!

It’s important that you can discard any card you don’t want. A simple right click will allow you to find a better one for the next turn!

You can also gain a lot of tiles at once by matching the letter of your card to your piece. So, S for Scrapper, and when he finishes he takes with him a large area that surrounds him!

You can also change what piece has which card before the selection phase ends by simply clicking them and a new card!


The Pieces

Contrary to the name, the Charger isn’t specifically designed to charge at the opponent and take chests. Each piece functions in the exact same way, but with different prey and counters.

The best you can do is watch where the enemy sends their pieces. If both of their hunters are near a single place, send your Charger in while keeping your Scrapper away. Those 3 point kills make a massive difference. This smart positioning often allows you to take chests without much hassle or competition!

But be wary of overextending! If you send your Hunter in to take a chest, make sure their Scrappers aren’t on your borders ready to pounce!

Remember that you can also knock pieces off the map! If a piece is near the outline, use a Hunter or Charger to knock them off of the edge, sending them back to spawn!


The Points

The points system is pretty easy to understand but can be a lot more complex when you are left with decisions that could drastically affect your score at the end of the game.

The 10 point chest is almost always a good idea, but on your way, you may be killed and leave uncontested tiles for your enemies to take! Tiles build up points faster than you think, so leaving a ton of them on the other side of the board free to be retaken is not a good idea.

Capturing is also a solid method of gaining points. If you can repeatedly take out their pieces and contest tiles you’ll quickly score into first place!

The last round! This is super important and can make or break your entire game. Taking tiles should be your absolute priority. Don’t leave yourself at risk in the round before, otherwise, you’ll just take the tiles you already have. Save some of those Area Capturing tiles for last and boost your score as much as possible!


Conclusion

Whirlyburly is actually quite fun, endearing and a unique game once you start to understand it. It can quickly take up a lot of your time and you’ll end up spending too much time in Velo City, or you’re like me and have created an entire gear set just to wear into games!

Hopefully, this allows you guys to better experience our new mini-game and earn some cool shirts!