How to Win: Fishing Tournament

Every Monday morning a new fish is out there for us to catch fishing tournament. When you catch one of the right size, the game will ask if you want to enter that fish in the tournament. If your answer is Yes, it will remove it from your fish basket and automatically tell you in which place are you in the tournament. If you answer no, the fish will be in your backpack already and you can sell it, or move it to an aquarium. You can also transfer it with the aquarium in the shared bank and move it into another player in the fish basket and take back the aquarium and repeat this. For the tournament, it will not count if you transfer to your other characters. Only the fish caught during that week’s tournament can be entered to the list. Only the first 100 players to have entered will win gold. Wizards who are at least Level 7 will be called by Lucky Hookline to learn the skill of Fishing. It’s important to have all of the fishing spells trained for the fishing tournament!

The most important spells to start with

  1. Catch a fish with a school lure rank, must be fishing rank 2.
  2. Reveal Whoppers and almost Whoppers and Reveal Small Fries and almost Small Fries, must be fishing rank 2.
  3. Reveal the Magic School of all Fish, must be fishing rank 2.
  4. Winnow will scare away all fish except the school you are fishing for (each school) fishing rank 3.
Continue your training with Haarek Silverscale, Frode Silverscale, Yuri Smokesnare,Timor Flamecaster , Ryoshi, and Alejandro de la Paz. Follow them from the Wizard City to Grizzleheim, Dragonspyre , MooShu, Avalon, and Atzeca.

There are three types of rarities that a Fish can come in: Common, Rare, and Epic. These rarities represent how often Fish can be found skulking around in their native ponds. Common Fish are much easier to come by, while Rare Fish are a bit more uncommon. Epic Fish are very rare. For Common fish, you can earn 120 tickets for 1st place, 2nd 50 and third 20. For a rare fish earn 1st 250 tickets 2nd 120 & 3nd 50.

Finally for epic 500 tickets for 1st place, 250 for 2nd and 120 for third place. Only one take the first place, 2 the silver place (about +/-0,5 from the 1st ) and 3 the bronze place (about +/-0,5 from the 2nd). Fish have 3 different classifications which include Regular, Tall, and Large. Regular is the most common size used by Fish. Tall generally consists of Jellyfish and Squids while Large is mostly for Stingrays and other large Fish.

For the fishing tournament, we need the rarest fish that and only the small fry’s or whoppers. All the fish have a specific limit from keeper to whopper or keeper to small fry. Reveal Whoppers and almost Whoppers spell, show and fish that are +0,10 from the limit. Reveal Small Fries and almost Small Fries spell, show, and fish that are -0,10 from the limit.

The gold for these fish will be more than if we sell a regular fish. Catching a fish for the first time gives 100 times the normal experience of catching the same fish again. Catching rare fish and epic fish will give more experience than catching common fish. Different kinds of fish are ranked differently, and this classification depends on their degree of difficulty being caught. Any Fish can be caught using any lure, but using a higher rank lure gives a higher chance of catching higher rank fish. In order to have the best chance of catching any fish, you need the right lure or more rank and the right school. Example: For a fish school of storm, rank 2, needs the “minor spark lure” spell. For a common fish, usually, we didn’t need fishing luck. For a rare fish we need at least 15-25% luck and finally, for an epic fish, we need 25-50% fishing luck. Gear with additional Fishing Luck is available from Brandon Mistborn for Arena Tickets.

Everyone who enters a fish in a Tournament will earn the badge “Medal Catcher” plus “Deep Sea Pro (Catch 1 Whopper Fish) or “Catch of the Day”(Catch 1 Small Fry Fish). Currently, fishing ponds are available in portions of Wizard City, Krokotopia, MooShu, Dragonspyre, Celestia, Zafaria, Grizzleheim, Avalon , Atzeca as well as from houses purchased through bundles and all 7 schools houses. To catch a fish is easy: give the right lure (rank fish, school) and then when the lure sinks completely underwater, press the spacebar fast.

Sentinels will protect the other Fish by scaring away fish that are nibbling on Lures, or they may even steal the Lures.

If you want to catch a sentinel fish, when it first touches the lure, press space bar very fast, don’t wait to sink the lure.

To see the fish in your backpack press V to open your fish basket. You can sell them or keep them for your collection.

If you want to see how many different types of fish you have caught press the angler’s tome button in your fish basket.

At the bottom of the angler’s tome you will see the total fish.

  1. Total Fish
  2. Total different fish
  3. Total Small fries
  4. Total Whoppers

Do your fishing spell quests with me and discover the secrets of winning the tournament each week!

Are you ready for a fishing challenge?

Catching the Sword Tail

Every Monday morning the weekly tournament fish changes. There are fishing secrets that I can tell you. I want to share with you my experience in the fantastic world of wizard101 tournament fishing!

Sword Tail

School Fire /Rank 2 /Common/Large /1,400 XP
 

Limits:


Small Fry < 12,90
Whopper > 25

No used in any recipes

Αverage sale price in gold: 200 each

Fish Locations:

Avalon:
Caer Lyon
Caliburn
High Road
Lake Shore
Mysterious Well
Poisoned Well
The Wild
The Wyrd

How to catch a small fry

The best to catch this fish is the Mysterious Well. In all locations you will also find the “Fish and Chips” fire school rank 1. The smallest pond we can see everything from fishing spells in at the same time is the Mysterious Well. It is a dungeon but it is not necessary to fight in order to fish there.
 

Find it in Order

Caliburn / Caer Lyon/ Outer Yard / Mysterious Well

Spells in order:

  1. Winnow Fire Fish
  2. Reveal Small Fish
  3. If nothing is affected – Summon Fish and repeat
  4. If it shows a fish – Check to see if it’s moving faster than the others, if not it’s the “Fish and Chips”

via GIPHY

The first 3 winners will get tournament tickets:
First: 120
Second: 50
Third: 20
 
The tournament ends at 27/08/18

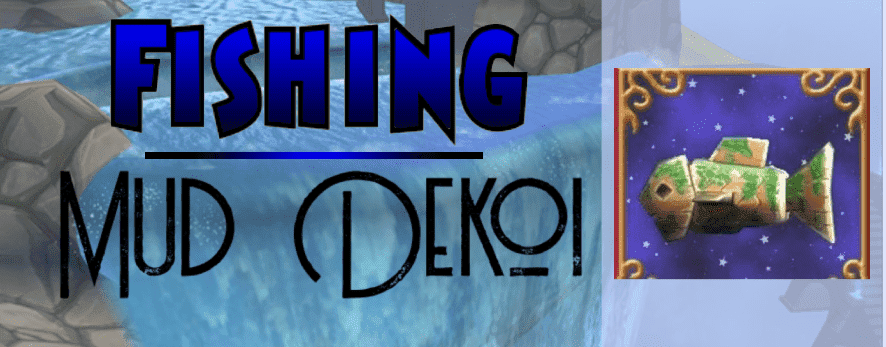
Catching the Mud Dekoi

Every Monday morning the weekly tournament fish changes. There are fishing secrets that I can tell you. I want to share with you my experience in the fantastic world of wizard101 tournament fishing!

This week we have the Mud Dekoi:

School Life
Rank 1
Common
Regular
900 XP

Limits:

 
Small Fry < 10
Whopper > 20

Fish Location in order:

Krokotopia

  • The Oasis/ Krokosphinx/ School of Balance/ Upper Zigazag
Mooshu
  • Jade Palace/ Yoshihito Temple/ Ancient burial grounds
  • Jade Palace/ Shoshun Village/ Kishibe village
  • Jade Palace/ Yoshihito Temple/Village of sorrow
Azteca
  • The Zocalo/ Zultun Dock/ Cloudburst Forest/ Tierra de Brea
Housing Items
  • Private Fishing Retreat

Αverage sale price in gold: 150 each

Used in recipes:

Tall Small Fry Aquarium

Vendors:
Eudora Tangletree/Wizard City – Olde Town   (2,750 Gold)
Frode Silverscale/ Grizzleheim – Northguard  (2,750 Gold)

Ingredients:

5 Storm Shield
15 Citrine
10 Mud Dekoi
50 Mist Wood
35 Leather Straps
5 Ancient Scroll


Tapestry to School of Life

Vendors:
Eudora Tangletree/Wizard City – Olde Town   (5,000 Gold)

Ingredients:

19 Spirit Armor
5 Mud Dekoi
1 Dagger of Absolution
30 Jade
60 Mist Wood
30 Acorn
15 Frost Flower

How to catch a small fry

The best place to catch this fish is in Upper Zigazag. In the same location you will also find the Jackson Polloc /Life Rank 2.
Mud Dekoi moves faster than Jacskon Polloc.
 

Find it in Order

Krokotopia/ Krokosphinx/ School of Balance /Statue /Upper Zigazag
 

Spells in order

  1. Reveal Small Fish
  2. If nothing is affected –> Summon Fish and repeat*
  3. If it shows a fish –> Reveal Fish School*
  4. If is life–> Reveal Fish Rank 1*
  5. If is rank 1–> Use life lure 1-3 and catch it
If nothing shows, repeat the summon fish spell.

via GIPHY

The first 3 winners will get tournament tickets:
First place: 120 tickets
Second place: 50 tickets
Third place: 20 tickets
 
The tournament end in 03/09/18

Fishing For Chest in Bundle Houses

In 2014 Wizard101 gave us fishing, by 2015 it had come to castles and houses.By 2016 after enough fishing, I noticed that some of the chests in bundle houses contained precious gifts. I started looking for more information online andI found various drops confirmed from houses purchased through bundles. 

My question was then: Does Every bundle pond, moat, or stream containing all of a bundles matching equipment? All of its gear, pet and mount inside the fishing chests found in its waters? I started a big hunt for the information, which continues to this day. In 2016, I decided to make a guide asking my friends in the community to screenshot anything that they got from chests in bundle houses

It turns out the answer is not so simple. To find out we need more wizards to get fishing and solve this mystery. Is all the equipment that comes bundled with Castles inside those chests? Some say yes. Myth or reality?

Eventually, we get confirmation that we can catch permanent mounts in Castles.

Fishing requires time and patience. It still has not gained a huge following in game, possibly due to its difficulty. If more wizards knew the secrets of fishing, and what they could win, we would have a better chance of finding out.

Fisherman Secrets:

  • Each Castle/House has a specific number of fish in its ponds.
  • When we catch some fish, they will be replaced automatically by new fish after 15 minutes.
  • Every Castle or location has one or more ponds.
  • Some ponds are connected between them so that the fishing spell you cast is for all. Some are not connected, so you need to repeat spells in each pond separately.
  • Each pond has specific limits. Some of the fish seem to travel through the limits, some even inside the obstacles, without being able to see them. So, we need specific spells to bring the fish closer to our position, and also to slow them down or even freeze them in place.
  • Each player has his own fish. No other one can scare off or catch the fish you see.
  • The fish you find in each Castle of the same type is the same for each Castle of the same name.
  • The chests there are like fish, in all categories, ranks, schools, and rarity. The fish are divided into common, rare and epic, the same is true for the chests.


The new fishing spell:

The new spell is like summon fish, affect the fish together with the chests. It gives us the ability to have a 50% better chance to get a chest from that moment on in the affected pond. KI gave us a great new fishing spell in Azteca, Buoy Chests 1, giving us fishers an exciting new advantage in finding these chests! The best plan is to catch everything in the pond within 15 minutes after we use these spells. 

More secrets:

Repeat the spell for every body of water that is not connected.Refresh the spells every 15 mins when the fish in the pond reset. 

How to search for rare/epic fish/chest:

We can tell them apart from the high speed and fast direction change.You will need fishing luck to catch these, and it may take dozens of resets to find them.If you do find them, stay there. 

Best plan after casting Buoy Chests 1:Use a rank 2 lure of whichever school seems to be most common in the housing pond when you use reveal. Try to catch as many fish as you can before the 15 min. reset.The spell only affects one pond every time, like the Banish Sentinels 1 does, before April 2018 update.*Banish Sentinels now Banishes Sentinels in the entire zone, not just the nearest pond.

  •  Every House also has a unique Doodlefish that confused us because they act like rare fish!

Are you ready to confirm that all the equipment is there?

Read More:

Massive Fantasy Palace

Polarian Shipwreck

Fishing Chests: Fantasy Palace

Does Every bundle pond, moat, or stream contain all of a bundles matching equipment?

All of its gear, pet, and mount inside the fishing chests found in its waters?

Are you ready to confirm that all the equipment is there?

We need your valuable help, time, patience and screenshots!

Let’s start with the Massive Fantasy Palace:

*This is what’s been confirmed or not yet by Wiki and the Housing Item Identifier or other sources.

Swift Gryphon

Wiki: Not Verified yet

Housing Item Identifier: Verified

Ancient Spear of Power

 
Wiki: Verified
Housing Item Identifier:
Epic Bundle Gift Card not available, so can’t answer
Prestigious (hat  robe – shoes)
Wiki: Not Verified yet
 
*The appearance boy/girl change depending on the character with the transfer of the shared bank, like all the clothes.
Housing Item Identifier: Can’t Verified gear, shows only the recipe of the mannequin.
Others sources and testimonies: Verified
(Discord: Wizard101/Fishing Gardening-help)

Fierce Hound

Wiki: Not Verified yet
Housing Item Identifier: Verified

Finally, the entire collection of 8 mini housing games:

 Wiki: Verified (All of them)

 
Housing Item Identifier: Verified (All of them)

As well as other pets, mounts, gear, unique housing items, seeds, regeants, teleporters, and many other precious gifts!

Advice:
  • The Castle contains 2 ponds that are linked together.
  • The spells will apply to both ponds, no need to repeat it.
  • The collected fish of that Castle are mostly balance school/rank 2, the Merle Doodlefish, so use balance lure!

If you get some of the crowns gifts that have not been confirmed in the Wiki, please take a photo with the chest drop showing and send it to us or directly at [email protected]

Thanks for visiting Ravenwood Academy
I can’t wait to see your photos and comments!
 
Thank you and Good luck!
 
Read more info here!

Crafting101 – Mooshu

Hello and welcome to the fourth installment of Crafting101 Wizard! Now that Marleybone is finished it is time to leave the big city and move on to greener pastures… Mooshu!

STEP 1 – TOSHIO

To get the next crafting quest you will need to find and talk to a little guy named Toshio. When you walk out of the Mooshu world gate he will be located on a porch around the corner to your left. He will give you the “Legend of Two Rings”. Be warned, the 2 rings are NOT the only items you will need to craft. After you finish that quest you will be asked to craft 2 Possibility Dirks. Also, note both of these items will have to be crafted on a new table – The Equipment Crafting Station.

STEP 2 – THE EQUIPMENT CRAFTING STATION

To complete this quest, you will need an Equipment Crafting Station. There are a few places to buy this item, but the nearest place is the furniture shop owned by Zhi Lan. It is located directly around the corner from Toshio. It will cost you exactly 1,500 gold and can be instantly placed in your home.

To tell what station you will need in order to craft a particular item, look for these icons;

BASIC CRAFTING STATION –

EQUIPMENT CRAFTING STATION –

CARD CRAFTING STATION –

There are more Crafting Stations that we will learn about in future articles, but these are the 3 that you may need for this quest.

STEP 3 – LEGEND OF TWO RINGS & DIRKS OF DARING

First, Toshio will ask you to create 2 Seals of the Seraphim. After you turn this quest in he will ask for 2 Possibility Dirks, so you can go ahead and buy both of these recipes in Toshio’s Shop. The Seals recipe will cost you 900 gold, while the Dirks recipe will cost 850 gold. In total for the Seals, you will need 8 Peridots, 6 Rubies, 10 Glass Vials, 20 Black Lotus, and 30 Mist Wood. For both Dirks, you will need 4 Sapphires, 4 Rubies, 10 Glass Vials, 10 Ectoplasm, and 30 Stone Blocks.

STEP 4 – GATHERING THE REAGENTS

Now that you know what you need for both the Seals and the Dirks, you can look for the materials simultaneously. I will go over what we need for the Seals first and then the Dirks.

SEAL OF THE SERAPHIM –

PERIDOT 

You can buy peridot from the reagent vendor right beside Toshio, Yuji Hamada, for 15 gold per. For the 8 that we need it will cost 120 gold in total. If you want to garden for them you can harvest these from Ivy Leagues, Snap Dragons, and Ultra Dandelions.

RUBY –

You can get rubies from Yuji Hamada for 15 gold per. The total for the 6 Rubies you will need comes out to 90 gold. These can be harvested from Ivy Leagues, Snap Dragons, and Ultra Dandelions as well.

GLASS VIAL –

Glass Vials are another item you will need to buy or harvest instead of find. Yuji has these for sale for 125 gold per. You will spend a total of 1,250 gold on the 10 of these you will need. Only Burning Snap Dragons drop these as a harvest.

BLACK LOTUS –

This pretty flower is most common in Mooshu. Below this list, you will find pictures of my favorite places to find reagents in Mooshu. You can buy these from the Bazaar if any are available, and you can also harvest them from Giving Trees, Burning Snap Dragons, Evil Magma Peas, and Honey Bee Plants. Another way to get this reagent is by buying a Card Crafting table as shown below from Zhi Lan for 1,500 gold and the Black Lotus Card from Toshio for 300 gold. At the Card Crafting Table you will be able to transmute 10 Cattails and 10 Scrap Iron into a Black Lotus!

MIST WOOD –

If you do not already have an abundance of Mist Wood, the Bazaar should have some for sale for around 25-175 gold per. Dandelions, Fickle Pickles, Snap Dragons, Tiger Lilies, and Venus Fly Traps will drop these. You will be able to find these in the grassy areas of Wizard City, or simply around the Spiral as you quest. You will need a total of 30 Mist Wood.

POSSIBILITY DIRK –

SAPPHIRE –

You will not be able to find Sapphires lying around the spiral, and will need to buy them from Yuji Hamada for 15 gold per. For the 4 Sapphires you need, it will cost you 60 gold. You can harvest Sapphires from Burning Snap Dragons, Ivy Leagues, Snap Dragons, and Ultra Dandelions.

RUBY –

You can get these from Yuji Hamada for 15 gold per. The total for the 6 Rubies you will need for this recipe comes out to 90 gold.

GLASS VIAL –

Yuji has these for sale for 125 gold per. You will spend a total of 1,250 gold on there 10 of these you will need for this recipe.

ECTOPLASM –

Ectoplasm can only be found or bought. You can get these reagents from harvesting Orange Dandelions, Ultra Snap Dragons, and Ultra Trumpet Vines. If there are any in the Bazaar you can buy them for around 250 gold per, depending on how the prices are in the Bazaar. If you are doing the crafting quests after you have finished some main quests and you have access to Dragonspyre, you can buy the crafting recipe from Balthazar Dragonthorn in the Atheneum, he sells it for 150 gold. It takes 5 leather straps to transmute an ectoplasm.

STONE BLOCK –

Stone Blocks are fairly common to find, in almost all of the cities in the Spiral. Unfortunately, often times this reagent is sold out, so unless you want to spam refresh the Bazaar in hopes of being able to buy some of these, I would recommend trying to find them. Burning Snap Dragons, Snap Dragons, Fickle Pickles, Dandelions, and Tiger Lilies may drop this reagent at harvest. 30 stone blocks will be needed in total for this recipe.

Here are a few of the places I found my reagents;

These little dead ends are a great place to find reagents in all of the areas of Mooshu

Anywhere along the green pathways yield lots of reagents.

STEP 5 – COMPLETING THE QUEST!

Once you have collected the materials for the rings and crafted them, you can go hand in the “Legend of the two Rings” and you will receive the “Dirks of Daring” quest. Above, I showed you where to get the items you need for the two dirks. When you have finished crafting those you can turn this quest in to Toshio! He will compliment you on your dedication to the craft before he gives you the “Dragon your Feet” quest. He will also reward you with 2,220 gold for the dirks and 2,360 gold for the rings, and finally, your Adept Crafter badge! Congratulations wizard, next time we meet we will be in the land of the drakes and Malistaire himself.

Crafting101 – Marleybone

Welcome to Crafting101 Wizard, or welcome back if you have been following along on this journey. Now that you have achieved your Apprentice Crafting Badge, I am sure you are excited to get the next badge, the Initiate Crafting Badge. Before you can begin this quest you need to get to Marleybone. In order to unlock Marleybone you will need to complete the last Krokotopia boss, Krokopatra. This purple Krokotopian boss is located in the Temple of Storms.

STEP 1 – FELICIA WORTHINGTON

Now that you have stepped out into Regent’s Square you are ready to track down Felicia Worthington to start the crafting quest. When you step out of the world gate room into Regent’s Square she will be down the road to your right. You will find the stylish lady hanging out beside the elevator to Digmoore Station. Once you find her and talk to her you will get the quest “Craft Services”.

STEP 2 – CRAFT SERVICES

Unlike the quest in Krokotopia, Felicia will tell you the 4 items she wants right off the bat instead of breaking it into two different quests. She wants 2 Stingers of the Scorpion and 2 Constellation Jewels. You will of course need to buy the recipes from Felicia, the Stinger costs 638 gold and the Jewels cost 675 gold. Since Felicia was kind enough to give us all the items we need to get to begin with, we can gather all the resources together! The Stingers will require 1 Citrine, 4 Glass Vial, 8 Scrap Iron, and 10 Mist Wood each, while the Jewels will require 1 Ruby, 2 Jades, 4 Glass Vial, 8 Scrap Iron, and 10 Stone Blocks. So in total for all 4 items we will need to gather 2 Citrines, 2 Rubies, 4 Jades, 16 Glass Vials, 32 Scrap Iron, 20 Mist Wood, and 20 Stone Blocks. This may seem like a lot of materials but if you gather items when you see them while questing you should get them all in no time!

STEP 3 – GATHERING THE REAGENTS

CITRINE –

You will need to get 2 Citrines in total. These reagents cannot be found and must be bought or farmed. You can buy these from Campbell Hodgson, the dapper dog beside Felicia for 15 gold a piece. By buying them you will spend 30 gold in total. If you have extra Ultra Dandelion, Ivy League, or Snap Dragon seeds these plants will drop Citrines.

RUBY –

You will need 2 Rubys in total. Rubies cannot be found in the Spiral, but you can also buy these from Campbell Hodgson for 15 gold per ruby. 30 gold will also be spent on these if you choose to buy them. Rubies can be harvested from Ivy Leagues, Snap Dragons, and Ultra Dandelions.

JADE –

4 Jades will be needed in total. You will have to buy or harvest these gems. Campbell sells these for 15 gold so you will spend 60 gold if you choose to go this route. Burning Snap Dragons, Snap Dragons, Ultra Dandelions, and Ivy Leagues drop these gems during harvest.

GLASS VIAL –

16 of these will have to be acquired. Glass Vials are yet again another item you will need to buy or harvest instead of find. Campbell also sells these for 125 gold per. You will spend a whopping 2,000 gold on Glass Vials if you choose to buy them. You can only find these by harvesting Burning Snap Dragons.

MIST WOOD –

If you do not already have a lot of Mist Wood, you will need 20 pieces of it. Mist Wood is common in the grassy areas of Wizard City or the sidewalks in Marleybone and Krokotopia. At the bottom of this list I have shown some of my favorite places to find many reagents in Marleybone, including Mist Wood. If you cannot find it you can buy it from the Bazaar if any is available for around 175 gold per. Dandelions, Fickle Pickles, Snap Dragons, Tiger Lilies, and Venus Fly Traps will drop these.

STONE BLOCK –

20 pieces of Stone Block is required for the items. Stone Blocks are fairly common to find, but not common at all in the Bazaar. Often times this reagent is sold out, so unless you want to spam refresh the Bazaar in hopes of being able to buy some of these, at 175 or so gold each, I would recommend trying to find them. Burning Snap Dragons, Snap Dragons, Fickle Pickles, Dandelions, and Tiger Lilies may drop this reagent at harvest.

SCRAP IRON –

Lastly, you will need to get a grand total of 32 pieces of Scrap Iron. I have some good news though, Scrap Iron can be found across the spiral and is fairly common in Marleybone. So while 32 pieces may seem like a lot, if you keep an eye open for reagents while questing in Marleybone, you should have them in no time! You can also buy them at the Bazaar for around 375 gold per 0-4 pieces. Burning Snap Dragons, Evil Magma Peas, Helephant Ears, and Venus Fly Traps will drop this reagent.

Here are some of my favorite places to find Reagents in Marleybone;

Near the teleporter hubs and teleporters there are often reagents to be found.

Near any of the walkways and clock towers or boss sigils there are plenty of reagents.

STEP 4 – COMPLETING THE QUEST

Now that you have all your ingredients, go back to your dorm and begin making the 2 Stingers and 2 Constellation Jewels that are required. You will have a 10 minute wait for members and a 20 minute wait for non-members in between some of the items. Once you have turned in your Stingers and Jewels, you will be awarded with 3,373 gold and your Initiate Crafter badge! You will also be given the next crafting quest, that will take place in Mooshu. Congratulations Wizard!

Crafting101 – Krokotopia

Welcome back to Crafting 101! Now that you have completed the first crafting quest, we are ready to move on to Krokotopia! In order to unlock Krokotopia, you must complete the story line in Wizard City and beat Lord Nightshade. Once you have unlocked Krokotopia, we are ready to begin!

STEP 1 – WUL’YAHM

Once you walk into Krokotopia and make your way into the Oasis, you will see two bridges to your left beside the pond. Take the 2nd one over to Wul’Yahm, he should have a golden question mark above his head. Talk to him to receive the next crafting quest “Ring in the New”.

 STEP 2 – RING IN THE NEW

Just like in Wizard City, you are not given the recipe for the item you must create. The Rings of Insight recipe will cost you 315 gold in Wul’Yahm’s shop. Once you have the recipe, you will notice it will cost you a few new items. The cost of one ring will be 1 Citrine, 6 Simple Vials, 4 Parchment, 6 Stone Blocks. You will also need 2 of these so in total you will need 2 Citrine, 12 Simple Vials, 8 Parchment, 12 Stone Blocks.

STEP 3 – FINDING THE REAGENTS

CITRINE –

As usual, the gem reagents such as Citrine must be purchased. In the Bazaar they will generally be more expensive, so I recommend buying them from reagent vendors. Behind Wul’Yahm there is a Desert Golem named Al Saf’Wan. He sells Citrine for 15 gold a piece. You can find Citrines also by gardening Ivy Leagues, Snap Dragons, and Ultra Dandelions. You will only need 2 Citrines for this quest.

SIMPLE VIALS –

Al Saf’wan sells Simple Vials for 40 gold each, you will need 12 so it will be 480 Gold. You can also get vials by gardening Orange Dandelions.

PARCHMENT –

Parchment is a reagent that can be found in the Spiral. It looks like a stack of paper on the ground. If you are having trouble finding all 8 of the parchment you need, you can buy it at the Bazaar when it’s available. It is often found in Krokotopia, so you should be able to find it as you are questing here. It can also be harvested from Fickle Pickles and Orange Dandelions. Here are some of the places I have found reliable for parchment in Krokotopia;

STONE BLOCK –

This reagent can be found in Krokotopia, and many worlds of the Spiral. The places shown above for finding Parchment are also great places to find Stone Blocks. You can buy them at the Bazaar or Crowns Shop. Stone Block can be harvested from Burning Snap Dragons, Dandelions, Fickle Pickles, Snap Dragons, and Tiger Lilies. Diego the Duelmaster also sells stone block for 50 tickets. You will need 12 stone block for this quest.

STEP 4 – COMPLETING RING IN THE NEW

With all the materials in hand, you can go back to your crafting table to create the Rings of Insight. Once you have crafted one of them you need to wait 10 minutes for members and 20 for non-members to craft the second ring. After the 10-20 minute cool down, you will be able to craft the next Ring and head back to Krokotopia to turn the quest in. Once you have spoken to Wul’Yahm you will be awarded experience, 855 gold, and your next quest – “A Set of Steak Knives”.

STEP 5 – A SET OF STEAK KNIVES

The last two items you will need to create are Poniards of Gallantry. The recipe should be purchased from Wul’Yahm for 261 gold. The recipe for these will require 6 Jade, 3 Simple Vials, 5 Deep Mushroom, and 6 Stone Blocks per. So in total you will need to get 12 Jades, 6 Simple Vials, 10 Deep Mushrooms, and 12 Stone Blocks.

STEP 6 – GETTING THE REAGENTS

We have already discussed how to get Simple Vials and Stone Blocks for the Rings of Insight above, so I will be discussing how to get the Jades and the Deep Mushrooms.

JADE –

Jade is a gem reagent you can buy from Al Saf’wan for 15 gold a piece. You will need 12 so you will have to spend 180 gold. The Gardening sources for Jade are Burning Snap Dragons, Snap Dragons, Ivy Leagues, and Ultra Dandelions.

DEEP MUSHROOM –

Deep Mushrooms are commonly found around the Spiral. They can be found in the grassy areas of Wizard City, especially in Olde Town and the Shopping Area. In Krokotopia I have found many of these in the Tomb of Storms along the walkways. If you do not want to look for Deep Mushrooms, you can buy them at the Bazaar. Boom Shrooms, Burning Snap Dragons, Snap Dragons, Dandelions, Deadly Fly Traps, Fickle Pickles, and Honey Bee Plants all have a chance of dropping this reagent. You will need 10 of these to complete this quest.

STEP 7 – COMPLETING THE QUEST

Now you have all the reagents for the Poniards of Gallantry and you can return to your house to create them. Just like before, you have a cooldown time after you create the first Poniard. Once you have finished crafting them both, you can return to Wul’Yahm and show him your work. He will reward you with experience, gold, and your Apprentice Crafter Badge! You will also get to keep the two rings that sell for about 15 Gold and give you a +3% Power Pip chance, and the poniards that sell for 52 gold and give you a 3% incoming health bonus. Congratulations on getting your next crafting badge!

Crafting101 – Wizard City

In Wizard101 there are many side activities that are not required but can add a little fun to your gameplay. These side activities can give experience, money, furniture, gear, and more. As you gain experience, you may even be able to craft your own permanent mounts!  Crafting is one of those activities that may seem a little tedious, but can yield great rewards! This guide will help you get through the first crafting quest in Wizard City and set you off on a crafting adventure.

 STEP 1 – EUDORA TANGLETREE

The first step is to find Eudora Tangletree in Olde Town. Once you enter Olde town you will go down the ramp past the Bazaar and take the first ramp to your left. Eudora will be on your left across a bridge beside Elmer Meadowgrass. Talk to her to receive the quest “Wizards in the Mist”

STEP 2 – WIZARDS IN THE MIST

This quest only requires you to collect 1 Mist Wood, which can be found almost anywhere in Wizard City. Mist Wood you already own and bought Mist Wood does not count, you HAVE to collect this once the quest is started. Just remember to keep an eye out in grassy areas for reagents while you’re out and about questing in Wizard City! Here are a few places I have found Mist Wood myself;

The grassy islands in the middle of combat roads is a prime place to find reagents of all kinds!

Unicorn Park in Unicorn Way has lots of reagents, including Mist Wood!

               Around the Boss Towers in Wizard City is one of my favorite places to get reagents!

STEP 3 – THE RAZOR’S EDGE

Once you have returned to Eudora Tangletree with your Mist Wood, she will reward you with 30 experience, and a Basic Crafting Station. She will then give you the quest “The Razor’s Edge”, which asks you to craft two Daggers of Absolution. Unfortunately, Eudora is not kind enough to give you the recipe for the daggers, you buy that from her recipe shop for 64 gold. As shown in the image below, it will cost us 2 Sapphire, 4 Black Coal, 2 Mist Wood, and 2 Cat Tails per dagger. So in Total, we will need 4 Sapphires, 8 Black Coal, 4 Mist Wood, and 4 Cat Tails to complete this quest.

STEP 4 – PLACING THE BASIC CRAFTING STATION

Now, before you can move on, you will need to go back to your home to place the Basic Crafting Station. Once it is placed, you can craft your recipes!

STEP 5 – FINDING THE REAGENTS

With the Basic Crafting Station ready to go, we can go into the Spiral to find the items needed for the daggers! There are many different ways you can get these items, and I will go over each item separately.

  MIST WOOD –

We already discussed where to collect Mist Wood, but you can also get this item from the Bazaar for around 30-33 gold. If you are a gardener, Mist Wood can also be found by harvesting Dandelions, Fickle Pickles, Snap Dragons, Tiger Lily, and Venus Fly Traps. This reagent is usually easy to find. You need 4 of these in total.

  CAT TAILS –

Cat Tails are common and are found in water. In the picture of Unicorn Park in Unicorn Way above, you can see one of these Cat Tails in the water to the right of the statue. Look in the rivers of the Commons and Unicorn Way, the pond beside the water wheel in Triton Avenue, and the rivers around Festival Park in Cyclops Lane. Keep an eye on the water! You can also buy Cat Tails in the Bazaar for around 170-175 gold. For you gardening wizards, the Cat Tails can be found by harvesting Dandelions, Honey Bee Plants, Tiger Lily, and Pink Dandelions. You need 4 of these in total.

  SAPPHIRE –

You will either need to either buy Sapphires from the Bazaar for around 75-80 Gold each or from the reagent vendor beside Eudora, Elmer Meadowgrass, for 15 Gold each. You will not be able to find these lying around the Spiral. You can harvest Sapphires from Burning Snap Dragons, Ivy Leagues, Snap Dragons, and Ultra Dandelions. You need 4 of these in total.

   BLACK COAL –

Black Coal will also not be sitting around the Spiral for you to pick up and will have to be bought. You can buy it in the Bazaar for 20-25 gold each or from Elmer for 5 gold each. Black Coal can only be harvested from Burning Snap Dragons and Snap Dragons. You need 8 of these in total.

STEP 6 – COMPLETING THE QUEST!

Now that you have all of the items needed, go back to your dorm or house and craft your first Dagger of Absolution. Notice that it will have a countdown of 30 seconds before you can create the other dagger. That is because you only have 1 crafting slot. Don’t worry though, after you finish this quest you will receive another crafting slot. You will get more slots as you complete more crafting quests.

Once you return the Daggers to Eudora you will get some gold, experience, and your Novice Crafter badge! Then you will be able to accept your next crafting quest in Krokotopia. Congratulations Wizard, your crafting adventure has begun!