The Masteries of Wizard101

Greetings fellow wizards! In this article I will discuss the different type of masteries, where they are dropped and their usage in PvP/PvE.

What are Masteries?

Masteries are a subgroup of amulets that allow a wizard to use Power Pips with spells that are not of their own school.

This is what a mastery looks like.
This one is the Life School Amulet.

Where to Find Them

Any Level

Dropped from either Waterworks, located in Crab Alley, Wizard City, or from The Tower of The Helephant, located in Pegasus Place, Wysteria.  Both are avaliable to wizards at level 60 or higher.
It can also be bought from the Crowns shop for 9995 crowns

Level 90


Dropped by all 3 secret bosses in Aquila.
Mount Olympus – Gladiator Dimachaerus
Atlantea – Sand Squid Tentacle
Tartarus – Cronus

Level 100


Dropped by the hidden chest in the first part of Darkmoor. A gold key is required to gain access to the boss. Castle Darkmoor becomes available to wizards who reach level 100

Level 110


Dropped by Omen Stribog in the River of Frozen Tears in Polaris. A gold key is required.

Level 130


Can either be crafted from a recipe bought in Nimbus Recipe vendor Romar sells the recipe for 50,000 gold

Usage in PVE and PVP

Life: Mainly used because of the amount of healing spells it offers. Regenerate and Satyr are the most popular to save you which in battle either in PvP or PvE. 

Death: Mainly used with damage, life steal and healing spells. But its more commonly used to spam the enemies with plagues.

Myth: Mainly used to stun, using earthquake to remove all the enemies blades and shields or the use of shatter. 

Balance: Mainly used to spam Loremaster and Mana Burn in PvP, but also used when the wizard wants to be a support focused player.

Fire: Mainly used for damage over time hits (DOTs) which include Fire Elf and Burning Rampage. Also good for the Eirikur Axebreaker spell that comes from the ColdFire Dragon pet.

Ice: Mainly used for the shields that ice has to keep their damage low and you can use it to stun your enemies.

Storm: Use if you want to land high damage hits on your enemy or cast dispels.

What else are Masteries good for?


Masteries are not just used for PvP and PvE, they can also be used as part of a stitch. For example,  if you’re trying to make yourself look like a life wizard it looks cool to have the orbs flying around your wizard’s head.

To the right is an example of the Mastery Amulet stitched to a matching look.

You can use a mastery from another school to take care of some of the weaknesses that your main school has. For example, Storm wizards have low health so some Storm wizards might use a Life Mastery to get themselves out of any sticky situations. 

If you buy or farm for a Mastery Amulet, I hope this guide helps you to use it to your best advantage in game!

Play Wizard101 for Free!

Let me start by saying, we’ve all been there. There’s always been a time in the game when you’re considered a free player, whether you’re out of crowns or your membership has just run out. Especially when you’re playing for the first time, crowns and membership can be difficult to get if your parents don’t agree to it.

This guide assumes you want to level up to receive more spells from your professor and receive lots of gold, without ever paying crowns or membership.

Phase I: The Early Days

Farming

There are plenty of different places to farm, but where do we start? Farming is the repetitive act of defeating an enemy’s instance or gauntlet.

Let’s begin with the simplest places to farm that you can access yourself.

1. The Kraken

Kraken, the mighty monster of the depths is famously farmed, right in Triton Avenue. This is the best option until you are about level 12. The Kraken drops clothing and furniture you can sell in the bazaar (or keep for your future house!)

I recommend that you join a busy realm, such as Ambrose or Balestrom to get as many people to join the fight as possible so it will go quicker. After defeating the boss if you return to the Storm Mill through the teleport pad and come right back, the Kraken respawns.

2. The Harvest Lord

Farming The Harvest Lord has all the same benefits as the Kraken, except now you have a Team-Up button. Once you click that button, higher levels will join to help you farm him from the Team Up station right outside the bazaar.

3.  Housing Gauntlets

Winterbane Hall and the Midnight Sun Pagoda are some of the best gauntlets there are for this purpose. When you farm them you will get weapons, clothing, furniture, seeds, and pets. The only downside to gauntlets is that there is no Team-Up button to find higher levels to help you. Therefore, you must invite your own friends, or find a way to gather help. Find this place in a shared home on the housing tours menu.

Below are the tiers of difficulty and experience for all gauntlets. The numbers represent your level. I suggest you should farm the gauntlets around level 12 to level up quickly. The closer you are to the latter end of the levels, the more experience you will receive. Upon second entry, you will receive half of the experience you received the first time.

  • 01-19:  Tier 1
  • 20-39:  Tier 2
  • 40-59:  Tier 3
  • 60-79:  Tier 4
  • 80-100: Tier 5

Remember to try to mix it up between the various gauntlets offered. They can yield large rewards and XP. Here is a list of all housing gauntlets there are, as of November 2018

  • Winterbane Hall
  • Midnight Sun Pagoda
  • Spiral Cup Gauntlet
  • Grand Tourney
  • The Great Clock
  • Fantastic Voyage Expedition
  • Accursed Playhouse

Please note: Tanglewood Terror, Baddle of The Bands, Zeus, KrokopatraMeowiarty, and Rattlebones housing instances from the crowns shop are non-repeatable, but yield great rewards. Use with caution. They are  extremely challenging and do not adhere to the same tier of difficulty rule as the gauntlets listed above.

Gardening

Upon the completion of level 11, you will be given a quest. You must speak to Moolinda Wu, informing you that your status as a level 12 player now gives you the ability to garden. Farming the Kraken and Harvest Lord all this time, have been saving your money?

The two best seeds you can buy are Stinkweed and Prickly Bear Cactus. Prickly Bear Cactus is useful for pet snacks, because there is a chance it will give a mega-snack at the elder stage, but don’t be surprised if it doesn’t give you one too often.

Stinkweed

This is unironically one of the best plants you can buy at a lower level, purely for the sake of how much gold you get per harvest. Remember to save your gold to buy items, like the mounts for gold. Please click here for Amber Ravynsong‘s guide on the various permanent mounts that you can purchase for gold.

“Smoke Screen” and “Poison” will give you 200 and 215 gold each, respectively, by selling them at the bazaar. It is also worth mentioning that each stinkweed will give you about a hundred gold per harvest.

All you need to do is buy one stinkweed. It should roughly cost 480 gold. The gardening spells, pest control and water are all you need for this plant. Don’t waste money on much else, besides a gardening gnome. The stinkweed will give you more seeds over time- after all, it grows like a weed.

Buy a castle block floor from the bazaar. Although, there may be a chance there won’t be one there right away. You can grow small plots on these like a grid. I suggest plotting it as a 3×3 to a 6×6 grid. If you do ever plan to get a membership to continue questing, the large range Mooshu gardening spells will be your friend.

Phase 1 Review

  • At levels 1-9 (roughly), you will quest until you are completely done with the free-to-play zone offered.
  • When you are levels 9-12, you will farm the Kraken and The Harvest Lord.
  • Reaching level 12, you will garden Stinkweed.
  • By planting a 6×6 plot of stinkweed, you will earn thousands upon each harvest, selling poison and smoke screen treasure cards.
  • Also when reaching level 12. you will farm the Winterbane and Midnight Sun Pagoda gauntlets.
  • By level 15, you should have 100,000 gold to buy yourself a nice house from the Crowns shop.
  • Try all the gauntlets at least twice by level 19, then repeat.

Phase II: The Higher Levels

Over time, you will feel this is going to be monotonous and grinding. What variation can we add to this sequence, to make it more fun? You can begin by helping those who have the same goal as you. You can go to the Team-Up center outside the bazaar and aid lower levels with their quests. Remember, you earn 3 xp per pip used in battle, so attempt to use bigger spells when you have the chance.

Fishing

Try to get involved in fishing. By catching fish, you can earn even more money. As you progress, you will get more energy every 2 levels. You can earn hundreds to thousands of gold for every fish you sell, especially if you catch the fish of the day, or the fish of the week. Please click here for our fishing guides for more information.

In-game Events

Within the game, you should take advantage of an event whenever it comes around. Events such as The Lost Pages and The Five BOXES come around once every few months. Seize the moment and go for it. With The Lost Pages, farming is built right into it. Try helping other young wizards with the event even when you are done.

Free Crowns

Overall, you cannot deny that crowns are king in this game. They buy so many of the nice items in the crown shop, such as pack items, unique housing items, and much more.

On the KI free games website that opens every time you log out of the game when you aren’t a member, there’s a trivia tab where you can earn 10 crowns for each quiz you take.

In-game, check out the “Free Crowns” button to watch videos and earn crowns. Recently, they’ve stopped working, so be hasty with using these when you see one available.

Every Christmas, free crowns are offered as a part of “The 12 Days of The Spiral” event where you can receive gifts. Be warned! Keep up with the event every day, even on the thirteenth day, or else you may just miss the day they offer that gift.

Thank you, Starlights, I hope you have a wonderful evening, and good luck playing the game.

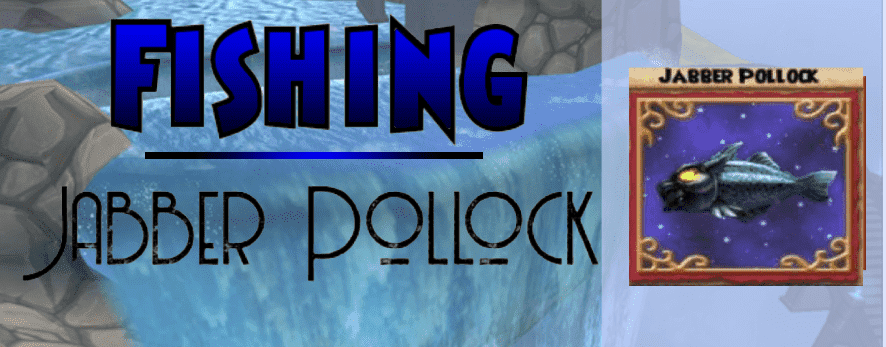
Catching the Jabber Pollock

Every Monday morning the weekly tournament fish changes. There are fishing secrets I can tell you. I want to share with you my experience in the fantastic world of wizard101 tournament fishing!

This week we have the Jabber Pollock:

School Myth | Rank 2 | Common/Regular | 1400 XP
 
Limits:
Small Fry < 15
Whopper > 25
 
Fish Location in order:
Avalon/High Road/ Poisoned Well
 
No used in any recipes
 
Αverage sale price in gold:
500 each
 

How to catch a Whopper

The only place we can find it is the dungeon: Poisoned Well. Be careful, because you must finish the battle first. So prepare your gear or your deck for a fight before you go in. Once you get to it, Jabber Pollok is the only myth school fish in the pond.


How to find this fish in order

1. Reveal Fish School/Reveal Large Fish

2. If no fish are affected Summon Fish and repeat
3. If a fish is revealed – Minor Fable Lure or / Common Fable Lure and catch it.

The first 3 winners will get tournament tickets:
First place: 120 tickets
Second place: 50 tickets
Third place: 20 tickets
 
The tournament end in 19/11/18
Good luck!

Jewels

What are Jewels?

Jewels are items in the game that can be added–affixed–to equipment. (Athames, rings, amulets, decks, and even pets!) There are five different types of jewels–circle, triangle, square, tear, and star. Each different shape gives different boosts to stats.

Square jewels boost resistance, stun block, critical block, and incoming healing percent.

   (The square, tear, and triangle shape jewels.)

Triangle jewels boost shadow pip percent, power pip percent, accuracy, and can grant cards.

Tear jewels increase mana, health, energy, and fishing luck.

Circle jewels boost damage percent, critical chance percent, and outgoing healing percent.

Star jewels are equipped to pets, and can offer a multitude of different things; accuracy, cards, damage, resistance, and can even increase your gold obtaining rate. Star jewels can also boost your pet’s attributes. (Suffice to say, star jewels can give your wizard a handy little boost.)

(Know that jewels can boost specifics as well. A square jewel that is red will give you a boost in a fire resist. Jewels that are rainbow colored are the jewels that are universal–universal resist, universal damage, universal accuracy, etc.)


When you affix–socket–a jewel to an item, you must shatter–break–it to reopen that slot. When you shatter a jewel, the jewel will usually disappear. There are exceptions to this rule, so before you affix a jewel to a piece of equipment, double check that it is, in fact, shatter-proof.

You can carry up to a hundred jewels in your bag. They can be trashed and sold, but they cannot be auctioned. You can put jewels in a bank and the shared bank.

Obtaining Jewels

Like mostly everything in the game, jewels can be obtained be farming, buying off of vendors, or crafting. (You can even find jewels in fishing chests.) Some jewels can’t be bought, some can’t be crafted, some can’t be farmed. It’s annoying, but it’s life.

To craft jewels, you need two things: the recipe and the jewel crafting station. (Which is obtained from a quest at level 15.) All jewel recipes require three fundamental things: a type of metal, a type of gem, and a type of treasure card. What type of metal, type of gem, and what type of treasure card depends on the recipe, but that’s the blanket rule.

For example, the recipe for a random ice school jewel for levels 45-65. In the bottom left, the ingredients needed are listed. 15 sapphires, 4 bronze, and 4 ice spear treasure cards.

Farming for jewels works just as farming for any other type of equipment. Do your research before setting off. Buying jewels from a vendor is just like buying gear from a vendor.


This is a novice’s wrench.

Opening Sockets

Some items have sockets that have a lock over them. This means you must open the locked socket before you can affix anything to it. This requires an item: a wrench. Different items require different wrenches. If you don’t have the correct wrench, you can pay crowns to unlock the socket. Wrenches are traditionally dropped by bosses, but a variety of bosses drop different wrenches.

Affixing Jewels

Courtney, you say, I have the jewel I want to affix, but what do I affix it to? 

Great question, young grasshopper.

You affix jewels to gear you know you will be using. The better the jewel, the more you want to ensure that it will get used.

Just recently, I got my gear from Darkmoor. My ring, Band of the Chilling Light (dropped from Aphrodite, the gold skeleton key boss in the Graveyard) gives three sockets: a circle, a tear, and a square. Since I plan on using this equipment piece of a long time, I would choose to affix a good jewel, perhaps a universal resistance jewel, a health-boosting jewel, and a really good damage jewel.

The ring I used before I got this one was one I got in Zafaria. At level 66. I never replaced the ring because I had my best jewels affixed to it, and the rings I found later on never matched up to it.

When you’re a lower level, you switch gear a lot. When you’re level fifteen, there’s a good chance you’ll be using a different athame at thirty. There’s nothing wrong with that, and I highly recommend you do not use a level fifteen athame at level thirty. Don’t equip a rare/good jewel you just found to an athame you’ll use, perhaps, for five more levels. (This is a suggestion, not a requirement. What I’m trying to get at is to plan out how long you’re going to use a piece of equipment. It does no good to waste jewels you spent hours farming for.) 

Shattering Jewels

This is the downside. I mentioned it above, but for almost all jewels, when you affix them, to get rid of them you must shatter them. This breaks the jewel, and you can never get that jewel back. There are jewels that are shatter-proof, but there are more jewels that aren’t. Be very careful what jewels you choose to affix.


I was very fond of the +17 ice damage as well as the +32 fire resist. I also never really found a better ring, but that could have been me forgetting to double check my gear.

The process of affixing/shattering a jewel to an item


 Community Contributor Courtney PixieBreeze

NEW Aero Plains Bundle

So with the release of Empyrea Part 2, Kingsisle has released a brand new bundle!  The all-new Aero Plains Bundle is related to the Aero Dwarves of Empyrea, some of my favorite area’s and characters!

With it, we get a load of new items like:
– The Aero Village House
– The Squirreligig Pet
– The Aero Dwarf Gear Set
– The Aerocannon Wand
– The Blue Ox Mount (Perm)

So how does this bundle stack up?  Is it worth your purchase?  Well, let’s take a look, shall we?!


The Gear

I think a lot of you will read this because of the gear.  Whenever a new bundle releases, there’s always the question of whether the gear will be an absolute must-have, or not.  Well, it’s not bad!


I think an immediate fun feature to note is the variety of cards!  They’re all smaller pip versions of the originals and could be a lot of fun to mess around with!

The stats are also not too horrible, and could serve as filler gear while you farm for your new Paradox gear!  The shadow pip chance is good, providing a combined shadow pip bonus of 11%!  This universal gear would be especially useful for a Balance wizard!

The wand could also be fun, especially in PvP with that may cast Mana Burn!


The Pet and Mount

The new pet is simultaneously the cutest and coolest pet I think I’ve ever seen!  The aptly named Squirreligig is a two-tailed blue and white squirrel that flies by spinning its two tails like a helicopter. Is that not just the most amazing thing ever?!

With it, comes an Unstoppable card and 4 Epic talents!  It also has decent stats, meaning transferring stats to this cool dude won’t be too hard!

The new mount, the Blue Ox, is a pack horse version of the Blue Ox mob from the
Aero Plains!  It makes a super adorable little jingle noise as it bounces around the Spiral!

It’s my new personal favorite mount and I love its design!  I personally would buy 5 more of these bundles just to have a Blue Ox on each character!


The House

While there’s not an abundance of outside space, there’s plenty of room to create an amazingly built up house!  Personally, I plan on building a super fun community focused house!  A fun area for a whole lot of friends to just hang around in!

With fishing available, it seems like there is something to please every type of Wizard101 player!  As for the house itself, there are 10 separate outside entrances all leading into the same massive interior.  It is an actual maze inside.  It is, and I’m not exaggerating, HUGE on the inside.  With multiple levels and some massive rooms, designing the interior of this is not only gonna be fun, but also challenging!

Oh and don’t get me started on the waterfall!  Right next to which is a windmill that gives you a free item every day!  Oh, and did I mention there’s a PvP arena out back for some saucy duels?!  This house is definitely my favorite part of this bundle!


So In Conclusion

Well, I think it’s safe to say this bundle is one of the best we’ve ever seen in terms of all-around design.  The beautiful house, the plucky happy-go-lucky Blue Ox and the adorably cool Squirreligig all show amazing design and creativity!  The new gear design is also awesome and definitely stitchable!

Inspired by one of my favorite area’s in-game, this is a bundle I’d highly recommend to any of you looking to pick up a new bundle.  It’s creative and altogether fun and worthwhile!

Polarian Shipwreck

Are you ready to take on the next challenge? Is all the equipment there?
We need your valuable help, time, patience and screenshots!
 

I will continue with the Polarian Shipwreck

This is what’s been confirmed or not yet by Wiki and the Housing Item Identifier or other sources.
 

Battle Narwhal

 
Wiki: Verified
Housing Item Identifier: Verified


Proper Penguin

Wiki: Verified
Housing Item Identifier: Verified


Polarian Explorer’s Pickaxe

Wiki: Not Verified yet
Housing Item Identifier:
Currently, it hasn’t been found.


Polarian Explorer’s

Wiki : Not Verified
Housing Item Identifier: Gear not Verified, shows only the recipe for the mannequin.
Others sources: Not verified as of now.
 

Advice

The Castle contains 4 ponds that are linked together.
The spells will apply to both ponds, so there’s no need to repeat them.
The fishes of this Castle are mostly from the ice school, so use Winnow Ice Fish or an ice lure!
Winnow ice fish can help too if you use the Buoy Chests 1 spell.
The Napoleguin Doodlefish, Ice school, rank 2 is the doodle of this Castle.
 

Secret Pond

At a lower point on the ice wall of the Polarian Shipwreck, there is a different color to the ice. If you walk through, you will find a hidden pond.
 
 
If you get some of the crowns gifts that have not been confirmed in the Wiki, please take a photo with the chest drop and send it to us at [email protected]
 
Thanks for visiting Ravenwood Academy
I can’t wait to see your photos and comments!
 
Thank you and Good luck!

Energy Saving Tips

Hey everyone!

Just sharing something I found out recently that might increase your energy efficiency while training pets. Let me know what you think!

First things first.....

Before I start, consider getting some energy gear if you don’t already have some! I made a guide you can check out here for some ways to get energy gear without emptying your crowns wallet.
 
Also, you should never use snacks that give less than 8-10 XP unless you are completely broke. It’s just so inefficient. Sell them if you have them, and buy the rank 7 snacks from the bazaar. (If the snack is the same school as your pet, that’s a plus too.) You may already have some rank 7+ snacks from bosses you have fought while questing or farming, so you shouldn’t always have to buy when you run out of mega snacks.

Back to the point.....

This mainly applies to people that have a limited number of mega snacks. If you have like 400+ in that tiny little backpack of yours, keep doing what you’re doing.
 
You wanna make the most out of your precious, limited supply of mega snacks?
DON’T USE THEM.
(Well, not yet at least.)
 
This may not make sense at first, but trust me here. Consider this: regardless of what level your pet is, the same snack will always give the same amount of xp.
 On the other hand, the level of your pet DOES decide how much energy you spend per game during training.
 
But why does that matter?
 
Theoretically, you’d want to spend more time at the lower levels to take advantage of the cheaper energy cost. The better snacks will level you up faster (which is the goal), but that gives you less time at the lower levels. And there’s no way using worse snacks can be more effective……right?
 
Not necessarily.
 
Still kinda confusing right? Well check out this example!
 
Imagine you begin training a pet, and have these two snacks in your backpack:
 
Fancy Yogurt (x5)
Shanta Pudding (x13)
Pet: Baby (0/125 xp)
Naturally, you want to rush straight to Teen using those Fancy Yogurts right? Well, 3 snacks will level you up. Here are the results:
 
Pet: Teen (25/250)
Games Played: 3
Energy Cost per Game: 2
***Energy Used: 6***
Remaining Snacks:
Fancy Yogurt (x2)
Shanta Pudding (x13)
Now, assuming you play 15 more pet games and used the remaining Fancy Yogurts and all the Shanta Puddings, you would just barely make it to Adult. Here are the results:
 
Pet: Adult (5/500)
Games Played: 15
Energy Cost per Game: 4
***Energy Used: 60***
Remaining Snacks: None
 
Overall to get from Baby to Adult, it took 66 energy and all 18 snacks. We used the mega snacks first, which is typically how people train their pets.
 
Now, lets see if what happens when we take the same situation, but start by feeding the Shanta Pudding instead of the Fancy Yogurt.
 
Since it only gives 10 xp, you will need all 13 snacks just to get to Teen. Results:
 
Pet: Teen (5/250)
Games Played: 13
Energy Cost per Game: 2
***Energy Used: 26***
Remaining Snacks:
Fancy Yogurt (x5)
Shanta Pudding (x0)
 
Then, you continue to Adult by using the mega snacks. Results:
 
Pet: Adult (5/500)
Games Played: 5
Energy Cost per Game: 4
***Energy Used: 20***
Remaining Snacks: None
Notice the difference yet? In both cases, you played 18 games, used 18 snacks, and ended up right at Adult.
 
The difference? Energy. In the first scenario, 66 energy total was used. But in the second scenario, only 46 energy was used.
 
You literally saved 20 energy from baby to adult just by feeding snacks in a different order.
 
The concept is pretty simple: by spending more time at lower levels, you decrease your energy usage overall. This was just an example, so I used specific snacks and only did 2 levels of training, but the same idea applies for any other situation.
 
The longer you wait to use your mega snacks, the more energy you will save in the long run.
 
Yes, it will seem like it’s taking longer at first. Even in the example, it took 10 games longer just to get to Teen. But if you’re in it for the long haul, you will appreciate the extra energy and less time spent at the higher levels.
 
Personally, I like to wait until my pet is Ancient (mainly because I have an absurd amount of the +15 xp snacks) before I start using my rank 8 and 9 snacks. If your pet fails early, you can rest easy knowing that no mega snacks were wasted. This also allows you to speed through those expensive 8-10 energy games as quickly as possible, which saves a ton of energy.
This concept does also apply during double xp, but the biggest priority in that case would be to use all of your mega snacks before the event is over. The sheer volume of double xp is worth more than saving some energy, but it is entirely possible to do both.
 
Like I mentioned at the beginning, if you just have limitless mega snacks (and I know at least a few of you gardening monsters do), then ignore this completely, as it won’t help you. The goal is to speed through the higher levels to avoid high energy costs per game; but if you can speed through the entire thing with only mega snacks, then you do you.
 
For those of you that made it this far, I appreciate you taking the time to read this post! Do you think this is effective? Leave a comment below!
 

By Community Guest Author: NinjaDudeb12

A Game Changing Deck Strategy

Have you been spending your training points on a secondary school thinking it’s the best option to help on your questing journey?

Well, I have a little game changer for you! Personally, this helped me so much in my journey through the spiral. I am a life wizard and everyone knows us life wizards don’t hit hard in the beginning. It’s a struggle until we get Forest Lord. So, I thought learning the spells of the strongest school in the game would help me out a lot. I was wrong. I struggled through all the worlds until I got to Celestia, which is main world no.6! I spent all my training points on the wrong cards.

It wasn’t until I found a useful set up that saved me more times than I can remember that life in the Spiral got a bit easier.

Let’s elaborate shall we?

ICE - Tower Shield

Tower shield is a necessary spell in case you are facing an enemy you don’t have a shield for or didn’t pack a treasure card for. It reduces 50% damage from any school. I don’t take this spell out of my deck unless I have a shield to match the school of the enemy I’m facing in battle. You have to be level 16 to learn it. All spells require 1 training point but you will have to learn Frost Beetle, Snow Serpent, Volcanic Shield, and Evil Snowman before getting access to train the spell. You will need a total of 5 training points.

Tower Shield is also available as a Treasure Card which gives an additional 5% shield. It can be bought from the Bazaar in Wizard City Olde Town.

DEATH - Feint

Feint is one of my favorite spells from the death school. It’s a trap that adds 70% damage with a small catch of also casting a 30% trap on you. It is not linked to another school, so can be used on any enemy to add more damage. You will have to be level 26 to be able to get this spell. You will have to learn Dark Sprite, Ghoul, Dream Shield, Banshee, Vampire, and Skeletal Pirate before getting it. You will need a total of 7 training points.

Feint is also available as a Treasure Card too! Instead of a 30% trap on your self it reduces to 20%. Also can be bought from the Bazaar.

BALANCE - Reshuffle

Reshuffle, a spell I had no idea was actually trainable in Wizard City itself! This spell is another favorite of mine and never leaves my deck. It is a massive help when you’re fighting a boss, or even a mob battle and haven’t packed enough attack spells or heals. Reshuffle does exactly what it’s called, reshuffles all your cards back into your deck. This spell is located in Colossus Boulevard in Wizard City. Mildred Farseer has the spell for you to train along with a few others. You will have to be level 20 to be able to train it and will only be 1 training point. You do not need to learn all the spells that she offers in order to train one. 

Reshuffle can be bought from the Bazaar. If you haven’t trained the spell and see it in the Bazaar, buy it quick as it is fast to go. You can also buy Reshuffle from the Library in the commons of Wizard City.

Below is a picture of Mildred Farseer and a map of where she is located in Colossus Boulevard. 

BALANCE - Spirit and Elemental Blades/Traps

These 4 spells are great for setting up a boss or mob to increase your damage. The blades adding 35% and traps adding 25% damage. They are not only great for yourself but if you are working with a team of other wizards, you can also help out by trapping the enemy they are aiming to hit or casting the blades on them. So these are a multi-useful spell. I would only get the cards that match your school.

Niles, the Balance tree has these spells. He is at the entrance of the Krokosphinx in Krokotopia, which is the second main world in the Spiral.  You will have to be level 15-25 to get these spells and you also must complete all the Wizard City main quests to gain the Krokotopia Spiral Key. Each of these spells needs 1 training point. 

Below is a picture of Niles and where he is located.

Training Points

To learn all the spells above, you will need a total of 15 training points. Don’t panic! Every four levels, you gain 1 training point and your school spells don’t cost anything! Also, doing Prospector Zeke’s quests in every world, which involve you exploring the world you are in to find whatever item he has requested, will help you gain another training point in each world.

A picture of Prospector Zeke along with 2 of his quests are below.

saffron22

I hope this guide helps you the way it did for me! 

Whirlyburly! The Basics

Introduction

So, how about Whirlyburly? Whirlyburly is that oddly-placed mini-game within our Velo City storyline. It’s kind of like chess, but three player… and hexagonal… with only three pieces…  Okay, so it’s nothing like chess, but it is a tactical board game with a lot of inner complexities that make it surprisingly fun.

The game can be complicated and confusing for a new player, and only through experience does one learn the ropes, but that’s what this is here for! So, let’s see what we can teach you!


The Cards

The random selection of 5 cards you get at the start of each round are what allow you to make specific plays. Ideally, you want big movement pattern cards, but often small, strategic plays can win you a match!

It’s important that you can discard any card you don’t want. A simple right click will allow you to find a better one for the next turn!

You can also gain a lot of tiles at once by matching the letter of your card to your piece. So, S for Scrapper, and when he finishes he takes with him a large area that surrounds him!

You can also change what piece has which card before the selection phase ends by simply clicking them and a new card!


The Pieces

Contrary to the name, the Charger isn’t specifically designed to charge at the opponent and take chests. Each piece functions in the exact same way, but with different prey and counters.

The best you can do is watch where the enemy sends their pieces. If both of their hunters are near a single place, send your Charger in while keeping your Scrapper away. Those 3 point kills make a massive difference. This smart positioning often allows you to take chests without much hassle or competition!

But be wary of overextending! If you send your Hunter in to take a chest, make sure their Scrappers aren’t on your borders ready to pounce!

Remember that you can also knock pieces off the map! If a piece is near the outline, use a Hunter or Charger to knock them off of the edge, sending them back to spawn!


The Points

The points system is pretty easy to understand but can be a lot more complex when you are left with decisions that could drastically affect your score at the end of the game.

The 10 point chest is almost always a good idea, but on your way, you may be killed and leave uncontested tiles for your enemies to take! Tiles build up points faster than you think, so leaving a ton of them on the other side of the board free to be retaken is not a good idea.

Capturing is also a solid method of gaining points. If you can repeatedly take out their pieces and contest tiles you’ll quickly score into first place!

The last round! This is super important and can make or break your entire game. Taking tiles should be your absolute priority. Don’t leave yourself at risk in the round before, otherwise, you’ll just take the tiles you already have. Save some of those Area Capturing tiles for last and boost your score as much as possible!


Conclusion

Whirlyburly is actually quite fun, endearing and a unique game once you start to understand it. It can quickly take up a lot of your time and you’ll end up spending too much time in Velo City, or you’re like me and have created an entire gear set just to wear into games!

Hopefully, this allows you guys to better experience our new mini-game and earn some cool shirts!

The WizardCity Orchestra

Intended for Musician and Non-Musician Alike

Wizard City, founded by Merle Ambrose, composed by Nelson Everhart, has an unexplainable joy located in the centre of the world that is uniquely magical. As we cross the line from magic to music, we will analyze through this guide the music that aids the story of the first world we step in. This is unique kind of guide- guided listening!

Music typically aids a story. A leitmotif is a form of musical aid when music is played to represent a specific character or theme. Famously used in Richard Wagner’s 15 hour Opera, The Ring Cycle (home of “The Ride of The Valkyries”). Leitmotifs often relate to each other in a musical way to present continuity in the aesthetic of what it represents.

“Main Theme”

One of the most iconic themes presented in Wizard City is located within The Commons. Throughout this article, a theme is defined as the main melody within a piece of music. I stress this, because we typically think of a theme as the piece as a whole.

This melody, notated above, is a descending major scale with some notes fluttering down faster than others in what is called sixteenth notes. We also have notes going back and forth between each other- a common characteristic in most of the Wizard City melodies. What is a major scale? It is commonly referred to as a collection of notes played in a specific order (Do Re Mi Fa So La Ti Do, if you are familiar with Solfege and/or The Sound of Music) that comes off as “happy” in tone.

We begin the melody on the English Horn, a relative to the oboe before being taken from the light and airy flute. Pizzicato strings snap along, giving a bouncy vibe. Please note, I only transcribed the underlying bassline and not the complete strings section. For simplicity’s sake, the example is written in concert pitch.

As we drive away from the complex aspects of music theory and orchestration, how does this make us feel? It makes us feel happy and relaxed. “The Commons” is for gathering with the community, and with the few instruments playing at any given time, it feels intimate and easy-going. The light atmosphere is perfect for a passing place to collect quests, or to simply walk on by.

“Theme 1”

Next, we have the original Ravenwood theme. The horn begins by ascending a dissonant Lydian arpeggio coming to a resolution within the next measure. After that, we repeat that same idea, but go down a whole tone scale, similar to how we went down a scale in The Commons theme. The music of Ravenwood is meant to be glorious and bestilling; to be standing before an ancient being as grand as Bartleby and to feel his serene vibe.

The strings respond to the horn, going back and forth between two notes in nearly the same rhythm the horn did, stating the theme as it develops. The Commons theme too, went back and forth between two notes in its melody, connecting these two melodies in a very subtle way.

“Theme 2”

We continue to explore Wizard City with Olde Town. The selection I picked from here begins at 00:27 seconds into the third track. This is the point we truly see the themes come together. The horn begins with a melodic shape that will develop into Theme 3’s main melody, then using that with a descending scale, similar to the whole tone scale used in Theme 1. There is then a key change that develops the first statement into A major, continuing onto a fragment similar to the main Commons theme.

After that climax, the strings (or clarinet in the rendition above) relax with a rhythmically slowed-down version of the Commons theme, developing its character. This is where our Wizard accepts the three streets questline and ventures forth, representing how they are becoming more at home with the world they magically were summoned to.

“Theme 3″

The orchestra ventures to Unicorn Way, the starting point of all trauma our wizards suffer. The clarinet soothingly hums out a happy, twinkling theme. 

It goes to and fro between thirds with passing tones in between, similar to the starting melody of Theme 2. But this specific melody develops until it begins to ascend. This is the first time we have purposely shaped the melody to ascend. This is the largest the melody has ascended, even from the beginning ascension of the Ravenwood Theme.

We go through a key change as the horn reaches the climax of the piece. The horn reaches a high Eb, the highest note used in the melody so far. Both of these show a deeper meaning that our Wizards will reach great lengths in their future. The future of our Wizard’s life is hinted that we will be expected to do great things during our time in Ravenwood, and the music encompasses that idea. 

After an instrumental interlude, we return to the classic Commons melody, but the ending has developed. Before it was five notes, now it is seven.

Thank you, Starlights, for venturing through my tour of The Wizard City Orchestra. Have a wonderful night.

Disclaimer:

Please note: I transcribed the music from the original/classic mode music scrolls. Not all of my transcriptions are 100% accurate, but they are close and the rhythm is properly notated. The Golem Tower, Wizard City Combat, and Wizard City Dreamworld Themes did not fit in with the above, so I have not included them in this presentation.