Vendors101: Krokotopia and Marleybone

Welcome to the 2nd “Quit Stalking the Bazaar”. Today we will be shopping in the worlds of Krokotopia and Marleybone!  From the sandy dunes of the desert to the elegance of Victorian life, I’ve scoured the shops for you!

Krokotopia Housing Vendors

Ea’rik

Ea’rik is the Furniture Shop keeper in Krokotopia. He is in the Krokosphinx. You’ll see him to the left when you get off the boat. He has a fabulous collection of housing items for sale. Even scaffolding which housing experts use for glitching can be found here.
 
Here’s a sample of what you will find


Scaffolding
Crafting Stations
Checkers and Gameboard
Hopscotch Mat
Many Fabulous Wallpapers and Flooring

Digby Hammershell

Good ole Digby is the Real Estate Agent for Krokotopia. You’ll find him inside the building next to Ea’rik. He’s a wonderful feller with 2 great castles for sale.

Castles available:

Oasis Camp-10,000 gold
Desert Villa-20,000 gold

Charley

Charley is the gardening expert in Krokotopia. You’ll find him on the left side of the Pyramid of the Sun. He sells spells and seeds and pots with Krokotopia designs!

Krokotopia Recipe Vendors

Wul’yahm

Wul’yahm is the Crafting Trainer in Krokotopia. You’ll find him on the 2nd island to the left of the Pyramid of the Sun. The Reagent Vendor is right behind him, so you can get your recipe and reagents at the same place!
 
Here’s a sample of the recipes he has for sale:


Tapestry to School of Balance
Tapestry to The Oasis
Glowing Fancy Lampost
Solar Decoration
Many Tablets and Obelisks

Kamal Sarhan

Around level 60 you will come back to Krokotopia for the House of Scales. The quest will lead you to Aleema who grants access to Zigazag. Kamal Sarhan the recipe vendor is in the central area of Upper Zigazag.
 

Recipes: Tapestry to House of Scales
Price: 5,000 gold

Pembaa

At level 25 a side quest for a lost beagle will lead you to Kembaalung Village. Pembaa is the recipe vendor in Kembaalung Village Krokotopia. He becomes available after completing The Attaché Case quest.

Recipes: Tapestry to Kembaalung
Price: 5,000 gold

Marleybone Housing Vendors

Neville Cobblestone

Neville Cobblestone is the Furniture Shop keeper in Marleybone. He is located in Regent’s Square inside the Real Estate & Fine Furnishings shop. Look to the right side of Market Square. He’s quite a pleasant person with some wonderful items!

Here’s a sample of what you can find:

Small Starry Tent
Amazing selection of Wallpapers and Floors
Grand Piano
Campfire with Kettle
Chess Pieces (to go with the game-board bought in Krokotopia)
Board-game

Tortimer T. Shellington

Tortimer is the “Go-to” guy for the best housing in Marleybone! Always ready to take you on a tour of his available castles. You can find him sharing a shop with Neville. They are best friends, you know!

Castles Available:

Metropolitan Manor-12,000 gold
Royal Estate-30,000 gold

Babbage Basset

Babbage Basset is a Castle Magic vendor. You can find him in Regent’s Square near the entrance to the Royal Museum. Babbage sells Castle Magic items and spells. He is renowned for introducing Wizards to the basics of Castle Magic.

Marleybone Recipe Vendors

Felicia Worthington

Felicia Worthington is the crafting trainer in Marleybone. She is outside Digmoore Station. This sweet, crafty lady sells recipes for the most delightful housing items. She might even offer you a spot of tea!
 
Here’s a sample of the recipes she sells:


Blue Wall Tapestry
Pavilion
Carved Bookshelf
Male and Female Mannequins
Weapon Rack

Captain Dartmouth

Captain Dartmouth is a recipe vendor inside Barkingham Palace on the left side. He becomes available after completing the Rooftop instance.

Recipe: Barkingham Palace Tapestry
Price: 5,000 gold

This completes our shopping trip through Krokotopia and Marleybone. So many vendors! So much to see! What was your favorite find? Tell us in the comments below. Join us next time for our excursion through the vendors of Mooshu and Dragonspyre!

Wizard City Housing Vendors

Tired of never finding the housing item you want at the Bazaar?  Well search no longer! There are many things available throughout all the worlds from a variety of vendors. Even items that are no auction and can never be found at the Bazaar! We will be visiting each world in this series and will show you who to go to for that perfect housing item. 

Wizard City Housing Vendors

There are four housing vendors in Wizard City, They have many housing items available. There are also six recipe vendors for craftable items. From Castles to Pet Bread Crumbs, we have them all listed here.

Aubert Quickhammer

Aubert is the furniture shop keeper in Wizard City. You’ll find him in the Shopping District by Eliks Edge, at the Wizard City Furniture & Castle Shop. He has everything from plants to wallpapers and floors. Tell him Sarai sent you!

Here’s a sample of what you will find.

Party Banner
Plaques for all schools
Fancy Lamppost
Small Yellow Tent
Small Blue Trim Rug
Tic-Tac-Toe pieces and Gameboard
Balloons
Music Player
Party Cake

Buxley Turleton

Buckley shares a shop with Aubert Quickhammer. He’s the best real esate agent in Wizard City!

Castles available:
Wooded Cottage 8,000 gold
Royal Playhouse 15,000 gold

Farley

Farley is the head gardener for Wizard City. You can find him in Golem Court.

Here’s a sample of what you can find:

Wizard City styled pots
Seeds
Tropical Garden Gnome

Roland Silverheart

You can find Roland on Unicorn Way outside of the PVP Arena. All of his items are non-auction and are purchased with Arena tickets. If you don’t PVP you can get tickets from doing your daily quests.

 
Here’s a sample of what you can find:
 
Wood Housing Blocks 
Bobbleheads 
Statues 
Ninja Sword Rack 
Market Tent Pavilion

Derrick Blaze

You can find Derrick next to the Bazaar. He sells the recipe for the Team Up Kiosk. In order to purchase this recipe you have to earn your Team Player badge.

Team Up Kiosk Price: 100 gold

Wizard City Recipe Vendors

Eudora Tangletree

You can find Eudora by the pond near the Bazaar in Olde Town. A lovely lady with great recipes! She has recipes for many different aquariums and seventeen different tapestries.

Here’s a sample of her other recipes:
Garden Lot
Directional Arrows
Moon Banner
Red Foodcart
Stack of Paper
Water Bucket

Lloyd Fallingwater


You can find Lloyd in the Shopping District near Eliks Edge. He has all the Stone Housing Block recipes. Who needs the Bazaar, just make them yourself!

Dr. Purreau

You can find Dr. Purreau in the Hatchery. He has recipes for a Pet Hatching Kiosk and a tapestry to the Hatchery. These recipes need Hatch Peppers. You can get this reagent by placing pets in the kiosk or in the chest from daily quest rewards.
 
Hatching Kiosk Recipe Price: 2,500 gold Tapestry Recipe Price: 2,500 gold

Harker

You can find Harker in Darkmoor to the left, near the small building. He has the recipe for the Castle Darkmoor tapestry. 

Recipe Price: 5,000 gold

Jackie Whisperflame

You’ll find Jackie in the snack shop at the Pet Pavilion. She sells the recipe for Pet Bread Crumbs. Bread Crumbs are an awesome way of controlling the movements of pets and mounts when they are placed in your Castle!

Recipe Price: 5,000 gold

This concludes the list of Housing Vendors for Wizard City. Whew, that was an all day shopping spree! Hope it helps you find that perfect item for your castle. Let us know in the comments below about your most surprising find shopping in Wizard City. Stay tuned for Krokotopia and many more worlds to come!

The Monquistan Choir

Despite its location in an isolated corner of the Spiral, Monquista, rich in gold and culture, is one of its most prominent powers. The Skull Island colonies enrich their people considerably. In line with Valencia and Marleybone, their society is posh and structured in which there is a noble class, a (daily changing) monarchy, and the Church. These powers fight vigorously with one another for control.
 
Please note I title tracks with their Wizard101 music scroll title and not the title of the You Tube video.

Skyway Theme

You can receive this music scroll from fishing chests in the Myth House, Sultan’s Palace, and Polarian Shipwreck

The Monquista soundtrack is most notable for its vocal counterpoint and harmony. This is complemented by stringed instruments like the guitar.
We begin with the full choir harmonizing together. The cello accompanies in a soulful motion, keeping the tempo and balance in the ensemble. Three pulses per measure is established, giving us a Mediterranean essence. 
We are greeted by the guitar at 00:18 seconds, the brass then joins in a perfect cadence. A classic resolution drives us into the next section. More strings join, creating counterpoint in the melodic contours between the pizzicato strings, the cello, and the voices
The tension rises though the chord progression. The cello hits a higher top note in each measure, leading us up to the entrance of the flute at 00:36 seconds. The contrasting chords in this section remind me of Tchaikovsky’s Swan Lake.
 
This continues until 0:52 seconds in when the high strings foreshadow other pieces to come. This connects the musical development and identity of Monquista. 

Royal Theme

You can receive this music scroll from fishing chests in the Myth House and Polarian Shipwreck

The piece begins with a regal texture, sharing likeness to Mozart’s Lacrimosa in melodic contour and structure. Beginning with the cello solo with the bass accompaniment, we feel the music in patterns of three, setting the tempo and mood for the entry of the choir.

At 0:26 seconds into the piece, the strings drop out, leaving the choir a capella. This leaves the music to sustain its somber, church-like tone until the string’s re-entry 0:38 seconds in, the cadential point, or moment the music’s tension seizes.

The flute begins 0:54 seconds into the piece, introducing the melody in a major modulation, or key change to a brighter key. We can hear the key change with the music’s relaxed tone instead of the somber and dramatic counterpart that came before.

Native Theme

You can receive this music scroll through fishing chests at the Death House, Nomad’s Camp, Polarian Shipwreck, Serpentine Escape, and the Winter Wind Tower.

The men of the choir sing in bass and baritone range, doubled by the guitar like the last track. This is the closest we’ve seen to monophony in the game’s soundtrack. In other words, each instrument plays in unison, without a simultaneous harmony. As the timpani strikes, the guitar drops out in favor of the strings section, thickening the orchestration
The horns crescendo into a new section. The strings take over, violins with the melody as the lower strings stabilize with long tones. The melody passes to the choir as the strings sustain beneath.
 
Like before, the orchestra crescendos into a new section. We receive a cadential point with a faint cry of the flute in the distance. The strings die down from sustaining chord progressions into lighter orchestration at timestamp 1:05
 
The guitar is accompanied by percussion in this new section. Every now and again we hear the flute’s cry once more. The melody passes from the choir to the strings, ending in a suspended chord, withholding a proper resolution.
 
We embark on the coda of the piece at timestamp 1:37. The beat is accented by the choir and tambourine. The strings interlude, leading us back to the beginning. 

Thank you, Starlights, for joining me on this musical adventure through the music of Monquista.

Disclaimer

Please note: I transcribed the music from the original/classic mode music scrolls. Not all of my transcriptions are 100% accurate, but they are close and the rhythm is properly notated

Aphrodite Strategy Guide

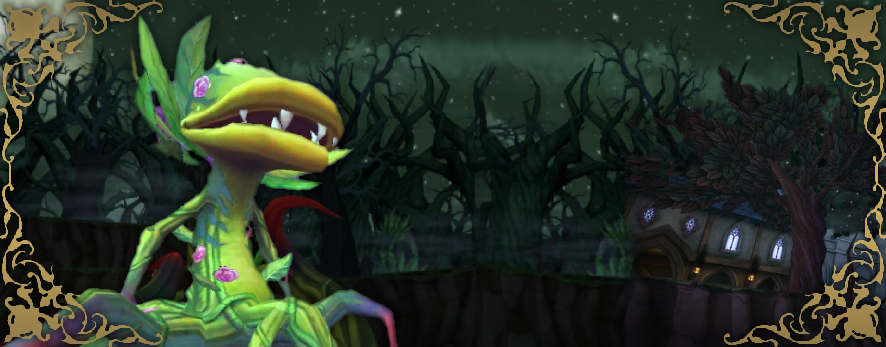
Now that we have mastered Darkmoor in my previous guide, the Ravenwood guide to Aphrodite is here. This boss is a key boss found inside The Graveyard. Once inside the gates go left around the battle with Yevgeny. You will find yourself at another gate which opens with a gold key.

If you are a Life wizard you will want to farm Aphrodite for “Sacred Charge” a spell that only she drops. If you are a Storm wizard you will want “Aphrodite’s Storm of Thorns.” This is the best damage athame for Storm at level 100 and beyond.

Wizards of any school may be here to enhance critical rating or improve their energy gear. With the staff for 10, ring for 8, and athame for 6 energy, you can increase your Wizards current energy by 24 points. A significant boost for any gardener or fisher in the Spiral.

Now let’s talk about how to conquer this overgrown flower and her Spirit School Tentacles.

There are four important roles in this battle. Each wizard must understand and fulfill their duty in order for the team to succeed. The positions we need to fill are


Hitter
Healer
Spammer
Trapper

Hitter

The hitter will need to stack traps, then aura, Shrike, and hit. Do not use blades, this includes global rings such as Darkwind that act as a blade. Any school can hit, but over-time attacks such as Dragon are not recommended. Failing to kill on the first strike with an over-time attack, will trigger an overtime cheat from the Life School Tentacles.

A Storm attacker will want to stack different forms of the Windstorm spell. Use regular and Potent Windstorm along with any other Storm traps you can get your hands on. Four stacked Windstorms is a thing of beauty against this rampant vine. You can achieve this, by stacking Treasure Card, regular, Potent, and pet or jewel forms of the card.

If you are a Storm, and your damage is lower than you would like, keep a Supercharge in your side deck. Any blade will trigger an all one enemy cheat from the tentacle diagonally across from you. As long as that tentacle isn’t Myth this is the one blade you want to risk. With a full pip Supercharge and stacked Windstorms, you should be able to one-shot this boss. Your Treasure Card deck will hold zero-pip shields which you should use defensively while building up the Supercharge.

If you are the hitter, do not run in with the team for the first round of battle. Once the spammer lands a hit, it is safe to join the battle.

Healer

I have a specific strategy I like to use for healers with this boss. Like Storm’s strategy, it will serve you well in Darkmoor.

Round One: Cast Empowerment or Adapt

Round Two: Cast Sanctuary

After these two moves, you will have all the pips and all the power you need to keep your team alive. No matter if you don’t yet have the best gear. Even two strong Rebirths in a row can be possible if you make these two moves first. Do your best to replenish your Empowerment or Adapt when it runs out to keep the extra pips flowing in. The rest is up to you and your healing style.

An important note for Life School healers in this boss, you may get hit with Life Dispels. You should carry shields to take them off when necessary. If you have one, equip a may-cast healing pet. This pet might clear those Dispels allowing you to heal the team rounds sooner.

Regular Cards on the left and Treasure Cards on the right

Spammer

In Wizard101, when we ask for “spam” we mean: To hit each round with small attacks. As a spammer in this battle, the most important stat for you to focus on is accuracy. I like to equip a Sidhe Wand for this reason. Whatever equipment you choose, the important thing is to increase your accuracy in every possible way.

Missing or fizzling your spam hit will cause the flower to drop its spores. This means Black Mantle, Plague, and Infection along with an overtime attack on every member of your team. This can trigger a self-feeding loop where one fizzle causes another until the team just can’t win. As spammer, you need enough accuracy to overcome the Black Mantle every time.

You must hit every single round, like clockwork. I like to keep my Treasure Card deck full of one or two pip spells when I am relied on as the spammer, so that there is never any reason to not have an attack.

As I mentioned above, over-time spells are not OK here. If your spammer is Life or Death school, they could end up Dispelled a round. The healer or trapper should have a few small hits in to back-up the spammer, just in case.

It does not matter which Tentacle you choose to spam as long as you spam the same one each time. This will allow the trapper to do their job.

Trapper

The trappers’ job is to stack Feints and traps on the tentacles while the hitter builds the attack. Feints and Potent Feints should be cast on all the tentacles that aren’t being hit by your spammer. Hex, Curse, and Elemental or Spirit traps are all also ok to use. Ideally, the trapper should be next in line after the spammer in battle order. This way, on the hit round a final Feint can be cast.

If the team works together and everyone plays their part, this battle can be fun and smooth. Good luck getting those drops, and I can’t wait to see you in the Spiral!
~ Amber Ravynsong

Permanent Mounts for Gold


Never quest on foot again, get a permanent mount for gold.

There is no reason any wizard should have to run around The Spiral on foot with the great selection of mounts Kings Isle is offering for in game gold only. Enjoy a 40% speed boost and get every quest done faster, just follow the instructions below! The first thing you should do is open the Crowns Shop and navigate to the Permanent Mounts section.

Next, scroll down to the Bengal Tiger, the first mount on the list that is available for gold. You will notice a tab activate that says “gold” Click the Gold tab, and you will see the price in Gold!

Classic Mounts

Not every mount can be purchased for gold, but there is a great selection of classic mounts such as Dragons, Cats, and Broomsticks that can be. When you switch the tab to gold for the Bengal Tiger, you will be able to see which other mounts can be purchased for gold and their prices. Now you can quest in style!

~ Amber Ravynsong