Crafting101 – Khrysalis

Tonight we will learn how to craft an Ornate Burrower Chair for Stendhill Hammertail's quest, “Stop! Hammertail.”

Welcome back to Crafting101, young Wizard! The next step in your crafting journey is Promethean Crafter! This stage comes after you earn the Transcendent Crafter badge. Like most crafting quests, you may teleport to a friend to reach Stendhill Hammertail. Otherwise, you will reach Stendhill while questing through Khrysalis. Khrysalis is home to many great recipes, so be sure to keep an eye out for the many vendors you’ll meet on your journey!

Stendhill Hammertail

Find Oztomeca in Silent Market, Khrysalis. He will assign you the next quest, called “Stop! HammerTail” This quest has you craft one Ornate Burrower Chair. The recipe is available for 45,000 gold.

The Recipe

Below is a list of all the reagents needed to craft an Ornate Burrower Chair along with their locations.

Deep Mushroom

Ten Deep Mushrooms are first on our recipe. This is a common reagent found throughout Wizard City, Krokotopia, Mooshu, and Grizzleheim. You can harvest this reagent from Boom Shrooms, Burning Snap Dragons, Fickle Pickle, and Dandelions. They’re sometimes available in the Bazaar!

Perfect Jade

Six Perfect Jades will bedazzle the chair. You can buy this reagent from Canica Sweet Chile, Archytas, or Noxolo Fasttrack for 100 gold per Perfect Jade. You might also harvest this reagent from Ivy League and Maelstrom Snap Dragons.

Comet Tail

Eight Comet Tails will give the chair some glimmer. Like other harvests, Comet Tail can be collected in areas of Khrysalis. You can collect this reagent in Crescent Beach, Khonda Desert, Sardonyx, and The Shadow Palace. This reagent is also dropped from mobs in Khrysalis, such as The Common Killer. In the Bazaar, this reagent goes for 400 to 4000 gold.

Sunstone

Four dazzling Sunstones also contribute to the making of the chair. These are a rare harvest from Sandstone and can be found in either Khonda Desert or Last Wood. I would also search the Halley’s Observatory instance in Marleybone. Sunstone is sometimes a harvest reward from Maelstrom Snap Dragon, Evil Magma Peas, Fickle Pickle, and Deadly Helephant Ears. While sometimes it can be found in the Bazaar, Sunstone can be bought with 200 Arena Tickets from Diego the Duelmaster.

The Transmute Recipe is listed below.

Turquoise

Seven Turquoise will add accent color to the recipe. Turquoise will be the hardest reagent to get on the list. You may want to farm the bosses of Xibalba or other bosses in Azteca to get this reagent. Aquilan bosses, like the Gladiator in The Pit of The Noxii, also have excellent drop rates for Turquoise. You might be lucky and find some in the Bazaar!

Golden Pearl

Six Golden Pearls will give off that nice golden look. These are a rare harvest that you can find from pearls in Stormriven Hall, The Grotto, The Portico, and Waterworks, Crab Alley. They are also able to be harvested from Maelstrom Snap Dragon, Evil Magma Peas, Deadly Helephant Ears, and Fickle Pickles. The Gorilla, Minotaur, Magic Eggs, and Dragonfly all have this item as one of their daily rewards. It’s also available in the Bazaar!

The Transmute Recipe is listed below.

Ore

Five Ore will complete our recipe. This is a common reagent, notably found throughout Wizard City, Krokotopia, and Dragonspyre. It can also be harvested from plants such the Dandelion, Fickle Pickle, Helephant Ears, and Snap Dragon. This reagent is rarely in the Bazaar because of its demand, but you might be lucky to find a few!

Transmute Recipes

Golden Pearl

Golden Pearls can be created with 15 normal Pearls. These Pearls can be found in aquatic places, such as Crab Alley, Wizard City’s Stormriven Hall, The Portico, and The Grotto in Celestia. This recipe is sold for 600 gold by Avery Templeton in Survey Camp, Celestia.

Sunstone

Sunstone can be created with 15 Sandstone. This recipe is available from Avery Templeton for 150 gold in Survery Camp, Celestia.

Completion

Now that you have all your ingredients, go back to your Housing Crafting Station and begin making the Ornate Burrower Chair. Once you turn in the quest, you will be awarded 1 crafting time slot, 150 gold, 23,245 experience points, and your Promethean Crafter badge. Congratulations, young Wizard!

Thank you, Starlights, for joining me in crafting and collecting reagents! Catch our next edition of Crafting101 in The Arcanum with Ignus Ferric.

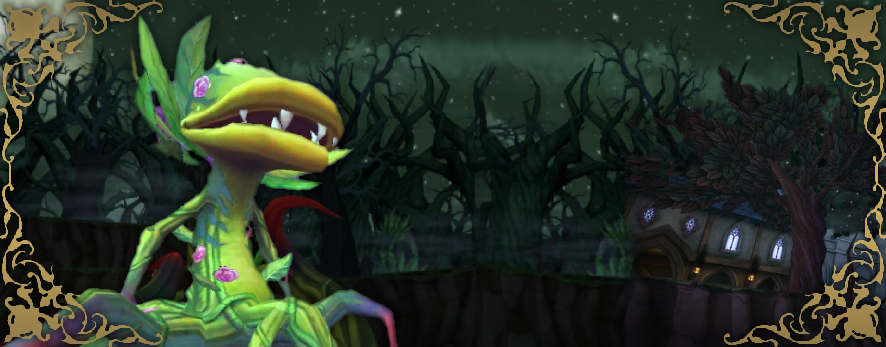
Aphrodite Strategy Guide

Now that we have mastered Darkmoor in my previous guide, the Ravenwood guide to Aphrodite is here. This boss is a key boss found inside The Graveyard. Once inside the gates go left around the battle with Yevgeny. You will find yourself at another gate which opens with a gold key.

If you are a Life wizard you will want to farm Aphrodite for “Sacred Charge” a spell that only she drops. If you are a Storm wizard you will want “Aphrodite’s Storm of Thorns.” This is the best damage athame for Storm at level 100 and beyond.

Wizards of any school may be here to enhance critical rating or improve their energy gear. With the staff for 10, ring for 8, and athame for 6 energy, you can increase your Wizards current energy by 24 points. A significant boost for any gardener or fisher in the Spiral.

Now let’s talk about how to conquer this overgrown flower and her Spirit School Tentacles.

There are four important roles in this battle. Each wizard must understand and fulfill their duty in order for the team to succeed. The positions we need to fill are


Hitter
Healer
Spammer
Trapper

Hitter

The hitter will need to stack traps, then aura, Shrike, and hit. Do not use blades, this includes global rings such as Darkwind that act as a blade. Any school can hit, but over-time attacks such as Dragon are not recommended. Failing to kill on the first strike with an over-time attack, will trigger an overtime cheat from the Life School Tentacles.

A Storm attacker will want to stack different forms of the Windstorm spell. Use regular and Potent Windstorm along with any other Storm traps you can get your hands on. Four stacked Windstorms is a thing of beauty against this rampant vine. You can achieve this, by stacking Treasure Card, regular, Potent, and pet or jewel forms of the card.

If you are a Storm, and your damage is lower than you would like, keep a Supercharge in your side deck. Any blade will trigger an all one enemy cheat from the tentacle diagonally across from you. As long as that tentacle isn’t Myth this is the one blade you want to risk. With a full pip Supercharge and stacked Windstorms, you should be able to one-shot this boss. Your Treasure Card deck will hold zero-pip shields which you should use defensively while building up the Supercharge.

If you are the hitter, do not run in with the team for the first round of battle. Once the spammer lands a hit, it is safe to join the battle.

Healer

I have a specific strategy I like to use for healers with this boss. Like Storm’s strategy, it will serve you well in Darkmoor.

Round One: Cast Empowerment or Adapt

Round Two: Cast Sanctuary

After these two moves, you will have all the pips and all the power you need to keep your team alive. No matter if you don’t yet have the best gear. Even two strong Rebirths in a row can be possible if you make these two moves first. Do your best to replenish your Empowerment or Adapt when it runs out to keep the extra pips flowing in. The rest is up to you and your healing style.

An important note for Life School healers in this boss, you may get hit with Life Dispels. You should carry shields to take them off when necessary. If you have one, equip a may-cast healing pet. This pet might clear those Dispels allowing you to heal the team rounds sooner.

Regular Cards on the left and Treasure Cards on the right

Spammer

In Wizard101, when we ask for “spam” we mean: To hit each round with small attacks. As a spammer in this battle, the most important stat for you to focus on is accuracy. I like to equip a Sidhe Wand for this reason. Whatever equipment you choose, the important thing is to increase your accuracy in every possible way.

Missing or fizzling your spam hit will cause the flower to drop its spores. This means Black Mantle, Plague, and Infection along with an overtime attack on every member of your team. This can trigger a self-feeding loop where one fizzle causes another until the team just can’t win. As spammer, you need enough accuracy to overcome the Black Mantle every time.

You must hit every single round, like clockwork. I like to keep my Treasure Card deck full of one or two pip spells when I am relied on as the spammer, so that there is never any reason to not have an attack.

As I mentioned above, over-time spells are not OK here. If your spammer is Life or Death school, they could end up Dispelled a round. The healer or trapper should have a few small hits in to back-up the spammer, just in case.

It does not matter which Tentacle you choose to spam as long as you spam the same one each time. This will allow the trapper to do their job.

Trapper

The trappers’ job is to stack Feints and traps on the tentacles while the hitter builds the attack. Feints and Potent Feints should be cast on all the tentacles that aren’t being hit by your spammer. Hex, Curse, and Elemental or Spirit traps are all also ok to use. Ideally, the trapper should be next in line after the spammer in battle order. This way, on the hit round a final Feint can be cast.

If the team works together and everyone plays their part, this battle can be fun and smooth. Good luck getting those drops, and I can’t wait to see you in the Spiral!
~ Amber Ravynsong

Crafting101 – Zafaria

Today we will craft two Conga Drums and two Spirit Caller Drums for the quest "Drum a Little Drum"

Welcome back to Crafting101, young Wizard! Congratulations on achieving your Grandmaster Artisan Badge. You are now well on your way to becoming a Legendary Crafter. The Zafaria crafting quest is unlike any other crafting quest. You cannot complete this quest by teleporting to a friend to access the trainer early as you could with the others. You must complete the quest “To Market, To Market,” before being able to collect his quest.

Koyate Ghostmane

After completing ‘To Market, To Market,” Koyate Ghostmane will have the quest for you. You can find him near the large hollow log in Baobab Market. He is the first lion you see when you enter the area. Once you talk to him, you get the quest “Drum a Little Drum.” This quest requires you to craft two Spirit Caller Drums. The recipe for the Spirit Caller Drums will automatically go into your recipe book.

You will notice that you need Conga Drums for the Spirit Caller Drums recipe. These will also need to be crafted. Gearwise sells the Conga Drum recipe for 4,755 gold. You can find him in Survey Camp, Celestia.

The Recipes

There are many reagents required to craft both of these drums. Below is a list of all the reagents you will need in order to craft them.

Conga Drum

You need two Conga Drums to make the two Spirit Caller Drums. In previous worlds, we crafted two items twice. Now we will learn how to craft items that are an ingredient in other recipes. This is an essential tool if you plan to craft a house, such as The Wyrd or The Treetop Getaway.

Legion Shield

The Spirit Caller Drums need 8 Legion Shield treasure cards between them. These have a chance of being harvested from White Tiger Lillies or Missile Toe plants. If you’re lucky, you may find this Treasure Card in the Bazaar. It’s price ranges from 540 gold to 1013 gold.

You can farm Winter Skulls in Nordrilund and Nastrond for a chance at this treasure card. These places are in Wintertusk, Grizzleheim.

Giant

Our Conga Drum recipe requires four Giant treasure cards. The easiest place to find this treasure card is from the Archivist in Celestia. You can also harvest Giant from Sunion plants.
 
Dromel Merchant, Lost & Found, and the Treasure Chest all have this item as one of their daily rewards. Avery Templeton’s treasure card recipe is listed below under ‘Transmute Recipes.’
 

Amethyst

The bright violet accent in the Conga Drums requires 2 Amethysts. Amethysts aren’t found in the Spiral. Buy them from vendors like Al Saf’wan or Campbell Hodgson for 15 gold per gem. Harvesting plants such as the Fortune Cookie Tree, Ivy League, and Snap Dragon can also give you this card.

Perfect Onyx

The Spirit Caller Drum recipe requires 4 Perfect Onyx. Noxolo Fasttrack and other reagent vendors sell them for 100 gold each. Noxolo lives within the large hollow log in Baobob Market, Zafaria. Additionally, Perfect Onyx may harvest from Ivy League and Maelstrom Snap Dragons.

Crystal Vial

The Conga Drums recipe needs 2 Crystal Vials. It is a pricey reagent when bought from a vendor or the Bazaar. The vendors in Wysteria, Mooshu, and Dragonspyre sell them for 330 gold.

Buying them from the Bazaar can cost between 165 to 1650 gold each. Their cost depends on how many are available. Harvesting Pink Dandelion can also get you some of these vials.

Pristine Vial

Four Pristine Vials are in the Spirit Caller Drum recipe. Pristine Vials are either bought or harvested. Archytas sells these for 500 gold each. Also, if you grow the Maelstrom Snap Dragon, you will have a chance at harvesting this item.

Black Pearl

There are 28 Black Pearls in our Spirit Caller Drum recipe. Black Pearls are a challenging reagent to find. It can be a rare harvest from Black Lotus or regular Pearl. You can also buy Black Pearl from Diego for 175 arena tickets. The Bazaar has them available for 188 – 1875 gold each.

A few gardening options are: Alligator Pear Tree, Deadly Fly Trap, King Parsley, and Ultra Tiger Lily. The transmute Recipe is listed below.

Golden Pearl

The gold accent in the Spirit Caller Drums calls for 16 Golden Pearls. These are a rare harvest from pearls found in many underwater places in the Spiral. This includes Stormriven Hall, The Grotto, The Portico and Waterworks in Crab Alley.
 
This reagent can be harvested from Maelstrom Snap Dragon, Evil Magma Peas, Deadly Helephant Ears, and Fickle Pickles. The Gorilla, Minotaur, Magic Eggs, and Dragonfly all have this item as one of their daily rewards. The transmute recipe is listed below.

Sunstone

18 Sunstones are required for our Spirit Caller Drum recipe. These are a rare harvest from sandstone.

Sunstone is harvestable from Maelstrom Snap Dragon, Evil Magma Peas, Fickle Pickle, and Deadly Helephant Ears. The transmute recipe is listed below.

Aether

12 Aether will be required in order to complete both sets of drums. This is a rare harvest from Kelp and Shells. You may harvest this reagent from Deadly Helephant Ears, Evil Magma Peas, Fickle Pickle, King Parsley, and Maelstrom Snap Dragon.

You also might get this reagent from housing rewards. This includes The Dragonfly Ride, Dromel Merchant, Giant Gorilla and the Horn of Plenty. If you have arena tickets, Diego sells Aether for 200 tickets each. The transmute recipe is listed below.

Shell

16 Shells are in our Conga Drum recipe. This reagent is common in Celestia. Shells can be found in places such as Base Camp, Stormriven, District of the Stars and The Grotto. They’re also in Wizard City’s own sunken Triton Avenue, Crab Alley.

You may be lucky enough to harvest this reagent from Fickle Pickles and Maelstorm Snap Dragons. The transmute recipe is below.

Fossil

24 Fossils are required to craft our Conga Drums. This is a rare harvest from Stone Blocks. They can be found in places like Stone Town and Waterfront, Zafaria. Buying this reagent from the Bazaar can range from 100-1000 gold each. The transmute recipe is listed below.

Scales

The Conga Drum recipe requires 8 scales. You might harvest this reagent from Maelstrom Snap Dragons. Additionally, there is a chance to receive this item from The Magic Eggs housing reward instance. This reagent goes for 400-4000 gold in the Bazaar. You can find the transmute recipe below.

Transmute recipes

Giant

Giant is available from Avery Templeton in Base Camp, Celestia. You can buy it for 150 gold. The recipe requires 1 Peridot, 5 Pearl, and 3 Black Lotus for each Giant treasure card.

Black Pearl

The Black Pearl transmute recipe is available from Toshio in the Jade Palace, Mooshu. It sells for 400 gold. You will need 15 Black Lotus per pearl.

Golden Pearl

15 white pearls make up a golden pearl. Avery Templeton sells this recipe for 600 gold.

Sunstone

Sandstone can create sunstone. Sandstone is a rare drop from Stone Blocks. Sandstone is common in the Savannah and Stone Town. You can also find it in the Khonda Desert. This recipe is available from Avery Templeton for 150 gold.

Aether

You can make Aether with 15 kelp. Kelp is located in Celestia and Crab Alley. The recipe is available from Avery Templeton for 600 gold.

Shell

Shells can be created with 10 Scrap Iron. This recipe is sold by Avery Templeton for 600 gold. Scrap Iron can be collected in Marleybone.

Fossil

This recipe requires 15 Stone Blocks. It is available from Balthazar Dragonthorn in The Atheneum, Dragonspyre for 200 gold. Stone Blocks can be found in Celestia and many other places in the Spiral.

Scales

Scales can be created by using 5 Fish Fins. Transmute Fin uses 5 Scales. Both recipes are sold by Avery Templeton for 800 gold.

Completion

Now that you have all of your ingredients go back to your Housing Crafting Station. Craft the Conga Drums, then the Spirit Caller Drums. Once you have turned in the quest you will be awarded 7,981 gold and your Legendary Artisan badge. Congratulations, young Wizard! 

Thank you Starlights, for joining me in crafting and collecting reagents! Catch our next edition of Crafting101 in Azteca, where we will craft an Eagle War Shield.