Waterworks Guide

Most of us have done this dungeon, whether you were farming for mastery amulets, mega snacks, or your level 60 Legendary gear, Waterworks is your friend for all of that. In this article, I will explain how to beat Waterworks, what you’ll encounter, and what to expect. Without further ado, let’s get started.

Entrance

When you first enter the dungeon, you’ll be underwater. No enemies are present here. Pull the lever and go on to the first room. Stop at the entrance to plan out your strategy for the fights that follow.

Room 1

In this room, you will encounter four enemies. Two Fintooth Warlocks (Death, 2,560 health) and two Slithering Eels (Storm, 2025 health). They do not cheat, but they do have considerable resist toward their same school. The best strategy for this first fight is to have your team prepare blades for a hard-hitting hit all spell. They’re easy mobs that you can kill in 2 to 3 turns, max.

The next fight is a little harder, but it’s doable. Here, you will face two Hydromatic Drones (Ice, 2,735 health) and two Rivershell Guards (Storm, 2,095 health each). The Hydromatic Drones love to spam Frost Giant and Tower Shield to make your life a little more difficult. The best thing to do is to blade up as usual and use hit all spells. After you’re done with this battle, this concludes the first area. Pull the lever and you’ll be ready to move on to the next area.

Room 2

Puzzle: Here, you’ll be met with a puzzle. It’s fairly easy, but you must move fast. You will need to open all the blue clams to advance to the next floor. Avoid the yellow clams at all costs or you’ll summon four enemies, and while they aren’t hard, you will waste valuable health and time. After solving the puzzle, you will be granted health wisps, which are very handy for the boss ahead.

Boss Fight: After the blue clams have been opened, you’ll encounter the first boss in Waterworks, Luska CharmBeak. He is a balance squid with 21,150 health, but he has some pretty massive fire and death cheats. He drops the Waterworks Hat and occasionally, mastery amulets. How this boss works is pretty simple.

You can’t put any traps Luska or he will remove them and follow up with a massive Power Link or Skeletal Dragon that does 1100 per turn for 3 turns. AOE Traps such as Windstorm are fine, and pet traps will not trigger this cheat either. Multi traps like Fuel are not allowed by Luska. Only the first trap gets removed but it will still trigger the Skeletal Dragon.

You can only attack Luska if you have been “inked.” The wizard who is inked can hit Luska with any type of spell, but if you’re not inked, you can only attack with hit all spells. The wizard occupying the first spot will immediately be inked and as Luska’s health drops lower, he will ink the second wizard and soon enough, the third wizard. The fourth wizard will never get inked, so your best idea will be to put a support wizard last since they don’t need to hit. He can be an easy, straightforward boss if you have a hitter in the first spot and avoid traps. After defeating Luska, pull the lever and move on to the third area.

Room 3

Fight 1: Here, you will face two Fintooth Marauders (Death, 2,715 health) and two Wingfin Slicers (Fire, 2,190 health). They do not cheat. Blade up, use a hit all spell, and the mobs should be dead. After they’re dead, you’ll proceed to the next battle.

Fight 2: Here, you will face two Stormtide Elementals (Ice, 2,705 health) and two Rivershell Shamans (Balance, 2,430 health). Just as before, they are an easy mob battle. Blade up and use a hit all spell to eliminate them, then pull the lever and head into area four.

Room 4

Puzzle: In this room, before you battle anything, you’ll be met with a puzzle. It’s a simple puzzle to solve. When you read the instructions they will tell you “Start here to play follow the leader.” An eel will appear and will start touching various levers. Follow the eel and pull the levers in the same order. If you fail at the puzzle, you will face 4 Slithering Eel enemies, they are storm with 2,025 health each. After this puzzle is done, proceed to the next phase of Waterworks.

Fight 1: Here, you’ll face your last set of mobs. You will face two Riverclaws (Ice, 2,690 health) and two Celestian Constructs (Moon, 2,670 health). There’s nothing special to it, blade yourselves and use a hit all spell, but do remember that the Ice Riverclaws can use Frost Giant and Tower Shield. After defeating this set of mobs, pull the lever and head back to the main room to drain the valve.

Main Room

Final Fight: Pull the lever and you’ll be greeted by three bosses. Sylster Glowstorm (Star, 24,980 health), Water-Wing (Fire, 8,190 health) and the Spellhammer Sorcerer (Death, 6,560 health). The enemies might look easy enough at first, but they have some nasty cheats that you must consider.

Sylster Glowstorm: Sylster drops the Waterworks Robe and Boots, as well as mastery amulets. When the battle begins, Sylster will put up a Doom and Gloom bubble and say, “Traps go undetected in the Light”. This means you can’t hit Sylster (or any of his allies) unless there’s a trap on them. It’s important to note that the trap doesn’t have to match the school of attack you’re using. For example, I won’t trigger Sylster’s Ra cheat if there’s a Myth Trap on him, but I choose to hit him with Leviathan instead. Any trap will prevent the cheat.

After four turns pass, Sylster will change the bubble and say, “The blade goes unseen in the dark.” Just like the trap cheat in the previous cycle, you can’t hit Sylster (or any of his allies) unless you have a blade on. If you fail to abide by Sylster’s rules and use a trap or blade in the correct cycle, he will hit you with a powerful Ra at 2,000 plus damage. The Water-Wing uses a weak Rebirth that doesn’t give absorb, and the Spellhammer Sorcerer uses a weak Scarecrow, so their cheats are less of a threat. I recommend counting the rounds so you know when to use Blades or Traps. Hit all spells will not trigger Sylster or any of his allies’ cheats during either cycle, so if you lose track you can safely cast that.

Spellhammer Sorcerer: He will take over Sylster’s Doom and Gloom cheat cycle if you kill Sylster first. He uses a weak Scarecrow if you fail to hit him with a Trap or a Blade.

Water-Wing: He will take over Sylster’s Doom and Gloom cheat cycle should both his allies be defeated. His cheat is a weak Rebirth if you fail to hit with a Trap or a Blade.

Bonus Glitch

Are you tired of running Waterworks, again and again, hoping to get your gear?

In Waterworks there is a glitch to make Sylster re-spawn without running the entire dungeon again. In order to do this, the entire team must remain in the dungeon together. All you have to do is have three of your teammates wait in the room where the battle just completed while the fourth goes into another room inside Waterworks. When the fourth Wizard returns to the team, Sylster will return for another battle. If done correctly, you can have infinite attempts at Sylster’s drops without having to run the dungeon each time.

Final Thoughts: Overall, Waterworks is a fairly simple dungeon with a decent drop rate. Most get their Waterworks gear within a day of farming, which is good because Waterworks gear is crucial to have. That said, I wish everyone the best of luck in farming Waterworks and getting their Legendary gear!

 Written by Ross Shadparvar

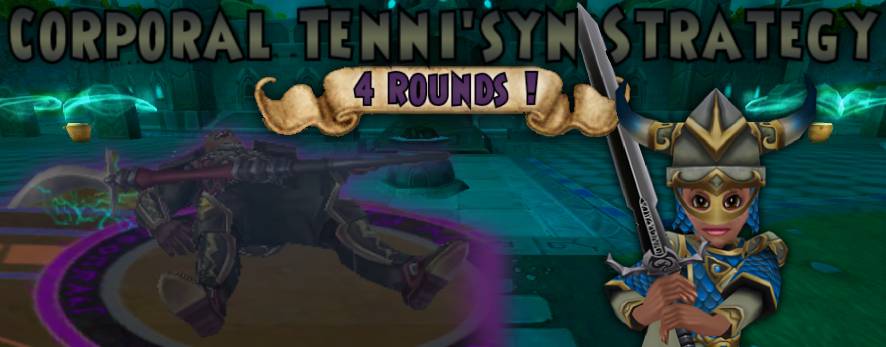
Corporal Tenni’syn Strategy!

Corporal Tenni’syn is a Gold Skeleton Key boss found inside the Zanadu Sewers, Empyrea. He drops the best offensive robes for every school, except Storm. Storm wizards will still want to use the Malistaire robe even at level 130.

Initially, this boss seems difficult, but with enough knowledge and game sense, he is actually incredibly easy! So, here is how I killed Corporal Tenni’syn in 4 rounds!

The Cheats

Tenni’syn uses a couple of important cheats to note. They can be annoying, but there’s no way to avoid them.

Only Feint once per round

If you feint Tenni’syn more than once, you’ll activate a cheat that removes every single trap that the team has placed on him.

Natural attacks lead to random Wild Bolt spam

Whenever he uses his natural attack he will shout about how it is “time to finish this!” Now, this sounds rather silly, but what follows isn’t.

He will spam up to 7 wild bolts on a random member of the team each time this attack occurs. Be careful because he’s packing a lot of damage and pierce!

Gains 3 Pips after every turn

After every round, no matter what, Tenni’syn will gain 3 power pips. This gives him the power to spam spells such as Glow Bug Squall, Sirens and Storm Lord.

Don’t Dispel

Other sources may claim that using dispel is ok if it is only used once per round. In my experience this will trigger a cheat that clears all negative charms. A better defensive strategy is to use Juju or storm shields.


The Strategy

Now that you know the cheats, lets find out how to deal 80,000 damage in 4 turns every time. Even when blades are cleared by Glow Bug Squall, Sirens and Catch of the Day, it’s still guaranteed to work. Here are the key points.

Jade gear and Storm resist

Having a wizard that can tank all the storm hits is important. Send someone in first who has high storm resist. The battle order is decided by the order in which your team enters the key room.

Scion 

When you hit use Scion of Storm with a prism, or Scion of Myth with 2 stun blocks up. Scion will allow you to one shot Tenni’syn on the 4th round.

Feint

Have the team member with storm resist feint using Potent, regular, and a Treasure Card to make the Scion kill guaranteed, even if he clears all blades.

Critical block 

In my experience, he must not have much critical block. He has never blocked a single one of my critical hits!

The only additional note is that he may use blades, so your team will want to carry enfeeble in order to get that Scion damage doubled.

 That’s it! It’s honestly that simple. I wish you the best of luck while farming!

Lambent Fire: 2 Turn Farming Strategy

Lambent Fire

Lambent Fire is a Stone Skeleton Key Boss that is found in Crystal Caves – Avalon. He drops the Burning Rampage spell, which is highly sought-after by many fire wizards. Unfortunately, his cheats work conveniently well to make the battle harder specifically for fire.

Main Cheats & Common Strategies

He cheat-casts steal charm on all fireblades, elemental blades, and universal blades. Aegis can be used to prevent this cheat, but many people don’t have that spell yet. If Bladestorm is used, only the caster will have their blade stolen. A common strategy is to have someone spam quench (fire dispel) on the boss so that someone else can blade. Hitters of other schools often don’t worry about this cheat (other than balance), but it’s mainly fire wizards that are farming this boss.

He also cheat-casts Immolate on any universal traps. That’s right – no feints, even if protected with Indemnity. You would need someone to spam quench for that, too. The only exceptions to this cheat are Mass Feint and Malediction (mass universal traps). Regular traps (like Fire Trap, Elemental Trap, Fuel, and Backdraft) all work fine. Fire Prism and Mass Fire Prism are both allowed.

A minion will also cheat-cast Bad Juju at the end of the 3rd turn to whoever has the most pips, which is usually the hitter. That always has to be cleared using a wand spell or Cleanse Charm before hitting. This cheat is part of a cheat-cycle and repeats every 3rd turn.

So if you’re fire, it’s hard to blade and hard to trap. Farming is all about efficiency; regardless of the drop rate, you have a higher chance of getting what you want if you get more runs in. But with all of the cheats against buffs, how could 4 average fire wizards ever hope to beat Lambent Fire in 2 turns?
 

Here’s The Strategy

 
Person 1: Minion Killer
 
You need one person to kill the minions. If you’re a fire wizard with a +1 pip deck, use Mass Fire Prism followed by an enchanted Scald.
 
Yeah, I said Scald. Trust me on this.
 
How high your damage is won’t matter, the minions will die regardless. If you don’t get a power pip on the 1st and 2nd turn, no worries; it will just take 3 turns to kill.
 
If the minion killer ends up not being a fire wizard, just find someone that can kill the minions by the 2nd turn. Having a spell that is both AoE and DoT (like Deer Knight or Reindeer Knight) would be ideal, but anyone else that can one-shot minions by the 2nd round is fine.
(Ex: Stormblade + Tempest/Storm Lord)
 
Person 2: Main Hitter

Here’s another surprise for you fire wizards: if you’re the hitter, use Fire Prism (single) on the boss, followed by an enchanted Heckhound. Even if you have a shadow hit ready.
 
Another “useless” spell, I know. Just go with it.
 
If your main hitter is not fire, then just have someone blade and hit with any DoT spell. Frostbite, Poison, or Thunderstorm (Rain Core pet spell) are all great options. Even if you have a stronger spell, please stick to DoT.
 
                                                                       Person 3: Secret Weapon
 
This is where the strategy comes together. Most of the people farming this boss are fire, right? Someone probably has Dalia’s Smoldering Hairdo, the fire hat from the Professor’s Hoard Pack. Congratulations, you have been selected to use Incindiate.
Does it make sense yet?
 
This will detonate all of the previously used DoT spells AND double their damage. To put this in perspective: Assuming a fire wizard was the main hitter and used what I said above, it would end up being a 5-7 pip Heckhound with a prism. If you include a Colossal enchantment and the double damage from Incindiate, you’re looking at a 1900-2440 base damage attack. That’s more base damage than any spell in the game. And that’s still without the 30% ice boost (from prism), stat damage, or even a possible critical.
 
The Scald works similarly; with Colossal and Incindiate, it would have 1540 base damage, which is still more damage than Raging Bull. That alone with the 30% ice boost is guaranteed to kill minions (and land a solid hit on the boss as well), not to mention your stat damage.
 

If you’re a non-fire wizard but you have the hat, you can still make it work. If you have a fire mastery amulet, great. If you have a +1 pip deck, using empower on the 1st turn will give you enough pips to cast Incindiate on the 2nd turn

f you are balance, you could go first and use bladestorms (cheat will only steal blade from you) to boost the other 2 hitters, or use Donate Power to boost the Heckhound, or both.
 
If you have Dworgyn’s Havoc Hood (the death hat from the Professor’s Hoard Pack), Mass Feint would also help.
 
If you are not fire but you are still a strong hitter, then you can blade and hit with whatever you got; just keep in mind DoT will do double damage.
 
If you have none of these, you could always buy Donate Power tc from the bazaar and use that on the main hitter before they use Heckhound, or buy Fire Trap/Elemental Trap/Fuel tc. Just find some way to be helpful.


Person 4: Backup

There is no specific role for this person, just help somehow. If you are fire/ice/death, I recommend doing the same thing as the main hitter. I’m specifically including ice and death because they both have solid, low-pip DoT spells they can use, and they each have a 30% damage boost against Lambent Fire.

If you’re fire but have really low accuracy/damage, use traps for the hitters. (Traps have to be after prisms, so enter battle after the hitters.)

If you are balance, you could go first and use bladestorms (cheat will only steal blade from you) to boost the other 2 hitters, or use Donate Power to boost the Heckhound or both.
 
If you have Dworgyn’s Havoc Hood (the death hat from the Professor’s Hoard Pack), Mass Feint would also help.
 
If you are not fire but you are still a strong hitter, then you can blade and hit with whatever you got; just keep in mind DoT will do double damage.
 
If you have none of these, you could always buy Donate Power TC from the bazaar and use that on the main hitter before they use Heckhound, or buy Fire Trap/Elemental Trap/Fuel tc. Just find some way to be helpful.


(If you’re a high level and wanna get fancy, a death wizard could use Empower then Wrath of Hades, or a myth wizard could use Empower tc then King Artorius (which both have a big 1000+ damage DoT). If you’re hitting minions, an ice wizard use Empower TC/Snow Angel, or a myth wizard could use Mythblade/Noble Humongofrog. Feel free to get creative!
 
Putting It All Together
 
If your backup person is not hitting or trapping, have them go first, followed by the 2 hitters (in any order). If the backup person is hitting, then all 3 hitters go in any order. Most importantly, have the person using Incindiate go last.
 
If anyone on the team doesn’t have enough pips to do their part by the 2nd turn (due to lack of power pips, entering late, etc.), everyone needs to wait until the 3rd turn to hit.
 
If your hitters aren’t very strong, or you don’t have a backup person, hitting on the 3rd turn can also give everyone an extra turn to trap, and increases Heckhound’s base damage (by gaining an extra pip). This would ensure a kill, although most full teams can manage it in 2 turns.
 
Preventing Fails
 
 
One of the unpredictable things in this battle that can cause a fail is Lambent Fire using Efreet. But with this strategy since the person using Incindiate is going last, the Efreet will always target them (since they will always be across from him) as long as you have a full team.


The Bad Juju cheat is another thing people worry about,
but hitting by the 3rd turn avoids this completely.
 
 
The minions CAN use Immolate, which can clear some of their prisms. If the minion killer is fire and has low damage, the Scald might not kill. Have a backup AoE hit in to clean up. Lambent Fire will not use Immolate.
 
Aside from that, watch your accuracy and power pips. Incindiate needs 15% accuracy to ensure no fizzles. Raise your power pip stat too, especially if you don’t have a +1 pip deck. Other than that, make sure your hitters all have 100% accuracy for their school. If your accuracy isn’t high enough, taking an extra turn to use Infallible is well worth your time. Accuracy and power pips are much more important than critical for this strategy.


Deck Setup

Minion Killer

If you are fire, this is the setup you wanna have. Keeping a maximum of 7 cards ensures that you will draw exactly what you need. the plan is to use Mass Fire Prism, then an enchanted Scald. If you get a pip fail can’t use Scald on the 2nd turn, use a trap while waiting for a pip. If your fire accuracy isn’t perfect, use Infallible tc regardless of pips.
 
If some minions clear their prism and end up surviving, then you have a backup enchanted Meteor Strike. In the rare case that it goes past the 3rd round, you may need a wand to for the Bad Juju cheat.
 
If you’re not fire, just replace the trap/prism with blades, and the attacks with your AoE spells.


Main Hitter/Backup Hitter
 
Same simple setup: Fire Prism then Enchanted Heckhound. Pip fails don’t really matter with Heckhound, but use a trap if someone else on your team needs to wait for pips. Just like before, you have an enchanted Meteor Strike and a wand hit for emergencies, but probably won’t end up using them.
 
If you aren’t fire, just replace the trap/prism with blades, and the Heckhound with your DoT spell. Backup hit is optional.
 
***All hitters NEED perfect accuracy, more than anything else. If you fizzle, you miss out on the Incindiate. If someone on your team needs to use Infallible tc, just hit on the 3rd turn.
 
Secret Weapon
 
It’s pretty simple for this person: enter the battle last and be ready to use Incindiate by the 2nd turn. if you have a +1 pip deck and at least 90% power pips, you’re solid. You can use a Fire Trap or anything else that would be helpful while you wait. If you don’t have a deck pip, increase your power pips as much as possible and use Empower tc on the 1st turn. Regardless, 15% fire accuracy is a must. Backup hit is optional.

Other Backup 
If the Backup is a fire wizard with low damage/accuracy and doesn’t want to hit, this is also a possible setup. Pack whatever traps you have, and go after the hitters so that your traps go after their prisms.
 
If the backup isn’t fire, then go first and support in any way possible. An easy way is by using Donate Power tc to boost Heckhound on the 2nd turn.
 
 
While I do agree that this strategy is a bit particular by requiring a spell like Incindiate, also consider that you’re more likely to run into fire wizards with this boss than anywhere else. The chance that someone on your team has it is pretty decent. All the current guides and strategies advise against having too many fire wizards (which is terrible since fire wizards farm it the most), but this one encourages it. This is also the only current strategy that can be done in 2-3 turns with a team of average Archmage fire wizards.
 
Good luck on your drops!
 

By: NinjaDudeB12 #4545

Mount Olympus Strategy Guide

When you reach level 30, Cyrus Drake will invite you to the Quest for Glory, your ticket to Mount Olympus. The quest will send you to Cyclops Lane, where you will discover something unique. Hiding in the back of the park is a golden chariot to Aquila. There, you will meet Silenus, who will send you to Mount Olympus to meet Zeus. This is a side quest you will definitely want to do, as the gear Zeus drops here will keep your stats where they need to be until you reach level 56 or 60.

When you step inside the sigil to Mount Olympus, you first meet Athena. She will be your guide and sends you to your first challenge, Apollo. Apollo is a Life boss with Myth minions, but he mainly deals Fire damage. This boss doesn’t cheat, but he uses a natural attack that leaves behind a smokescreen nearly every round. Stacking a Feint or two on the boss with a few blades on your attacker will work. After defeating Apollo, you will be awarded your first Legion Token, an Ophidian Archer.

After you turn in the first Legion Token, Athena will send you to the next challenge. The Moon Chamber. Inside you will find Moon school and Death school mobs. There isn’t a boss here, and there are no cheats. It’s worth noting that many at-level Wizards prefer to use a particular strategy to minimize the number of mobs in this fight.

For the mob-reducing strategy, only one Wizard enters the room to start the battle before the rest of the team joins. This trick works in all of Aquila, wherever rooms contain battles with minions. Your usual mob-killing strategy boosted by an extra blade or two should do the trick, and in no time, you will have your second legion token, a Minotaur Warrior.

Next, Athena will send you to the Sky Balcony to face the Praetorian Guards. This is another mob like the last one. Even though one of them is in a different school like a boss would be, the health is about the same for all of them. The “boss” is a Storm, and the mobs are Myth. The same strategy you used in the last fight will also work here; be sure to convert the boss if your attacker is Storm. Grab the free statue of Zeus, which you will find on the Sky Balcony, then swipe the third Legion Token, a Carthenian Elephant.

After turning in the final Legion Token, Athena will send you off to face a new kind of challenge. Down in the Arena, Eris Golden Apple has a puzzle you must solve. She will show you two teams, and you will have to figure out which of your warriors can take down the ones she selects. Lucky for us, she makes the same moves every time. First, move your Carthenian Elephant. Second, move the Minotaur Warrior. Then end the game with the Ophidian Archer.


If you complete the puzzle correctly, you won’t have to fight anything here, turn in the quest and move ahead to the next challenge.
 
Next, The Hall of the Watchful Eye contains an easily conquered Myth mob, the Elite Cyclops Guard. After you defeat them, you will gain access to Hephaestus.

Before moving ahead, you must gather Hephaestus’s statues that are hidden all around Mount Olympus. Start by heading straight out the door and down the hall. When you get to the end of the hall, head out the door and hang a left toward the Chamber of the Sun. Enter the Chamber of the Sun, but stop side the door and turn to your right. You will see the first statue in the corner (1).

Head back out the door and toward Athena; you will find the next statue in the corner by the entrance (2). Now, go toward the Moon Chamber, but when you get to the top of the stairs leading to the Moon Chamber door, turn to the left. The third statue is hidden in a corner (3). Finally, head down the nearest set of stairs to the Arena. When you get to the bottom of the stairs, stop and turn to your right. You will see the fourth eagle statue standing near the bench in the alcove there (4). Now that you have gathered all the eagles, you can bring them to Hephaestus and brace yourself for the next challenge.

Inside the Hall of Battle, you will meet Ares Savage Spear. Ares is a fire boss with Death minions and has a damage aura that is permanently renewed. If you hit him directly, he says, “You dare strike me directly!?” and smacks you with the business end of his spear for just under 500 damage, leaving behind a 40% trap.

The best strategy here is to stack up a few Feints on the boss, a few blades on your attacker and hit with an All One Enemy attack such as Tempest or Meteor. If Ares doesn’t die in the AOE attack, make sure the follow-up hit finishes him off or face his wrath.


Next is the big boss, Zeus. The same mob-reducing strategy is often employed here that I introduced you to in the Moon Chamber. It’s a good idea in this fight, especially because Zeus is a Myth boss with Ice minions that are not easy for an at-level team; they tend to cast a lot of shields that complicate things.

If you use any spell over six pips in this battle, Zeus will hit you out of turn with a free Minotaur and scold you that “You hesitate too much!” The best strategy here is to stack 2-3 feints on Zeus plus 3-4 blades on your attacker and go for a one-shot kill. Having a supporter carry Shatter is a good idea, just in case those Ice mobs stack up too many shields before your attacker is ready to kill.

When you complete this battle for the first time, you will be awarded the title Honorable Bronze Archon, and you will have conquered Mount Olympus!

Power Pips

Power pips are a special feature within the game and with good reason. A wizard has a base chance of getting a power pip, starting at level ten. This chance goes up by one percent every level until you reach level fifty, where it is maxed at 40%.
 
Power pip chance can be increased with gear (pets can also develop a talent for increasing a power pip chance.) Depending on how the game is played by the individual, some may favor another stat. Others will devote a whole gear set just for power pip chance. Higher power pip chance is found on better gear, and as your wizard gains more levels, the gear has a higher power pip chance. Balancing power pip chance with other stats is a part of the game.
(These are just examples. Not all rings will offer 12% power pip chance.)
 
Once you reach a certain level, wands will start to give you either a pip or a power pip. This is just a standard power pip, it doesn’t affect power pip chance.
 
Power pips are, as stated above, a two-for-one deal. One power pip represents two normal pips, but only for spells that are from your primary school. A storm wizard who has two power pips could not, for instance, cast Satyr (a four pip spell.) This is because life isn’t their primary school, and the power pip would only count as one.
 
The number of pips a spell cost is in the upper left-hand corner of your spell card.
 
Spells that have an X in their upper left-hand corner are based on the number of pips you have on hand. Tempest and Dryad, for example, have this symbol. However, Dryad is a healing card, and based on the number of pips you have, is how much it would heal you for. Dryad heals 200 health for one pip. A life wizard who wanted to heal 800 would have to wait for four turns. This life wizard would only have to wait for two turns if they received a power pip each turn.
 
No power pip: 200 [amount of health on the card] x 4 [the number of normal pips] = 800 [the amount that would be healed]. This would take four turns.
 
One power pip: 200 [amount of health on the card] x (2 [the number of normal pips] + (1 [ number of power pips] x 2 [value of power pips])) = 800. This would take tree turns.
 
Two power pips: 200 x (2 [number of power pips) x 2 [value of power pips]) = 800. This would take two turns.
 
Tempest would be the same way, only for damage. If a storm wizard wanted to do 320 damage, that would require four turns. (As it is 80 damage per pip).
 
Power pips can be used for a side school if you have the school’s mastery amulet. There is a mastery amulet for each of the seven schools of magic. You can buy the basic mastery amulets in the Crowns Shop, but you cannot buy the amulet of your own school.
 
There are also exalted mastery amulets that do the same thing but offer extra stats for your wizard. Critical block for two other schools, damage boost, and balance and life offer incoming or outgoing health boosts. Exalted amulets have to be farmed for as they cannot be bought in the Crowns Shop.
 
Spells that take pips (Mana Burn, Lord of Winter, etc.) will specify on the card. Mana Burn is a balance card that does 80 damage per pip and takes the enemy’s pips as well. It takes 3 pips from your opponent.
 
Spells that take pips will only take what it lists on the card. If the enemy has three power pips, it will take the three pips the enemy has and give you three normal pips, even though the power pips would equal out as six pips. If an enemy has two normal pips and a power pip, it will take the two normal pips and a power pip. It won’t leave a pip behind. Power pips cannot be taken apart and you are only given what you’re promised on the spell. It’s all or nothing.
 
It’s important to know that if you cast a spell, and someone casts a spell on you that removes your pips, you still attack even if you have nothing. If you are hit with a Mana Burn, and the seven pips you had go to four, you still use the spell you selected that costs seven pips.
 
In short, power pips are considered a fundamental part of the game because they help with performing a spell quicker. Every school uses some form of the pip, and power pips are just a two-in-one pip deal. Increasing the power pip chance is invaluable as well, however, some wizards may choose to increase another stat.