Blacksmiths Fjord Bundle

The Blacksmith’s Fjord Bundle is the second new bundle of 2021, and we are excited to explore it with you! This Grizzleheim-themed bundle is available at Gamestop and comes with the following items:

  • Blacksmith’s Fjord Castle
  • Permanent Fjord Dragon Mount
  • Forge Goblin Pet
  • Forgemaster’s Gear
  • Forgemaster’s Sword
  • 1-month prepaid membership or 5,000 crowns

Blacksmith's fjord house

The Blacksmith’s Fjord is a beautiful piece of Grizzleheim you can call your own. This serene retreat sits right on the river with a tower to keep watch over your home away from home. The docks bring a beautiful light to the endless fishing available in this home. We found the Steelhead Doodlefish and seasonal fish. We can’t help but wonder what other fish will show themselves here? Let us know what you find!

To the side of the docks, you will find your very own watchtower lined with shields. You can touch the sky! Well, almost, but you are getting a better view of the waterfalls and endless scenery.

Beside your castle, you will find the hard-at-work water wheel, supplying the power and energy needed to keep the famous Grizzleheim forges up and running.

Let’s venture inside and see what else awaits us!

Stunning vaulted ceilings greet you when you walk through the doors. You can tell the previous owners built this place to last; the exposed beams were carved with such care. You will also find an excellent themed bank to store all of your gear and items. 

Venturing down the halls of this home, we find the main attraction, the Blacksmith’s Forge. This fiery furnace, powered with the help of the water wheel, will get the job done. Walk up and interact with it to get a pleasant daily surprise. Who knows, you might get some Amber, a valuable reagent used for many Spell Card recipes. Walk upstairs, and you will find the great hall where you and your guests can feast and swap tales. 

If you look around, you might find some hidden secrets lying within.

The Gear

The kit consists of the Forgemaster’s Helm, Forgemaster’s Smock, and Forgemaster’s Boots. Each piece gives one Grizzleheim Lore spell. In addition, the Helm offers Hammer of Thor, the Smock gives Grendel’s Amends, and the Boots have Ratatoskr’s Spin. The Boots are especially high in Damage, Resistance, and Health at all tiers. They are a great option for any Life Wizard, especially with the Ratatoskr’s Spin card. The Helm is high in offensive stats and adds some pierce the boots do not have. The Smock follows in the same pattern as most bundle robes. It offers a defensive build with high Health, Resistance, Critical Block, and Outgoing Healing, which combines well with the Grendel’s Amends card.

The Wand

The Forgemaster’s Sword is one of our favorite pieces of this bundle. The beautiful Norse-style blade is fresh from the forge! Glowing bright and engraved with magical runes, it makes a fantastic stitch piece for any Wizard. 

Not only is it stunning, but the stats on this wand are also notable. It is common for bundle wands to have mid-level stats, and the new Forgemaster’s Sword is no exception until level 100. I chose to redeem mine at that level, which gave me 42 Critical Rating, 11% Damage, one Power Pip, and 13 Shadow Rating. It makes for a significant and timely upgrade from your Sky Iron Hasta. Even the level 110 and 120 tiers of this sword are as impressive. 

While it still has decent stats at lower levels, it may not be the best choice since it doesn’t surpass the Sky Iron Hasta’s damage until level 100. This Wand comes with attack cards for Myth, Life, and Storm. The Forgemaster’s Sword also has a May-cast Chromatic Blast spell at levels 100 – 140. Chromatic Blast gives a Universal +5% damage per pip blade to the caster. This May cast provides the wand with the potential strategy of countering Wards in exchange for an extra blade.

The Pet

Made from cinder and smoke, with a heart of fire is the Forge Goblin pet. The first-generation talent pool contains zero common talents, six uncommon, two rare, one ultra-rare, and one epic talent. This gives our fiery friend a total pedigree score of fifty-two.

The Forge Goblin gives one Shatter Card at Teen and another at Ancient. Its first-generation stats are as follows: 

  • 250 Strength
  • 195 Intellect
  • 200 Agility
  • 235 Will
  • 185 Power

These are impressive stats for a first-generation pet. If you’re looking for a starting point for your hatch or a unique pet to use, this could be the one. When it comes to training, this pet likes Death school snacks and Meal type snacks. When I raised the Forge Goblin to Mega, it manifested; Attentive, Death-Shot, Death Dealer, Death Assailant, and Forceful. What did yours get? Given the talents we’ve seen, this pet seems like it could make a great Death starter pet.

The Mount

The permanent Fjord Dragon mount is a single-rider, 40% speed boost mount. This blue and green dragon slithers gracefully through the air. Its wings resemble spring leaves, the perfect complement to any green stitch. But, don’t let its stoic stare scare you! This fierce, elegant dragon is here to help you traverse the Spiral.

In Conclusion

This concludes our review of the Blacksmith’s Fjord Bundle. It’s a unique addition to the Grizzleheim-themed homes and items.

The Forgemaster’s Gear gear will help you in your adventures through the Spiral. This bundle’s wand at high tiers adds more variety when deciding what you will use while questing. This bundle brings cool-looking gear that packs a punch of damage and resistance. The Forge Goblin pet is an excellent addition to any Death collection. The Fjord Dragon is a unique mount that will stand out. We are impressed.

We hope this helps you decide if this is the right bundle for you. We look forward to seeing what you create. Tell us what you think of the Forgemaster’s Bundle in the comments below. 

See you around the Spiral!

Discord Admins Baldur and Hannartia!

Pip Wizardry 2020

Pip Wizardry 2020!

Hello Wizards, this is Nathan Shadowbringer here to help you calculate the actual damage of spells per pip!
 
This article will be updated if spell changes happen down the line. Eventually, I plan for this list to include even Loremaster and crafted spells.
 
We will start with the highest Pip spells, and works our way down to the lowest ones. You will notice some of the spells are not a whole number. Why is that, you ask? Currently, Shadow-enhanced spells that use Shadow and standard Pips – have been changing. In the summer 2020 Test Realm, KI has confirmed that one Shadow Pip now equals 3.6 pips. This number is subject to change. 
 
Before the 2020 Summer Update, Shadow enhanced spells had severe damage compared to non-shadow-enhanced spells. These spells went through changes to balance them. Shadow Pips previously never had an absolute value, but now they do thanks to the new spell changes! They are still powerful, but now within reason to normal spells of a similar rank.
 

Calculating Damage Per Pip

First, if the spell has a damage range, we must find the average damage. For example, let’s take the spell Storm Owl. Storm Owl is a ten Pip spell, that can do anywhere between 1330 – 1470 damage. Which, on average, is about 1400. I would divide 1400 by 10 to get the spell’s loss per Pip or DPP. Storm Owl would come out to be 140 DPP.
 

This can be represented by the formula: (damage)/(x-y). 

Here you would take the spell’s average damage (based upon the values on the card), and divide it by the difference of its Pip cost (represented by the letter x) and its utility Pip cost (represented by the letter y) which we’ll get to in a moment.

So the math for Storm Owl would look like this:

(damage)/(x-y)

(1400)/(10-0) 

1400/10

= 140 

It seems simple, right? Not always. To get a spell’s true DPP, we have to factor in Pip reductions, and damage multipliers.

What Are Pip Reductions?

A Pip reduction is something factored into a spell’s DPP calculation. These reductions happen when a spell has an added effect or utility attached to it. When calculating DPP, some Pips may get subtracted. 

For example, one type of Pip reduction is the scion condition. Scion spells cost 11 pips, and do x2 damage if a particular condition is met depending on the spell. Because Scion spells can do x2 damage, reducing their initial damage. Their base damage is around the damage of a ten Pip spell. See where I’m going with this? 

The Scion Condition results in -1 Pip when calculating damage per pip. Yet, the Scion condition is not the only Pip reduction. There are, in fact, many more. 

Types of Pip Reduction

The following list contains the types of Pip reductions along with how many Pips they reduce.

  • Special: 10% Pierce blade: -0 Pips
  • Rusulka’s Wrath blade/weakness: -0.5 Pips
  • 800 Absorb: -1 Pip
  • Disarm: -1 Pip
  • Guiding Light: -1 Pip
  • Infection: -1 Pip
  • Pierce: -1 Pip
  • Remove 2 pips: -1 Pip
  • Scion Condition: -1 Pip
  • Steal 1 pip: -1 Pip
  • Stun: -1 Pip
  • Summon minion: -1 Pip
  • Trap: -1 Pip
  • Tower shield: -1 Pip
  • Bubble change: -2 Pips
  • Double Disarm: -2 Pips
  • Double stun: -2 Pips
  • Gain 1 pip: -2 Pips
  • Plague: -2 Pips
  • Pierce before hit: -2 Pips
  • Smokescreen (40% accuracy debuff to all enemies): -2 Pips
  • Spirit Shield + Elemental Shield: -2 Pips
  • Stun all: -2 Pips
  • 45% Weakness: -2 Pips
  • AOE 45% Weakness -3 Pips

What This Means

These Pip reductions may NOT all be accurate, because determining the number of Pips a utility takes away is tricky. KI developer Mattnetic has said some utilities may cost less and others more. The issue is finding out which ones. Most pip reductions appear to be -1 one Pip, with AOE utilities such as Plague counting as -2. One for the utility, and one for the AOE effect. However, that still leave some loose ends, so allow me to to tie those up right now.

Because all King Artorius spells to get a 10% Pierce charm, the Pierce charm is not counted as a utility. Thus, every King Artorius spell gets it for free.

Rusalka’s Wrath gives either a 30% storm blade or a 30% Storm Weakness to the caster. Considering it has a chance to positively and negatively affect the caster, it was given 0.5 pips instead of 1.

Because the typical bubble would cost two pips, the Pip reduction is counted as two Pips.

Calculating the Pip reduction for an 800 Absorb was difficult. The actual Absorb spell is three pips for a 400 Absorb; therefore, wouldn’t it be counted as six Pips for an 800 Absorb? If so, then the DPP of Hungry Caterpillar would be extremely high. But that wouldn’t be, right? Would it? These things can be quite challenging. 

What Are Damage Multipliers?

You factor in a damage multiplier after you calculate a Pip reduction. For example, a standard damage multiplier is an AOE, or area of effect. An AOE spell is when a spell hits all enemies. Let’s take the spell, Glowbug Squall. This spell is an AOE, and it does 940 damage to all enemies. It costs five regular Pips and one shadow Pip. A Shadow Pip currently equals 3.6 Pips; therefore, Glowbug Squall would be 8.6 Pips in total.

AOE spells have their damage multiplied by 0.75, or 3/4. To account for this spell being an AOE, we get the inverse of 3/4 and multiply by 4/3. Instead of dividing 940 by 8.6, we would multiply 940 by 4/3 first to get 1253.3. Now, we divide by 8.6. Finally, this makes the DPP of the spell Glowbug Squall 145.7.


Calculating Drain DPP

Calculating the damage multiplier for drains was difficult. Thanks to the new spell, Ship of Fools, we can now figure it. Ship of Fools has two routes you can go and upgrade using spellements. One is damage, and the other is a drain.
 
We can now accurately compare drain damage to typical damage. For example, the final tier of Ship of Fools. We found drains to suffer a 0.88% damage dropoff compared to pure damage. The final drain tier for Ship of Fools deals 330 damage. The final pure damage tier for ship of fools deals 375 damage. 330/375 is 22/25, 0.88, or 88%. 
 
This rate stays consistent for each upgrade of Ship of Fools. Therefore, before we calculate a drain spell’s DPP, we have to multiply its damage by the inverse of 22/25, which would be 25/22, to find the true DPP.
 

Calculating DOT DPP

One more type of damage multiplier is “damage over time” or DOT. These spells have initial damage, and then the damage dealt over three rounds. Because this damage takes longer to deal, the damage is 25% higher than the average spell—DOT’s damage multiplies by 1.25. So, to find DPP of spells with DOT’s divide by 1.25 to get the final DPP value. 

X rank spells like Tempest and Snowball Barrage are not affected by the AOE multiplier. Because they already have their damage per Pip value listed on the card.

What do the Devs say?

The first chart here is from Ratbeard’s Dev Dairy, it shows the individual base DPP for each school of magic. In addition to the new and old DPP for each school’s Shadow-enhanced spells. 

With the damage per pip chart below, you will start to notice things with some spells above rank 7. The damage per pip curve caps off at eight Pips. It does not increase further. To account for this, rank eight spells and above get utility for cheaper then what a rank seven or lower would. They get these utilities at a 50% discount, compared to a rank seven or below spell. 

There is one utility that does not get this discount, the Scion Condition, which remains at -1 Pip, not -0.5. The discounted utilities are bolded on the chart.

Another thing to note is rank seven spells DO NOT get penalized for being an AOE. They are purposefully over the damage curve. None of the things mentioned above apply to Shadow enhanced spells.

Formulas: (x = number of Pips and y = utility Pip cost)

AOE: [(damage)(4/3)] / (x – y)

DOT: [(damage)(0.8)] / (x – y)

Drain: [(damage)(25/22)] / (x – y)

If you’re interested in learning more about DPP you can check out Ratbeard’s Dev Dairy on the subject with this link! https://www.wizard101.com/game/dev-diary/spell-balance-audit

Final Notes

Moving forward the it’s important to keep this information in mind:

  • One Shadow Pip equals 3.6 pips
  • Storm base DPP is 125
  • Fire base DPP is 100
  • Myth base DPP is 90
  • Death and Balance base DPP is 85
  • Life and Ice base DPP is 83
  • DOTs have a damage multiplier of 1.25
  • Rank 7 spells are intentionally above the curve in DPP (no x4/3 AOE multiplier when calculating DPP)
  • DPP scales slowly as spells start to cost more Pips
  • Shadow enhanced spells have a higher DPP compared to regular spells.

We hope this article helps you to understand the logic behind the recent changes to the game and how they will help balance things going forward. Personally, I am excited to see what new spells will be possible now.

Thanks For Reading!

Special thanks to Shawn Fire and Dustin from the Ravenwood Community Discord for assisting me in the many calculations throughout this article. I would also like to thank KI developer Ratbeard for responding to my questions about DPP so quickly, he was extremely helpful! And, thank all of you for reading. I hope you enjoyed this article as much as I did writing it. If you did, please check out the other guides and information Ravenwood Academy has to offer. Let us know what you think and what your calculations find in the comments below, or at the Ravenwood Community!! 
 

Balance 100% Critical Guide

Ah the school of Balance! Arguably one of the hardest schools to beat in PVP. In addition, they can also achieve max critical and high damage. With this setup you can get around 130% damage and 839 critical.

Benefits of the Balance School

The Balance school is really amazing. They’re one of the most feared schools in PVP. Loremaster, Mana Burn and Supernova can all be deadly spells when used correctly. I usually always lose to Balance in PVP, so I hate going up against them.
 
Their wide variety of spells can prove to be very useful in certain situations. Yet, one disadvantage they have that isn’t shared with the other schools is a prism card. This forces them to fight Balance bosses without the option of a hit conversion spell. This can be very annoying in PVE. You’re forced to ask for help, which is not always possible since some dungeons are solo.

disadvantages of this build

 
 Of course when you boost certain stats, you run the risk of decreasing the others. In this case, pierce and power pip chance and resist might be reduced. You don’t really see many Balances running around with 100% critical these days. This is solely because they don’t really like sacrificing other valuable stats. However, it’s always nice to critical every hit you use.
 
For this build I would use the Morganthe’s Shadow of Amber amulet because of the extra blades. You can swap it out for the Darkmoor alternative if you’d like. It would increase your critical by 5 and increase your pierce a little.
 
Personally, I would adjust the pet slightly to allow for more damage. This would decrease your critical, but it would still be high enough to achieve regular critical hits. That’s the beauty about customizing your load out to your own specifications. You can adjust the damage and critical to suit you, as long as you don’t decrease one of them too much.
 
Another disadvantage is that the Balance school doesn’t have the 3% damage Ghulture mount. Unlike the other Ghulture mounts, it caps it at 2% which is unfortunate. This is because the Balance Ghulture gives universal damage, not school specific damage.


What You’ll Need

Robe: Virtuous Light Brigade Armor

Hat: Balanced Paradox Conical

Boots: Balanced Paradox Boots

Wand: Jack Hallows Guitar

Pet: Quad damage, double critical pet.

Athame: Athame of the Chosen one (with two (2) +18 critical Citrine jewels)

Ring: Balanced Paradox Ring (With one (1) +18 critical Citrine jewel)

Amulet: Travelling Dead’s Charm

Mount: Balance Ghulture

Deck: Balanced Paradox Deck

Total Damage: 129% (Rounded to 130%)

Total Critical: 839 (100%)

Gear Setup

Calculations

We hope you find this guide helpful in your journey as a Balance Wizard. What is your favorite way to use your Balance 100% critical set? Let us know in the comments below!

Check out the rest of our Gear Guides, we have a guide for every school at Ravenwood Academy!

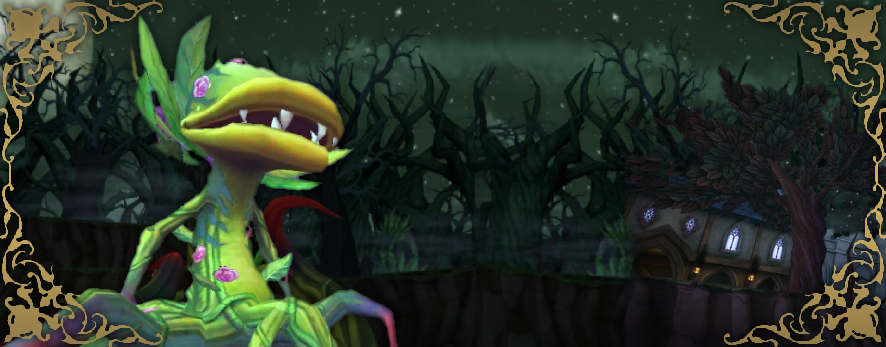
Aphrodite Strategy Guide

Now that we have mastered Darkmoor in my previous guide, the Ravenwood guide to Aphrodite is here. This boss is a key boss found inside The Graveyard. Once inside the gates go left around the battle with Yevgeny. You will find yourself at another gate which opens with a gold key.

If you are a Life wizard you will want to farm Aphrodite for “Sacred Charge” a spell that only she drops. If you are a Storm wizard you will want “Aphrodite’s Storm of Thorns.” This is the best damage athame for Storm at level 100 and beyond.

Wizards of any school may be here to enhance critical rating or improve their energy gear. With the staff for 10, ring for 8, and athame for 6 energy, you can increase your Wizards current energy by 24 points. A significant boost for any gardener or fisher in the Spiral.

Now let’s talk about how to conquer this overgrown flower and her Spirit School Tentacles.

There are four important roles in this battle. Each wizard must understand and fulfill their duty in order for the team to succeed. The positions we need to fill are


Hitter
Healer
Spammer
Trapper

Hitter

The hitter will need to stack traps, then aura, Shrike, and hit. Do not use blades, this includes global rings such as Darkwind that act as a blade. Any school can hit, but over-time attacks such as Dragon are not recommended. Failing to kill on the first strike with an over-time attack, will trigger an overtime cheat from the Life School Tentacles.

A Storm attacker will want to stack different forms of the Windstorm spell. Use regular and Potent Windstorm along with any other Storm traps you can get your hands on. Four stacked Windstorms is a thing of beauty against this rampant vine. You can achieve this, by stacking Treasure Card, regular, Potent, and pet or jewel forms of the card.

If you are a Storm, and your damage is lower than you would like, keep a Supercharge in your side deck. Any blade will trigger an all one enemy cheat from the tentacle diagonally across from you. As long as that tentacle isn’t Myth this is the one blade you want to risk. With a full pip Supercharge and stacked Windstorms, you should be able to one-shot this boss. Your Treasure Card deck will hold zero-pip shields which you should use defensively while building up the Supercharge.

If you are the hitter, do not run in with the team for the first round of battle. Once the spammer lands a hit, it is safe to join the battle.

Healer

I have a specific strategy I like to use for healers with this boss. Like Storm’s strategy, it will serve you well in Darkmoor.

Round One: Cast Empowerment or Adapt

Round Two: Cast Sanctuary

After these two moves, you will have all the pips and all the power you need to keep your team alive. No matter if you don’t yet have the best gear. Even two strong Rebirths in a row can be possible if you make these two moves first. Do your best to replenish your Empowerment or Adapt when it runs out to keep the extra pips flowing in. The rest is up to you and your healing style.

An important note for Life School healers in this boss, you may get hit with Life Dispels. You should carry shields to take them off when necessary. If you have one, equip a may-cast healing pet. This pet might clear those Dispels allowing you to heal the team rounds sooner.

Regular Cards on the left and Treasure Cards on the right

Spammer

In Wizard101, when we ask for “spam” we mean: To hit each round with small attacks. As a spammer in this battle, the most important stat for you to focus on is accuracy. I like to equip a Sidhe Wand for this reason. Whatever equipment you choose, the important thing is to increase your accuracy in every possible way.

Missing or fizzling your spam hit will cause the flower to drop its spores. This means Black Mantle, Plague, and Infection along with an overtime attack on every member of your team. This can trigger a self-feeding loop where one fizzle causes another until the team just can’t win. As spammer, you need enough accuracy to overcome the Black Mantle every time.

You must hit every single round, like clockwork. I like to keep my Treasure Card deck full of one or two pip spells when I am relied on as the spammer, so that there is never any reason to not have an attack.

As I mentioned above, over-time spells are not OK here. If your spammer is Life or Death school, they could end up Dispelled a round. The healer or trapper should have a few small hits in to back-up the spammer, just in case.

It does not matter which Tentacle you choose to spam as long as you spam the same one each time. This will allow the trapper to do their job.

Trapper

The trappers’ job is to stack Feints and traps on the tentacles while the hitter builds the attack. Feints and Potent Feints should be cast on all the tentacles that aren’t being hit by your spammer. Hex, Curse, and Elemental or Spirit traps are all also ok to use. Ideally, the trapper should be next in line after the spammer in battle order. This way, on the hit round a final Feint can be cast.

If the team works together and everyone plays their part, this battle can be fun and smooth. Good luck getting those drops, and I can’t wait to see you in the Spiral!
~ Amber Ravynsong

Petmaking 101

Where to Start

The first step of the hatching process is to determine what your end goal is. If you don’t have specific talents in mind, it will be hard to know when you have finally trained your dream pet. If this is your first pet, I recommend going for what is known as a triple/double. The talents for this type of pet will be 2 universal resist talents, 1 universal damage talent and 2 school specific damage talents.

I like to start with this type of pet for a few reasons: First, it’s the most versatile pet. It helps you while questing at any level and can also be used in PvP. Second, it causes you to build base pets along the way that can be useful for creating other pets later on. Here are examples of a myth triple/double and an ice triple/double, the type of pet the talents are on doesn’t matter, as long as it has these talents, it is a triple/double.

The Pet Tab

If you view a pet on the pet tab, there are few different sections to look at. I’ll try to break down the important parts to look at and what they mean.

When you first open your pet tab, I recommend clicking the Full Talent View at the bottom to show you all of your pet’s talents as opposed to just the manifested talents.

This tab shows you everything you need to know about your pet. You can click on “Talents” and “Derby” to change back and forth between combat talents and pet derby talents.

Pedigree – the pedigree is the rarity of all of your pet’s talents, normal and derby combined, + 1 per talent. Unfortunately, it doesn’t tell you much about the pet, because a higher rarity talent isn’t necessarily a better one.

Manifested pedigree – this is like regular pedigree, but its only for your manifested talents. Also like regular pedigree, its not very useful except that this is how the hatching kiosk organizes pets. More on this later.

Stats – stats are determined when the pet is hatched. Each stat influences the final value each different talent can give you. For instance, damage talents such as pain-giver are calculated using this formula (2*strength + 2*will + power) * 2/400. Each talent has its own formula, but certain types of talents are always calculated using the same stats. Selfish talents are talents that increase the maximum value of your pet’s stat(s). The maximum stat values without a selfish talent are 255 strength, 250 intellect, 260 agility, 260 will and 250 power. Pets with these max stats are known as 2.0 pets.

The Hatchmaking Kiosk

The first place you should go to look for a pet to hatch with is the hatchmaking kiosk located outside of the hatchery. This kiosk allows people to put their pets inside for others to hatch with in return for hatching peppers. It’s unlikely to find the perfect pet you’re looking for in the kiosk, but it’s a great place to start. It still costs the same amount of gold for you to hatch through the kiosk and it functions identically to hatching with another player directly. The easiest way to find the pet you’re looking for is to enter the kiosk, go to “Browse Pets”, and find the type of pet you’re looking for. In this example I selected a clockwork paladin, so the kiosk will display all of the clockwork paladins it has at this time.

The kiosk organizes the pets in descending order by their manifested pedigree. Things worth looking at are the item cards the pet gives, the stats the pet has and the talents in the pool both manifested and unmanifested. Some pets give cards innately, these are known as item cards and function identically to cards given by other pieces of gear. Some pets give their cards at baby while others require you to level up the pet to unlock the cards. These cards are tied to the type of pet. So, all clockwork paladins, for instance, will give the clockwork minion spell. Certain pets can be put in the kiosk but will require crowns to hatch with unless you already own that pet. Some other pets aren’t available for hatch making at all, these pets will have a corresponding tag on them. I recommend avoiding crowns pets if you can or just hatching with these pets directly through a player.

Hatching Your Own Pet

So at this point, you should have an idea what kind of pet you actually want. Assuming you do, now it’s time to start looking to hatch. Look through your pets to see if you have any that have one or more of the talents you are looking for manifested already. If you do, look for either the pet with the most ideal talents manifested or the pet with the highest stats. If not, I recommend starting with a Wizard City first generation pet. First generation pets are pets obtained in the world that have never been hatched. These pets will always have the same talent pool and stats but do not always manifest the same talents. These are nice for a few reasons. For starters, you know exactly what talents are in its pool and where they are located which makes them easy to track. In addition, most of these talents are much easier to replace because very few pets you’ll be hatching with have them already in the talent pool.

Hatching The Other Pet

The best-case scenario would be to find the exact pet you’re looking to get to hatch with. However, that’s not always available when you aren’t lucky enough to have a helpful friend. So, the next best thing you can do is find a pet that has at least some of the talents you’re looking for. The tricky part is, you also want to make sure it has none of the talents you don’t want. Otherwise, those talents will be more likely to manifest in future generations. So, for example, if you wanted to make the triple/double from before you could look for a pet that has pain-giver and spell-proof to start. Once those talents manifest you could then look for a pet that has some of the other talents you are looking for. Continue doing that until your pet has all the ideal talents within its pool.

Pets in the hatchmaking kiosk go on cooldown for one hour when hatched with and are completely removed from the kiosk after they’ve been hatched with 10 times. Players whose pets are hatched with through the kiosk receive one hatching pepper reagent each time someone hatches with one of their pets.

Base Pets

Now while it might be tempting to hatch with the pet you want and train it straight to mega that’s a risky plan of attack. There is a “strategy” for creating pets known as base pets which make excellent checkpoints along the way. A base pet is a pet that has some of the talents your ideal pet wants with no bad talents manifested. This allows you to always have a pet to hatch with without introducing bad talents to the pool. If you were to train your base pet further, and it manifested a talent you didn’t want, you wouldn’t be able to hatch with it without risking the newly manifested talent showing up in the offspring.

If on your journey to creating a triple-double, you train a pet to ancient and it manifests three talents you want, it would be wise to not train that pet any further. Instead hatch with it again as an ancient base pet. Then, if that offspring makes it to epic with four ideal talents, you could either hatch again or train it to mega. If the newest hatch fails, you can go back to the ancient base pet and hatch again.

This could seem like a waste of resources at first because there’s a chance that ancient pet could have just been perfect had you trained it to mega. Let’s look at energy cost to show why I recommend this method.

To train a pet it costs:
baby to teen
2 energy per game and 125xp
to adult
4 energy per game and 250xp
to ancient
6 energy per game and 500xp
to epic
8 energy per game and 1000xp
to mega
10 energy per game and 2000xp
to ultra
10 energy per game and 2000 xp

As you can see, not only does the energy cost go up, but the amount of xp you need goes up too. This means training a pet from epic to mega is significantly more expensive than training a pet from adult to ancient. This is why I recommend having at least an ancient base pet before pushing to mega, some people like to be extra safe and use an epic base instead.

Becoming Self Sufficient

While the hatchmaking kiosk I mentioned earlier can be a great way to get started on your perfect pet, I wouldn’t suggest relying on it entirely. Since pets go on cooldown every time they’re hatched with and get removed after 10 hatches, you’re banking on the fact that you’ll get all the hatches you need to complete the project. Because of this, your goal should be to become self-sufficient as soon as possible.

This means getting all of your ideal talents manifested on two base pets. Ideally both ancient, the older the better. Once you do this, you can self hatch instead of using the kiosk. This way you are no longer at the mercy of the owner of the pet you desire, so you can hatch anytime. Another benefit is that your pets will have very similar pools. This makes preserving both stats and talents much easier and reduces the risk of accidentally introducing new talents to your pool.

The safest way to use this method would be to have two epic bases. They should both have three of the same talents you want, then each should have one of the last two talents you want. For example, if you were making the myth triple-double from before, one epic base might have spell-proof, spell-defying, myth-giver and myth-dealer. The other base might have spell-proof, spell-defying, myth-giver and pain-giver. As you can see, ¾ of the talents overlap between the pets, making them likely to manifest in the offspring which reduces the risk of a bad talent manifesting.

Pet Jewels

Once your pet reaches ancient, it unlocks a jewel slot. Pet jewels, or star jewels, in most cases just function as a sixth talent. While the jewel slot unlocks at ancient, different jewels require your pet to be different ages to socket them. For example, a Wisp Bonus Opal only requires ancient+ while a Spell-proof Opal requires ultra+. You will not be able to socket a jewel if your pet already has the same talent manifested.

Most Wizards don’t socket an ultra jewel, because training a pet to ultra does not grant you an additional talent, it only allows ultra jewels to be used. If you socket a jewel and then the pet manifests the same talent, the jewel will remain on the pet but you will not get the effect it provides. When this happens you have to shatter the jewel to place a useable jewel in the socket. There are many places to get jewels, but most school specific jewels can be crafted using the crafting recipes from Lowe Springfield in the Pet Pavilion. Opals, special jewels that give universal talents, are dropped from enemies or gathered from Jewel Blossoms. Kroger jewels have unique talents and give two talents per jewel, but can only be obtained by a select few Wizards.

Clean Pools

The bare minimum you would want to do before training a pet to mega is getting 5 ideal talents in the pool. There is something called a “clean pool.”  A clean pool means introducing talents that would allow you to make a different pet accidentally. For example, in your triple double pet’s pool, you may want to include pain-bringer, mighty or piercing talents. While manifesting those talents wouldn’t necessarily give you the pet you want, you could accidentally make a quad/proof or a piercing pet. Going for clean pools usually takes a lot more time and effort but a single clean pool can allow you to create a handful of pets using the same base.

Clean pools will not make it easier for you to obtain a specific pet. The purpose of a clean pool is to give your fails a chance of being useful. If you are just trying to make one specific pet, clean pools will not help you. 

Snacks

Each snack gives a variety of stats and counts as experience towards your pet’s next level. The snack rank gives you a general idea of how much xp the snack gives. Snacks rank 8+ are “mega snacks” and give 25+ experience.

Each snack also has a school and type associated with it. The types are fruits, vegetables, meats, munchies, candies, desserts and cereals. If the snack school matches your pet’s school, your pet will
like the snack and will gain +1 extra experience. Each pet also has a specific snack type, if the snack you feed them matches that, they will also like it and gain +1 experience. If both the snack type and the snack school match your pet’s, your pet will love it and gain +2 experience.

With pet snacks It’s usually best to focus on the xp gained and not the stats themselves. This is what makes mega snacks so appealing. Here are a few ways to obtain mega snacks:

  • Arena Tickets – you can purchase rank 8 mega snacks from Broc Connery in the pet pavilion for 50 arena tickets each, which can be useful in a pinch.

  • House Gauntlets – Winterbane and Pagoda are both decent ways to get some rank 8 mega snacks. It requires combat so you need to be a decent level or bring a friend who is.

  • Mirror Lake – the final dungeon of Zafaria, Mirror Lake gives two rank 8 mega snacks when you complete it. The dungeon also offers other loot and the snacks drop every time.

  • Gardening – by far the best method for obtaining mega snacks, but also requiring the most prep. I recommend setting up a full garden from the start so you don’t spend more time gardening than pet training. Couch Potatoes and Evil Magma Peas both give rank 9 snacks at elder which are some of the best snacks in the game.


Fake Stats

You may notice some stats show one thing on your character sheet but do not give the full effect in combat. This is due to “fake stats.” These occur because the character sheet adds common values and then rounds values greater than 0.5 up, but the combat calculator adds common values and then does not round.

Piercing talents are the one exception and they actually round down to the nearest whole number for combat.
 For example, the formula for calculating the value of armor-breaker is (2*strength + 2*agility + power) * (5/2000). Which for this pet calculates to 3.5 and shows as 4%. The formula for calculating armor piercer is (2*strength + 2*agility + power) * (3/2000).

For this pet that calculates to 2.1 and shows as 2%. However, the combat calculator adds these two values together and does not round them. So 3.5 + 2.1 = 5.6 which means in combat I only get 5% effective pierce.

For all talents other than pierce, the individual rounded talents are displayed on the pet, the rounded sum on the character sheet, and the exact decimal value is used in combat. This means the difference between 9% damage and 10% damage is often smaller than it looks. 

FAQ

  • What is pedigree and should I care about it?
    • Pedigree just tells you the rarity of the talents in the pet’s pool. However, a higher rarity talent is not necessarily better, so in most cases you can just ignore it.
  • What kind of pet should I make?
    • The most standard pet you could make is a triple/double. For pvp ward pets are popular and for pve critical pets are popular.
  • What pet should I put my talents on?
    • The safest bet is either an enchanted armament or a pet with a blade as they will always be useful.
  • How long does it take to make a pet?
    • It varies a lot depending on what your starting pet is, what the pet you’re trying to make, how much energy and snacks you have and of course luck.
  • How are stats determined?
    • When two pets are hatched, the offspring rolls each stat individually. Each stat has a 25% chance to be equal to parent A’s; 25% chance to be equal to parent B’s; and a 50% chance to be the average of both parents.
      This means the only way to get a max stat is by hatching with a pet that has a max stat and that if both parents both have max stats, the offspring will always have max stats as well.
  • How does someone’s pet have an 11% damage talent or 11% resist talent?
    • The only way to get stats that high is to have a selfish talent. If a selfish talent is manifested instead of socketed as a jewel it won’t appear but will still affect the pet.
  • Why is a max stat pet called 2.0?
    • The original max stats a pet could have were 250 across the board and that was known as 1.0. However, since then higher stats have been introduced, and the new max stat values are now referred to as 2.0.
  • What are these weird names for pets?
    • Triple/double = three damage talents and two universal resist talents
    • Quad/proof = four damage talents and one universal resist talent
    • Ward pet = any pet with ward talents, usually also paired with universal resist talents
    • Quint damage = five damage talents
    • Quint resist = two universal resist talents and three resist talents of the same school
    • Utility pet = pet that provides non-combat benefits, such as fishing and gardening talents
    • Universal pet = pet with all universal talents

How to Get “One in a Million”

“One in a Million” is one of the most popular badges in Wizard101. Unfortunately, without the proper setup and strategy, you may fail at your attempt to earn it, wasting time and gold. So, here are my tips and tricks on how to achieve “One in a Million.”

Prisms

If you use a prism in your setup, you can double the number of traps used for your big hit. By using your counter school traps first (for example, a Fire wizard applying Ice school traps) and then casting a prism before placing fire traps, the fire traps will be triggered followed by the ice traps. This will double the damage your school traps can provide!

You can easily get treasure card traps for your opposing school at the Bazaar. With the help of a friend from that school, you will also have access to the regular trap and regular potent trap.

 Universal Traps and Blades

Bringing a Balance wizard along will make your life a lot easier. They can layer you with many blades, you could even end up doing 50 Million if that was possible! You also can get a few balance blades by using treasure cards.

Feints are super important to this strategy. If you use regular feint, potent, treasure card, potent treasure card, item card, pet feint, and mass feint, you’ll have a huge advantage in getting your damage up to one million!

All The buffs!

It’s really easy to forget a couple of blades or traps when you’re assembling over twenty, so try to write a list and quintuple check that you have packed everything. You may forget that one last sharpen or an elemental trap which could result in you not reaching your goal.

Some schools get especially useful spells like Supercharge and Backdraft that will make hitting a million much easier. Be sure that you include these in your setup if you can!

Some extra tips

You need to remember to bubble and aura. Combined, these provide a significant damage bonus.

Also, remember to pack a heal or two. Even max-levels may get too low on health. you don’t want to die and lose all of those carefully stacked blades.

Don’t forget to attempt this on an enemy that your school boosts on. It’s a free, easy damage bonus you wouldn’t get from a different creature. Also remember that if you’re using the prism as I previously suggested, you’ll want to face a creature of the same school that you are to get this boost.

Go to an empty realm if you are attempting this in an open area! I cannot stress this enough. Otherwise, unknowing or inexperienced players may run in and wipe out all your progress. Take preventative measures in advance.

That said, go out there and earn your “One in a Million” badge!